Master Bedroom Makeover - One Room Challenge Week 2 - Electrical and Doorways + A VIDEO!

It's week two of the One Room Challenge! I didn't start until I wrote last week's announcement blog post so I'm only a week into the challenge. 7 days down, 28 more to go!

If you found me through ORC, welcome! I'm Ashley and for the past three years, I've been restoring a craftsman bungalow in San Diego, CA. Learn a touch more about me here, preview the before-and-after room transformations here, and see my previous ORC rooms here and here.

bed to bedroom2-1-2.jpg

The first week of ORC is always prep week. It isn't the most glamorous, but there's nothing like emptying a room and putting holes in the wall to feel like you're making progress. I find that this week is much more fun in time lapse and music video (minus any dancing) format, so I give you a video of the week's progress. If you like old-fashioned reading, then scroll down!

This Week's Video:

P.S. I promise the video is more entertaining than the text. It's less than 4 minutes long, so it's worth the watch.

Ross was out of town, so I emptied the room solo. Whenever I do that, it becomes my workout for the day. It's not a good habit, but I definitely find myself skipping yoga after doing demo, or heavy lifting, or really after doing anything sweaty.

The Gold Hive One Room Challenge Den Guest Room

Since we moved out of the master and I'm selling all of the furnishings, I needed a spot to sleep, so I moved into the den next door. The blue velvet couch is a pull-out, so I stacked our mattress on top of the couch mattress and I feel like the Princess and the Pea. If double mattresses weren't luxury enough, the den also has the TV, so I can watch my British crime shows fully reclined. Winning.

The Gold Hive One Room Challenge Week 2 Electrical

After emptying the room, I called in our trusty electrician who previously rewired the entire house to bring us into the 21st century. For this room redo, he moved an outlet to hide behind the nightstand, moved an outlet that would be in the way of the new exterior door, wired for the exterior light, put in a switch for the new light, added a 3-way switch for the overhead flush mount, and wired for the new bedside sconces.

The Gold Hive One Room Challenge Week 2 Conduit Before

While the electrician was here, I got inspired to do a project that was on my agenda for a long time. There have been three lines of conduit running the length of the back of the house to power clunky floodlights and a single bulb in the garage. I figured I'd leave them until we did more electrical work down the road, but knowing I'd be installing a new sconce right next to the ugly pipes, I decided to pull it all down. Now that it's gone I'm regretting not doing it sooner. It's really the little things that are most satisfying! (also, watching the time-lapse of it coming down is veeeery satisfying)

After putting holes in the walls of the bedroom for new electrical, I needed to close off a really big one - the doorway into the kitchen. If you recall in my week 1 plans, I'm closing off the door from the master bedroom to the kitchen. Removing this passageway is kind of a bummer, but it's the right thing to do for the layout of the bedroom. We'll be able to maximize storage and create a more open space. Don't forget, I'm adding a door with lots of glass to the backyard in a couple of weeks, so soon enough I'll have forgotten about the loss of the kitchen door.

Below are the views sans door from the bedroom and the kitchen, respectively.

The Gold Hive One Room Challenge Week 2 Closed off doorway
The Gold Hive One Room Challenge Week 2

I pulled off all of the trim (delicately as to save it for future use) but hired out help to frame and drywall the opening. Getting perfectly smooth walls on a big patch is not the easiest thing to do, so hiring it out to the pros was certainly the right thing for me to do. Once I paint, you won't even know a door was there - unless you read this blog, of course.

That's all I finished between week 1 and 2 so come back next week for more progress! Be sure to follow along on Instagram Stories where I share live updates and ask for your advice when I can't make a decision! This is only the first of my ORC videos, so subscribe to my YouTube channel to support future videos. If you aren't already subscribed to the blog, you can do that here.

If you want a refresher on the plans and the before photos, you can review the week 1 post here.

Check out progress from my fellow featured designers below, and don't miss out on the guest participants!

Apartment 34 | Beginning in the Middle | Coco & Jack | The English Room | The Gold Hive
Gray Malin | Jenna Sue Design | Jojotastic | Kelly Rogers Int. | Linda Holt | Marcus Design
Michelle Gage | Natasha Habermann | The Painted House | Rambling Renovators
Sacramento Street | Shannon Claire | Sketch 42 | Stephanie Kraus | Bisou Style
Media Partner House Beautiful | TM by ORC

Psst! To jump into the future and see how this room turned out, click here!
 

This Week's Sources

The Master Bedroom Is Getting An Update! - One Room Challenge Week 1 - The Before and The Plans

I'm back for my third round of the One Room Challenge! I considered taking a break from the 6-week design challenge after I painted that mural last time, but I just love putting pressure on myself, so here I am again!

If you found me through ORC, welcome! I'm Ashley and for the past three years, I've been restoring a craftsman bungalow in San Diego, CA. Learn a touch more about me here, preview the before-and-after room transformations here, and see my previous ORC rooms here and here.

We're supposed to keep which room we're working on under wraps, but I accidentally gave out clues when I asked for your input on the layout changes for the back of our house. If you guessed I would do the kitchen, then bless you for thinking I can tackle that in 6 weeks. If you guessed dining room, sorry! If you were hoping for a master ensuite, so was I, believe me! BUT, the master bedroom it is!

The Before

The room right now isn't bad! I coated the walls in Behr's Silver City, replaced half of the hardwoods due to termite damage, moved in all of the same furniture we had in our old house, then added a few new things. If you're into the before sources, here they are:

The Gold Hive ORC Bedroom Before-1-6.jpg
The Gold Hive ORC Bedroom Before-1-8.jpg
The Gold Hive ORC Bedroom Before-1-7.jpg

The Plan

First things first, I'm going to remove the door into the kitchen. While it's convenient to grab a snack before crawling into bed, having the door there prevents us from using the wall for furniture or art. Plus, when we remodel the back of the house later this year, this door is going to be in a different spot, so let's get it outta there now!

The Gold Hive ORC Bedroom Before-1-13.jpg

While I'm removing a door, I'll be adding one, too. I'm SO excited to have backyard access from the master. Since the bedroom isn't that big, by adding a door, it will open up the room to our (future) outdoor living space. When we remodel the backyard, I imagine a nice sitting area with a fire pit and lots-o-plants.

The Gold Hive ORC Bedroom Before-1-12.jpg

Also, how great will the view be from the den and the rest of the hallway when there's a view to the outdoors there? Swoon!

When these doors get removed/added, it will change the configuration of the furniture, too. Here's what I have in mind.

The Gold Hive ORC Bedroom Layout Plans.jpg

Along with the new orientation, the room will get all new bedding, furniture, light fixtures, window treatments, a rug, paint, and art. While I promise I'm not painting another mural, I will still be adding interest to the walls.

I'm a total sucker for board and batten, so that's what the master is getting! While wall treatments are currently trending - shiplap, anyone? - I'm adding a detail that has been in this house for the last 103 years. Tucked behind the room dividers in the living/dining room is some pretty, subtle board & batten that I'll be mimicking. Yay for old-house features and dimensions for inspiring new rooms!

For the room transformation, I'm going for a subtle, moody vibe with neutrals and simple finishes. I'm still sourcing products because I'm plagued with indecision, so keep coming back for more updates! In the meantime, I give you a shoppable mood board.

the Future Products

I can't wait to share more with you as I finalize the finishes and pull the whole look together!

Come back next Wednesday for a progress post. I'm going to start putting holes in the wall this weekend to run new electrical, and I'll probably need your help picking paint, so keep an eye out in Instagram Stories! I'm also going to do videos throughout the process, so subscribe to my YouTube channel so you don't miss out. If you aren't already subscribed to the blog, you can do that here.

Check out progress from my fellow featured designers below, and don't miss out on the guest participants!


Apartment 34 | Beginning in the Middle | Coco & Jack | The English Room | The Gold Hive
Gray Malin | Jenna Sue Design | Jojotastic | Kelly Rogers Int. | Linda Holt | Marcus Design
Michelle Gage | Natasha Habermann | The Painted House | Rambling Renovators
Sacramento Street | Shannon Claire | Sketch 42 | Stephanie Kraus | Bisou Style
Media Partner House Beautiful | TM by ORC

To jump into the future and see how this room turned out, click here!

I Won The One Room Challenge, So I'm Doing It Again!

I can't remember if I even shared this glorious news on the blog, but I won the One Room Challenge last fall! Sophie Donelson, editor in chief of House Beautiful magazine, picked her top two favorites out of 200+ guest participants and mine was one of them! GASP! The other room transformation winner was my blogger bud, Natasha Habermann.

In case you forgot the room transformation I did, my home office won for the handpainted mural and my love for organization. You can walk through each of the seven weeks of the transformation here.

The Gold Hive Office Winner of the One Room Challenge Fall 2017
The Gold Hive Office Winner of the One Room Challenge Fall 2017 Before and After

Winning was a highlight, but the prize also comes with the honor of being a featured designer in the upcoming season of the One Room Challenge! The last two times I joined in, I was a guest participant which is open to anyone with a blog (so jump in if you like rambling on the internet!). Natasha and I will be participating with a group of 18 other featured designers for the Spring ORC starting next week! Come back in exactly 7 days to see what we all have up our sleeves. A handful of blog friends are joining as guests (like Sarah, Nicole, Cathy, and Alison) and I'm already itching to see what they do, so don't play favorites - check out the featured AND guest participants!

Spring 2018 Featured One Room Challenge Designers:

Apartment 34 | Beginning in the Middle | Coco & Jack | The English Room | The Gold Hive | Gray Malin | Jenna Sue Design | Jojotastic | Kelly Rogers Int. | Linda Holt | Marcus Design | Michelle Gage | Natasha Habermann | The Painted House | Rambling Renovators | Sacramento Street | Shannon Claire | Sketch 42 | Stephanie Kraus | Style Me Pretty Living
Media Partner House Beautiful | TM by ORC

I promise that this time around I won't hand paint a mural for 100+ hours. I'll take it a little easier, but I'm really excited for the changes headed for another room in our house. Any guesses as to which space is earning a 6-week makeover?

The Gold Hive Office Winner of the One Room Challenge Fall 2017 Before and After

One Room Challenge Week 7 - The Office and Mural Reveal!

Can you believe the One Room Challenge is over!? The day we've all been waiting for is here - the reveal! I've spent the last seven weeks completely transforming our home office and I'm thrilled to finally share it.

The Gold Hive Home Office Reveal ORC-0652.jpg

If you're anything like me and can't stand watching TV shows out of order, you can catch up on the progress at each of the below links. 
Week 1 - the before, the inspiration, and the plan
Week 2 - preparing for a bold wall mural
Week 3 - tricks for creating a perfect wall mural
Week 4 - painting the mural
Week 5 - walls, windows, and shades

If you're already caught up but want a refresher, take a look at the before photos.

The Gold Hive Office Before

And since side-by-sides are the best.

The Gold Hive Home Office Before and After.jpg
The Gold Hive Home Office Before and after 2.jpg

The room got an entirely new layout, lighting, storage, and window treatments, but most dramatically, an accent wall mural.

The Gold Hive Home Office Reveal ORC-0783.jpg
The Gold Hive Home Office Reveal ORC-0836.jpg

I think I put in about 100 hours painting this thing and I'm so tickled with how it turned out!

Come back next week when I release a video with a full time-lapse from start to finish!

The Gold Hive Home Office Reveal ORC-0715.jpg

As a reminder, I used an image I found on the Met's open source image archive, converted it into an image to project on the wall, then coated eight different colors (two layers each!) using beautiful paint from Farrow & Ball to get to where we are today.

The Gold Hive Home Office Reveal ORC-0584.jpg
The Gold Hive Home Office Reveal ORC-0603.jpg

We rearranged the layout to make better use of the room. The desk, which is actually a dining table, gives us more room to spread out and it's just so darn pretty with its black top and metal legs.

The Gold Hive Home Office Reveal ORC-0568.jpg
The Gold Hive Home Office Reveal ORC-00391.jpg
The Gold Hive Home Office Reveal ORC-0526.jpg

To make the table function more like a desk, we devised a cable management solution that lets us plug in our devices without cords dangling everywhere. We screwed the grid-it to the underside of the desk to keep our power supplies for our computers contained and also as flush as possible to the bottom of the desk. We also attached a cable clip to the corner and adhesive on the leg to run the extension cord along the leg to a nearby outlet. So many typical cord storage options are chunky and thus would be visible from nearly any angle. This configuration is invisible unless you're looking for it!

The Gold Hive Home Office Reveal ORC-0108.jpg

Speaking of storage, we put two IKEA cabinets side-by-side and customized the interior for all of our supplies. Be sure to check out last week's post detailing how we customized a ready-made piece.

The Gold Hive Home Office Reveal ORC-0720.jpg
The Gold Hive Home Office Reveal ORC-0723.jpg

Since Ross does most of his work on the road, his backpack is his portable office. The backpack used to get plopped on the floor in the corner whenever he was home. Now, it has its own spot in a basket.

The Gold Hive Home Office Reveal ORC-0113.jpg
The Gold Hive Home Office Reveal ORC-0710.jpg

Every office needs a graphic clock. One of the volunteers at the nonprofit I work at spotted this one for me and knew it was the perfect fit. Thanks, Nancy!

The Gold Hive Home Office Reveal ORC-0687.jpg

We moved the ceiling junction box a few feet over to provide task lighting for the desk. This brass beauty casts a lovely warm glow over the desk in the evenings.

The Gold Hive Home Office Reveal ORC-0706.jpg

This wall sconce that I customized from one of my favorite Etsy shops lights the corner when the sun isn't pouring in. That globe also lights up, too!

You'll notice that the trim got a couple of coats of paint. I shared all about prepping walls for paint here and I talked about the woodwork painting debate here. Spoiler: I'm still a wood purist, which, while it seems oxymoronic, is why this severely damaged trim needed a slathering of paint.

We're lucky to have sunlight flood into this south and west-facing room, but sometimes it's a bit much. We added roman and solar shades to give us a variety of sunlight adjustments.

I have the hardest time picking rugs. Why? I have no idea! Someone help me next time! For this room, I wanted something traditional but not too high-contrast. I like the muted palette of this one and it's seriously the softest rug in the whole house. The. Softest.

reveal storage unit-0266.jpg

Because the mural is such a statement, I didn't want to go wild with graphic art, but I couldn't say no to the two pieces that live on the storage unit. Artist Mary Sinner is one of my favorites and she kindly sent me this original that I can't get over.

The Gold Hive Home Office Reveal ORC-0082.jpg

On our latest vacation, we picked up this print in Austin by Jon-Michael Frank. We knew it would be the perfect print for our office - even before the One Room Challenge was a twinkle in my eye. The print cracks me up every. single. time. I look at it. 

The Gold Hive Home Office Reveal ORC-0662.jpg
The Gold Hive Home Office Reveal ORC-0106.jpg

Get The Look:

If you're tuning in via the One Room Challenge and want to stay up to date on all of my home's transformations, subscribe to get future posts in your email! Also, follow along on Instagram for daily updates.

Big thanks to Farrow & Ball for supplying the paint to make the mural possible! For a full breakdown on each color and the painting process, click here!

I'm not the only one that slaved away to transform a space over the past seven weeks. Check out the featured bloggers and guest participants!

One Room Challenge Week 6 - IKEA Hack for Custom Office Storage

It's week six of the One Room Challenge! Today would be the day that you'd see the full reveal. However! You have to wait another seven days since the design challenge has been extended by another week.

modern office storage reveal

If you're jumping in now, I'm Ashley and I'm transforming my home office of our 1915 craftsman bungalow in San Diego. Take a look at the plans which include a new layout, storage, lighting, furniture, and most importantly, a dramatic mural! Catch up on the last five weeks of progress here.

I'm still actively working on the mural, but this week I'm sharing how we customized storage for our home office needs.

If you recall, the only storage we had in our previous office was a hutch.

Office storage before

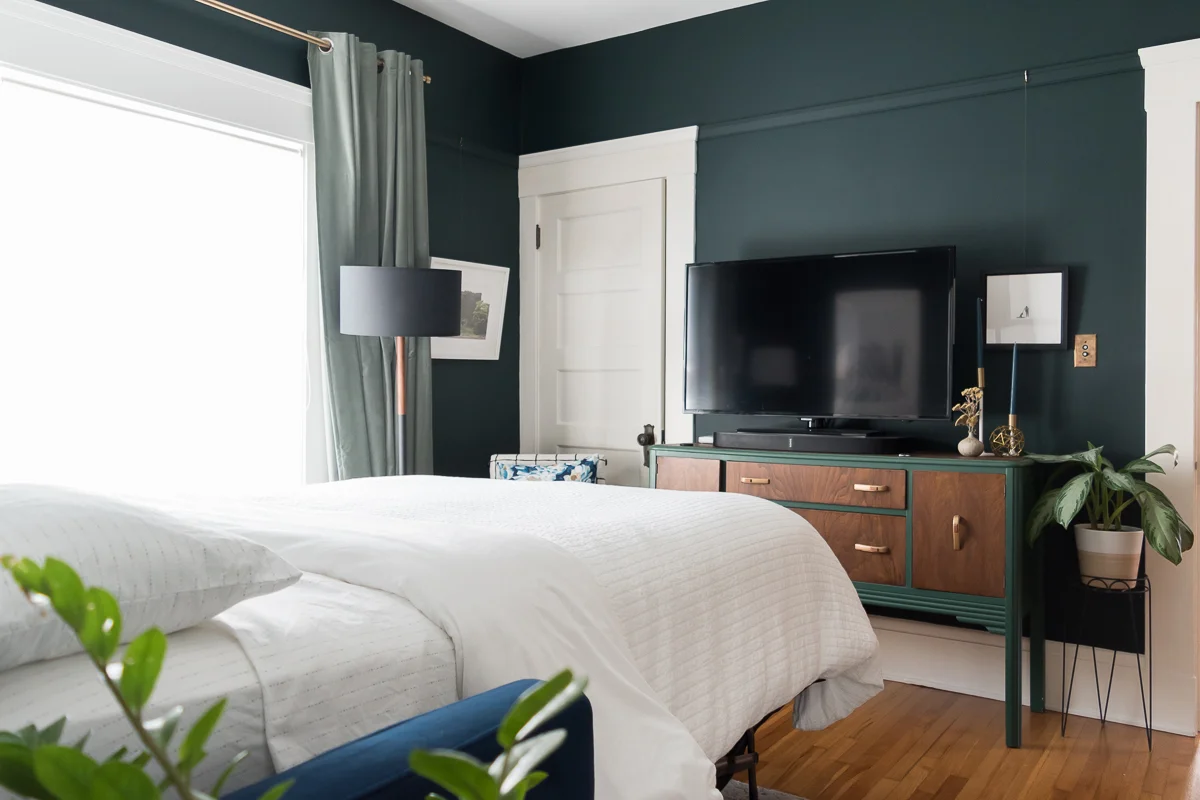
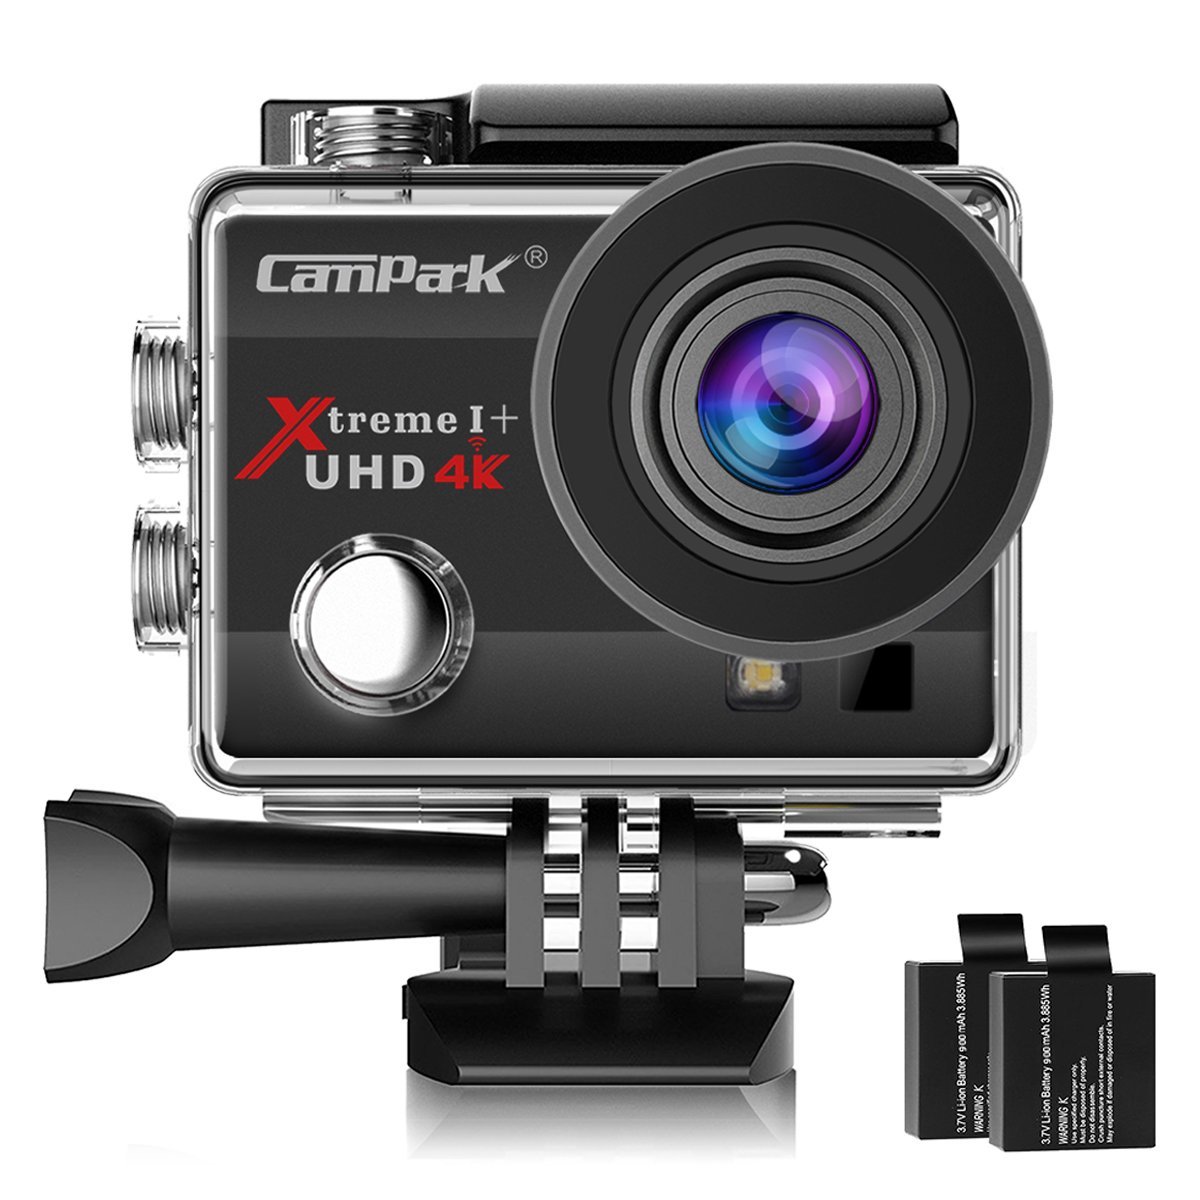
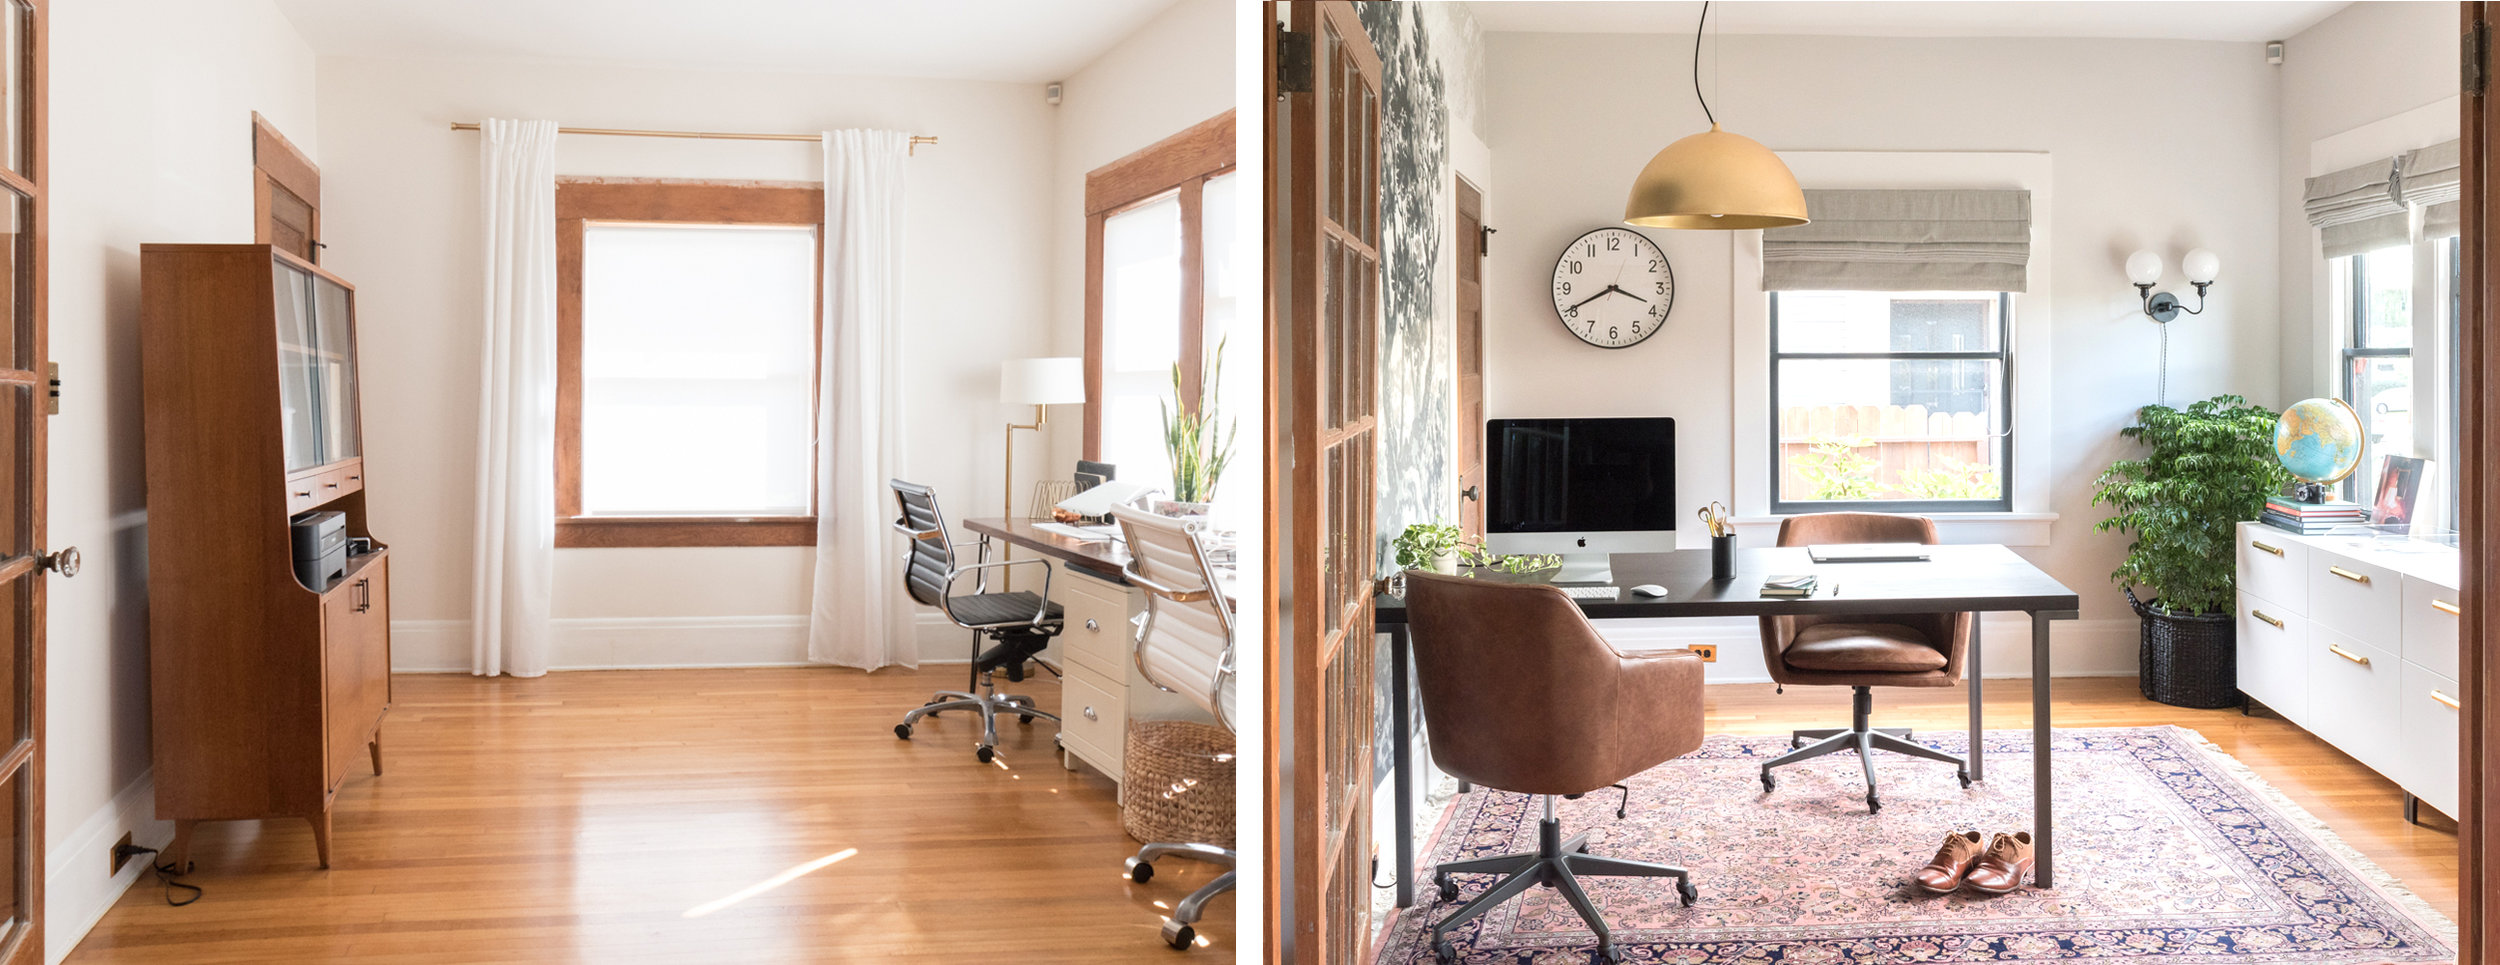
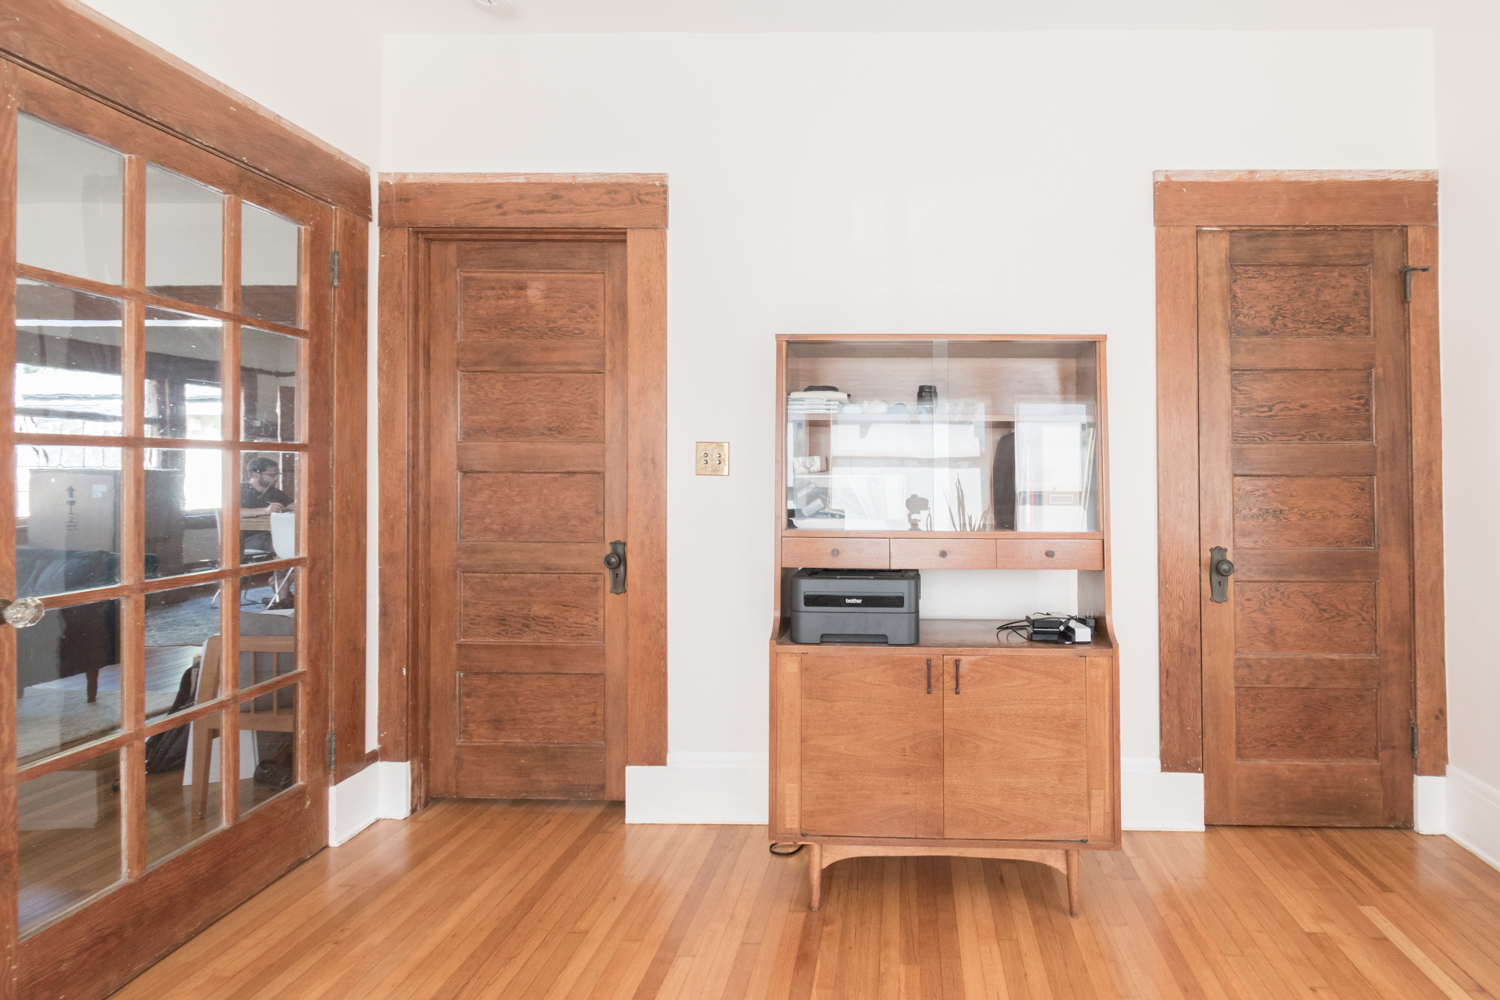
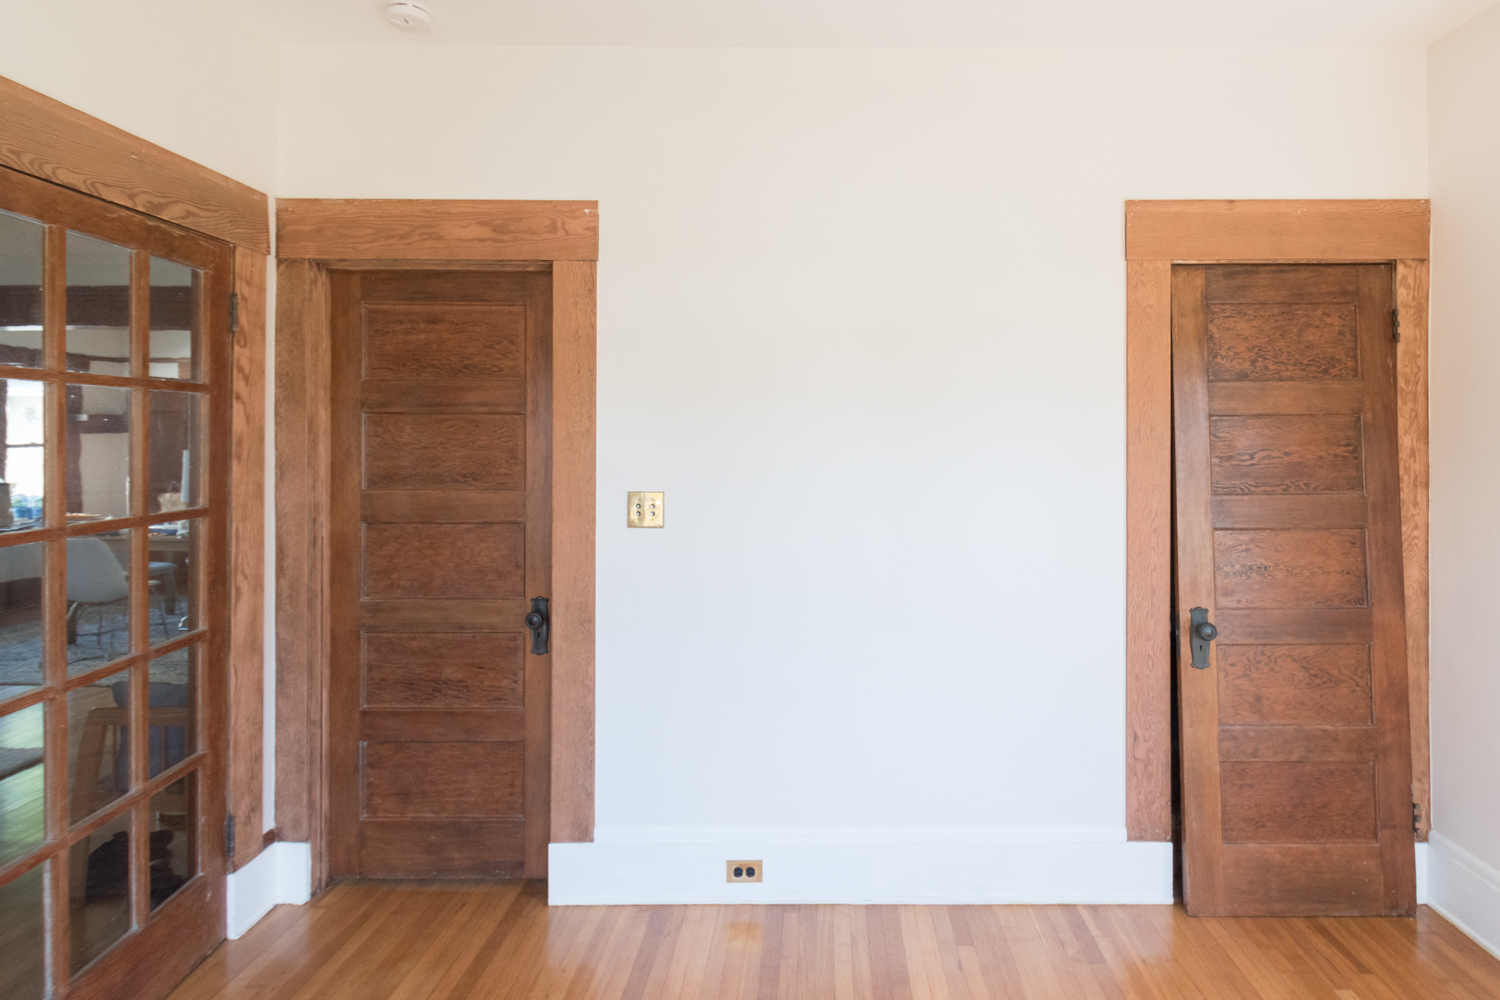
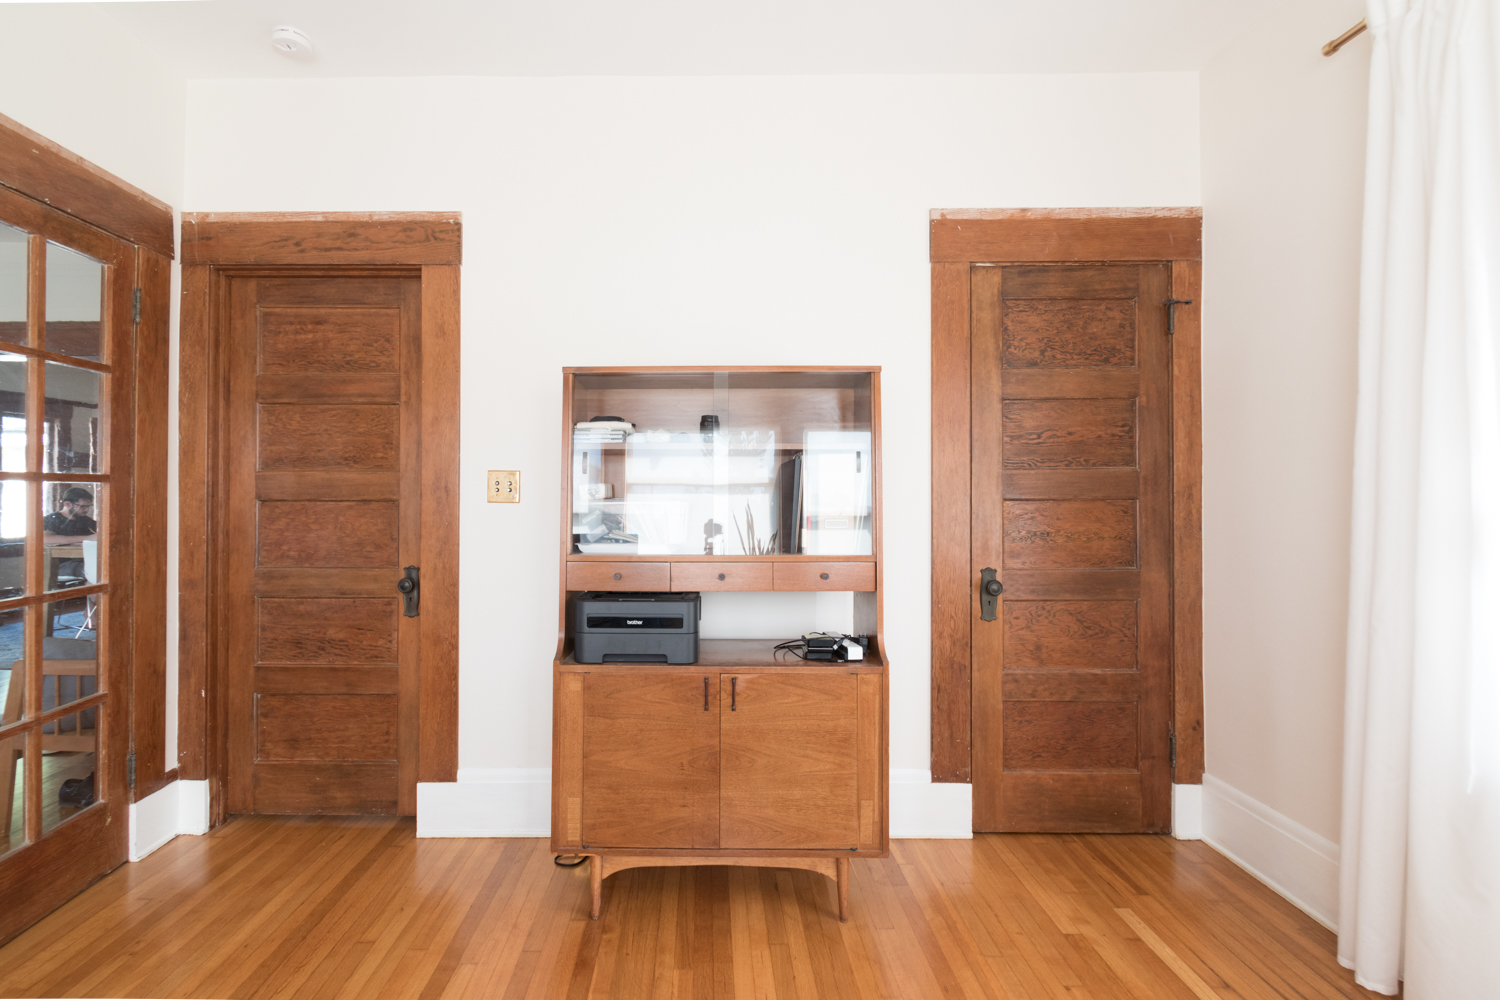
It was a mid-century beauty but it wasn't designed for keeping files, electronics, or office necessities. So, I added a filing cabinet to the mix, but still had nowhere for camera gear or odds and ends. Everything we didn't use was on display and everything necessary for the office didn't have a home and was just strewn about on top of the desk or throughout the house.

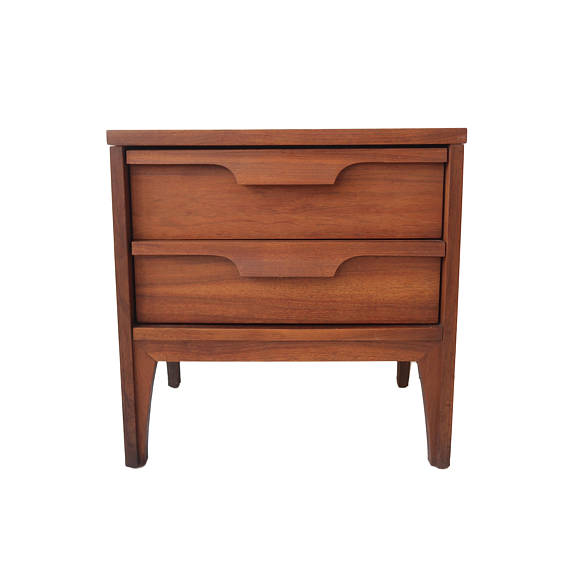
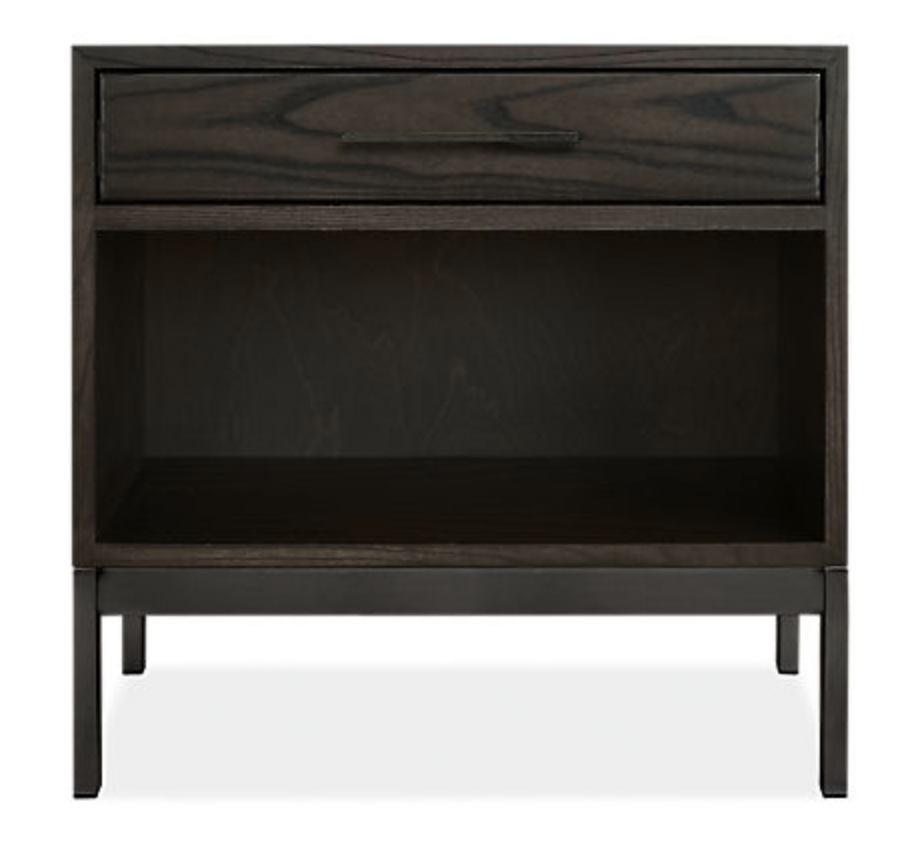
Have you ever tried looking for attractive filing cabinets with combined storage and drawers? It's nearly impossible. I first started looking at office furniture but the options are pretty limited to exclusively filing cabinets without any other storage for odds and ends. So then I looked at credenzas and media cabinets. They were the best option, but if they had doors, I wanted drawers, and if they had drawers, I'd wish they were deep enough to fit hanging files. Gah!

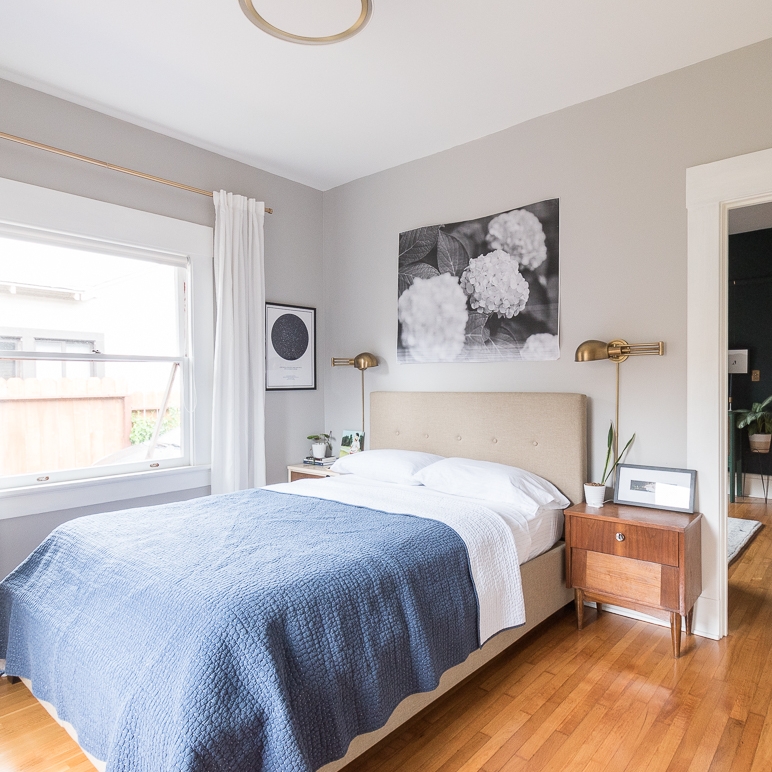
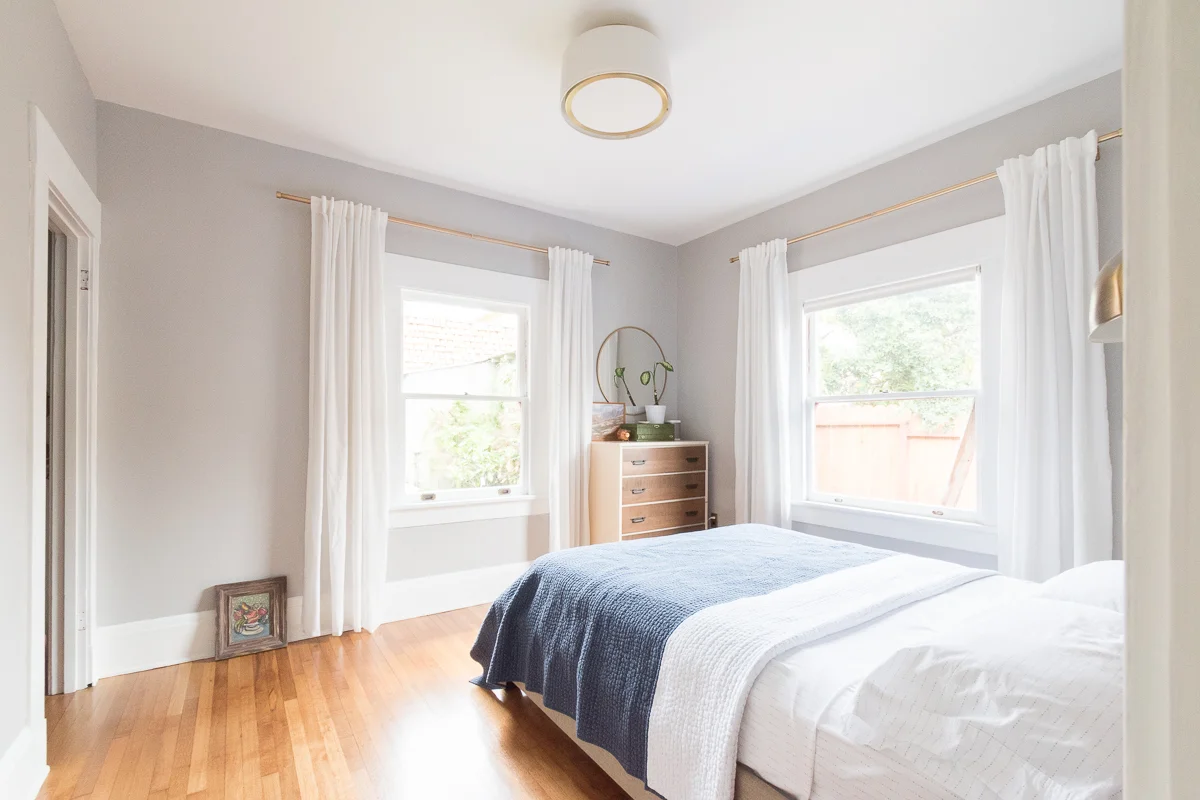
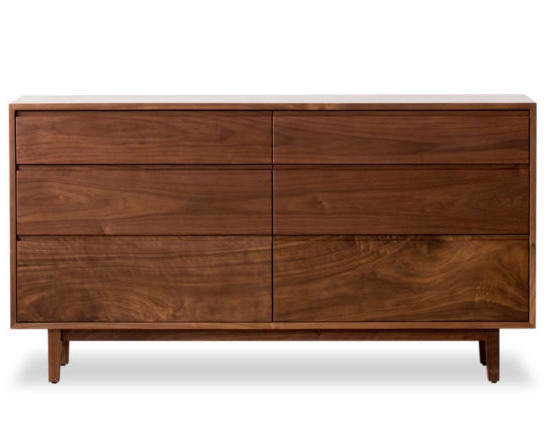
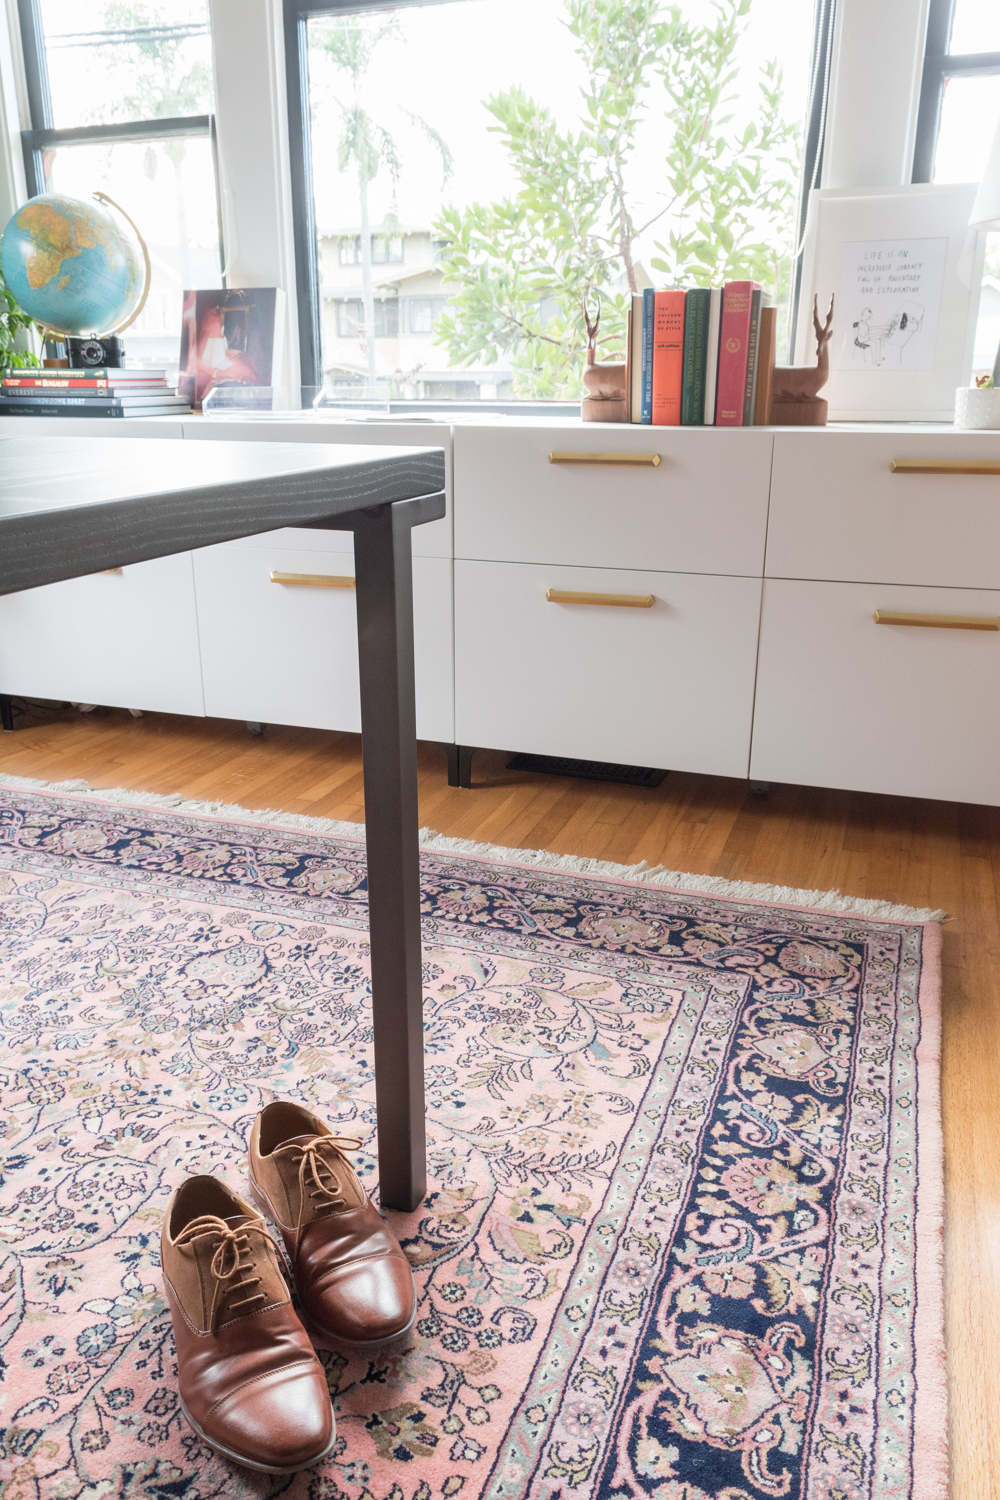
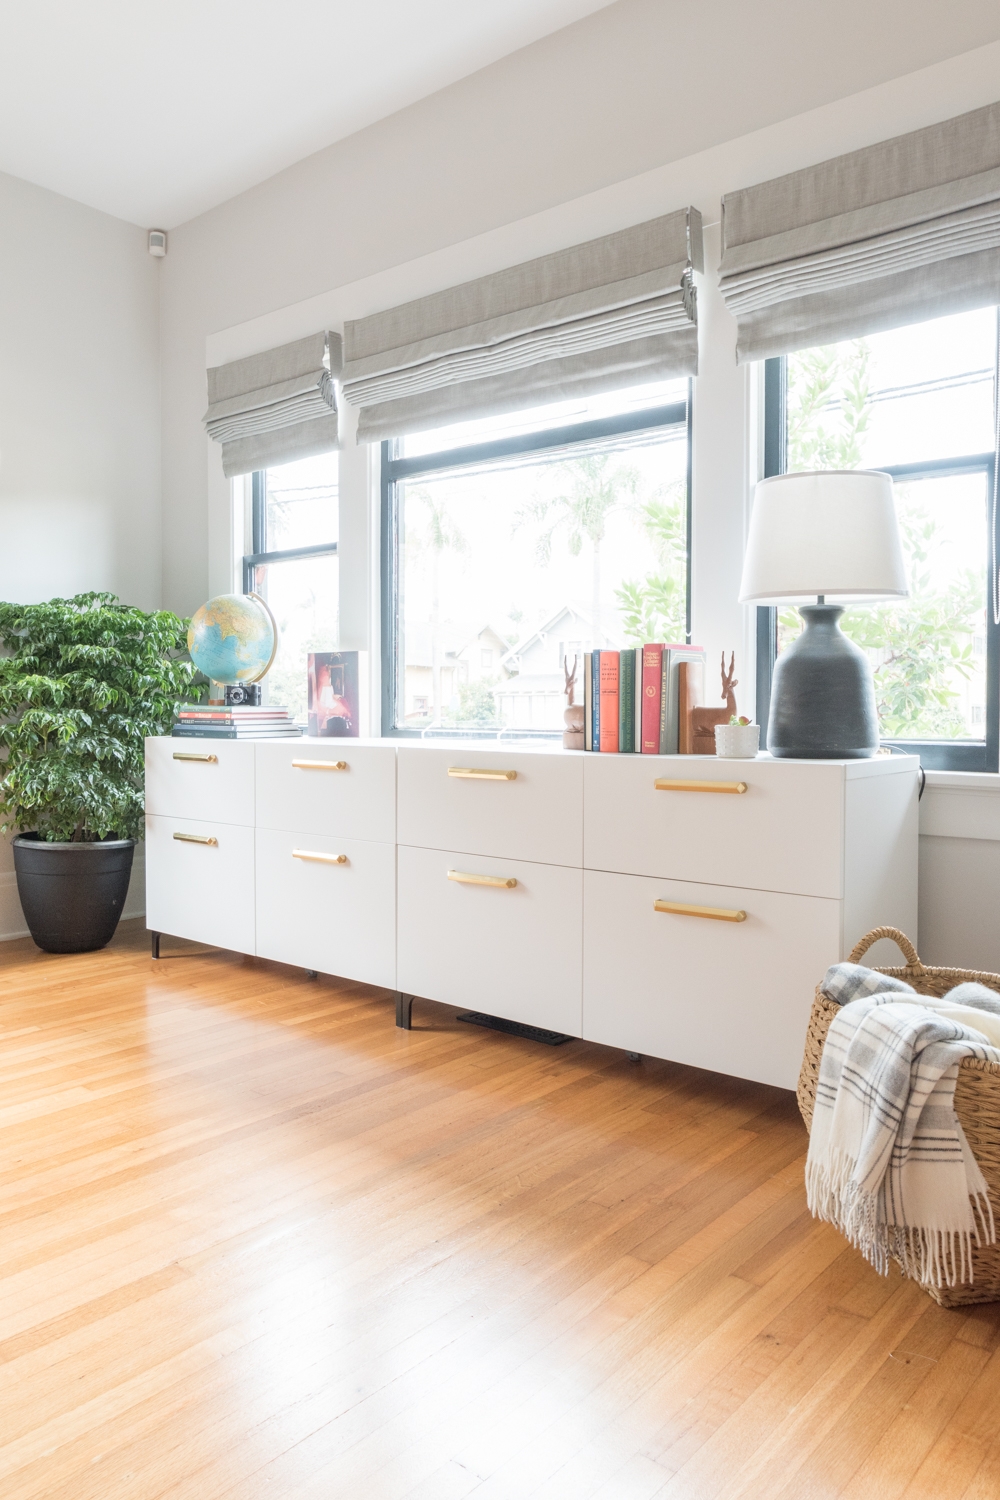
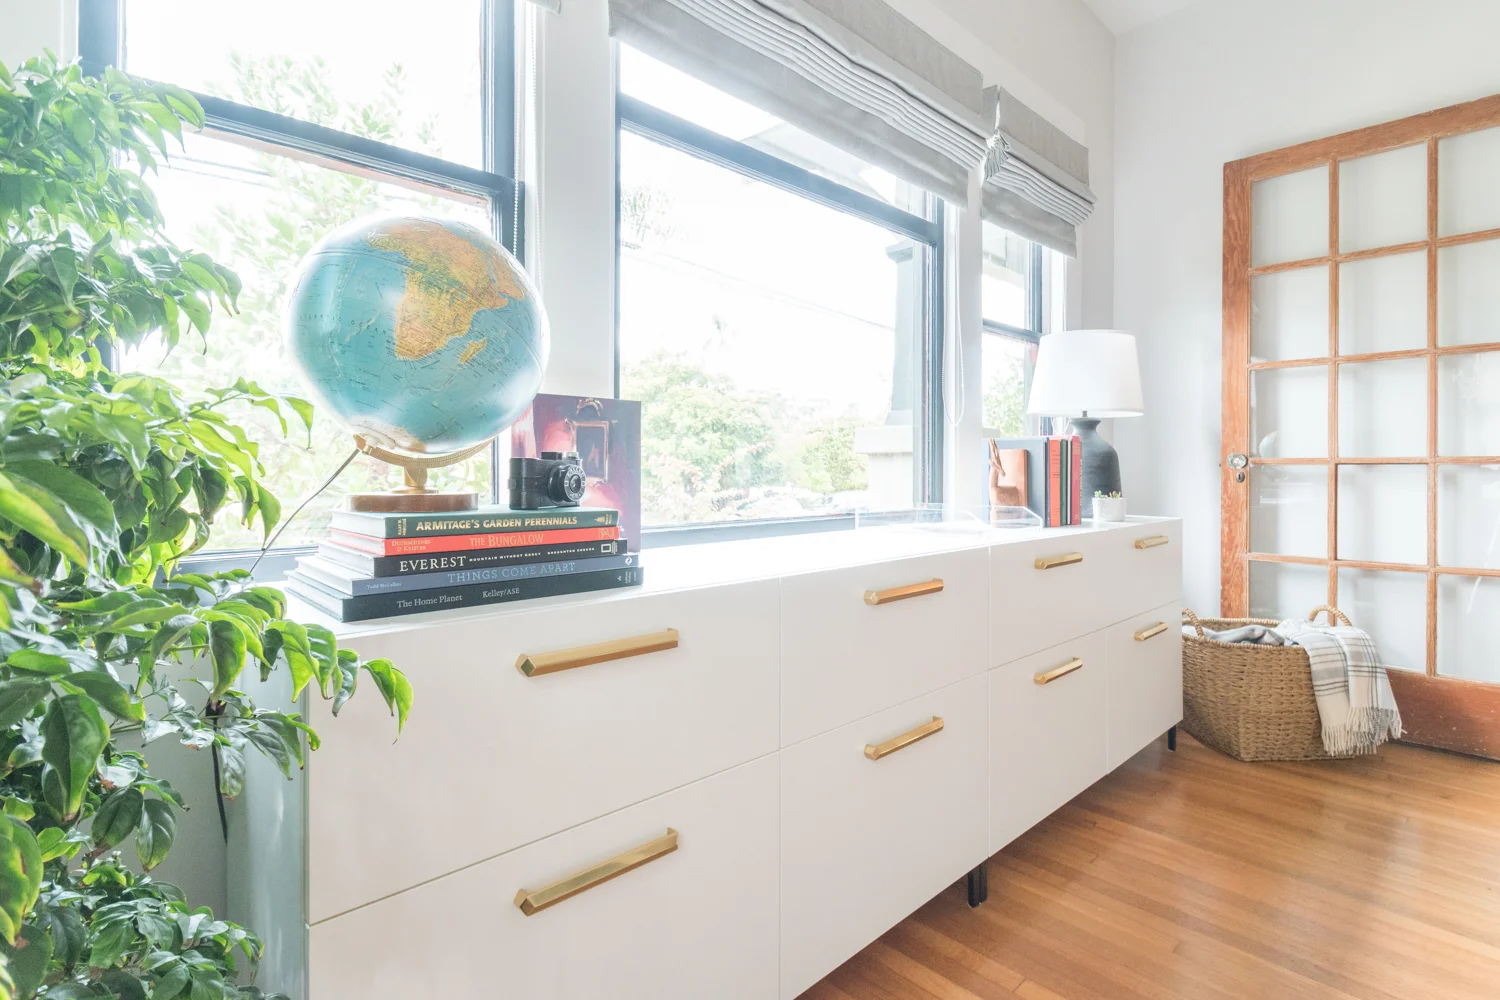
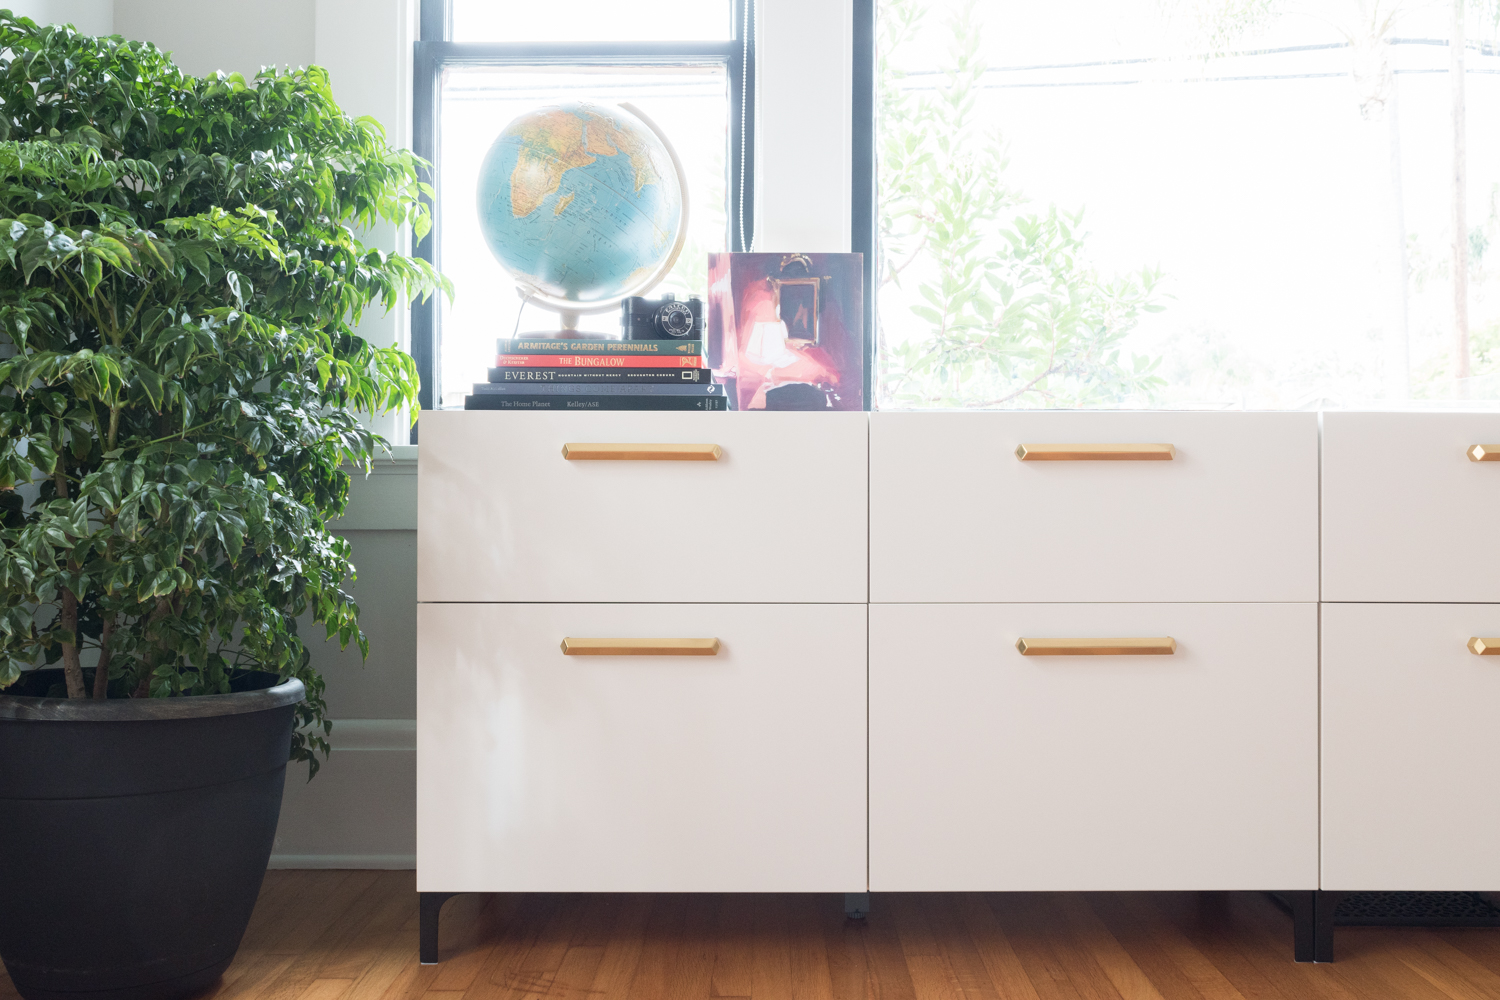
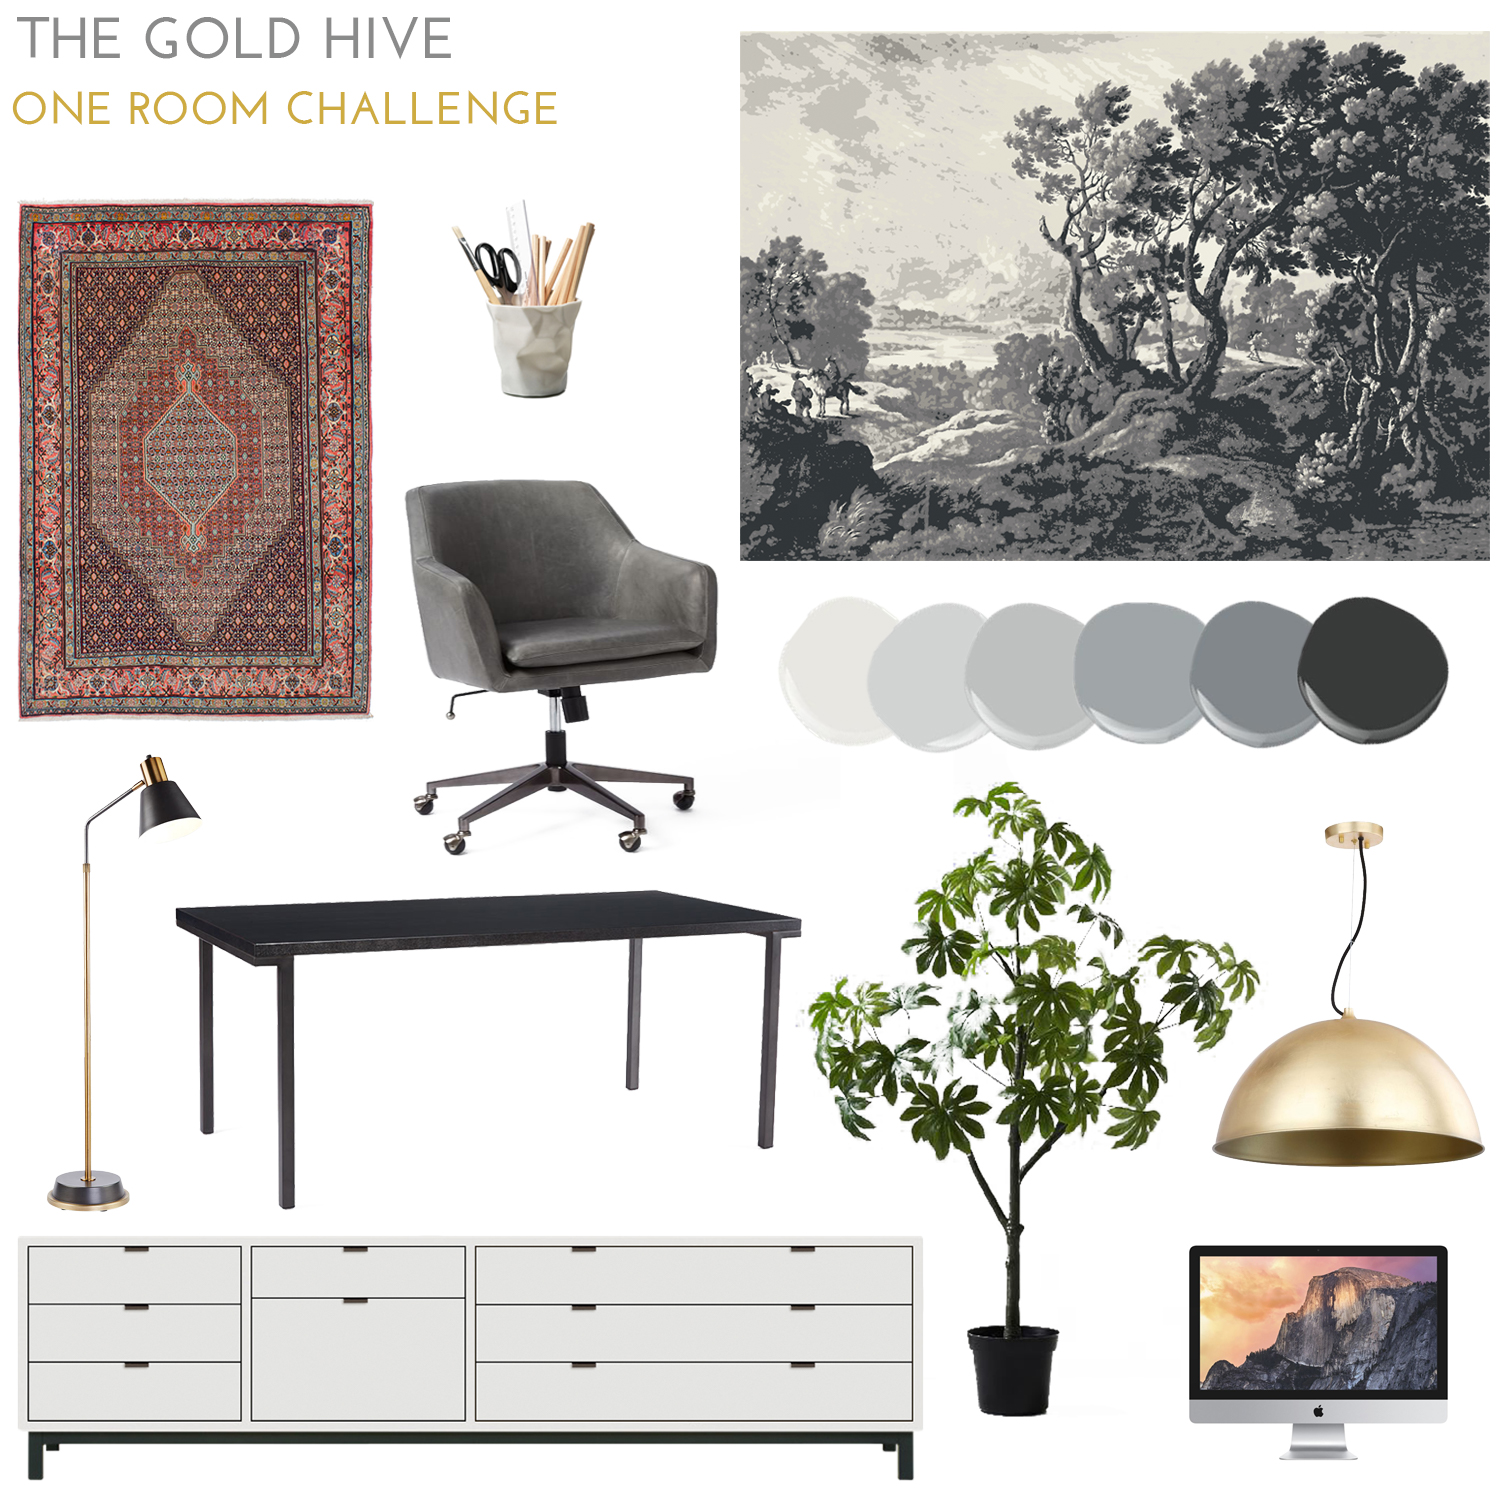
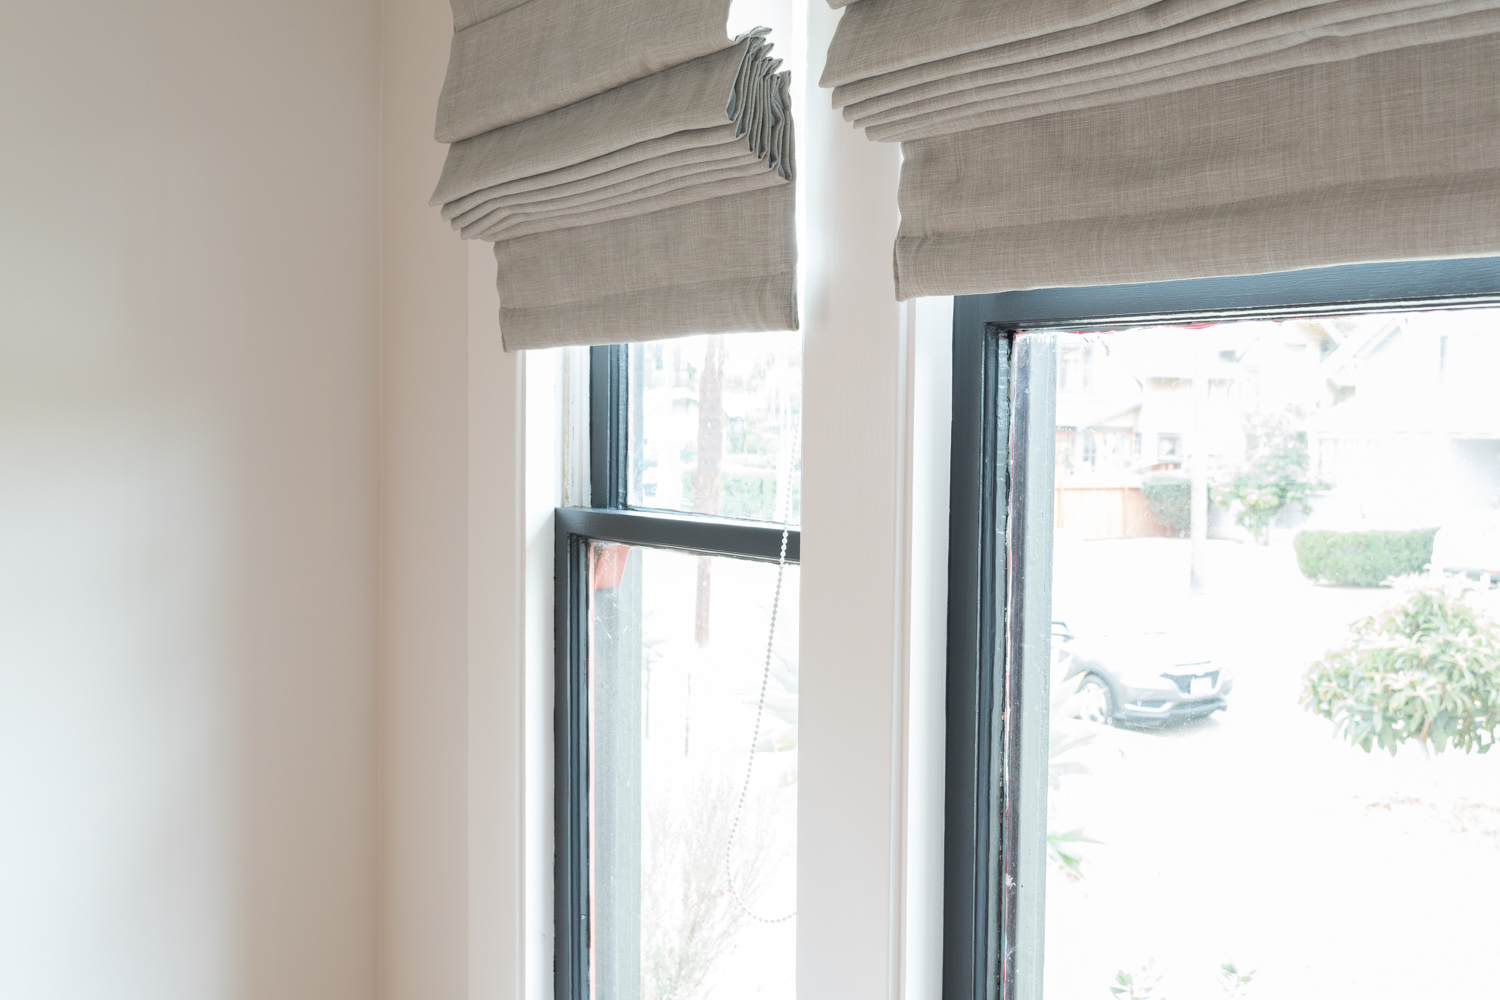
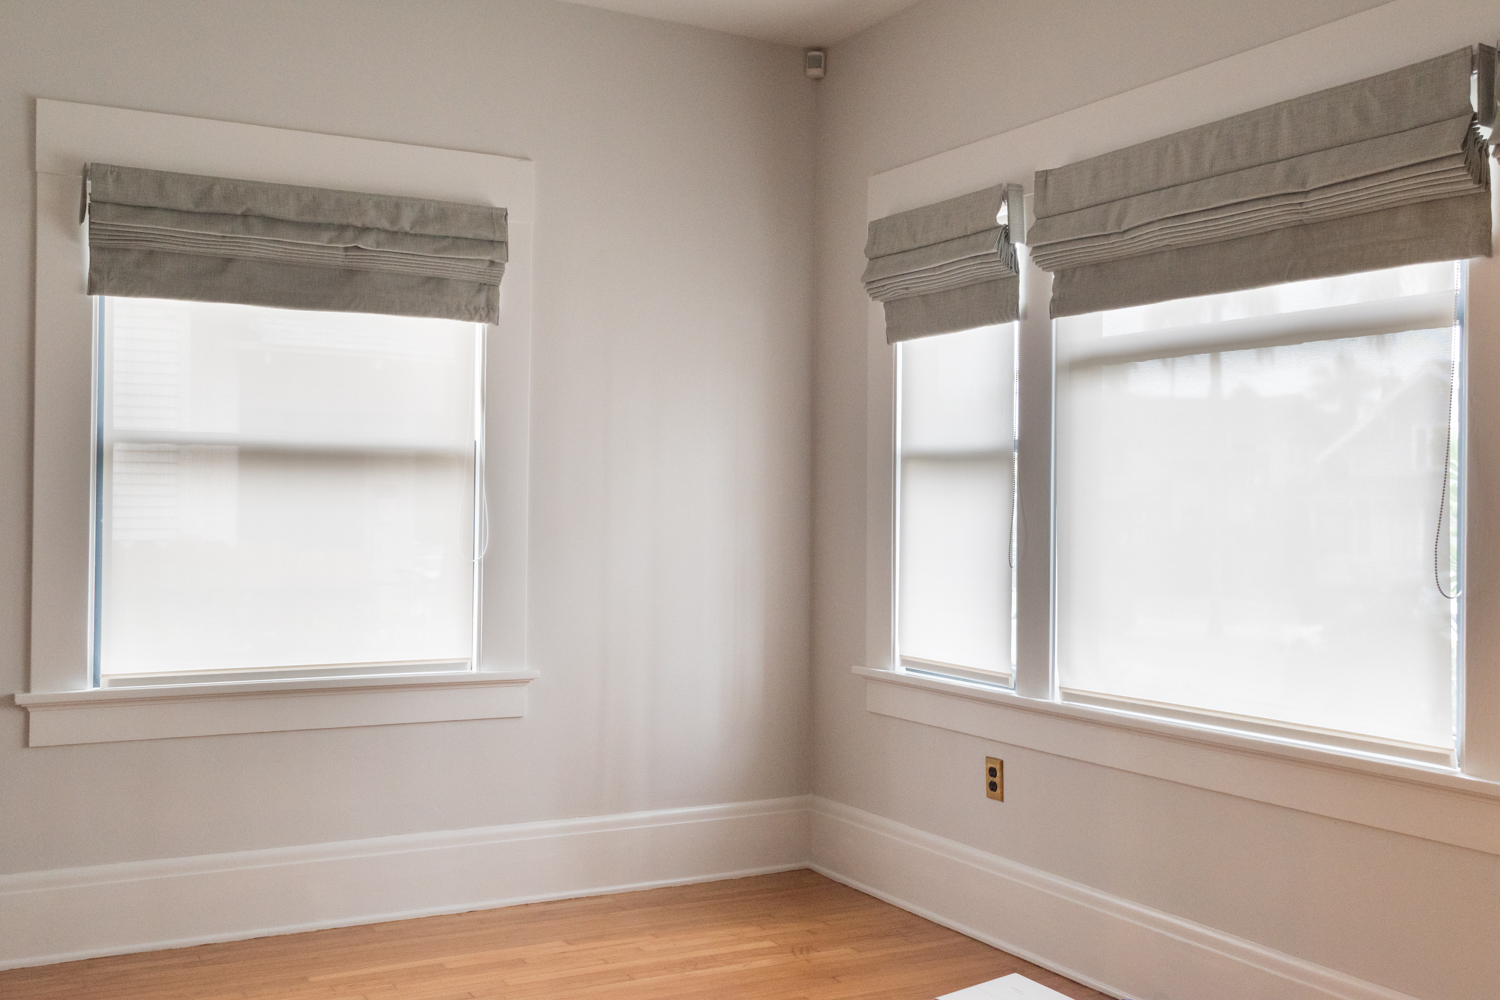
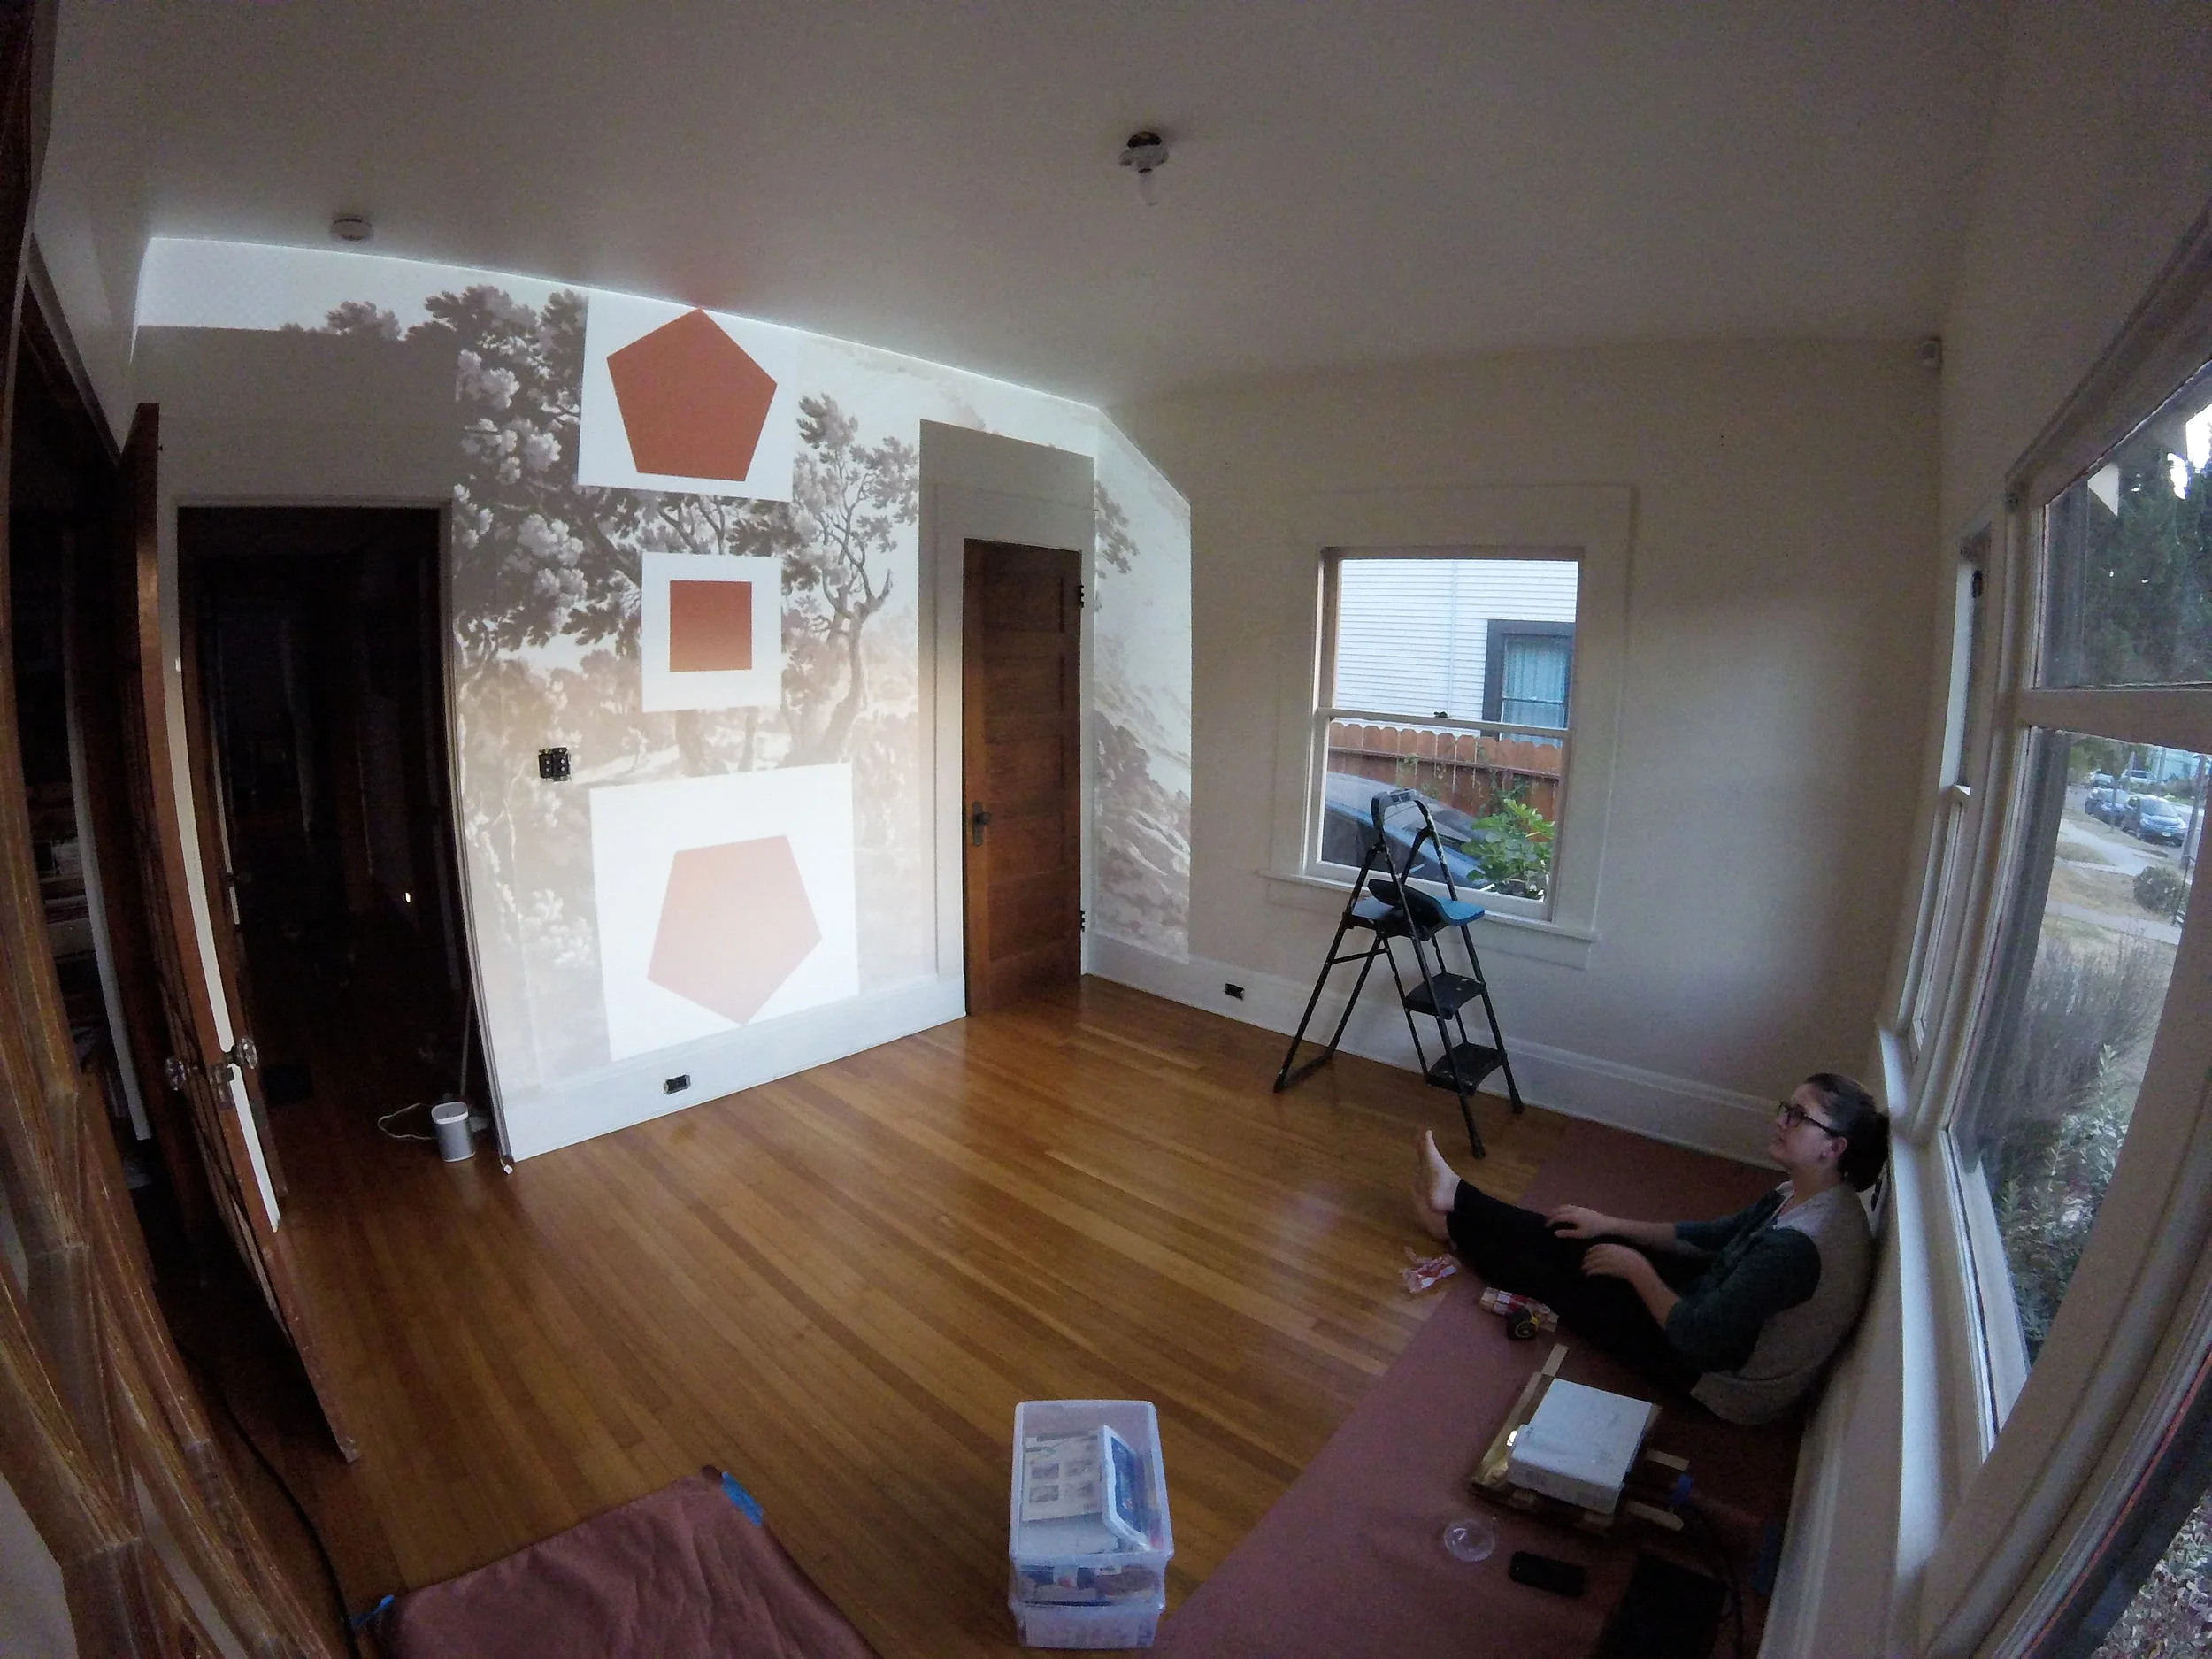
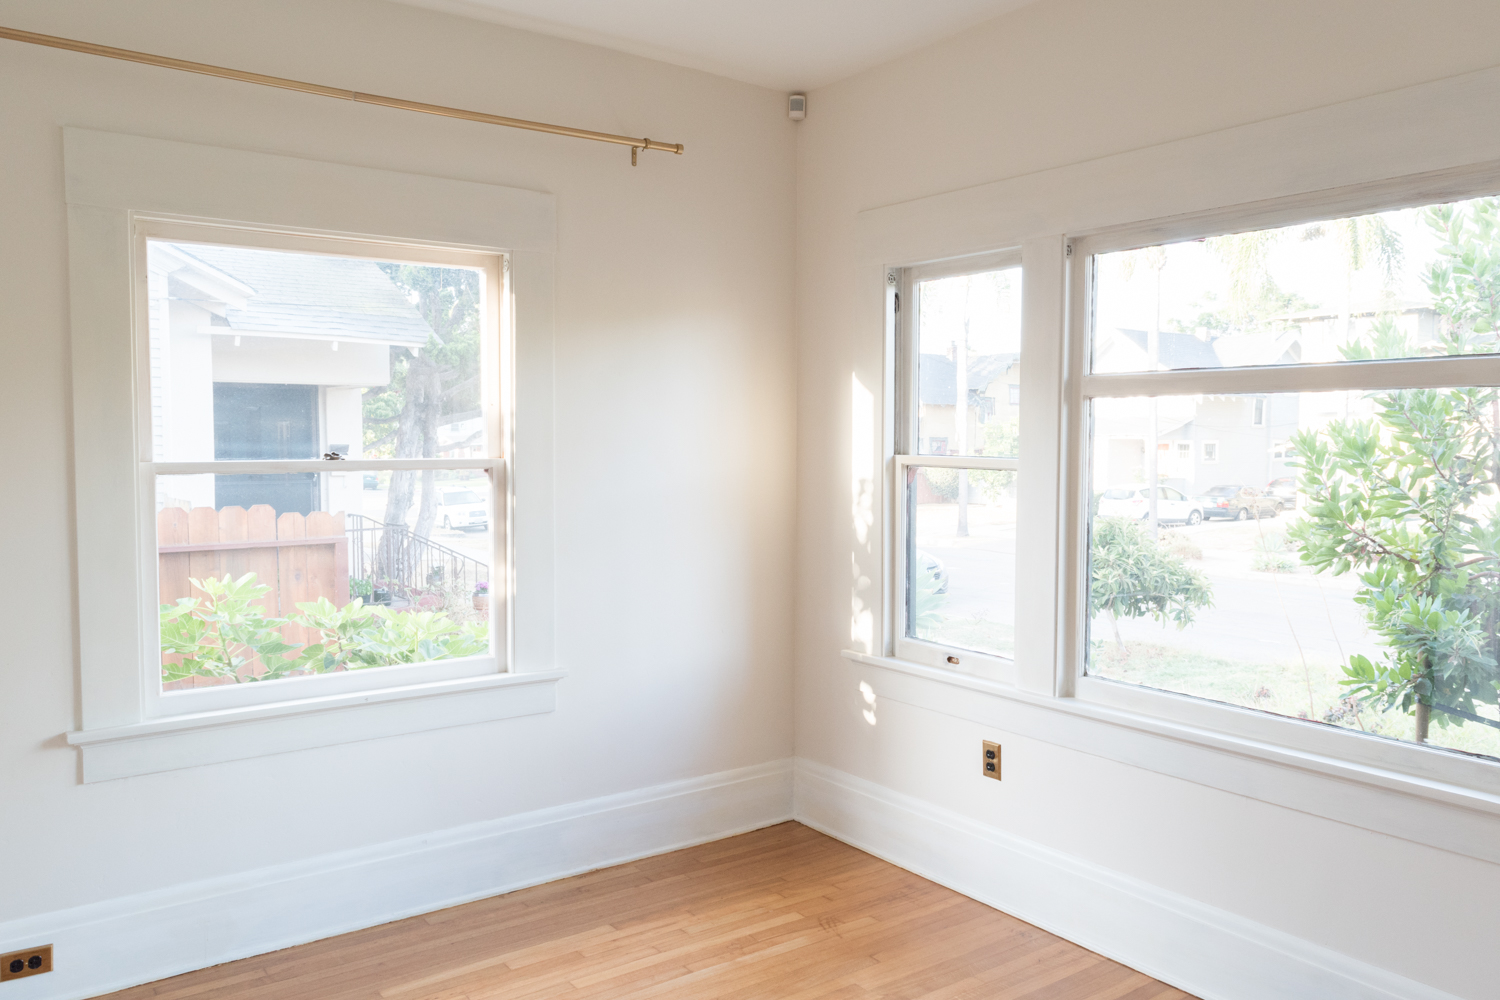
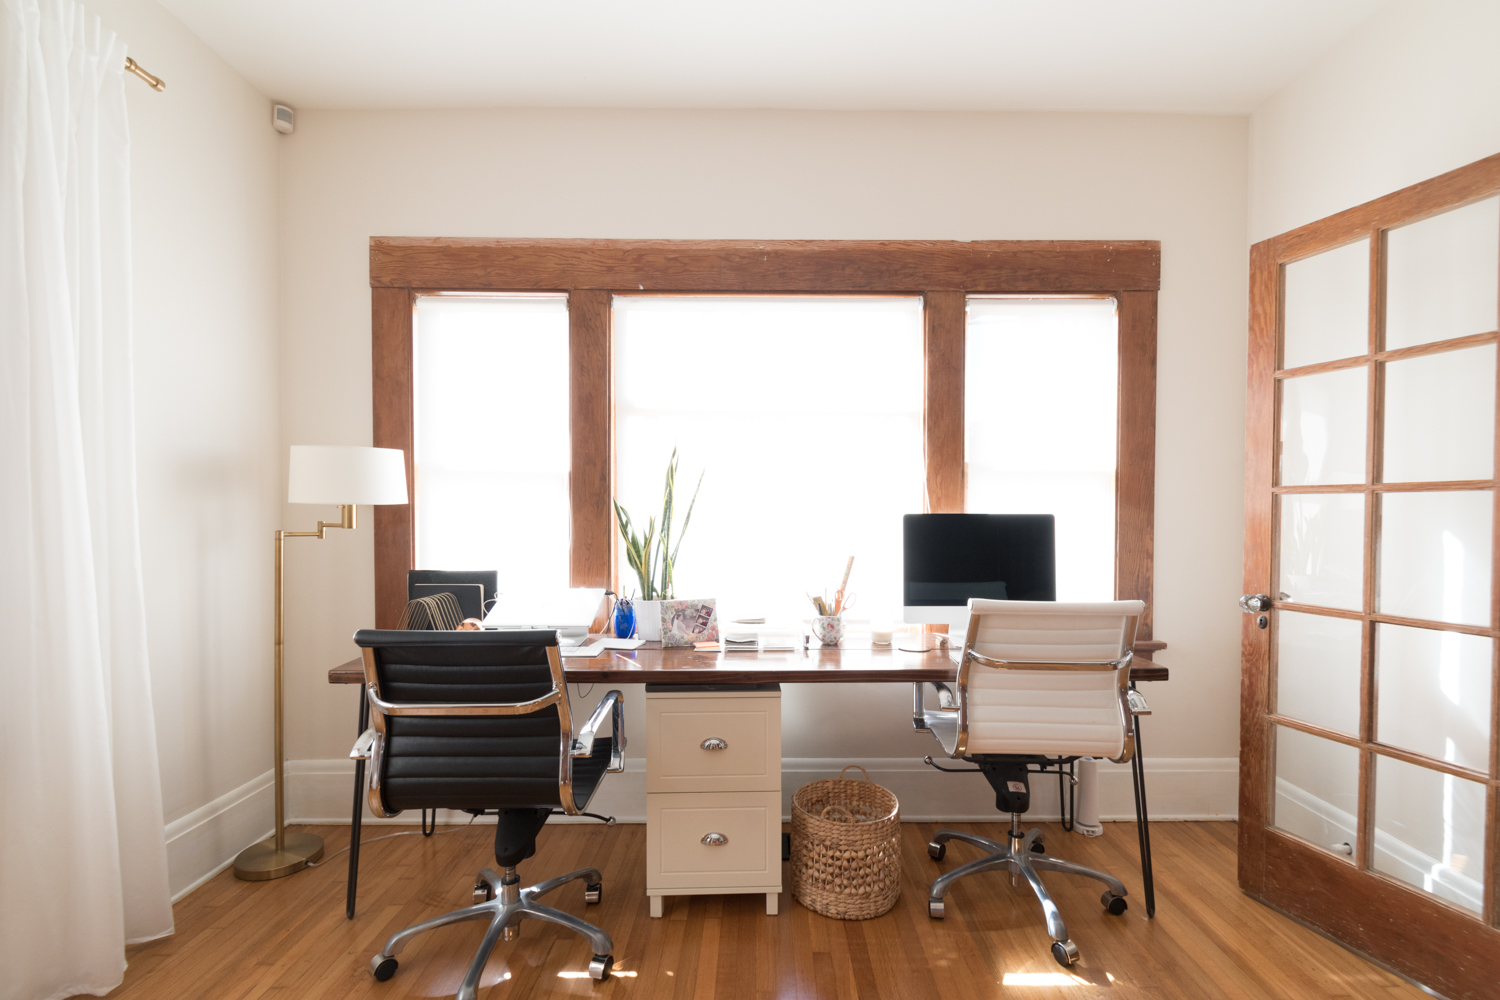
Additionally, I wanted a low cabinet that wouldn't obstruct the view out the window, and something long enough to fill most of the wall. It just simply doesn't exist out there! Then, I came across this beauty that can be customized to the depth, height, and length as well as drawer and cabinet features. It was exactly what I wanted. I was in love. BUT because it was custom made, it wouldn't have arrived in time for the One Room Challenge. 

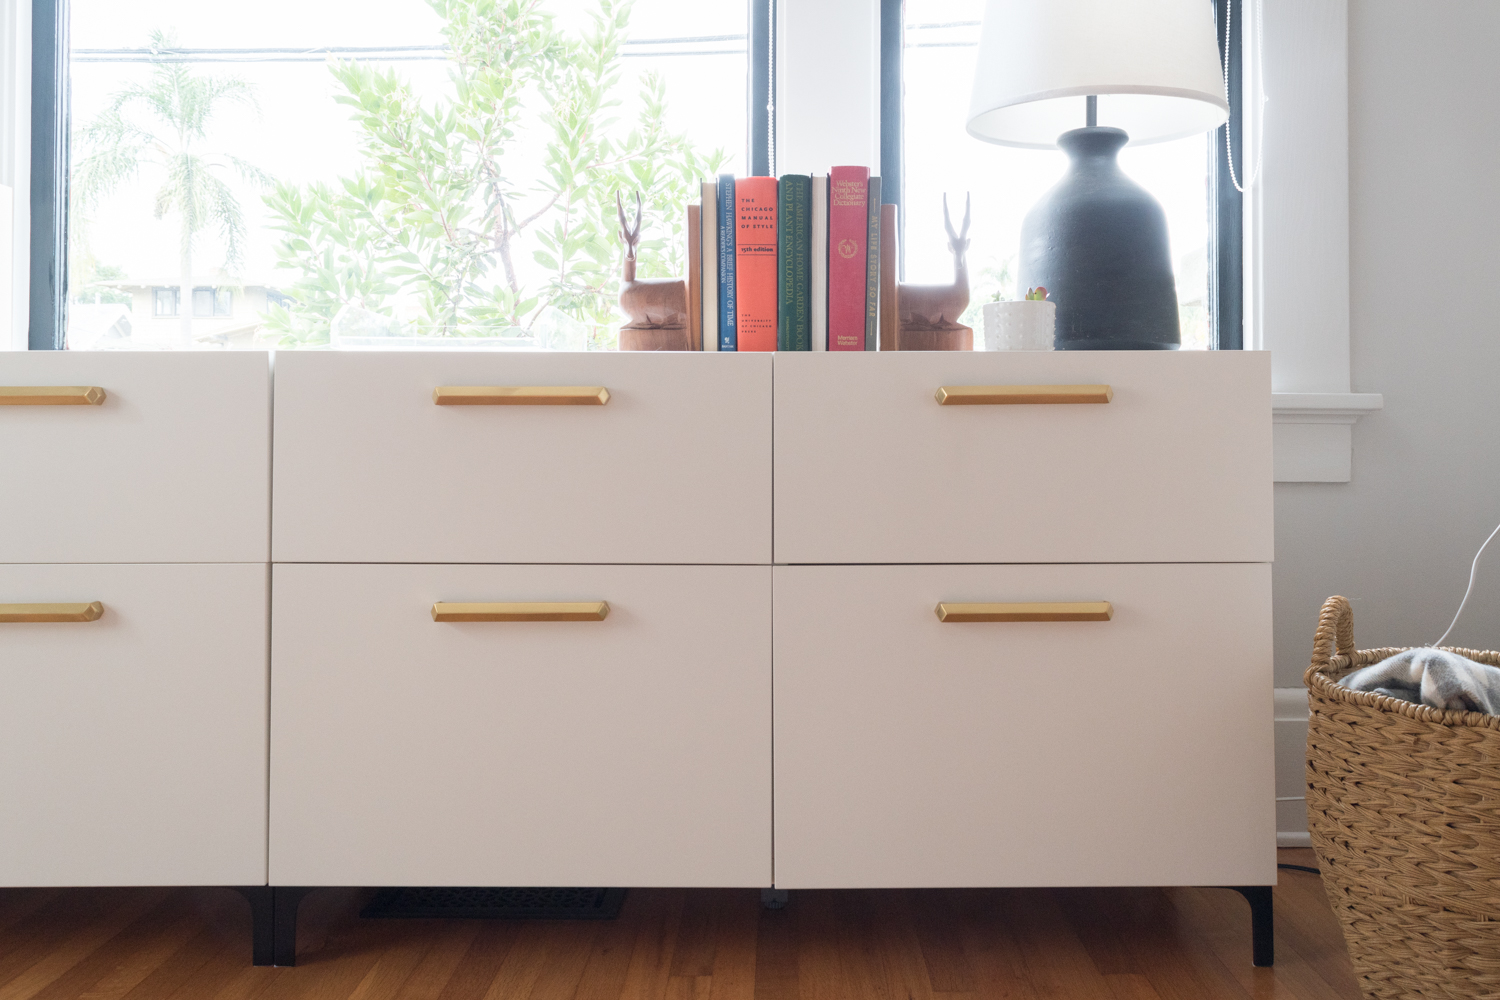
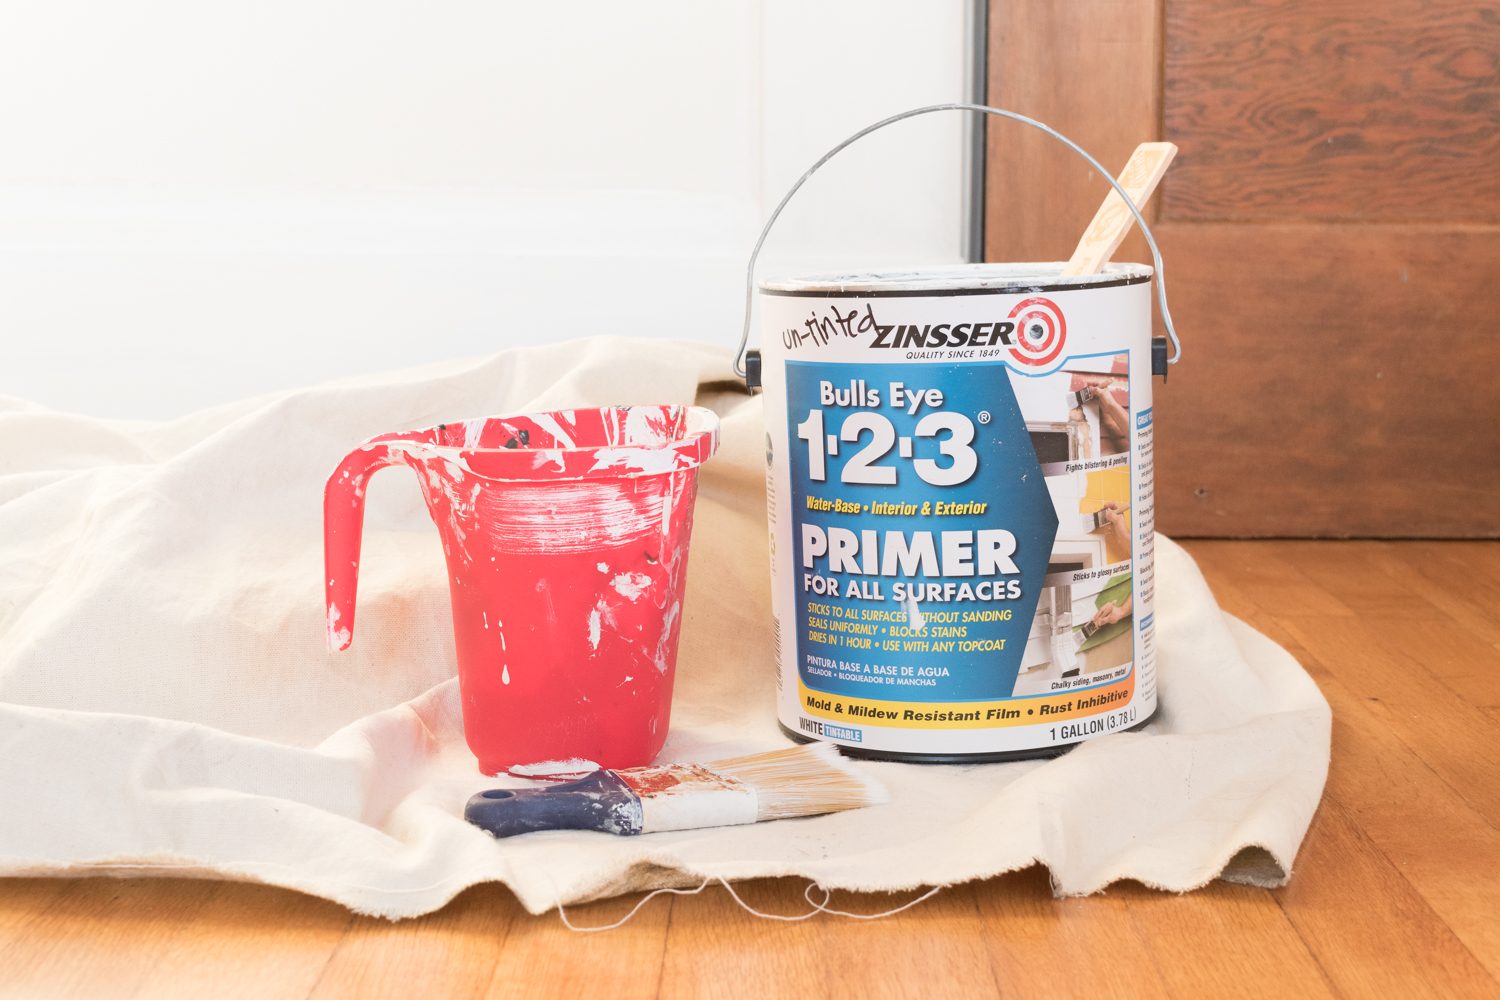
So I went back to square one and searched high and low for something premade that fit the bill. Then, decided an IKEA hack was the way to go. 

custom IKEA office storage

I started off with one of the BESTA units in the 47x15x29" size with four drawers. Then, got another of the same size, but with three drawers and one cabinet with doors. We also added a few legs and shelves to the mix along with some of the BESTA storage options. A full shopping list is at the bottom of this post.

IKEA has a bad rap, but I genuinely enjoy assembling their furniture. Call me up the next time you don't want to assemble your cabinet. I'll bring my "helpful" assistant along with me to support. 

reveal storage unit-0239.jpg

We dressed up the plain white cabinets with the most beautiful handles.

It's no surprise that I went with a pretty brass finish. These are the 8" Blake Drawer Pulls from Rejuvenation and me oh my are they dreamy!

drilling holes-0220.jpg

What's great about the IKEA drawer fronts is that you can install any kind of hardware in any spot on the cabinet because it doesn't have any pre-drilled holes. I could have done knobs, narrower handles, or installed them at any height. The unlimited design options are great, yet I was plagued with indecision when it came to placing the handles. 

reveal storage unit-0177.jpg

The beauty of the customization is how it holds all my things. Shall we take a look at what's inside?

open-and-close.gif
reveal storage unit-0235.jpg

The most officey drawer is the one with the everyday office gear. It also houses everyday home improvement tools so I don't need to run to the garage whenever I need to hammer something. This collection of tools is veeeery minimal at the moment. I'm sure this will become a junk drawer in no time, but I'm going to try to resist putting the reciprocating saw in here. 

To corral everything, I used the BESTA box and these Amac boxes from the Container Store.

reveal storage unit-0296.jpg

I'm prone to losing my shutter release remote for the camera, so I am sure glad to have a spot to keep the camera gear. Obviously not pictured is the camera and the tripod, both of which fit in the drawer.

reveal storage unit-0195.jpg

The drawers aren't designed for file storage, but they are just the right size for a standalone hanging file unit which keeps paperwork nicely filed, and also some space for who knows what!

reveal storage unit-0214.jpg

We recently cleaned out our electronics junk and narrowed it down to a few keepers. The IKEA drawer divider seems like it was perfectly designed for our Doxie scanner. The felt liner is so handy because it prevents everything from sliding around when we open and close drawers.

reveal storage unit-0219.jpg

While six out of the eight cubbies are drawers, two of the cabinets have doors with shelves. This way, I can hide things that actually do better on a shelf - like the printer. One of those bins (which is actually a shoe box) stores art supplies so I can pull it out and take the whole lot to a table. The other easy-to-move around bin is filled with greeting cards so I can catch up on my correspondence.

cut cabinet-0386.jpg

Retrofitting the cabinet for the printer was as easy as cutting a hole in the back for the power supply. The back panels are a thick cardboard, so a sharp exacto is all that's needed to run cables through.

If you wanna get the scoop on how I hide all of my electronics and cables throughout the house, click here!

reveal storage unit-0208.jpg

Two of the drawers are empty! I'm sure I'll find a use for them soon, but for now, it feels so refreshing to have empty space.

reveal storage unit-0250.jpg
reveal storage unit-0266.jpg

Can we take a moment to admire the original painting by Mary Sinner? Swoon.

reveal storage unit-0152.jpg

Mabel appreciates the storage unit being the perfect height to survey her queendom.

Be sure to check out my blog post all about organizing cables, wires, and electronics throughout the entire house here!

If you're tuning in via the One Room Challenge and want to stay up to date on all of my home's transformations, subscribe to get future posts in your email! Also, follow along on Instagram for daily updates.

Get The Look


UPDATE

I’m getting a lot of questions about the exact configuration of this storage unit. I’m not an IKEA expert so I can’t give you any insight into the current IKEA offerings, so I do recommend you chat with an employee to help you. Based on comments I get the impression that they changed some products. However, keep in mind that I customized the Besta unit by mixing and matching doors and drawers. This isn’t an off the shelf item! Since folks are still asking for more guidance and I’m happy to provide, I’ve included the shopping list I have on file. Click the button below to take a look. You can see my doodles to give you an idea of what I picked up. Remember that things have likely changed in the past few years, so please don’t use my document as an exact model for you!


Be sure to check out the featured designers here and guest participants here, too!

One Room Challenge Week 5 - Walls and Windows and Shades oh my!

Can you believe we're five weeks into the One Room Challenge?! Holy Moly it feels like it's been flying by and I can't keep up, yet at the same time it seems like I've been painting forever!

pulling blinds-0143.jpg

If you're just tuning in, I'm Ashley and I'm in the middle of transforming the home office of our 1915 craftsman bungalow in San Diego. Take a look at the plans which include a new layout, storage, lighting, furniture, and most importantly, a dramatic mural!

The Gold Hive One Room Challenge Design Plan

The mural is the star of the show, but this week I turned my attention to the other walls and the windows.

Farrow & Ball Ammonite

I coated all of the non-mural walls in Farrow & Ball's Ammonite, a pretty light grey. It provides just enough contrast for the trim (which is painted in Strong White) to pop, yet, not it's so dark that it would compete with the mural for attention.

Farrow & Ball Off-Black

I have been dreaming of black window sashes for ages. AGES. And I finally went for it. I love them so much. They got a couple of coats of Off-Black and have never looked better. Well, maybe they looked better 103 years ago before the neglect, but you know what I mean!

Each of these three colors are already in the mural so they are repeating throughout the space. Strong White is the whitest of the eight mural colors, Ammonite is the second lightest, and Off-Black is the deep moody base color. Hubba hubba.

freshly painted window trim

You may notice some funky wobbly paint edges on the sashes next to the glass. Don't go thinking I painted with my eyes closed! The wobbly paint is because of the many coats of poorly painted exterior paint over the last century. These layers make it looks less crisp on the inside, but what I do like about them is you can see each of the colors this house has been over the ages. It used to be blue! A far cry from the green and red exterior it is now. One day, I'll scrape off the exterior paint to make a nicer edge. One day.

brass sash pulls

When you weren't looking at the funky paint edges, didja get a look at that sash pull? Didja? Wow, those guys cleaned up nicely.

How to clean window hardware

The bottom one has a lot of patina that can absolutely be left as is, but the details were hidden in the old paint. I scrubbed and scrubbed until the paint came off and then I ended up with a shiny little number that looks so happy against the deep color of the sashes. I'm curious to see how it patinas over the years.

If you recall from my ORC intro post, one of the biggest challenges was the lighting in the office. Our desk previously looked out the window straight onto the surface of the blinding sun. I realize complaining about too much light sounds ridiculous, but it truly got really bright and really hot.

I'm happy to say that the issue has been remedied! Each window has a combo of two different shades. First are the solar shades that are installed on the inside of the frame and roll down with a chain. These beauties are on all of the windows throughout our home and we've had them for several years and love them.

Solar shades come in varying levels of opacity which allow you to select how much sunlight you want to block. More opacity means more protection, but more transparency means you can see out of them better.

Because our old windows don't have any UV protection, blocking the rays from bleaching our furniture and hardwoods was a big motivator for the solar shades. Since we want protection all the time, we keep these shades pulled pretty much 24/7. Their clean look is perfect for admiring the shape of the window frame as well as seeing outdoors. For reference, these are 3% opacity, but other shades in the house are 10%.

Even though the solar shades work wonders for us throughout most of the day, when 4pm rolls around and the sun starts to set, it shines directly into the room and we simply want less of its bright glare. So, we put classic roman shades with blackout liners on top of the solar shades. Now, we get so much variety with light options. I can black out the whole room to paint a mural, or diffuse the light, or let the sun shine in!

using a projector to paint a mural at home

I could have ordered wider roman blackout shades, but I preferred seeing as much woodwork as possible, so I made a lighting sacrifice by getting narrower ones that don't block as much light as what might be necessary in say, a nursery.

This animation is the perfect example of how the shades can affect the light in the room.

The solar shades are inside mounted into the frame of the window, and the roman shades attach to the surface of the trim with a clip.

Both the solar and roman shades are from Select Blinds. Their prices are great - especially for custom sized window treatments! All four of these windows came in under $600, and one of them is a beefy 50" wide! For your reference, our solar shades are 3% in white, and the blackout roman shades are in the pretty Stone Textured fabric in the classic folded pleat.

While I like the easy-to-use cord on the solar shades, we tried out the cordless option for the romans and it's great! I'm always wary that products with spring mechanisms won't do as you ask them to do, but so far these ones follow directions nicely!

I've been working on coating the second layer of paint on the mural, rather than adding new colors, so it doesn't look too different. Stay tuned!!

Room progress with roman shades

Come back over the next few weeks for more updates on the progress and set a reminder to return the morning of November 16th to see the final reveal!

Big shout out to Farrow & Ball for supplying all of the paints and the ones i'm using for the mural! Select Blinds kindly extended a discount on their roman shades. However, opinions are all my own and I stand by these products.

If you're tuning in via the One Room Challenge and want to stay up to date on all of my home's transformations, subscribe to get future posts in your email! Also, follow along on Instagram for daily updates. You're seeing only a sneak preview of the mural, so be sure to come back for more progress updates!

Be sure to check out the featured designers here and guest participants here, too!

Get your Own Etching or Paint-By-Numbers Landscape - An Etsy Roundup

Thank you all so much for the love of my One Room Challenge mural! Many of you are reaching out asking for updates, but I think I'm going to keep you in suspense until the reveal on November 16!

As you probably already know, to achieve the mural, I took a vintage etching and converted it into a paint-by-numbers-style image. So, I searched all over Etsy for vintage prints and paintings that you may enjoy in your home - on a smaller non-mural scale!

Click on your favorite image to add it to your personal collection!

Etchings

If you're less into the grayscale etching look and you're after the colorful paint-by-numbers style, I give you these.

Paint-By-Numbers

Come back on Thursday for more One Room Challenge updates!

One Room Challenge Week 4 - Painting a Foliage-Filled Wall Mural

It's week four of the One Room Challenge and boy has the past week been a doozy! I started the mural on Friday and found it to be a thousand times more time consuming than I ever anticipated. The One Room Challenge team decided to extend the event by one more week to assist participants affected by the recent natural disasters. I don't want to downplay the seriousness of the catastrophic events, but I'll admit that this extra 168 hours will most certainly come in handy. So, I get seven weeks to transform the space instead of six, but you will have to wait a few more days for the reveal - sorry!

This post is sponsored by Farrow & Ball. They generously provided the paint to make this mural possible yet all ideas and opinions are my own. Thanks for supporting the brands that allow me to share projects with you.

wall mural of tree using projector and layers

If you're just tuning in, I'm Ashley and I'm in the middle of transforming the home office of our 1915 craftsman bungalow in San Diego. Take a look at the plans which include a new layout, storage, lighting, furniture, and most importantly, a dramatic mural!

The Gold Hive One Room Challenge Design Plan

As a reminder, I'm painting an eight-color mural in a paint-by-numbers style. Take a look at last week's tutorial of how I planned to create a mural in the home office. It outlines sourcing a photo, modifying the design in photoshop, editing the image to cover multiple walls, and using a projector to cast the design onto the wall. It's worth reviewing to get some backstory on how this week's progress came to be.

Layered paint by numbers gif of each layer

If you're in an RSS reader, click through to admire the animation showing each color coming together to create the whole scene.

Without further ado, I started the mural!

Painting a mural with layers farrow and ball paint

I kicked off the painting on Friday night. Because starting at one end of the hue spectrum made more sense than bouncing around between colors, I launched the painting with the darkest shade since it takes up the most surface area.

This pretty deep color is Farrow & Ball's Off-Black. It took about 5 hours to do this layer from 10pm-3am - a real sacrifice because these are hours are when I get my best REM cycles in.

tracing projection onto wall to paint mural

As a reminder, I was using my trusty projector and Photoshop to cast the image onto the walls for me to trace. It provided the perfect guide for each color as I turned off the hue layers that I wasn't painting at the moment.

multi-colored wall mural painting diy

Once the dreamy off-black color was on, I turned my attention to Farrow & Ball's Down Pipe which happens to be a very similar hue as the bathroom walls. This second layer took 7 hours - eek!

The next pretty shade was Mole's Breath which I guarantee looks better than what a furry animal smells like when they exhale. This coat took 5.5 hours.

Evolution of wall mural using Farrow & Ball paints

The fourth color was Worsted, a rich warm grey. This one only took 3 hours!

After I got 20 hours into the project, I realized that I sorely overestimated how much I could accomplish during this tight timeline. I was 20 hours in, and only painted four out of the eight colors. PLUS! Each color would need a second coat.

Some of you on Instagram were kind enough to reassure me that the single-coat was still pretty. Thank you to all of you that gave me feedback as I shared live updates over the weekend! But, I really wanted solid chunks of color that looked like a true paint-by-numbers more than a textural pattern.

how to paint a mural at home

So, another slathering of paint is a must. I wish I could say that the second coat was faster than the first, but it wasn't. It took more time because instead of taking some creative license like I did with the first layer, which allowed me to apply the paint more organically, I now had to perfectly trace the existing color. 

using a projector to paint a mural at home

Do you see my site supervisor Mabel keeping an eye on quality control?

I want to point out that the process isn't hard. It's just time-consuming and can be boring. I listened to a bunch of podcast episodes of 99% Invisible before switching over to a David Sedaris audiobook. That guy's impression of Billie Holiday always cracks me up!

I'm not tallying up the hours to complain or seek pity, but rather to be totally honest about the process. I didn't just whip a mural together overnight and my art school background didn't save the day. Patience is the biggest skill you need if you aim to take on a project like this.

Farrow & Ball grey paint colors for mural off-black down pipe worsted mole's breath purbeck stone corn forth white ammonite strong white

Now that I've stared the double coat process, I've put in about 30 hours so far, and have a few more hues to go! If I haven't scared you away from taking on a project like this, here are a few tips I've gained from my experience so far.

how to use a projector for multiple paint colors

I explained in my previous post how to set up the projector. Since writing that post, a technique I found helpful is to color each hue a different bright color in Photoshop. This way, I can turn multiple layers on and clearly see each of them. At first, I just turned on each grey layer one at a time, but since the projector was known to move as I stomped around the room, maintaining visibility for each layer was super helpful.

how to techniques for using a projector at home to paint a wall treatment

Look how spiffy it is when those psychadelic colors project onto the white chair!

how to organize paints for ease

It seemed only fitting to use my childhood painting table/easel as my work surface. With so many paints, containing them in an organized fashion has been a must.

HANDy Paint Pail and liners for organizing paint colors

To keep each color organized, I'm using the HANDy Paint Pail and its corresponding liners - one for each color. I then labeled them accordingly. Whenever I want to use a shade, I pop it into the paint pail and paint away!

How to store paint in the fridge

When I'm not using that color, I cover it in plastic wrap and pop it in the fridge. This storage method has definitely taken over my perishables. Do note, that I have been painting every day with small batches of paint. This storage technique doesn't last forever and will require dumping the paint and pouring fresh from the can every so often.

artist paint brushes for mural painting

For brushes I'm using some old ones from high school and college, but any round brush for acrylics from your local art store would do the trick. Depending on the size of the image and the room, the detail will vary. For most of my mural, I've been getting away with a size 6 round brush, but certain images may require narrower brushes and others could get away with wider ones.

And that, folks, is where I'm at. I probably have another 40 hours of painting to go. There are 4 more hues to paint, 6 more colors to re-coat, 4 more walls to paint a solid color, trim to coat, and window sashes to give a dark hue. As you're reading this, I'm probably with a brush in hand!

Painting a wall mural using a projector as a template

Come back over the next few weeks for more updates on the progress and set an reminder to return the morning of November 16th to see the final reveal!

I'm thrilled to have partnered with Farrow & Ball on this project. They generously provided me oodles of paint for this mural that's requiring eight of their beautiful grey hues. Their paints are the bee's knees so I'm excited to work with their quality and eco-friendly paints for this project. Thanks, Farrow & Ball!

If you're tuning in via the One Room Challenge and want to stay up to date on all of my home's transformations, subscribe to get future posts in your email! Also, follow along on Instagram for daily updates. You're seeing only a sneak preview of the mural, so be sure to come back for more progress updates!

Be sure to check out the featured design participants here and guest participants here, too!

One Room Challenge Week 3 - The Tricks To Creating a Perfect Wall Mural

It's week three of the One Room Challenge and I'm barely making progress on the most dramatic part of the home office transformation - the mural! With only a few weeks to go, and lots of wall to cover, I'm worried about making the deadline! *insert nervous teeth-gritting emoji*

Projection of photo for painting mural The Gold Hive

If you're just tuning in, I'm Ashley and I'm in the middle of transforming the home office of our 1915 craftsman bungalow in San Diego. Take a look at the plans which include a new layout, storage, lighting, furniture, and most importantly, a dramatic mural!

The Gold Hive One Room Challenge Design Plan

There are many options to buy wallpaper sized and designed to cover walls. But, why would I make it so easy on myself? Instead, I'm custom designing a wall treatment from an image I found online. If you, too, want to take on a project like this, here's how!

Step 1: Select an Image

You can turn pretty much any photo, drawing, painting, etching, or image into a wall mural. I was initially inspired by centuries-old etchings, so that's where I started. My image was sourced from the Met's open-source collection of artwork. You can also find other great art downloads here and even Audubon images here (thanks for the bird tip, Marti!).

I selected this image called A Landscape with Travelers at the Left, an etching by Adam Perelle from the 1660s. When searching for an image, I wanted lush greenery that was neither suffocatingly dense like I was lost in the forest, nor super vast that would give some sort of trompe l'oeil look.

Step 2: Modify Image for Painting

Depending on your image, you could skip this step and make a realistic representation of your image. However, if you want to make the process "easier," you may want to remove a bit of detail or avoid photo-realistic shading. So, you can convert it into a simpler color-blocked image for painting. Let's face it, we aren't all Chuck Close (yes, those are paintings - not photos).

How to make an image for a mural

To simplify my etching, I converted it into a paint-by-numbers style image. No longer is it made up of small hash marks naturally found in etching, it is swaths of solid color. Instead of detailed line work and shading, the image is reduced to eight colors that, when combined, create the illusion of the shading and dimension of the original image.

Here's how:

  1. Import your image into Photoshop.

  2. Make any edits to your image like removing imperfections, cropping borders, or making color adjustments.

  3. Click Filter>Blur>Smart Blur to blur out the details.

  4. Define your radius and threshold by testing the different options. Select high quality.

  5. Click Image>Mode>Indexed Color, then select the number of colors you want to paint and adjust the settings until it looks like a paint-by-numbers you are comfortable with.*

  6. Click Image>Mode>RGB to convert it back to its original profile.

  7. Click Select>Color Range and turn down the fuzziness, then use the eyedropper to select a color.

  8. Create a new layer from the selection (command J).

  9. Repeat steps 7 & 8 until you have a layer for each color.

*Instead of changing the mode, you can try the Cutout filter. It wasn't the look I was going for, but it will affect each photo differently, so give it a shot!

Layered paint by numbers gif of each layer

If you're in an RSS reader, you'll want to click through to admire this spiffy gif that shows each layer of paint. Really, who doesn't love a good gif?

Step 3: Edit the Photo to Wrap Around the Walls

If you want to do a mural on only one wall, then you can skip this step. However, I wanted the landscape to wrap around all four walls and give the illusion of a continuous image. Because the dimensions would certainly not wrap all the way around, I duplicated, mirrored, and modified the image in Photoshop.

Mural panorama for projection

The diagram above shows each of the four walls divided by blue vertical seams. The dark grey cutouts are the doors, windows, and baseboards. To do the same, create a Photoshop file with a canvas size the same dimensions of your room (or a scaled down version). Then, block off each part of the wall that won't get paint, like doors and windows. No need to account for light switches. Then, import your layered paint-by-numbers file and duplicate and modify it as you like.

When you look at the image panorama, you can see where I duplicated and mirrored parts of the scene. You can make all the tweaks you want on your image, but don't stretch the image, which would distort it. There are a few spots that look too similar in the image above, so I'll be making modifications freehanded. Pay attention to details as they wrap around the walls. Do you want all of the clouds circling in the same direction, or do you want the illusion of the gusting from one direction? It's your call, but this is the time to make the edits!

Step 4: Set Up the Projector

The most effective way to get a photo from Photoshop to your room is with a projector. I'm using this short-throw HD projector that's able to cover an entire wall at a nice resolution. When shopping, be careful of low-res projectors that won't fill up your whole wall. Otherwise, you'll have to puzzle piece your way around.

Isn't she pretty?

First things first, kill the lights and draw the shades. Projectors like the dark.

Projecting art on wall to create mural

I set up my iMac on a small filing cabinet outside of the office. I want it nearby for making edits and turning off layers (more on that in a minute) but I wanted it far enough away that it isn't in danger of getting painted. It connects to the projector with a 25' long high-speed HDMI cable.

Lining up the image is key, especially if you'll be covering multiple walls. Avoiding distortion is important so it doesn't feel like the trees are leaning in on you or falling sideways. To do this, I created shapes overlayed on the image to line up the projector. Points on the top and the bottom helped me line the image up with the architecture of the room, and a square in the middle sized to 12"x12" in Photoshop gave me a guide to measure with a tape measure on the wall.

Aligning a projector for a wall mural
Setting up a projector for a mural

The scene for passersby probably gave the impression I was running a cult. Maybe I should use the projector for spooky Halloween decor while I'm at it.

Setting up a projector for a wall mural
How to use a projector for a wall mural

I'll admit that setting up the projector for the first time was quite time-consuming. We had to figure out the right zoom on Photoshop, the best distance to place the projector from the wall, and we also had to shim it up to have the right angle on the wall.

Step 5: Transfer Image to Walls

How to paint a mural on a wall with a projector

So, now that the projector is shining pretty, you can get to painting.

Layered image for mural wall projection

Remember that spiffy gif from before that broke down each of the colors on their own layer? Well, this is when it comes in handy.

Depending on your design and the number of colors, you could paint using the full image. However, I think that isolating colors and painting one color over the whole wall, then moving to the next color and the next color is the best way to cover ground - err walls.

how to paint a mural with layers in Photoshop

To see only one color at a time, you'll turn off the layers of the other colors. Then, paint away by tracing wherever that color is on the wall. Thanks for the help, projector and Photoshop!

Isolating layers for painting a mural with a projector

The dark shades show up nicely on a white wall, but the light colors often need help by creating a high-contrast background. Adding color helps differentiate it from any greys you may have on the wall already. Alternatively, you can tint the actual color layer that you're working on, rather than its background. It's up to you and how much color/light your eyeballs can handle.

Painting a wall mural inside

The projector creates a template to guide you. Just follow the shapes and lines to replicate the projected image onto your walls. It's basically just tracing - but on a big scale!

Then, repeat, repeat, repeat, repeat, and repeat for all eight colors and four walls. Did I mention that I haven't started the mural yet??? The paint only just arrived and I had lots of prep including moving the ceiling light box and some other odds and ends. Wish me luck! I'll be back next week for painting progress and tips.

I'm thrilled to have partnered with Farrow & Ball on this project. They generously provided me oodles of paint for this mural that's requiring eight of their beautiful grey hues. Their paints are the crème de la crème, so I'm giddy with excitement to be working with their quality and eco-friendly paints for this project. Thanks, Farrow & Ball team!

If you're tuning in via the One Room Challenge and want to stay up to date on the progress of this project and see what I have coming in the future, subscribe to get blog posts in your email! Also, follow along on Instagram where I'll share stories of the transformation along the way.

Be sure to check out the featured design participants here and guest participants here, too!

One Room Challenge Week 2 - Preparing for a Bold Wall Mural

Welcome to week two of the One Room Challenge!

How to prep for paint

If you're just tuning in, I'm Ashley and I'm in the beginning of transforming the home office of our 1915 craftsman bungalow in San Diego. Take a look at the plans which include a new layout, storage, lighting, furniture, and most importantly, a pretty cool mural! For a refresher, here's where we're headed.

The Gold Hive One Room Challenge Design Plan

Week two is often pretty slow going - these last few days were all about preparing for the statement wall treatment. It's true when they say, "prep is the most important part of painting." It took a couple of days to sand, patch, prime, caulk, patch again, prime again, and finally, clean up. It already feels like a transformation, and we're only on the priming stage!

All this effort was put into the trim to give it new life. For anyone concerned about painting the woodwork, take a look at my logic here.

To see what I've been up to this past week, scroll through below. Note, it isn't dissimilar from watching paint dry.

First, I used a coarse grit sandpaper on my orbital sander to knock down the existing finish and remove the splinters.

How to prep for paint

The sander worked wonders for evening out the texture (I meant it when I said there were splinters on the interior woodwork). Shaving off the finish also gives the primer solid wood to grab hold of.

How to sand woodwork

I only sanded the door casings because the doors are in great shape, even though the trim was rather unfortunate. The baseboards were already painted. To get an idea of the state of the wood and how I decided to paint it, check out this post.

Primer

After sanding, I followed up with my go-to primer, my go-to paintbrush, and my go-to paint tool.

painting primer

There were oodles of gouges in the wood and nail holes to fill. Some like to fill these gaps before priming, but I like how a thin coat of white paint helps to show each of the imperfections needing patches. 

I like to use this putty. It's really easy to control and doesn't need sanding, but does require a long dry time (24-48 hours). My favorite caulk works wonders and can be painted in 30 minutes. My tip for caulking is to use a small container with water and a few paper towels for cleaning up messy fingers, and for dipping into for a smooth swipe along the bead of caulking.

After patching the holes, I did another layer of primer to be extra prepared. And I mean, once you're in your painting clothes, why bother stopping?

Preparing for paint

For more painting tips and tools, I always have a kneeling pad, a sturdy step ladder, two drop cloths (one for sliding around as I move throughout the room and one for keeping all of the supplies), an interchangeable screwdriver for removing hardware, clean paintbrushes for dusting, a can of LaCroix (can you spot it in the above photo?), stir sticks, and most importantly, a device for playing podcasts and tunes.

Painting wood trim The Gold Hive

The reason the trim blends into the walls is that I used leftover primer from when I painted these walls. I had it tinted to the wall color (hot tip!) so the window casing isn't exactly popping off the wall right now. Not yet, at least!

Painting wood trim The Gold Hive

Yep, that's a GoPro. Prepare yourself for a timelapse of the mural application!

Painting wood trim The Gold Hive

Just look at how happy those doors are surrounded by a crisp blanket of white paint rather than neglected woodwork.

primer progress-0333.jpg
Painting wood trim The Gold Hive
primer progress-0309.jpg

For a satisfying step-by-step, click through these images below. 

All of this was laborious and not a wildly dramatic transformation, but it's a necessary step to get to a blank state before applying those 8 shades of grey to the walls. Come back next week for some mural progress!

Painting wood trim The Gold Hive

If you're tuning in via the One Room Challenge and want to stay up to date on the progress of this project and see what I have coming in the future, subscribe to get blog posts in your email! Also, follow along on Instagram where I'll share stories of the transformation along the way.

Be sure to check out the featured design participants here and fellow guest participants here, too!

One Room Challenge Week 1 - A Foliage-Filled Home Office

Do you remember that time earlier this year when I transformed our den? That time when I painted the walls a deep moody green, installed picture rail molding, reupholstered a chair, sourced new art and furnishings, and also blogged all about it? That time when I did all of that in a matter of six weeks? Well, if that wasn't enough speedy home design for one year, I'm doing it again this fall!

That's right, I'm participating in the One Room Challenge for the second time! I've selected another neglected room in our house to completely redesign. Eek!

If you found me through ORC, welcome! I'm Ashley and for the past two years, I've been restoring a craftsman bungalow in San Diego, CA. Learn a touch more about me here, and preview the before-and-after room transformations here.

Our home office is the most neglected room of the house. It didn't even earn a viewing in the recent Design*Sponge feature because it's too darn bland.

Before I get into what the home office looks like now, I'll give you the plan and the inspiration first!

one room challenge design.jpg

The biggest part of the transformation is the wall treatment. I'll be hand-painting a mural on all four walls of the room with pretty grey tones!

I was inspired by these wallpapers that mimic etchings.

In search of a unique etching, I went to The Met's open source catalog of art and selected this beauty. After a few tests, I decided the etching look wasn't the best option for hand-painting a room in six weeks, so I've modified the image to mimic a paint-by-numbers.

etching to paint by numbers 2.jpg

I'm exhausted just thinking about painting eight different greys on each wall in the likeness of that etching, but I can't wait to see the final result! I hope you'll follow along!

Since I know you're itching to see the befores, here you go!

The Gold Hive One Room Challenge Before

I built the desk about five years ago to fit in our old house. The size works, but the sunshine from the window is a killer. It's so bright and hot that I feel like I'm working on the surface of the sun. So, problem 1: desk orientation.

The Gold Hive One Room Challenge Before

The desk orientation is unfortunate for ocular-comfort, but it also doesn't do anything for the layout of the room. We have a big open space in the middle with absolutely nothing going on. Problem 2: room layout.

The Gold Hive One Room Challenge Before

The hutch was a great estate sale find but it doesn't help with our storage needs. It has glass shelving for displaying pretties - which none of our office things are. It lacks drawers for files, so we have a little filing cabinet under the desk. Yet, neither of these combined units fit the bill for an efficient office. Problem 3: storage.

The Gold Hive One Room Challenge Before

I painted the walls the same color as the living and dining room (Sail Cloth by Behr) then never decorated. There's no art, no pattern, no interest. Problem 4: boring aesthetics.

Luckily, I have a plan for the bland room and I can't wait to get started! This space is in for one heck-of-a-transformation. I hope you'll follow along and encourage me when my arm goes numb from hand painting that mural!

If you're tuning in via the One Room Challenge and want to stay up to date on the progress of this project and see what I have coming in the future, subscribe to get blog posts in your email! Also, follow along on Instagram where I'll share stories of the transformation along the way.

Be sure to check out the featured design participants here and fellow guest participants here, too!