One Room Challenge Week 3 - The Tricks To Creating a Perfect Wall Mural
/It's week three of the One Room Challenge and I'm barely making progress on the most dramatic part of the home office transformation - the mural! With only a few weeks to go, and lots of wall to cover, I'm worried about making the deadline! *insert nervous teeth-gritting emoji*

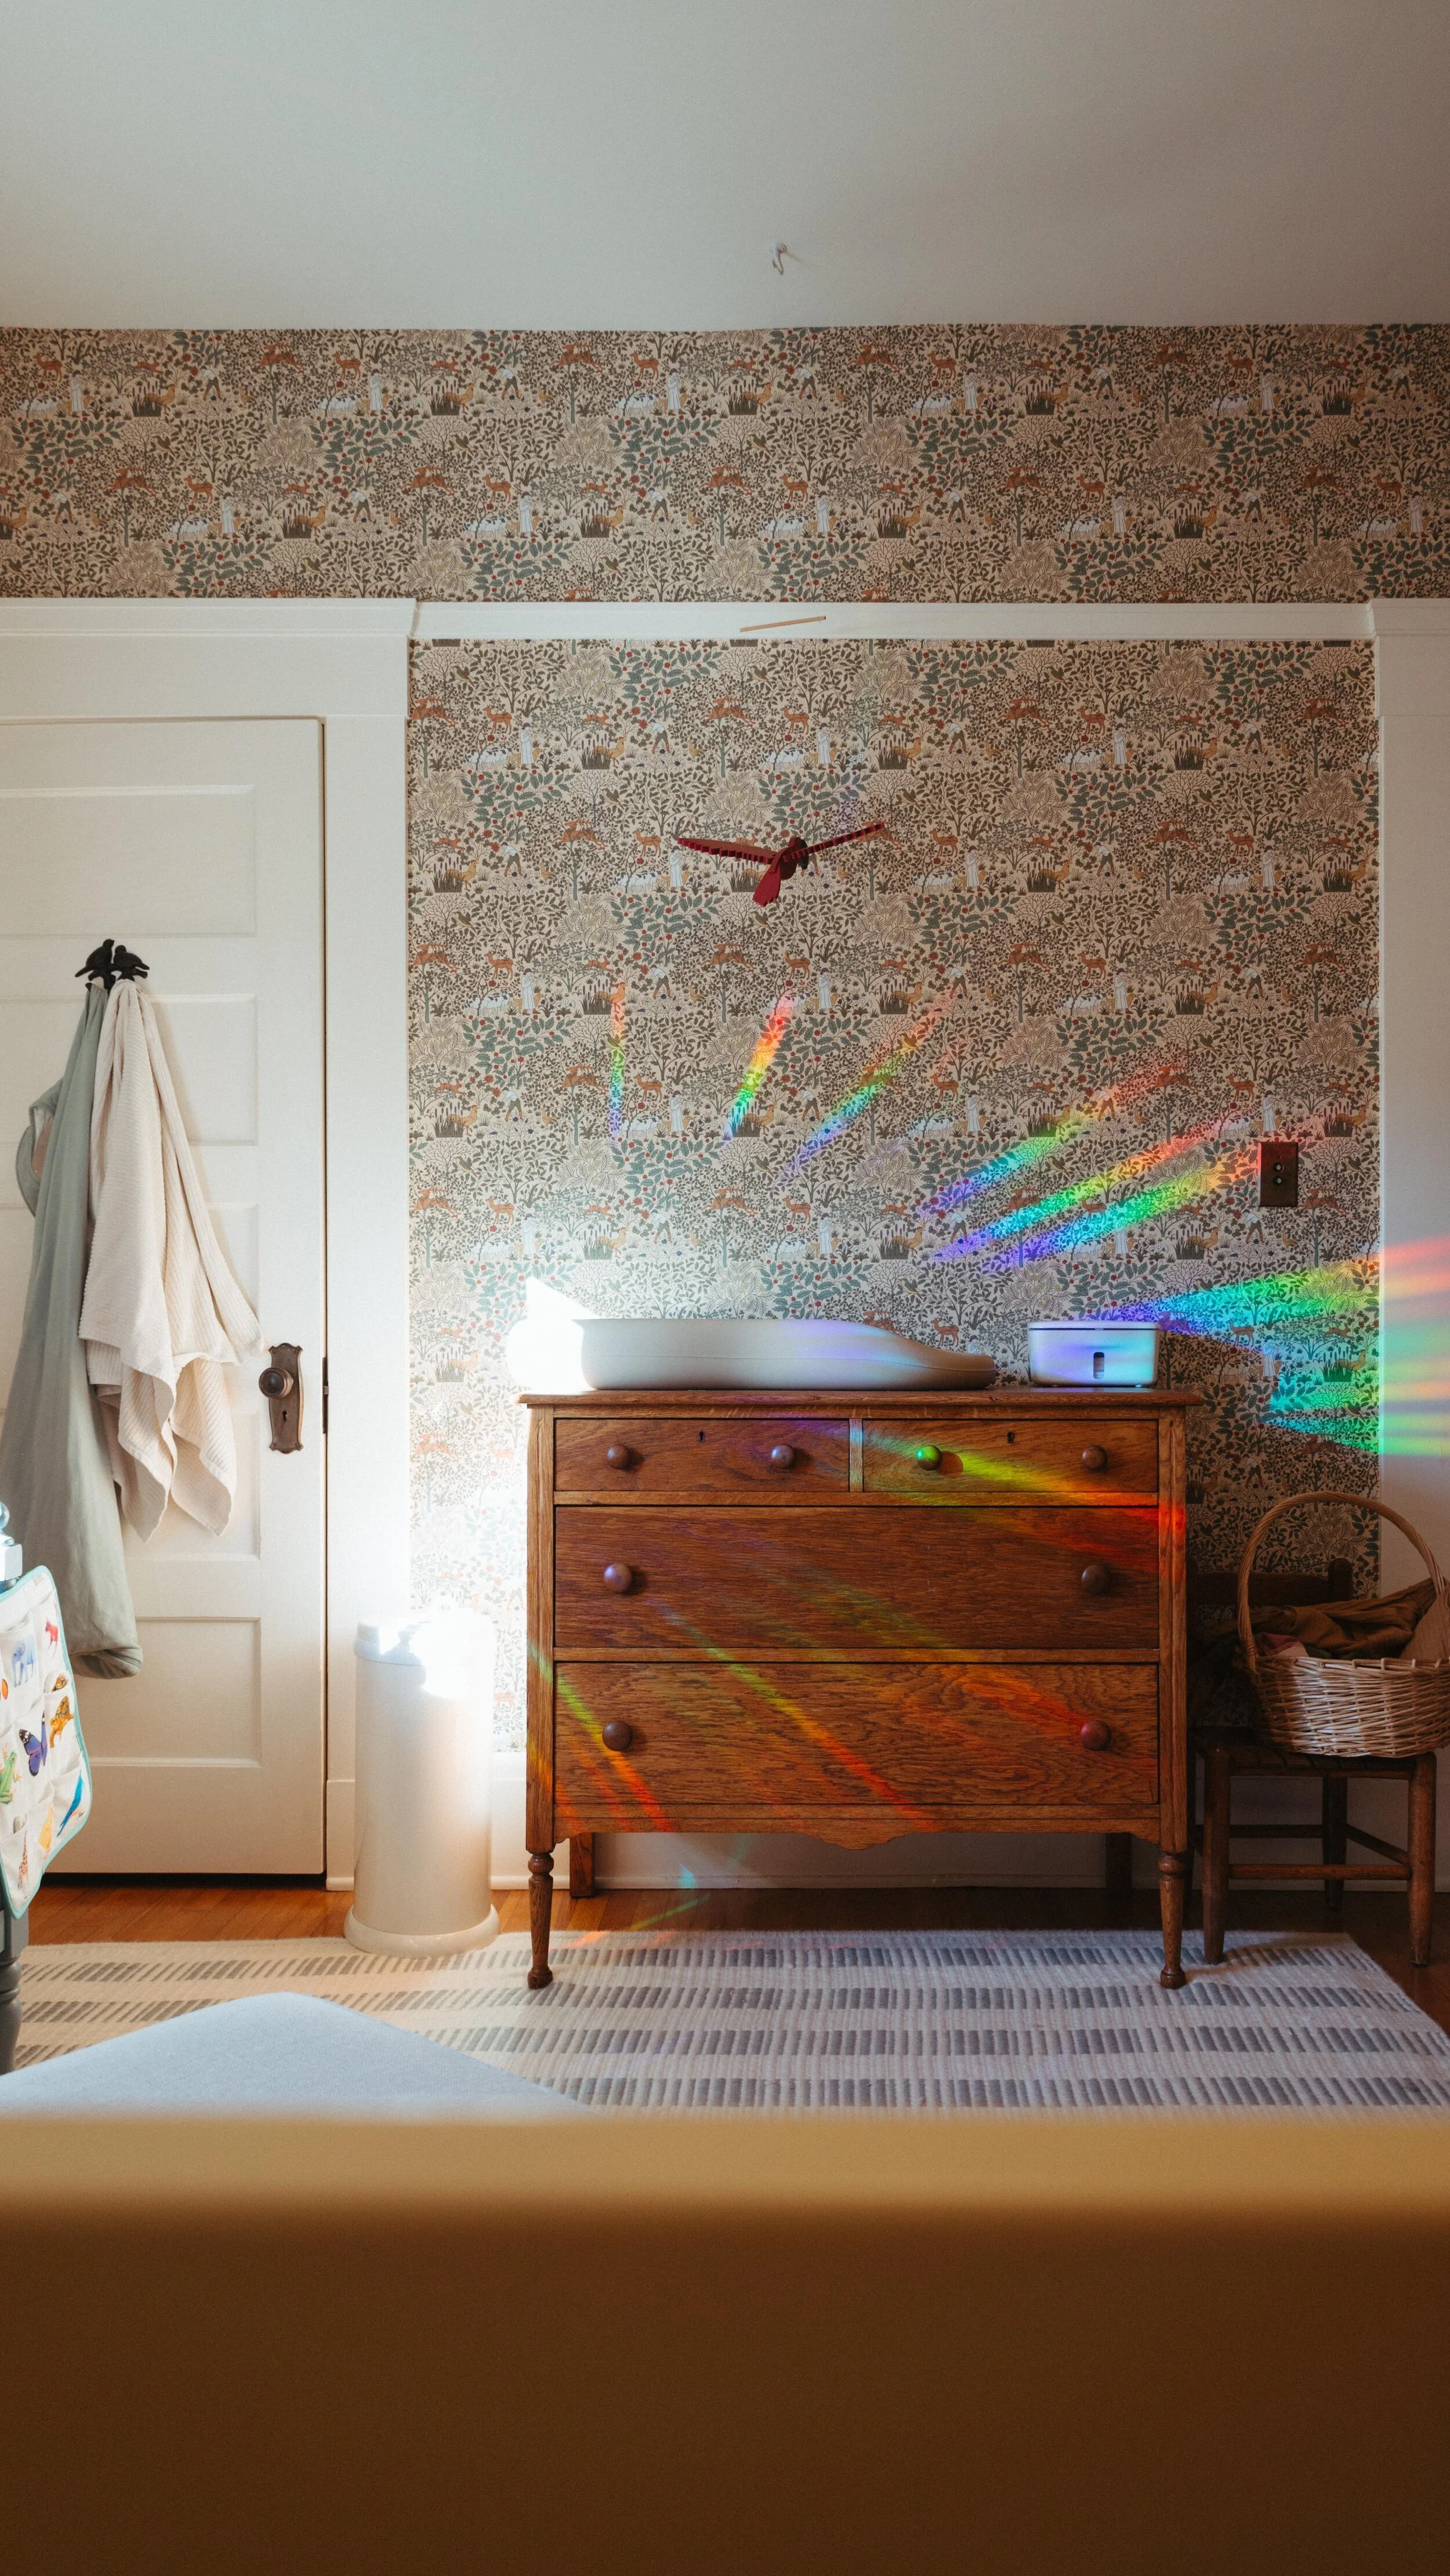
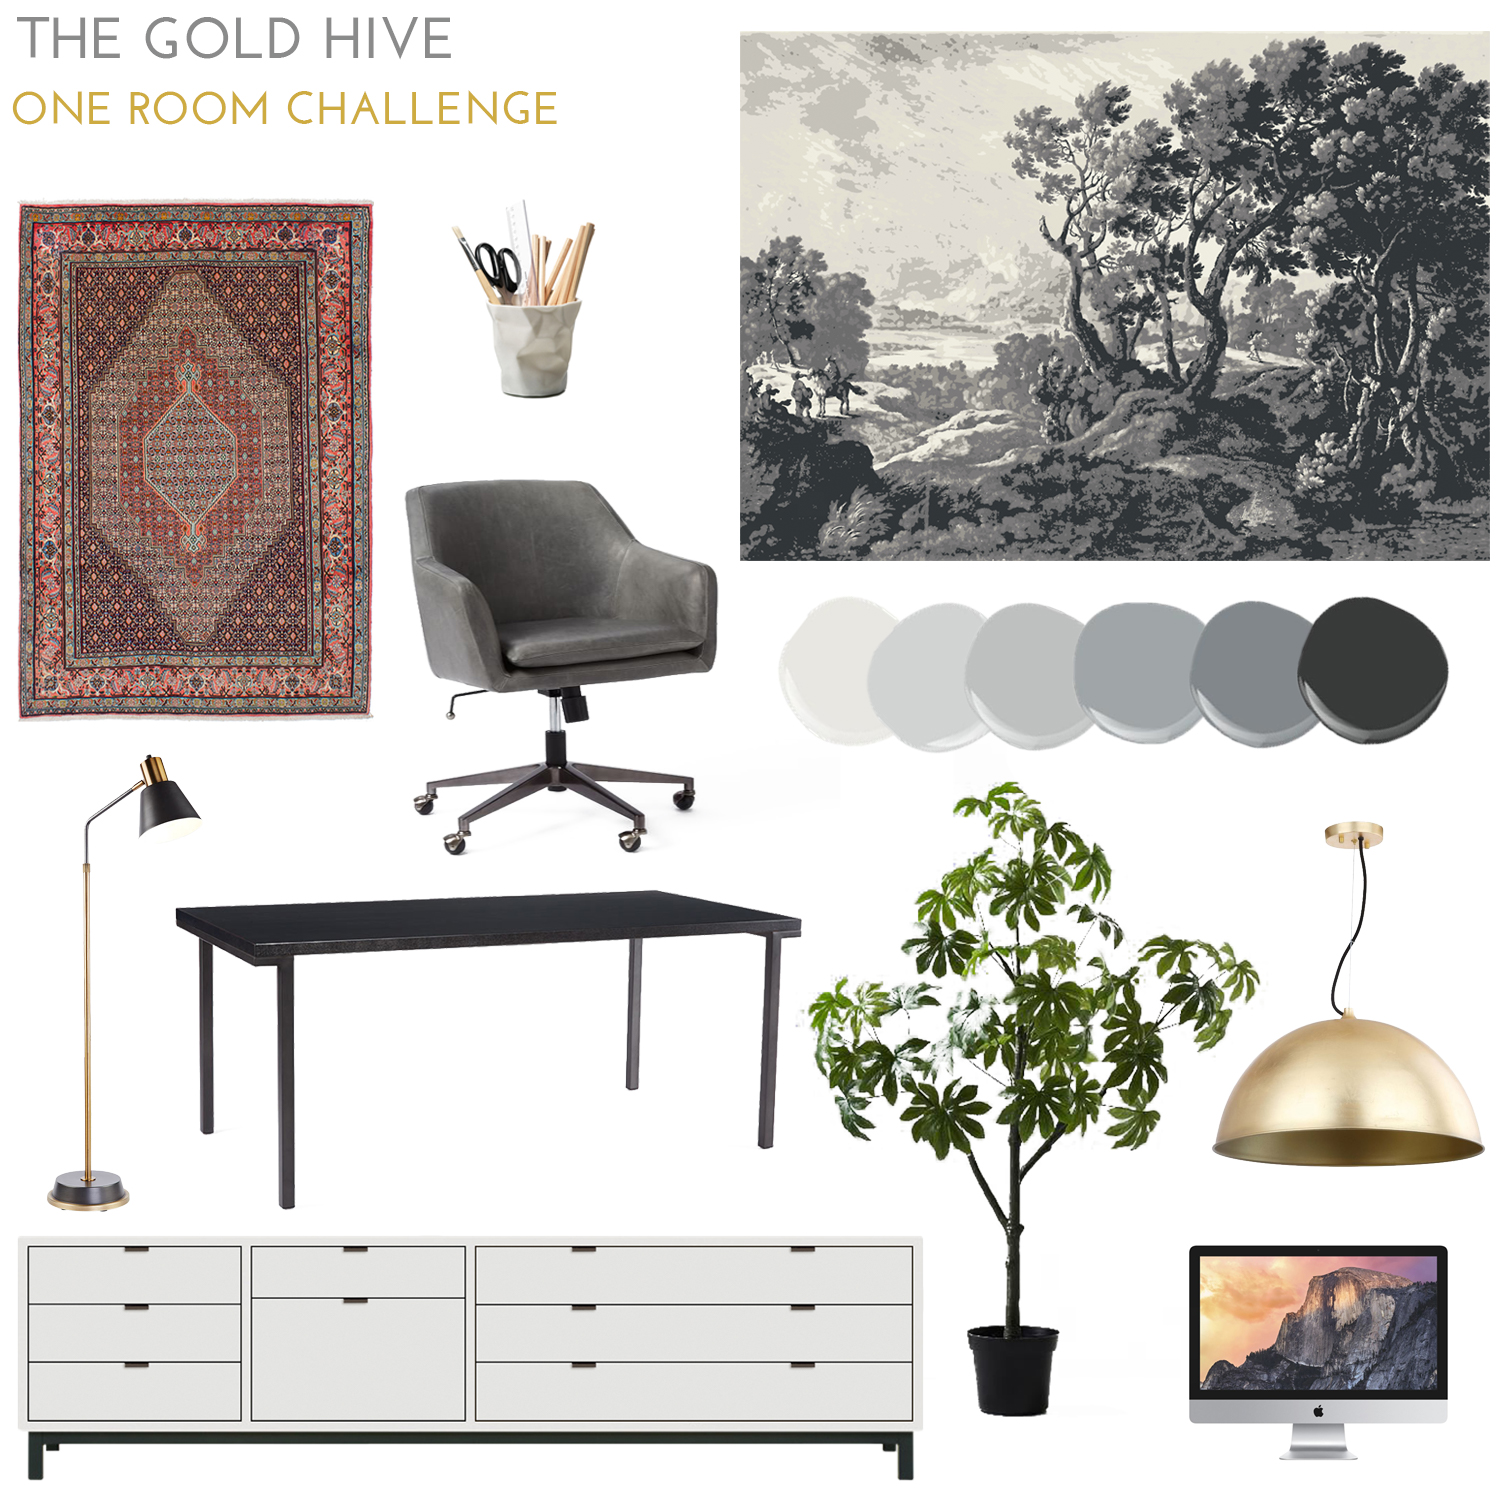
If you're just tuning in, I'm Ashley and I'm in the middle of transforming the home office of our 1915 craftsman bungalow in San Diego. Take a look at the plans which include a new layout, storage, lighting, furniture, and most importantly, a dramatic mural!
There are many options to buy wallpaper sized and designed to cover walls. But, why would I make it so easy on myself? Instead, I'm custom designing a wall treatment from an image I found online. If you, too, want to take on a project like this, here's how!
Step 1: Select an Image
You can turn pretty much any photo, drawing, painting, etching, or image into a wall mural. I was initially inspired by centuries-old etchings, so that's where I started. My image was sourced from the Met's open-source collection of artwork. You can also find other great art downloads here and even Audubon images here (thanks for the bird tip, Marti!).
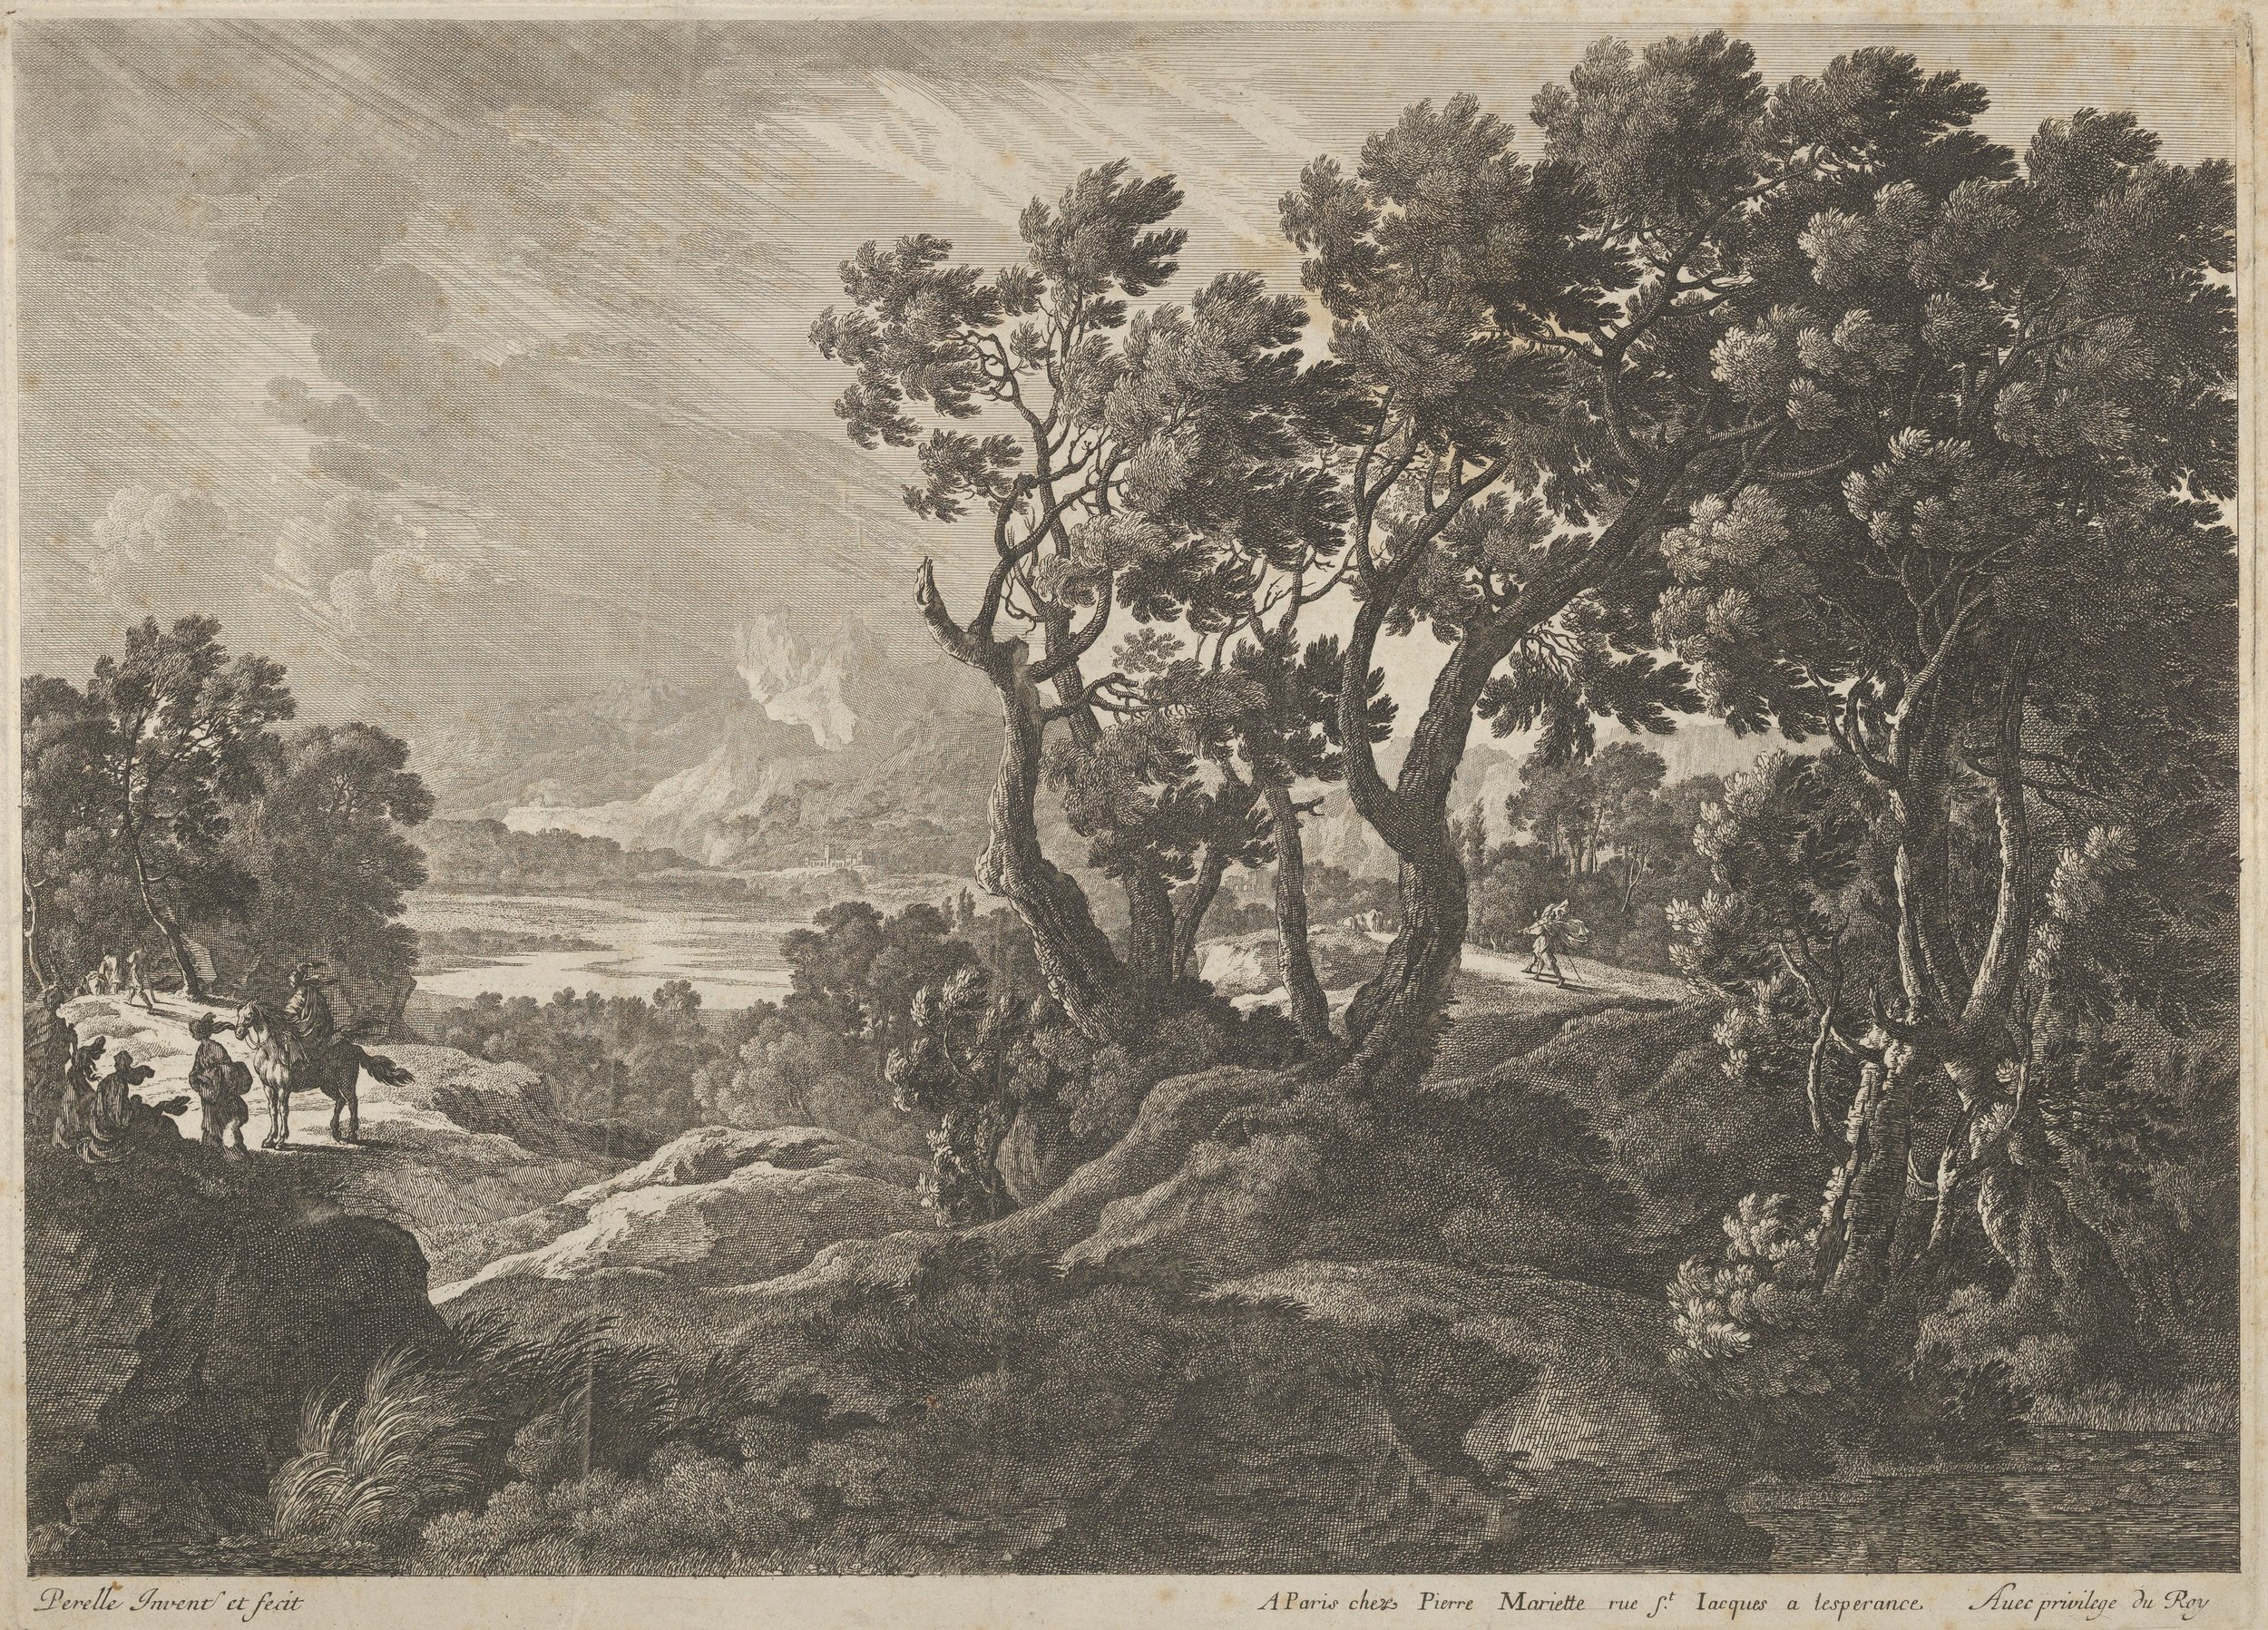
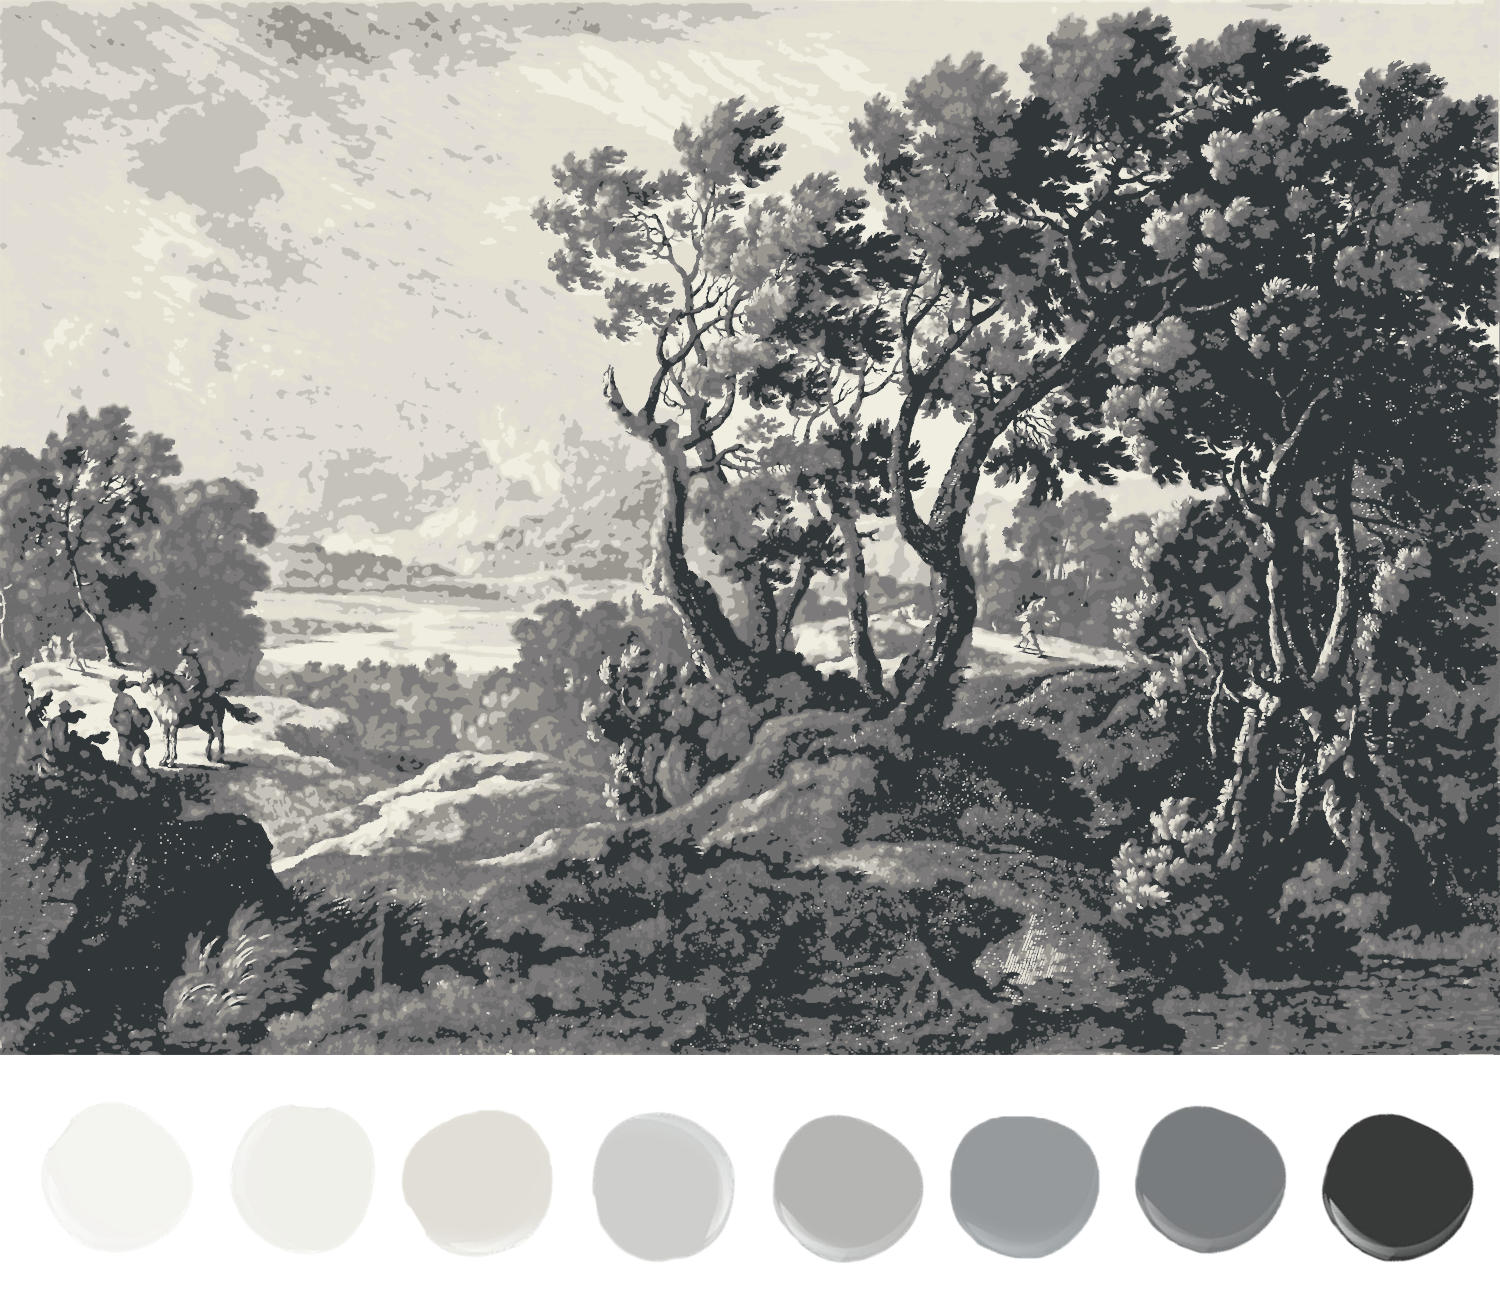
I selected this image called A Landscape with Travelers at the Left, an etching by Adam Perelle from the 1660s. When searching for an image, I wanted lush greenery that was neither suffocatingly dense like I was lost in the forest, nor super vast that would give some sort of trompe l'oeil look.
Step 2: Modify Image for Painting
Depending on your image, you could skip this step and make a realistic representation of your image. However, if you want to make the process "easier," you may want to remove a bit of detail or avoid photo-realistic shading. So, you can convert it into a simpler color-blocked image for painting. Let's face it, we aren't all Chuck Close (yes, those are paintings - not photos).
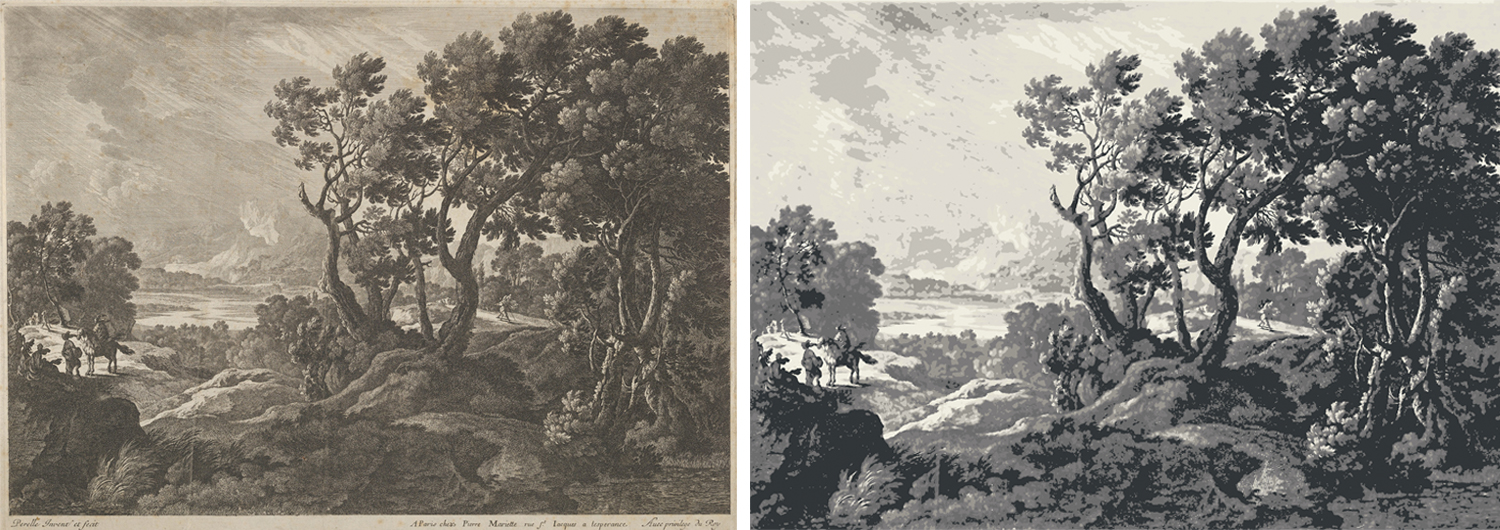
To simplify my etching, I converted it into a paint-by-numbers style image. No longer is it made up of small hash marks naturally found in etching, it is swaths of solid color. Instead of detailed line work and shading, the image is reduced to eight colors that, when combined, create the illusion of the shading and dimension of the original image.
Here's how:
Import your image into Photoshop.
Make any edits to your image like removing imperfections, cropping borders, or making color adjustments.
Click Filter>Blur>Smart Blur to blur out the details.
Define your radius and threshold by testing the different options. Select high quality.
Click Image>Mode>Indexed Color, then select the number of colors you want to paint and adjust the settings until it looks like a paint-by-numbers you are comfortable with.*
Click Image>Mode>RGB to convert it back to its original profile.
Click Select>Color Range and turn down the fuzziness, then use the eyedropper to select a color.
Create a new layer from the selection (command J).
Repeat steps 7 & 8 until you have a layer for each color.
*Instead of changing the mode, you can try the Cutout filter. It wasn't the look I was going for, but it will affect each photo differently, so give it a shot!

If you're in an RSS reader, you'll want to click through to admire this spiffy gif that shows each layer of paint. Really, who doesn't love a good gif?
Step 3: Edit the Photo to Wrap Around the Walls
If you want to do a mural on only one wall, then you can skip this step. However, I wanted the landscape to wrap around all four walls and give the illusion of a continuous image. Because the dimensions would certainly not wrap all the way around, I duplicated, mirrored, and modified the image in Photoshop.

The diagram above shows each of the four walls divided by blue vertical seams. The dark grey cutouts are the doors, windows, and baseboards. To do the same, create a Photoshop file with a canvas size the same dimensions of your room (or a scaled down version). Then, block off each part of the wall that won't get paint, like doors and windows. No need to account for light switches. Then, import your layered paint-by-numbers file and duplicate and modify it as you like.
When you look at the image panorama, you can see where I duplicated and mirrored parts of the scene. You can make all the tweaks you want on your image, but don't stretch the image, which would distort it. There are a few spots that look too similar in the image above, so I'll be making modifications freehanded. Pay attention to details as they wrap around the walls. Do you want all of the clouds circling in the same direction, or do you want the illusion of the gusting from one direction? It's your call, but this is the time to make the edits!
Step 4: Set Up the Projector
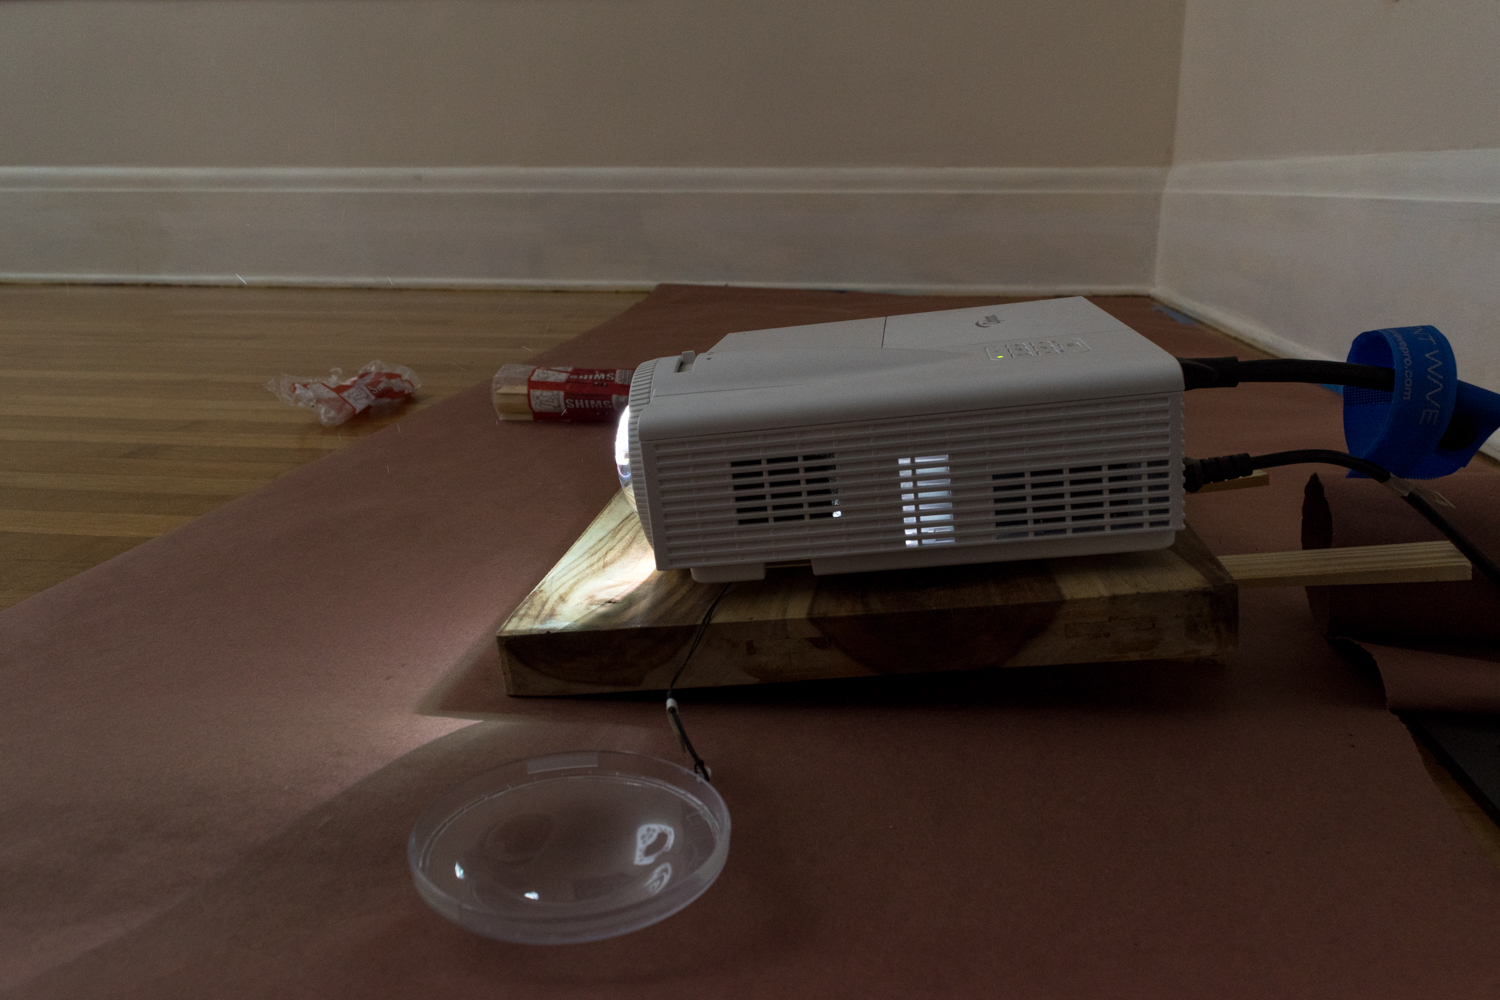
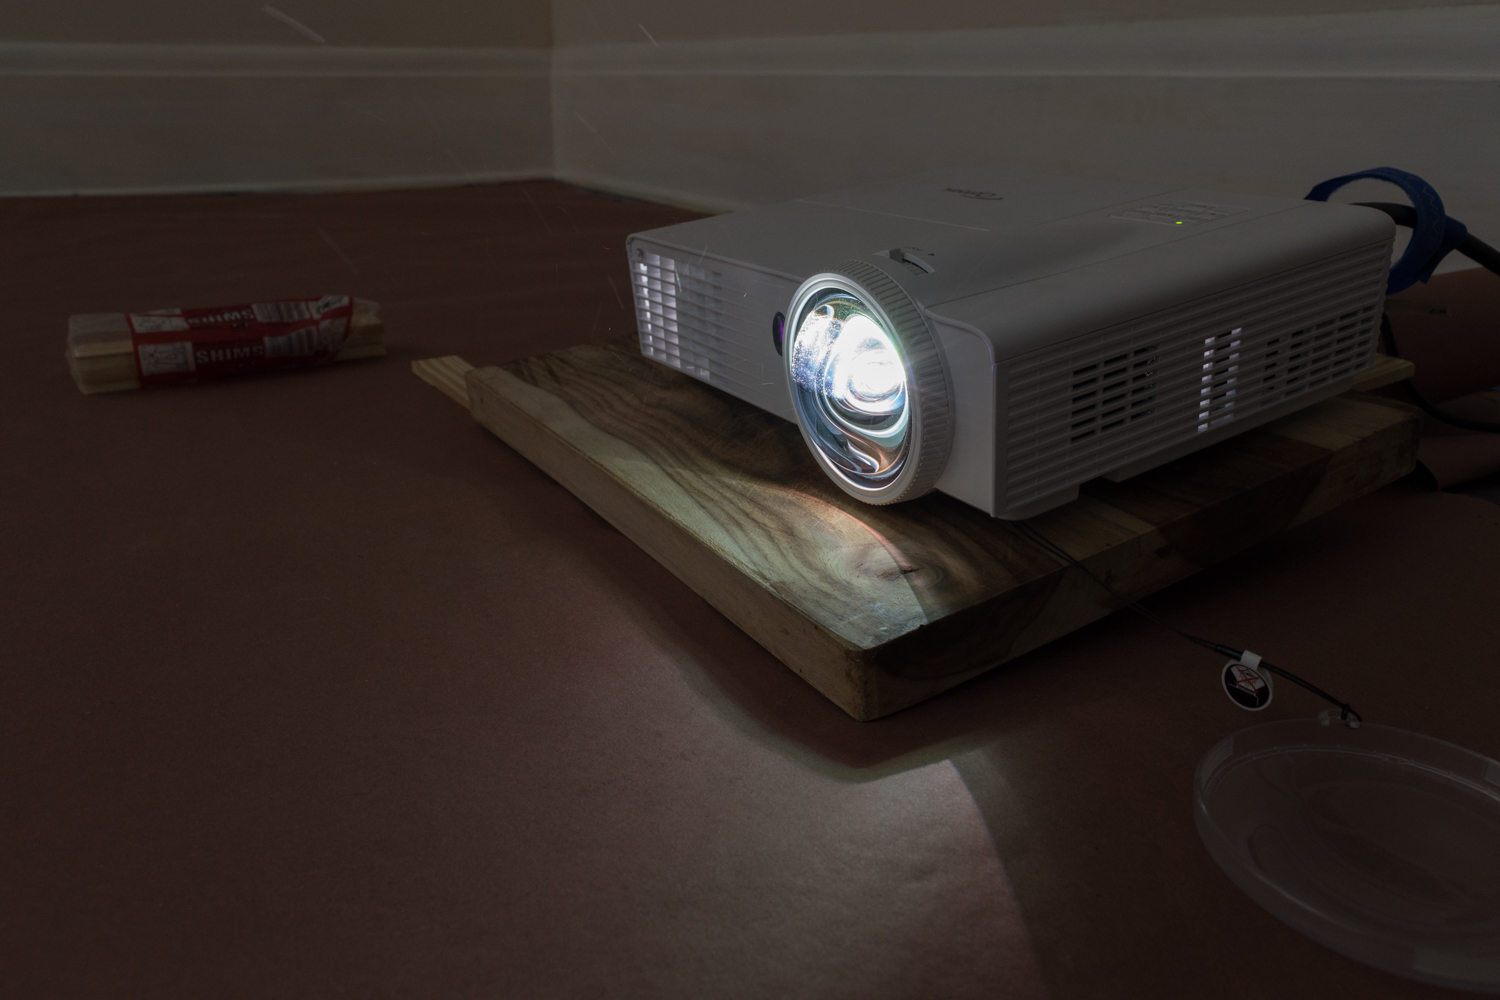
The most effective way to get a photo from Photoshop to your room is with a projector. I'm using this short-throw HD projector that's able to cover an entire wall at a nice resolution. When shopping, be careful of low-res projectors that won't fill up your whole wall. Otherwise, you'll have to puzzle piece your way around.
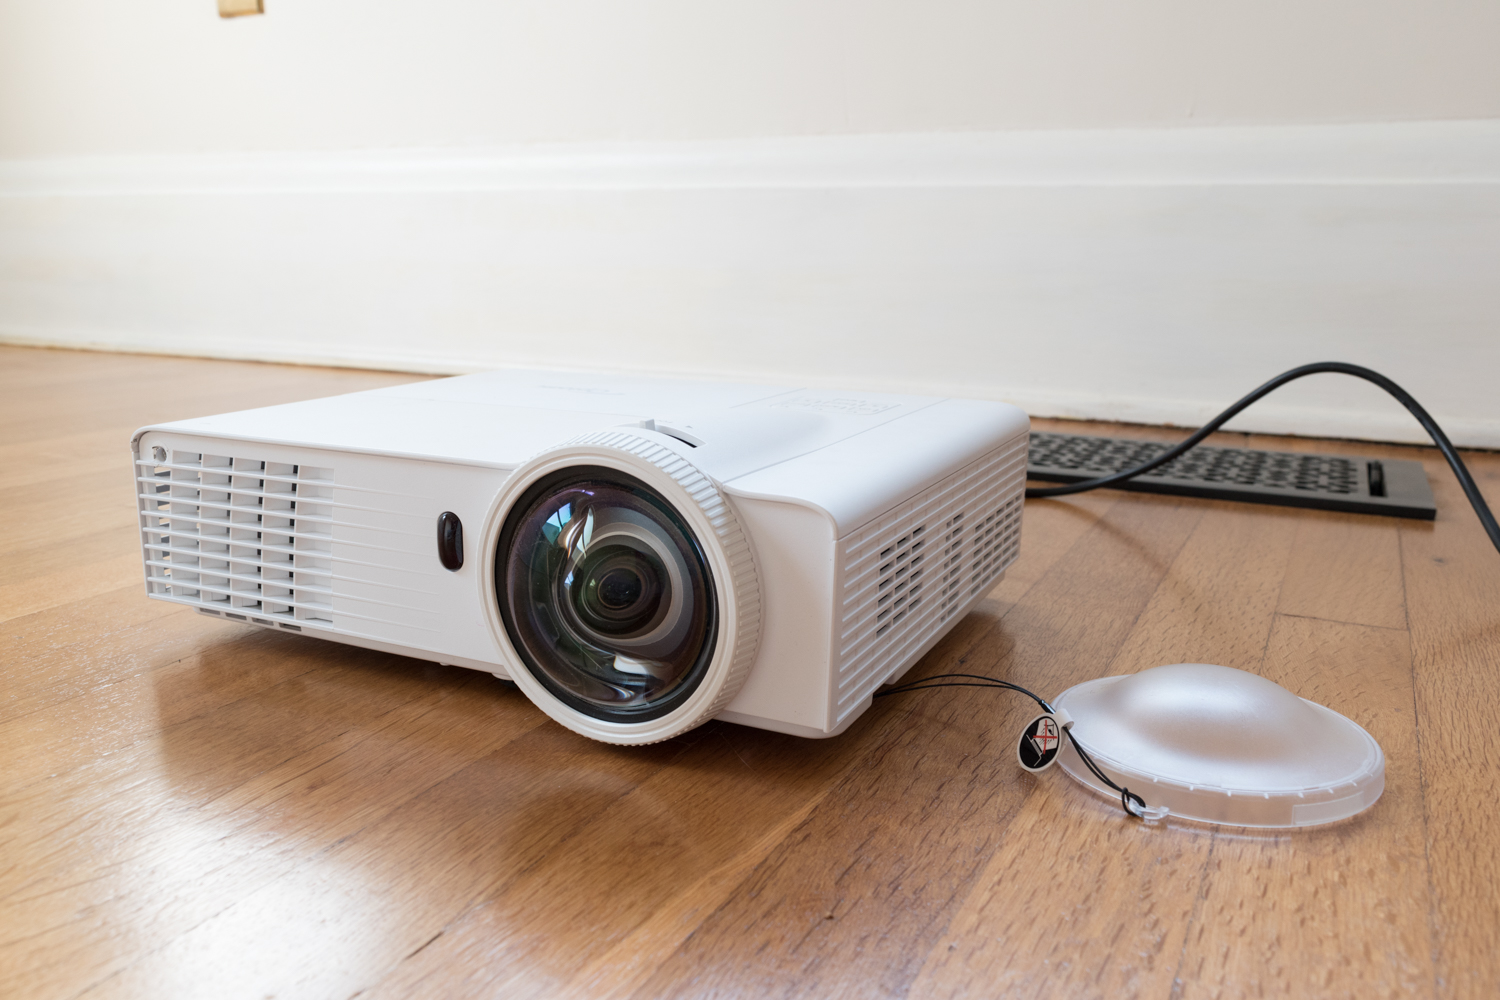
Isn't she pretty?
First things first, kill the lights and draw the shades. Projectors like the dark.
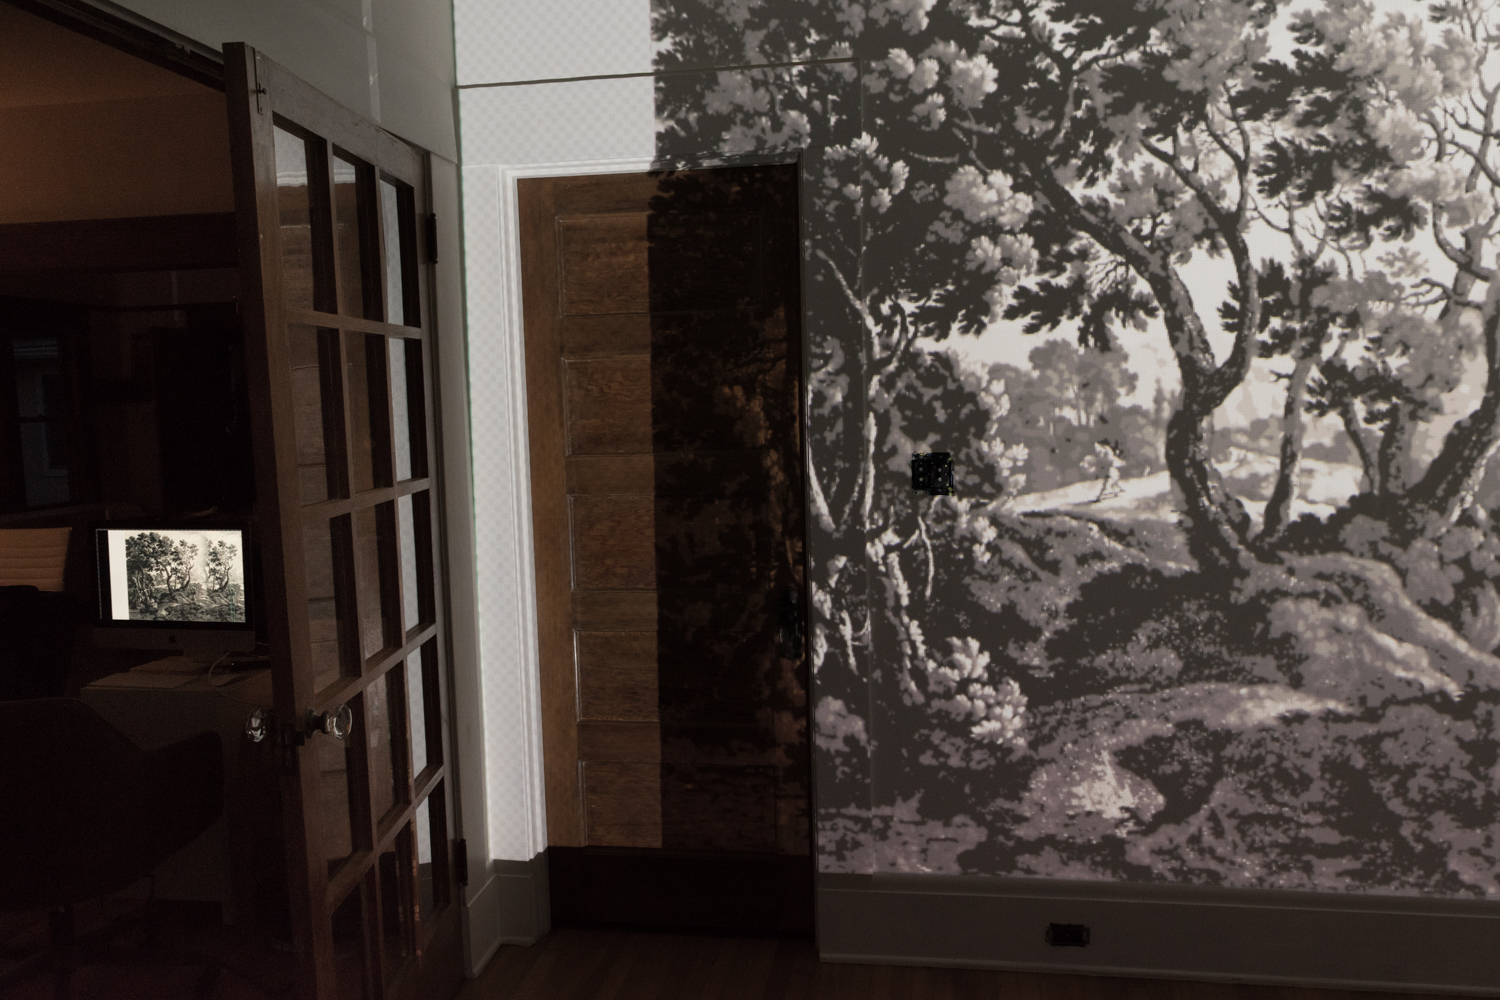
I set up my iMac on a small filing cabinet outside of the office. I want it nearby for making edits and turning off layers (more on that in a minute) but I wanted it far enough away that it isn't in danger of getting painted. It connects to the projector with a 25' long high-speed HDMI cable.
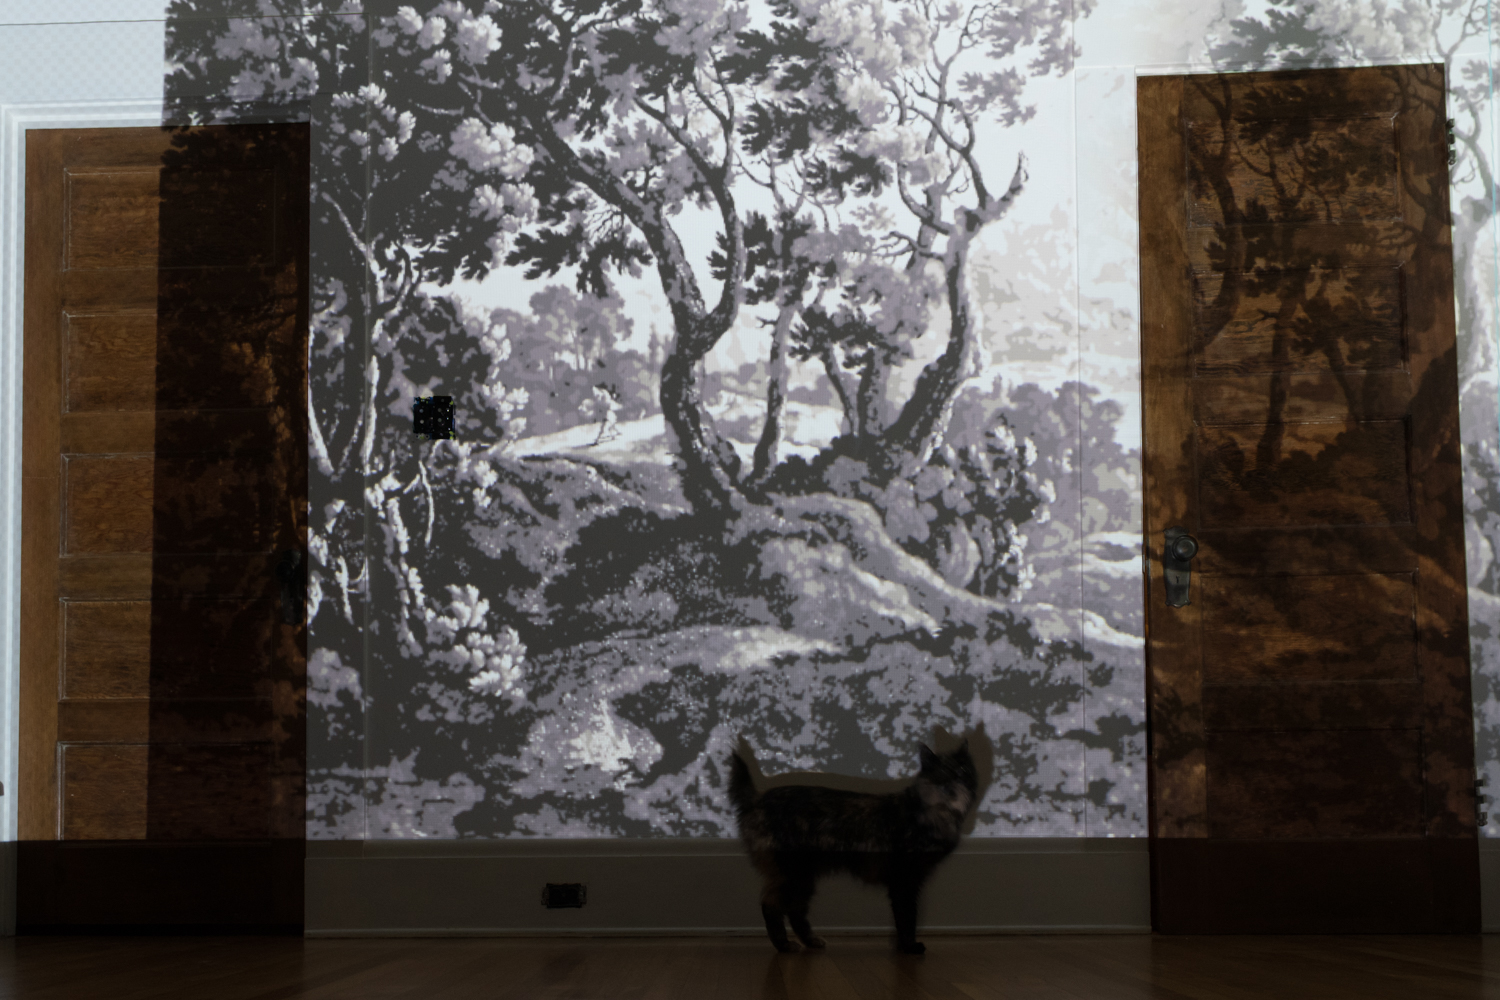
Lining up the image is key, especially if you'll be covering multiple walls. Avoiding distortion is important so it doesn't feel like the trees are leaning in on you or falling sideways. To do this, I created shapes overlayed on the image to line up the projector. Points on the top and the bottom helped me line the image up with the architecture of the room, and a square in the middle sized to 12"x12" in Photoshop gave me a guide to measure with a tape measure on the wall.
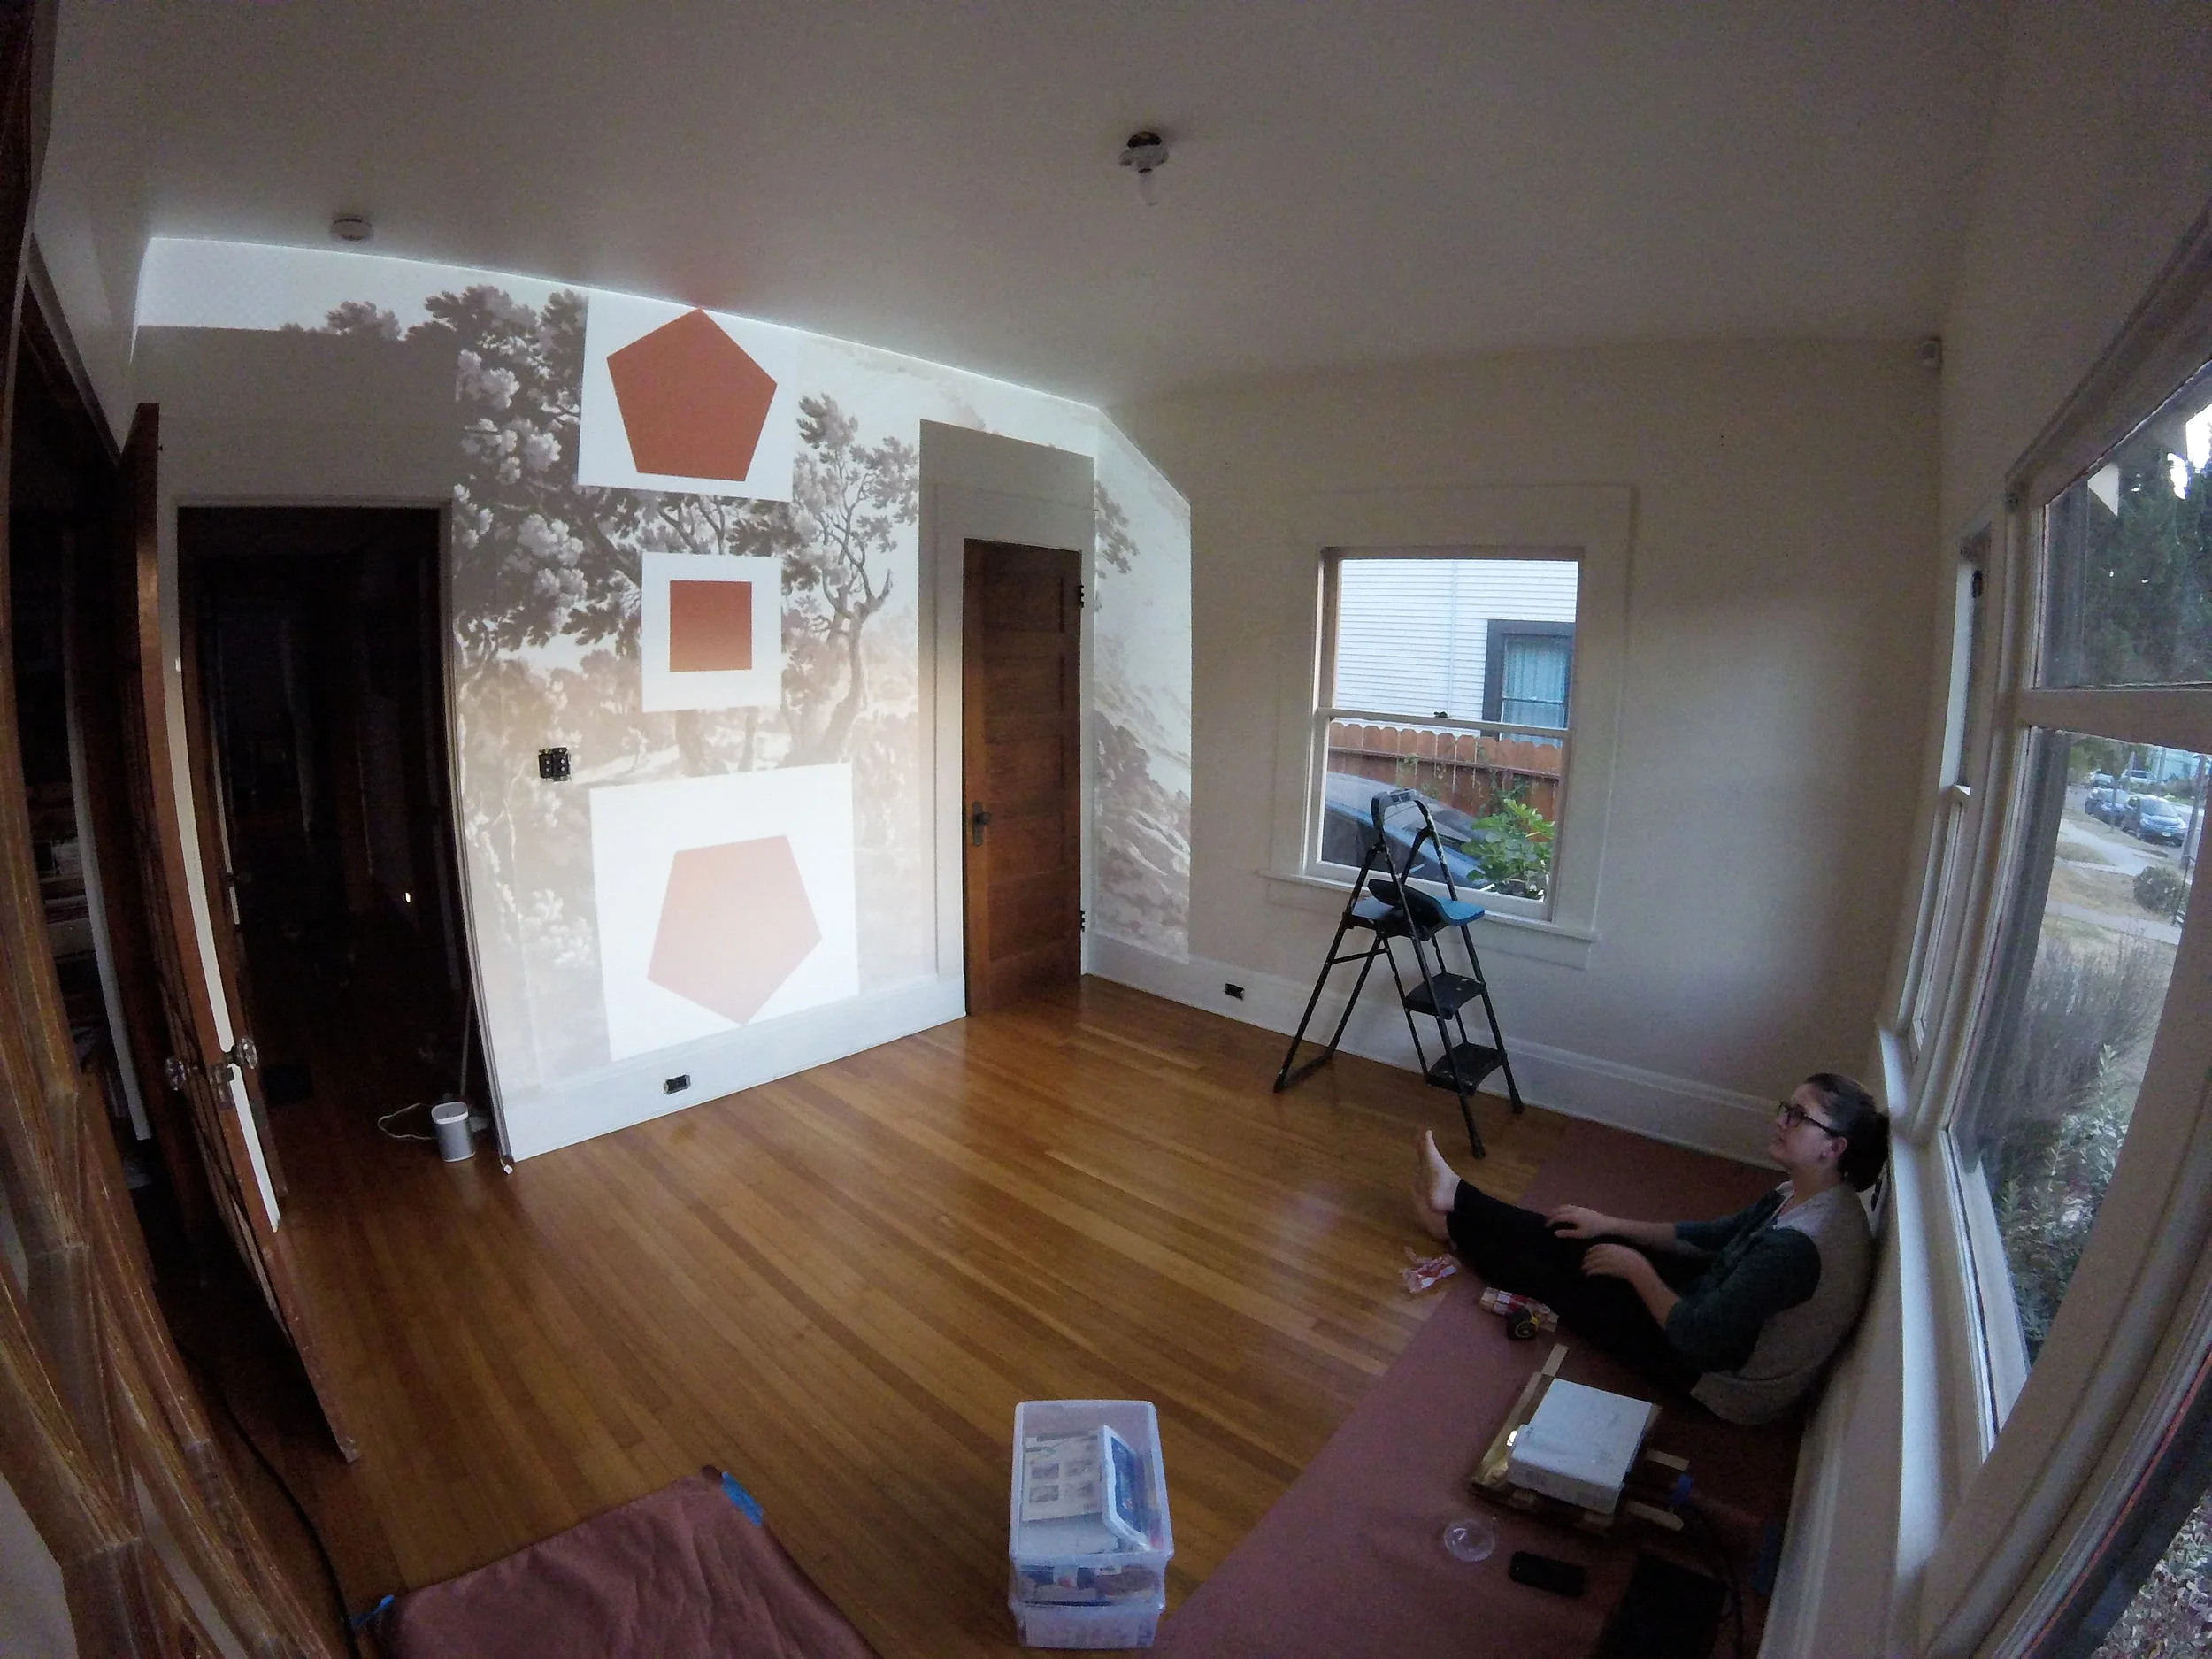

The scene for passersby probably gave the impression I was running a cult. Maybe I should use the projector for spooky Halloween decor while I'm at it.
I'll admit that setting up the projector for the first time was quite time-consuming. We had to figure out the right zoom on Photoshop, the best distance to place the projector from the wall, and we also had to shim it up to have the right angle on the wall.
Step 5: Transfer Image to Walls
So, now that the projector is shining pretty, you can get to painting.
Remember that spiffy gif from before that broke down each of the colors on their own layer? Well, this is when it comes in handy.
Depending on your design and the number of colors, you could paint using the full image. However, I think that isolating colors and painting one color over the whole wall, then moving to the next color and the next color is the best way to cover ground - err walls.
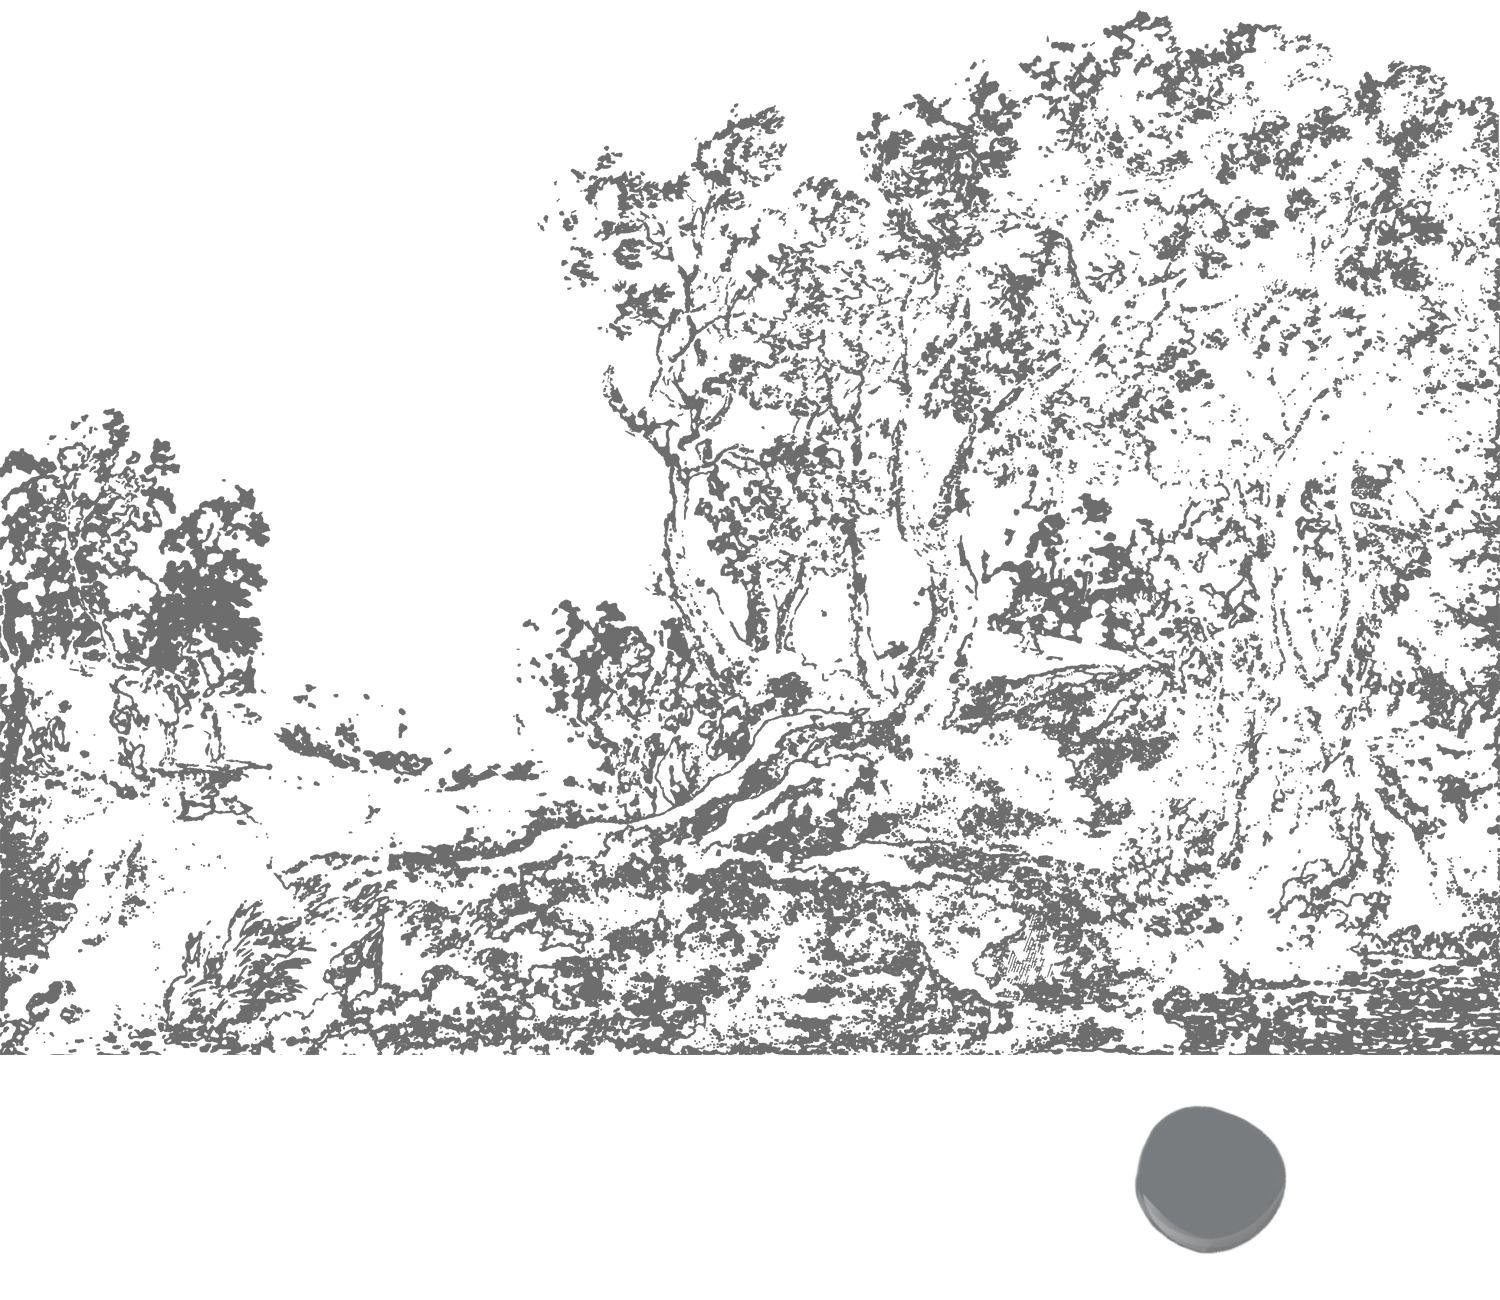
To see only one color at a time, you'll turn off the layers of the other colors. Then, paint away by tracing wherever that color is on the wall. Thanks for the help, projector and Photoshop!

The dark shades show up nicely on a white wall, but the light colors often need help by creating a high-contrast background. Adding color helps differentiate it from any greys you may have on the wall already. Alternatively, you can tint the actual color layer that you're working on, rather than its background. It's up to you and how much color/light your eyeballs can handle.
The projector creates a template to guide you. Just follow the shapes and lines to replicate the projected image onto your walls. It's basically just tracing - but on a big scale!
Then, repeat, repeat, repeat, repeat, and repeat for all eight colors and four walls. Did I mention that I haven't started the mural yet??? The paint only just arrived and I had lots of prep including moving the ceiling light box and some other odds and ends. Wish me luck! I'll be back next week for painting progress and tips.

I'm thrilled to have partnered with Farrow & Ball on this project. They generously provided me oodles of paint for this mural that's requiring eight of their beautiful grey hues. Their paints are the crème de la crème, so I'm giddy with excitement to be working with their quality and eco-friendly paints for this project. Thanks, Farrow & Ball team!
If you're tuning in via the One Room Challenge and want to stay up to date on the progress of this project and see what I have coming in the future, subscribe to get blog posts in your email! Also, follow along on Instagram where I'll share stories of the transformation along the way.
Be sure to check out the featured design participants here and guest participants here, too!
Fall One Room Challenge progress:
Week 1 - the before, the inspiration, and the plan
Week 2 - preparing for a bold wall mural
Week 3 - tricks for creating a perfect wall mural
Week 4 - painting the mural
Week 5 - walls, windows, and shades
Week 6 - IKEA storage hack
Week 7 - the reveal!
Look back at the Spring One Room Challenge:
Week 1 - the before, the inspiration, and the plan
Week 2 - paint, paint, paint
Week 3 - how to install picture rail molding
Week 4 - sourcing the artwork
Week 5 - refreshing a chair
Week 6 - the reveal!