Why (and How) We're Keeping A Door to Nowhere
/On the back of our house we have a door that isn’t really a door - it goes absolutely nowhere. The door opens to just drywall and framing lumber. We’re required to keep it, so I’ve devised a plan to make the most out of it!

This post is sponsored by Great Stuff ™. Thanks for supporting the brands that keep the blogging lights on!
Why a fake door? Let’s back up a bit.

This is what the back of our house looked like a few years ago. But, we wanted to renovate the kitchen and add a bathroom, which modified the doors and windows on the back of the house.
This normally isn’t a big issue, but our home is historic and has Mills Act which means we have a contract with the city to ensure we will maintain historic integrity (which I love). Sometimes, this means that we have to make some compromises, and the layout on the back of the house is one of those compromises.
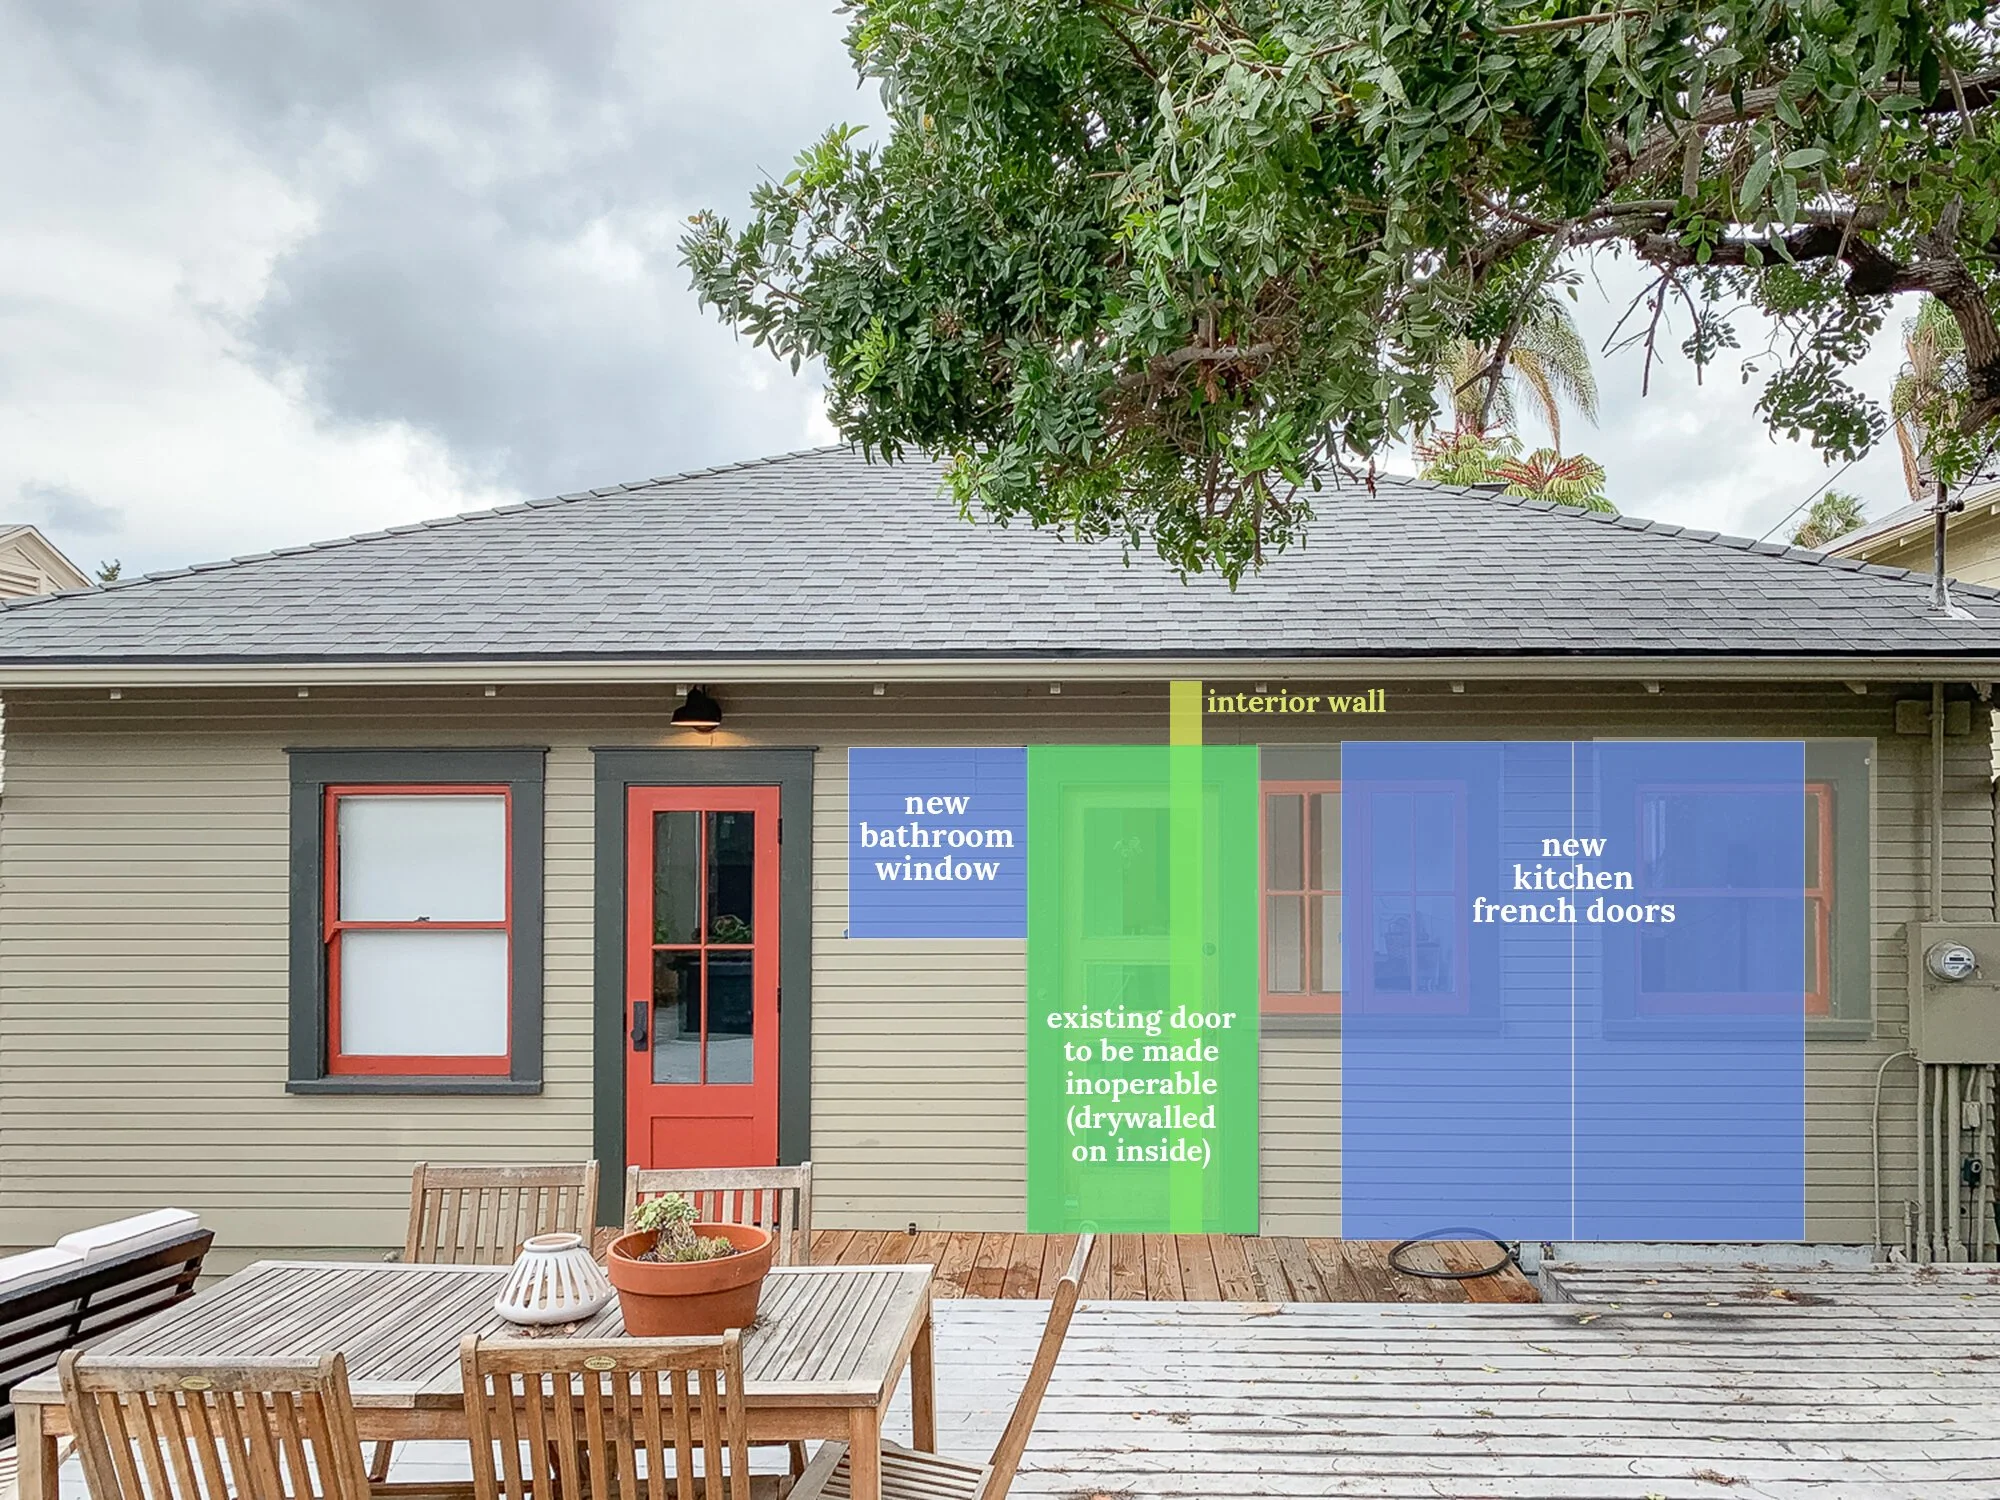
In order to add new French doors into the kitchen and add a bathroom, the original kitchen door opening would need to be removed because it was smack in the middle of the new wall between the kitchen and bathroom. However, the city required us to keep that original opening to maintain the history of the home’s original design. Originally, they told me I couldn’t remove the door and I would need to entirely redesign the kitchen - maybe even lose the second bathroom we wanted to add! (yikes!) But, we compromised on keeping the door opening. I found it a bit ridiculous, but I’ve come to like the weird door to nowhere.
Retaining the original opening meant the bathroom window would shrink (darn!), but we could install big new French doors (yay!), and it meant we had to keep a fake door (huh?!)
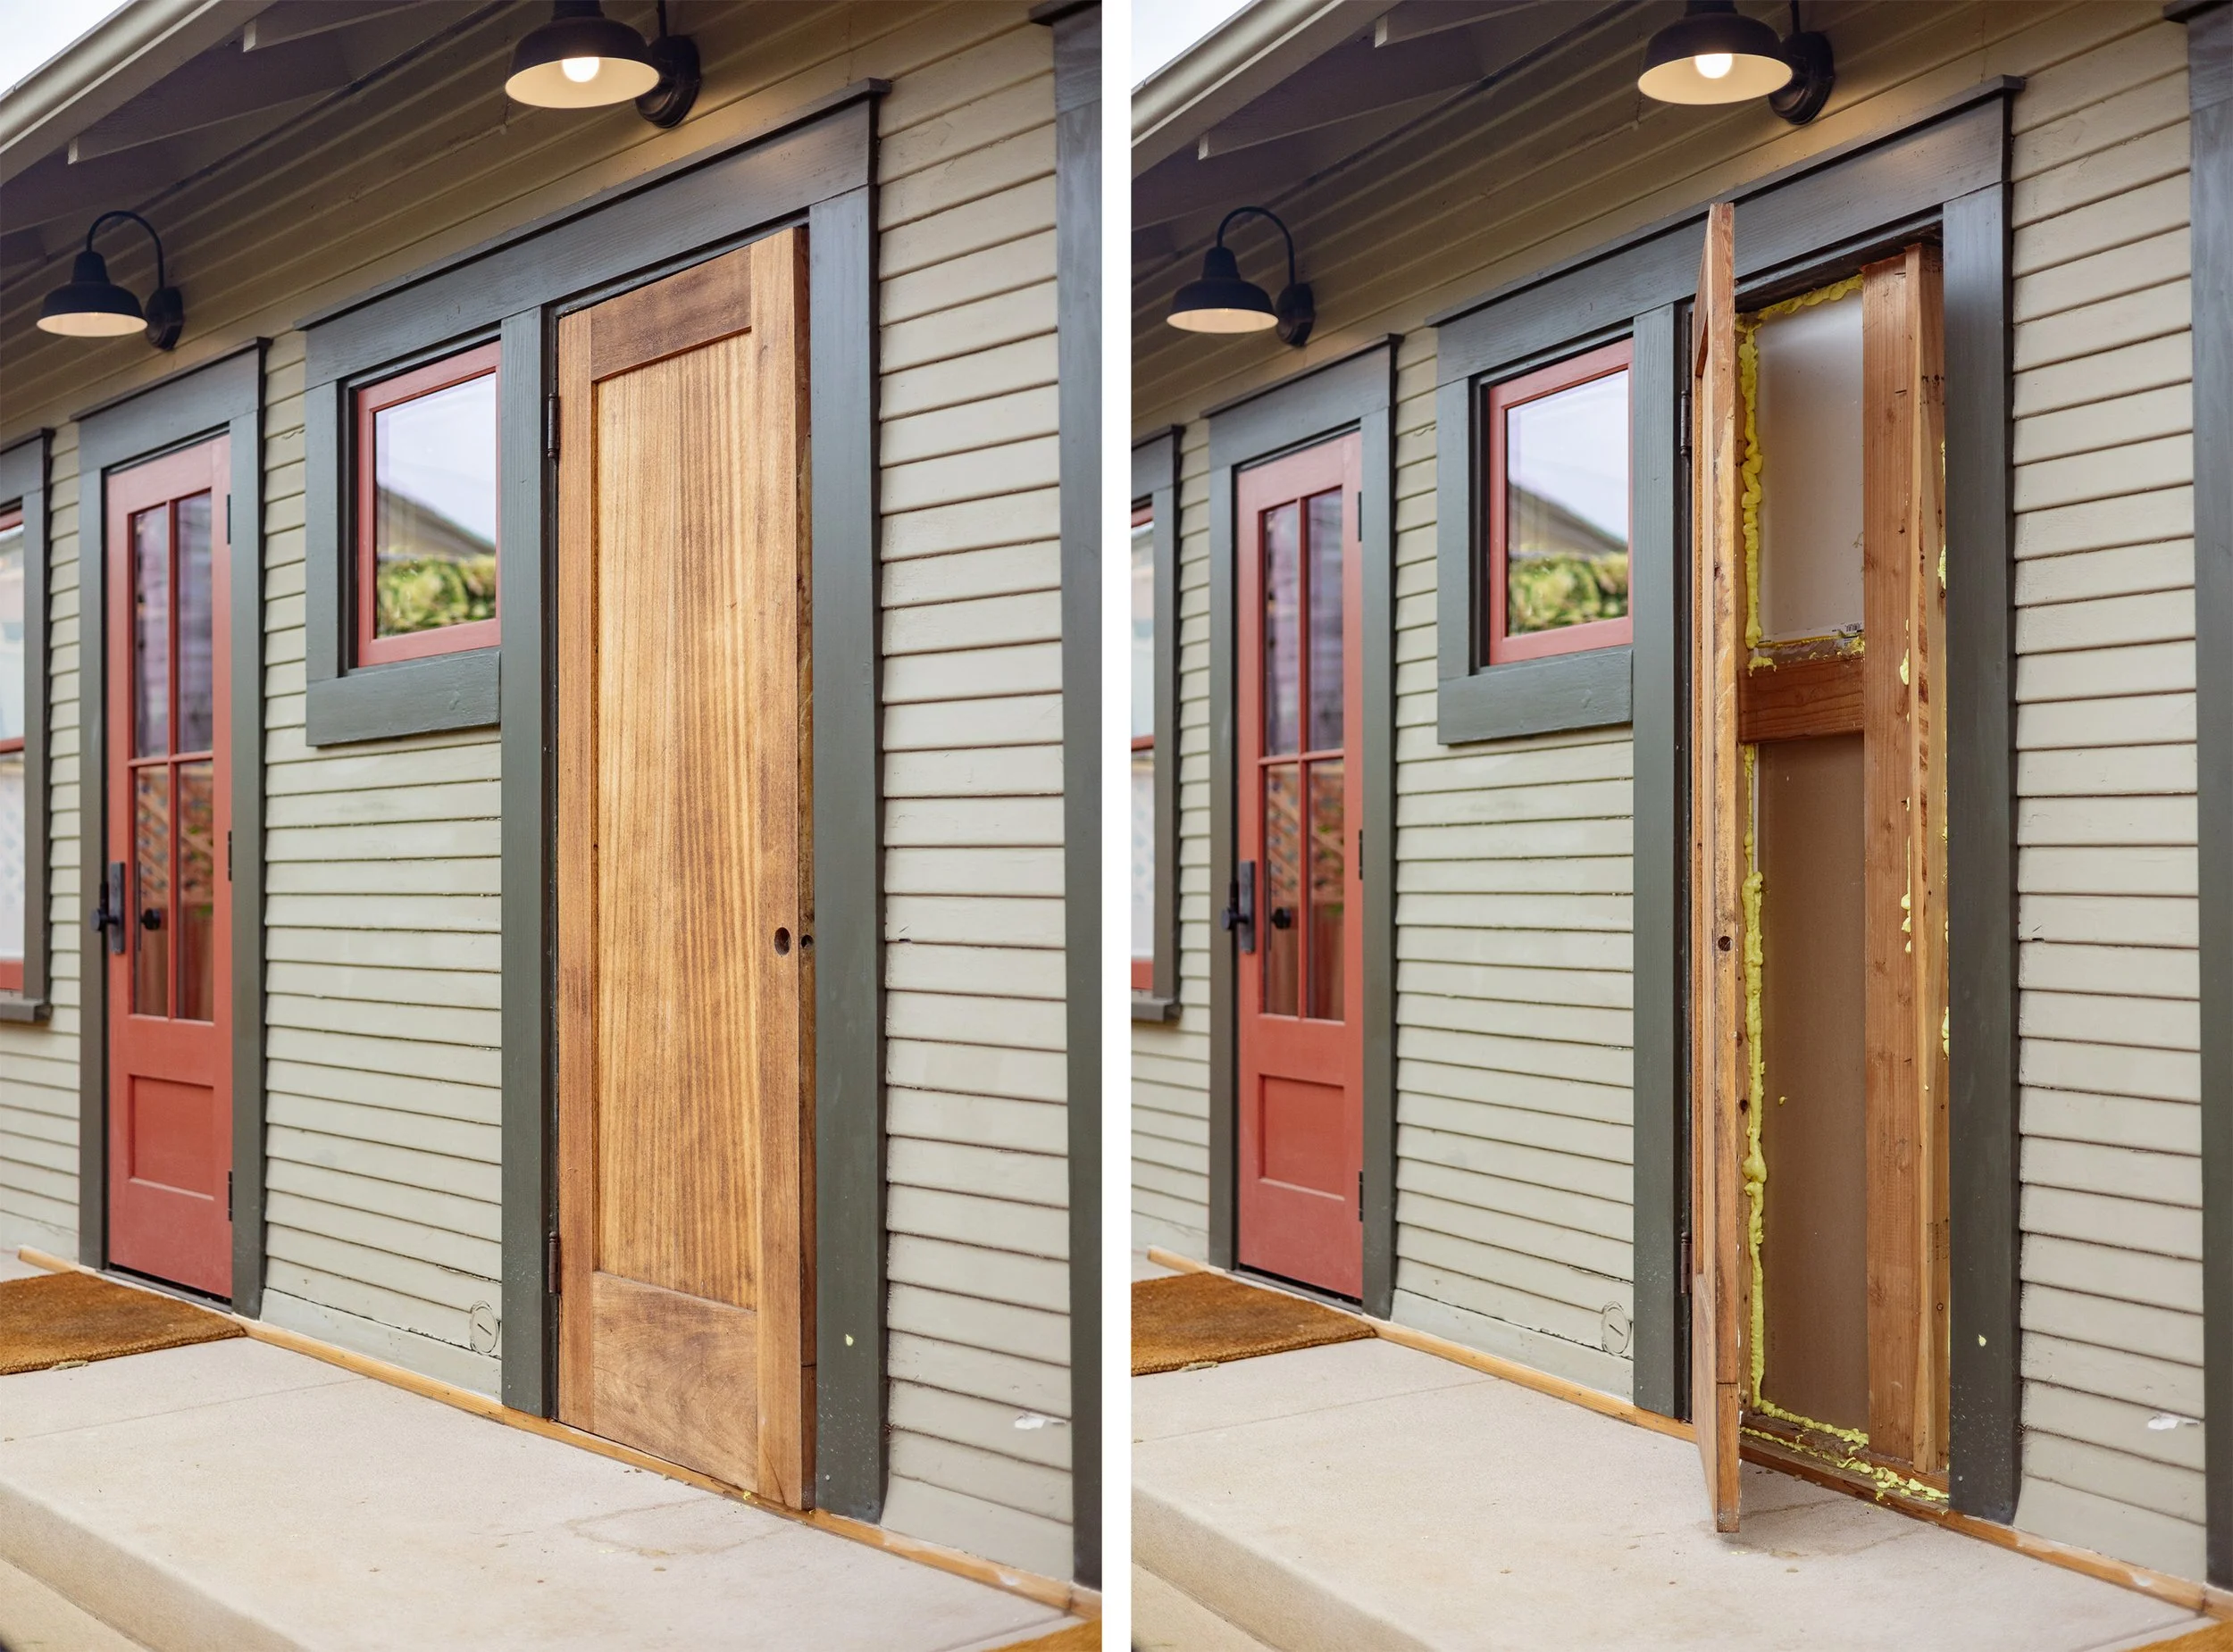
So, I sourced a salvaged old door (because the one we had was made of plexiglass), we walled off the inside, and we carried on with the renovations with a fake door on the back of the house.
It sat unattended for a couple of years, but it’s time I finally finish the job of insulating and sealing it up.
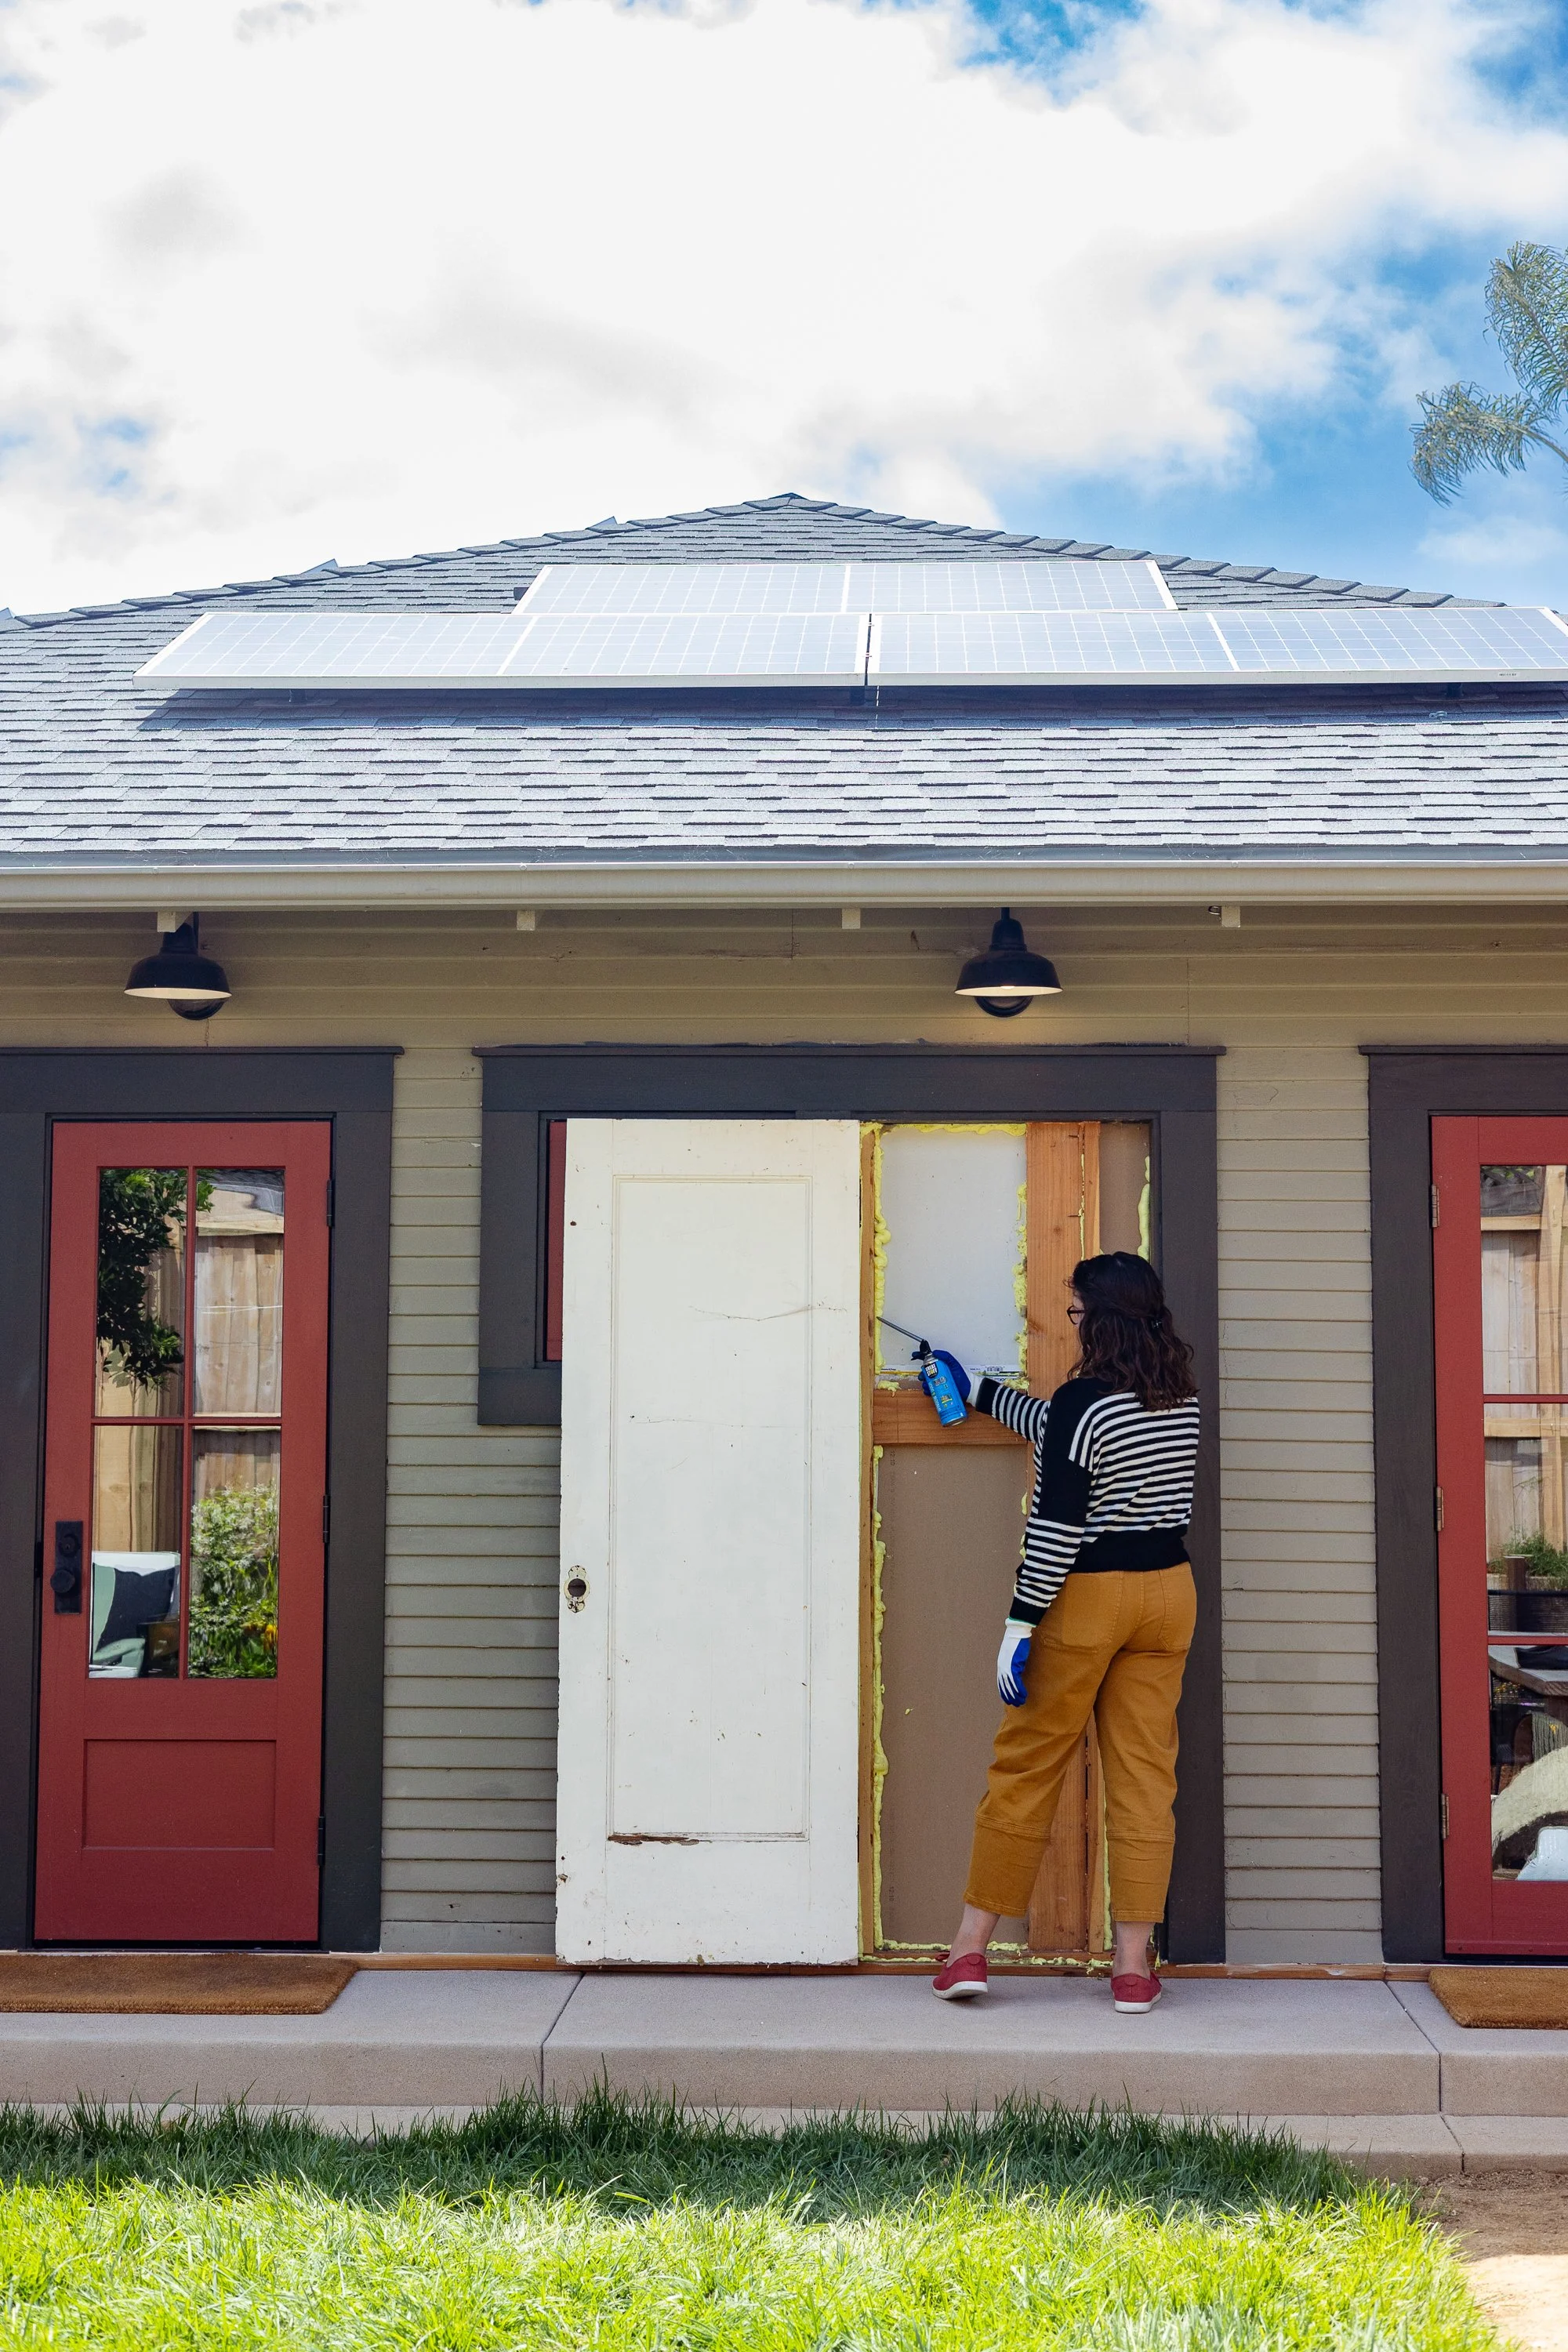
When I mentioned this years ago, many people recommended I keep the door and use it to store things in the cavity. I love the idea! The challenge is that we have a mere 3” of space inside. Hardly enough room to put much of anything. Plus, this wall takes a beating from the sun, so insulating and weatherproofing the cavity is the right move for our home.

The first order of business was to seal all of the gaps and cracks with Great Stuff ™ Insulating Foam Sealant. I used it throughout the kitchen renovation, and admittedly I got a little overzealous with the stuff. But, it does a great job of sealing up the biggest or tiniest cracks that could let in air or pests.
There’s a whole lineup of different sealants, but I always grab the Window & Door option because it’s designed to be expand with less pressure around doors and windows to prevent bowing. It’s gentle, yet effective, so it’s my go-to.
I’ve been getting in a bad habit of not finishing my projects once I start them - you know, the kitchen, closet, bathroom, nursery, and backyard, are all incomplete. Most of the time it’s because I have decision fatigue, but sometimes it’s because Margot has other plans for the day’s schedule. She’s been doing 30 minute naps lately which makes it tricky for me to finish the projects that I start during her slumber.
Lucky for me, the Great Stuff™ Smart Dispenser™ has some sort of magical design that prevents it from getting clogged if you stop using it and pick it up later. Gone are the days of wasting the entire can of foam because it sealed itself shut! So, I was able to pause the project to tend to my short-napping-baby one day, then resume using foam sealer another day.
The final steps in the project are to insulate the cavities, waterproof it, permanently close the door, and affix dummy hardware. Stay tuned!
The video below gives a great view of how the bathroom meets up with the door, check it out!


