Backyard Transformation: The Journey To A Thriving Oasis of Nature, Harvests, and Play
/It’s been a year since we renovated our backyard and it exceeds my expectations for what was possible in the space. I’m overdue for a walkthrough of the process from beginning to end, but here I am!


This post is sponsored by Tilly, an online landscape design company. Without them, our yard would still be a weed-filled, deck-covered, and jacuzzi-prominent eyesore. The project is also supported by Monrovia, Article, Kichler, and Emtek.
Step 1: Design
I outlined the design process here including our wishlists, the scope changes, and lots of before-and-afters. In a nutshell, we hired a professional landscape designer through Tilly, to breathe new life into our yard. I’m so grateful for the support of a professional during the process!
Step 2: Demolition
The time-consuming act of demolition kicked off with a purpose: to avoid contributing to the ever-growing landfill. Instead of mindlessly tearing apart and trashing the deck, I posted it on Craigslist. I was delighted when folks came forward, eager to claim the decking, piers, and support lumber. One kind person even salvaged the wood to build a wheelchair ramp for their neighbor. The experience left me convinced of the joy in giving things away for free, for it connects you with deserving humans and reduces our impact on the planet. Plus, it saved me a cool $1,000 in labor and dump fees.
In addition to taking out the decking, the crew removed the jacuzzi, ground three tree stumps, tore off the shed (click here for a sweet 70-year-old note I found inside), and removed the vegetation.
Step 3: Prep foundation
With a fresh canvas, the true state of the yard revealed itself - previously hidden beneath the decking. Surprise surprise, we discovered that the slope of the yard was not as drastic as we initially perceived! It was merely a heap of soil that someone piled up when they installed the giant 10-seater jacuzzi.
Strangely enough, a part of me felt sad that the grading issue we anticipated didn’t materialize. It was this very challenge that sparked much of Tilly's ingenious design plan. Did you see that cool gabion rock wall that Claire designed for us? Originally intended to stabilize the soil, it also served as seating for the fire pit area, defined a garden bed, and seamlessly integrated with stair steps. THIS kind of creativity is what a professional designer brings to the table!
When the earth was clear, the crew chopped up roots from invasive trees to keep those suckers at bay. They also trenched so the electrician could run new electrical (we cut power to the garage when removing the jacuzzi). While they were at it, we had them add outlets, to plug in market lights, speakers, and whatever other shenanigans we decide to plug in.
Step 4: Lay concrete steps
Amidst the unexpected soil grade change, we decided to shift gears from the original design. Instead of bringing the soil up, we opted for steps out and down to a lower, flattened yard.
Now, I’m not a fan of pouring lots of new concrete. It’s a big source of greenhouse emissions and it acts as a stubborn impermeable surface, hindering the absorption of water into the soil - the precious resource rushes into storm drains and puts pressure on local infrastructure. So, I tried to limit new concrete in our yard as much as possible (I’ll explain more on that below), but we did need concrete for creating stairs and to follow code for surfaces against a wooden house.
The good news is the crew saved all of the concrete, brick, and rock rubble from excavating the yard to use as fill for the concrete steps. This meant that less new concrete was used and no demolished concrete went to the landfill! After waterproofing the house, they built forms, filled with rubble, and poured concrete. I wanted the new steps to match the 100-year-old concrete in the driveway, so they added the pigment (Sandstone) and then they did a Topcast finish which removes the fresh, smooth surface to reveal the aggregate underneath - it essentially ages it overnight instead of over a century - so cool.
Step 5: Rebuild fencing
The black fence dividing our neighbors was in really rough shape. Filled with termites and missing boards, it was in need of an overhaul down to the support lumber. So, the team rebuilt it to match the style of fencing our other neighbor used on the back of our yard (board on board with diamond lattice on top). It’s not necessarily the style I’d do, but consistency is key for making the yard feel cohesive and more expansive.
Contemplating the area where the shed once stood was puzzling. The shingled portion (on the right seen above) belonged to our neighbor's garage, plagued by water infiltration issues. Our solution involved waterproofing it akin to a roof, and then cleverly constructing a "fence" atop it, creating the illusion of a seamless-ish fence. All other solutions would have broken up the yard, but my goal was to maximize the perception of a larger space. (see the result in step 6)
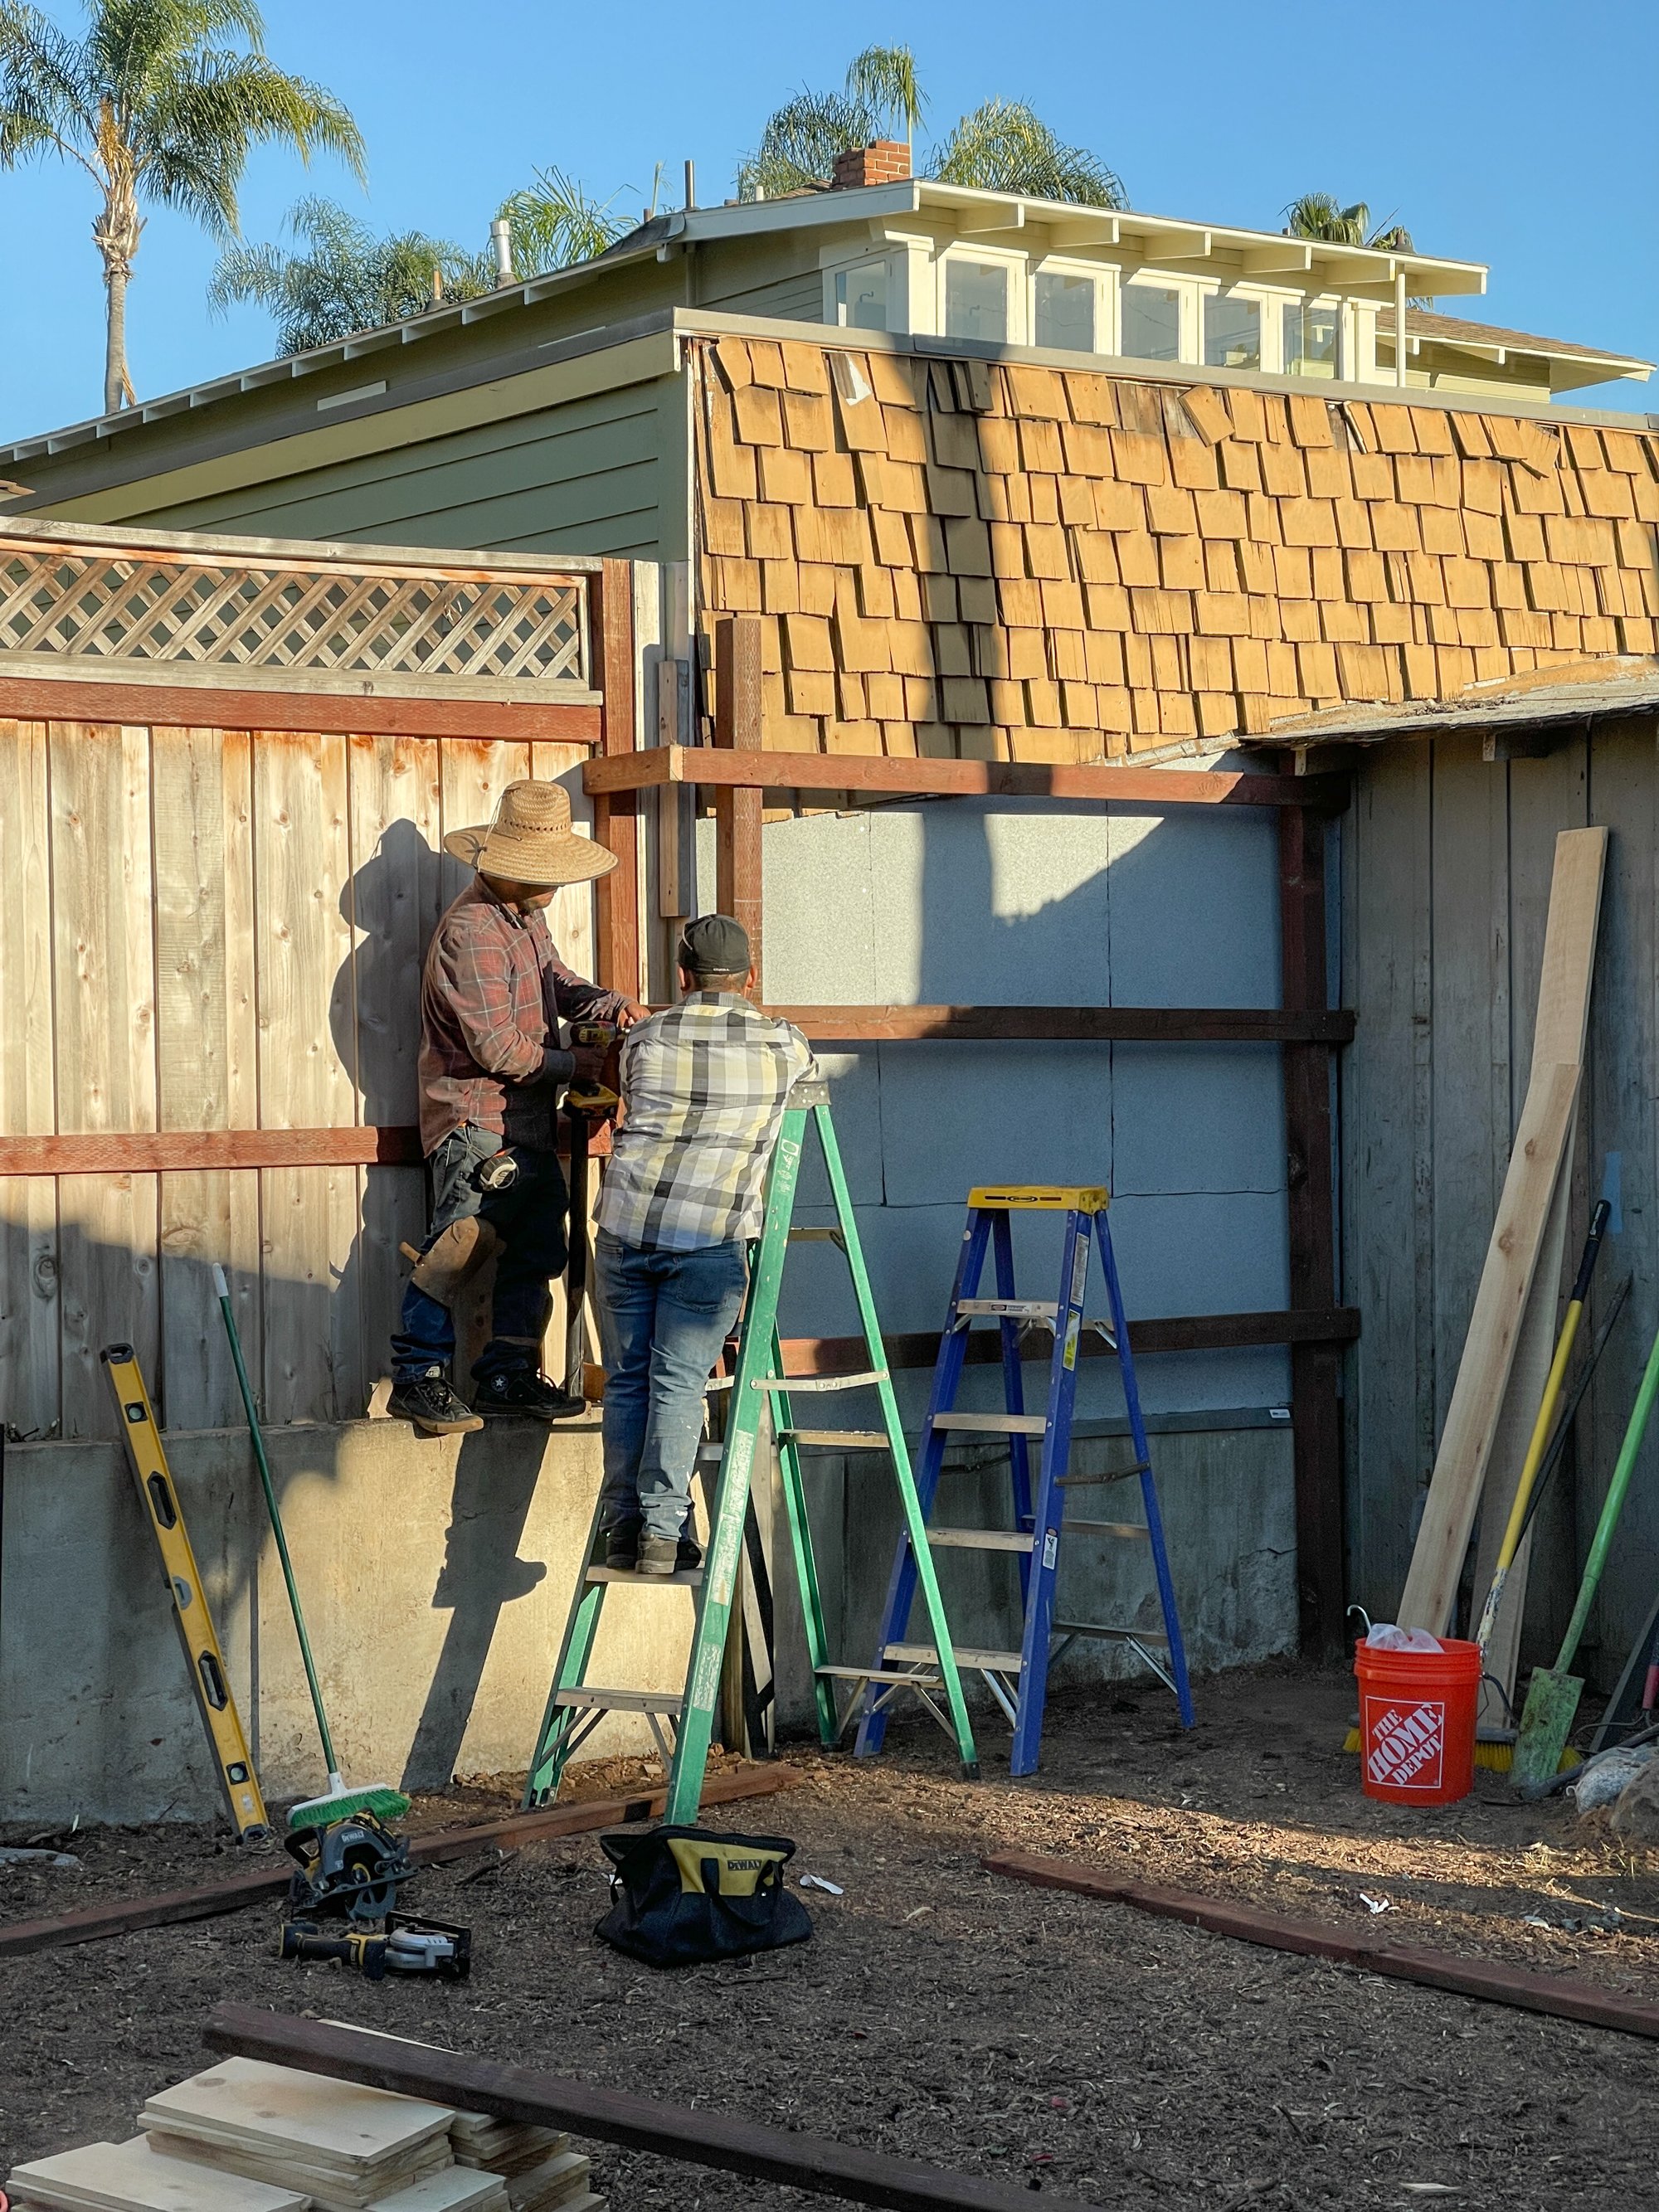
Since the neighbors paid for the fence, they made theirs the “pretty” side and we got the side with the support structure visible. I don’t really mind, but as the cedar has aged, the pressure treated support posts have been standing out more. So, we had the crew clad those support pieces in cedar so the tones would match. They also gave it a fresh pressure wash, too. You can see the improvement in the image below compared to the first image in step 9.
While the yard was a blank slate, we also assessed the century-old retaining wall that the back fence sits on. It had significant cracks, isn’t very thick, and has already shown signs of leaning into our yard. I asked the crew to reinforce it - the last thing we need is for the neighbor’s lawn to fall into our yard! The guys dug deep footings, and set steel poles that they later filled with more concrete. The new posts aren’t cute, but even with a few months of plant growth, they’re hardly noticeable.
Step 6: Hardscaping

Next, I worked with our contractor, James to bring the Tilly hardscaping plan to life. We had to adjust a little since we added the stairs and removed the gabion rock wall, but the vision our designer created for us was so clear - organic curves and layers.
We did lots of measuring of our seating and dining areas, then we used bender board to lay out the curves that defined each space. Hot tip: install your materials up to the top of the bender board so it’s completely invisible and not a tripping hazard!
Once set, the crew started filling each curvy shape with a material. Top soil for garden beds and lawn, and stabilized decomposed granite (DG) for hardscaping underneath the dining table and seating area. Remember how I said I don’t like concrete? Well, we used DG instead of concrete because the crushed rock will absorb rainwater and pass it through to the soil below. Instead of our yard shedding water down the drain, it gets absorbed like a sponge and keeps the precious resource available for our landscape. This is so valuable in our Southern California region where rainwater is scarce.
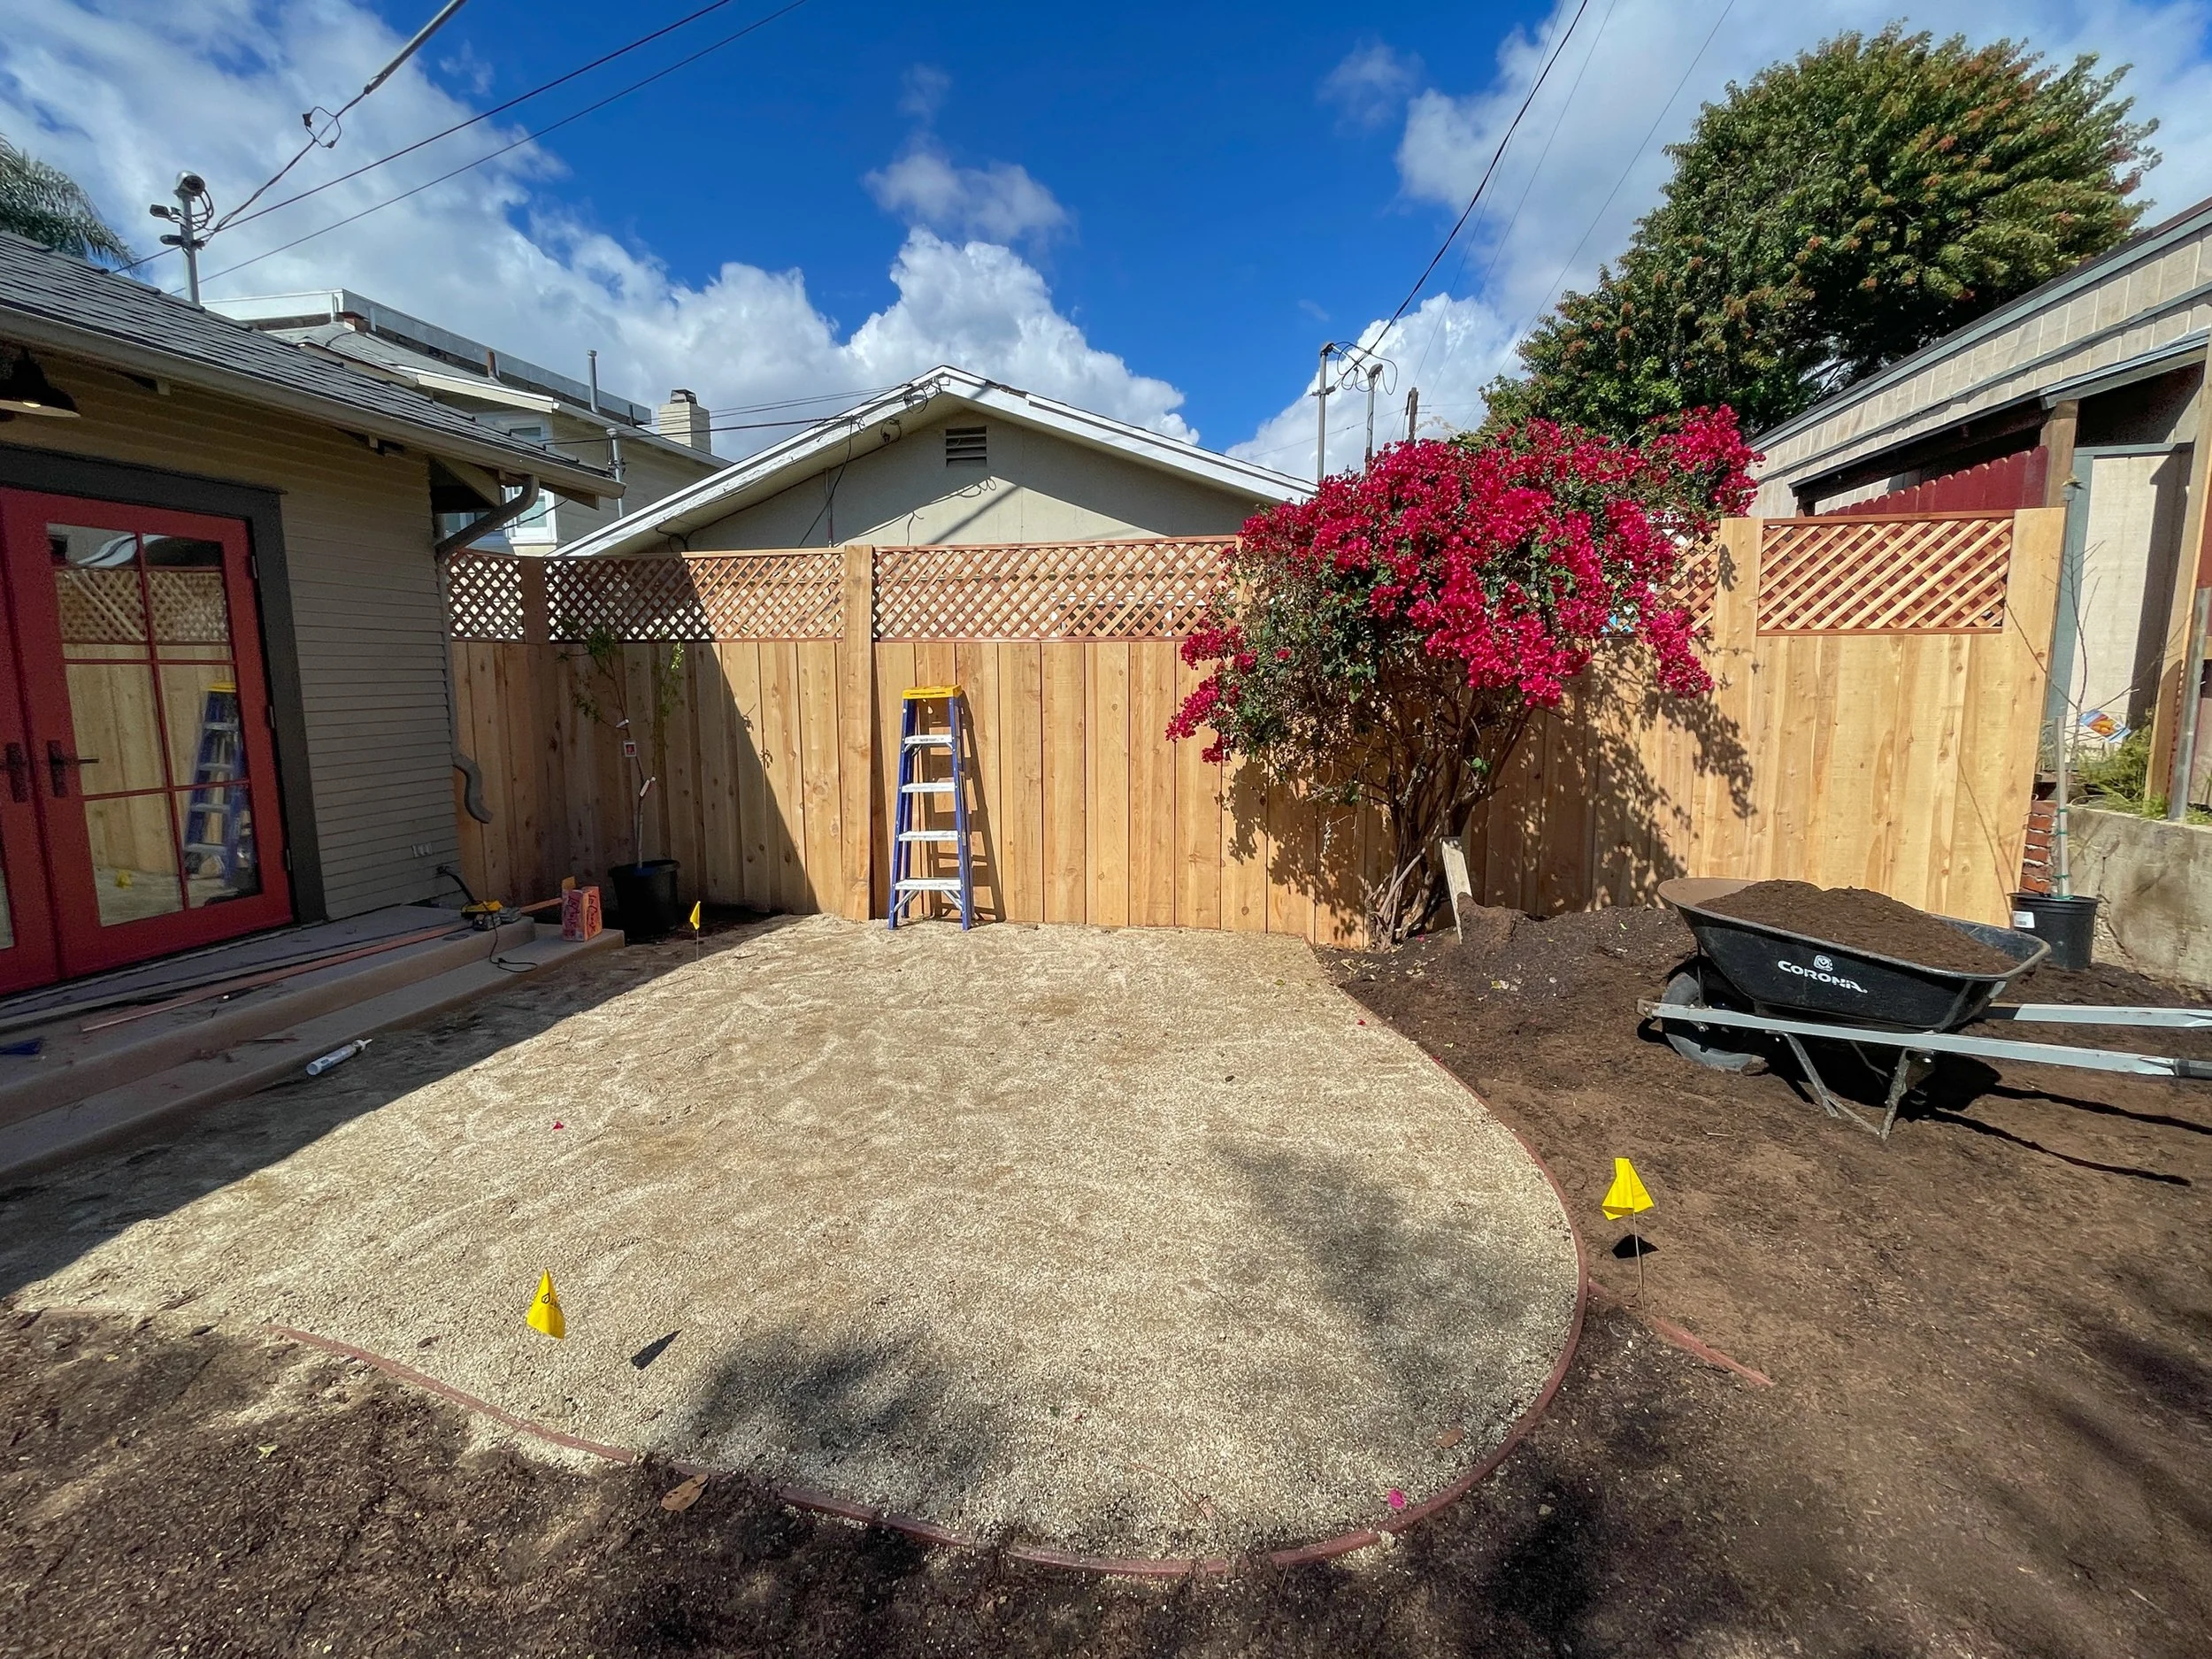
The Tilly design actually called for flagstone in these areas - which we think is SO pretty. But the flagstone was a $6k price and I wasn’t totally sure it was worth it. I love the look of it and appreciate that it’s still permeable between the seams of the stones. But I was trepidatious. Our contractor reminded us that he has to lay DG before flagstone, so why don’t we try the DG as it is, then add flagstone later if needed. Sold!
Now, full transparency - DG alone is kinda a pain. It’s stabilized so it’s firm underfoot, but it has a sandy texture that gets stuck to feet and shoes, so it’s a bit of a nuisance. We might install the flagstone down the road, but in the meantime, I’ve added a rug under the dining table and I’m researching some solutions to contain the grit. I can’t sing the praises of my cordless electric leaf blower enough!
Step 7: Trees!
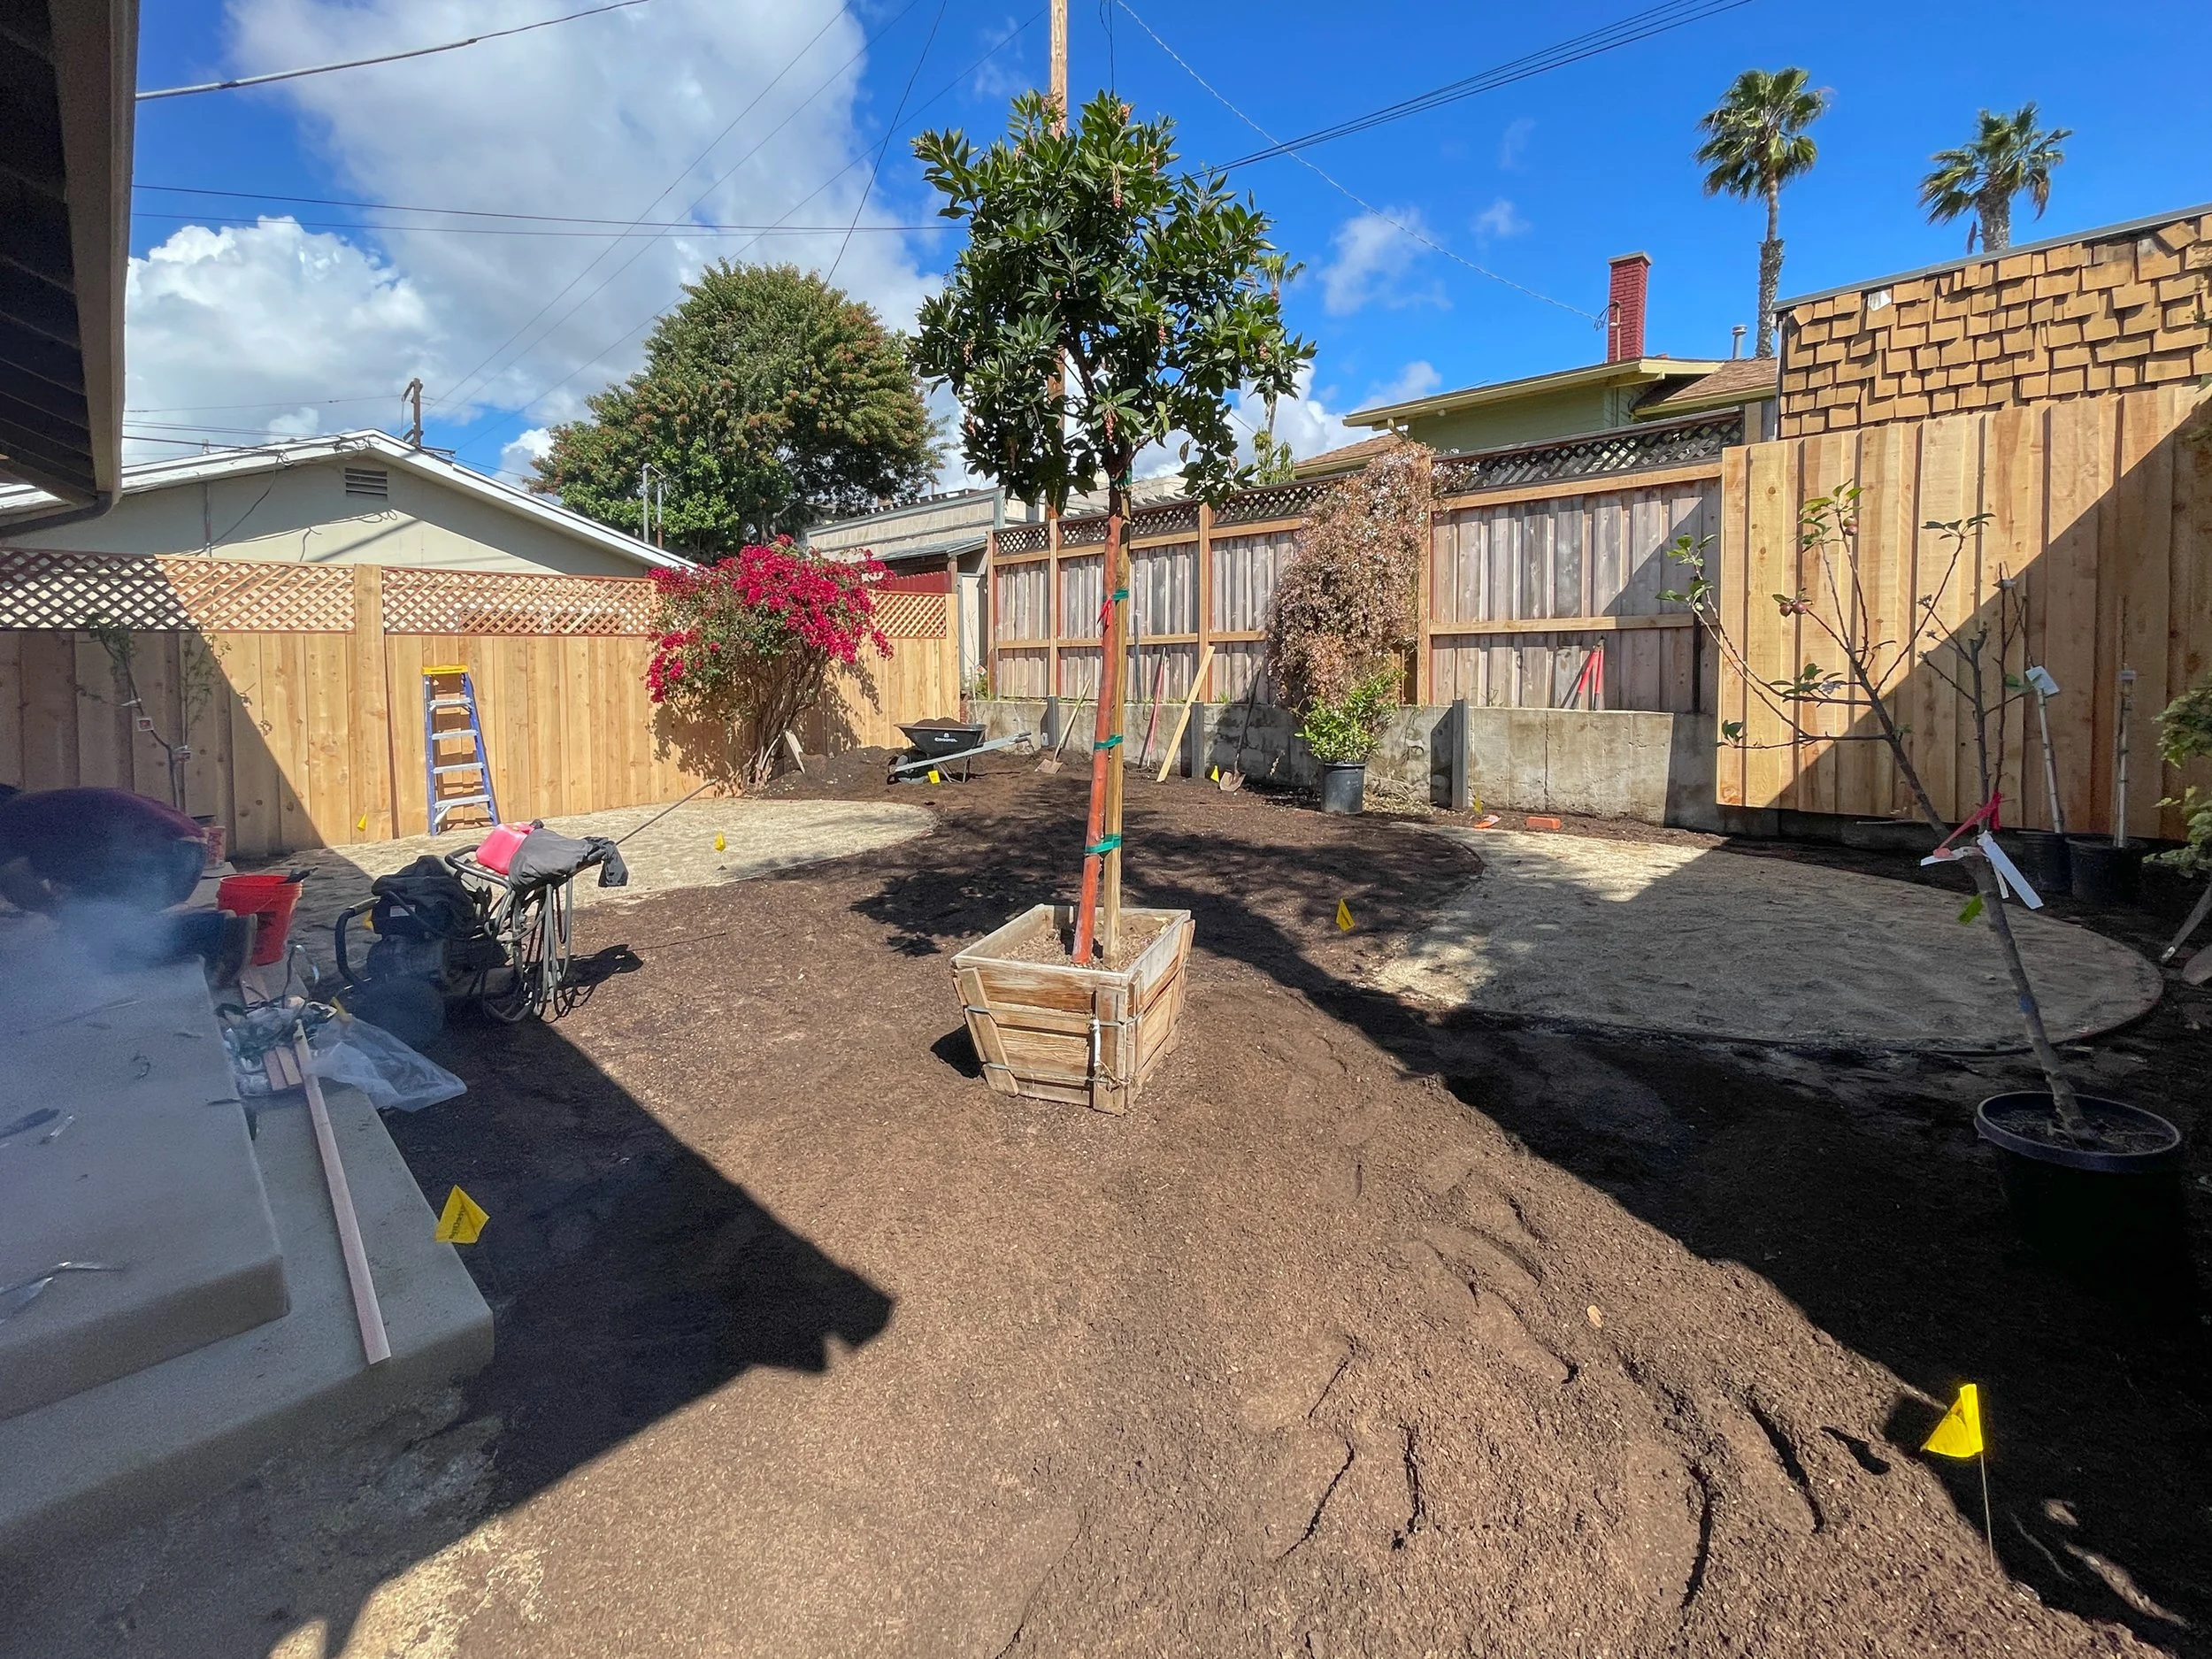
Years and years ago we met with a landscape designer for the backyard and his response to my question of, “how many trees can I plant back here?” was “one.” What?! Just one tree?! We obviously didn’t hire him.
Our backyard now has nine trees. Nine! I told our Tilly designer that I wanted to pack in as many trees as we could reasonably fit, so she suggested dwarf fruit trees along the back fence, and full-size trees where we wanted shade and privacy. We’re now the proud owners of trees that produce apples, pears, apricots, limes, oranges, lemons, plums, and figs - and multiple varieties of each, too!
You can just barely spy the fruit trees in the photo above - they are those little twigs in small pots. The big tree in the foreground is an Arbutus Marina Strawberry Tree. We planted the same variety in the front yard and love the fast-growing evergreen with a red trunk and pink flowers so much that we needed another one. I’m hoping it fills in soon to provide a lovely canopy and shade over the play space.
Step 8: Grass
Years ago when I envisioned our yard, I didn’t imagine grass. California has been suffering from a dreadful drought for over a decade, so we’ve been mindful of our water use. Traditional lawns are water hogs and aren’t beneficial to native bugs or animals. It gets a bad rap, and I support the movement to remove huge underutilized lawns in favor of native plants, trees, food-producing plants, and wildlife habitats. However, we decided that a lawn would be a lovely place for Margot to play, jump onto from her swing, set up a kiddie pool on, and do all the things you do on soft surfaces. Lawns are great when they’re put to use and appropriately sized! So we added in a small patch of green carpet that certainly get lots of little foot traffic! As an aside - I most certainly advocate for real grass rather than plastic artificial turf that contributes to heat island effect, causes water runoff, and will end up the landfill at the end of its life.

We opted for Marathon tall fescue grass which is resilient to lots of foot traffic and does well under shade (which our trees will hopefully provide!). Our plan is to water it well (less frequent but longer watering time) during its establishing stage so it can grow deep roots, which will make it more drought tolerant in the long term. We should be able to water once every other week in a year or so!
Step 9: Gate and arbor

We worked with Tilly to incorporate privacy and security to our yard by adding a gate. We initially talked about adding one at the base of the driveway, but instead opted to put the gate closer to the yard - between the garage and the side of the house. I was worried it would make the yard feel smaller, but oddly, it feels bigger! Adding the walls defines the yard rather than having it spill into the driveway. It feels more like a secluded space than an extension of where we park the cars.

Once again, we matched the style of the fencing in the rest of the yard. The lattice will provide support for the future grape vines that will wind through the diamonds and up over the arbor.
We added this Emtek lever to the gate along with three of these hinges which combined make the gate feel so substantial and solid. They aren’t technically gate hardware - rather normal(?) door hardware that’s weather rated. Gone are the days of flimsy gate hardware!

Step 10: Plants

There was a lot of work to creating the foundation for the backyard, but the real stars of the show came from Monrovia. Flowers! Fruit! Veggies! Shrubs! Vines! Plant material was generously given by Monrovia who worked with the Tilly design to send us plantings that feed our pollinators, and create a lush cottage garden. We opted for plants that do well in our climate and with the specificity of our unique space - there’s a shady corner perfect for hydrangeas, which I’ve always wanted!

The plan is for the vines to climb up and attach to the supports on the fence so it becomes a green wall with white flowers, the shrubs will cover the retaining wall, the flowers will creep and paint the yard in color.
You can see the excitement of plant delivery here, and get details on each of the plants we got from Monrovia here.

In addition to the fruit trees, shrubs, and vines, we also installed two raised veggie beds. Our Tilly designer helped us pick the best spot for our veggie garden - facing south, and right next to the kitchen doors. We designed the veggies beds to be a spot for lettuces, herbs, and edibles that we’ll “cut and come again” throughout the season. Then, in the ground behind the dining table, we left an open-ended area for planting things that take up more space or don’t get harvested daily. I planted pumpkin, watermelon, and several squashes in the summer of 2022 (seen in the below reveal photos) but in spring of 2023 it’s a delightful sweet pea fort.
Step 11: Accessories
We didn’t install the playhouse that we had in our Tilly design - yet. We priced out a custom playhouse, looked at some pre-made ones, and considered DIY options. At the end of the day, we decided to hold off on a permanent structure until we know more about Margot’s long-term interests and can tailor a space for her. In the meantime, her swing set and the sweet pea fort with a water table underneath is serving her perfectly! I see this area also being a mud kitchen or a kiddie pool with seasonal vining squash overhead later in the season. Margot is perfectly content swinging, plucking flowers, and saying “hi” to the caterpillars, so have no fear that she isn’t enjoying the yard without a custom structure.

The dining table and chairs are a beautiful set from Article and I can’t recommend them more. Multiple friends have bought the chairs because they’ve been impressed with the comfort, and I still can’t believe how solid and heavy the big teak table is. I’ve linked both umbrellas (including the triple-sized one!), the dining table, the loveseats, my custom macrame chair, and more here. I also sealed the teak with a couple of different products and finally found one I like here.

We, of course, filled the yard with landscape lighting from Kichler. I talked all about how and why we chose this lighting here, and detailed how we used it at a friend’s house here. I’m running out of space in this post, so you’re just going to have to trust me that the lighting makes the space shine (pun intended!) in the evenings.
Step 12: Enjoy!
We couldn’t be more thrilled with how the yard has come together! We use it every day and can’t wait to see it evolve more over the years as our family adjusts to new ways to take advantage of our outdoor space.
And for a 10 second video transformation, I give you this!