The Whys, Whats, and Hows of Landscape Lighting
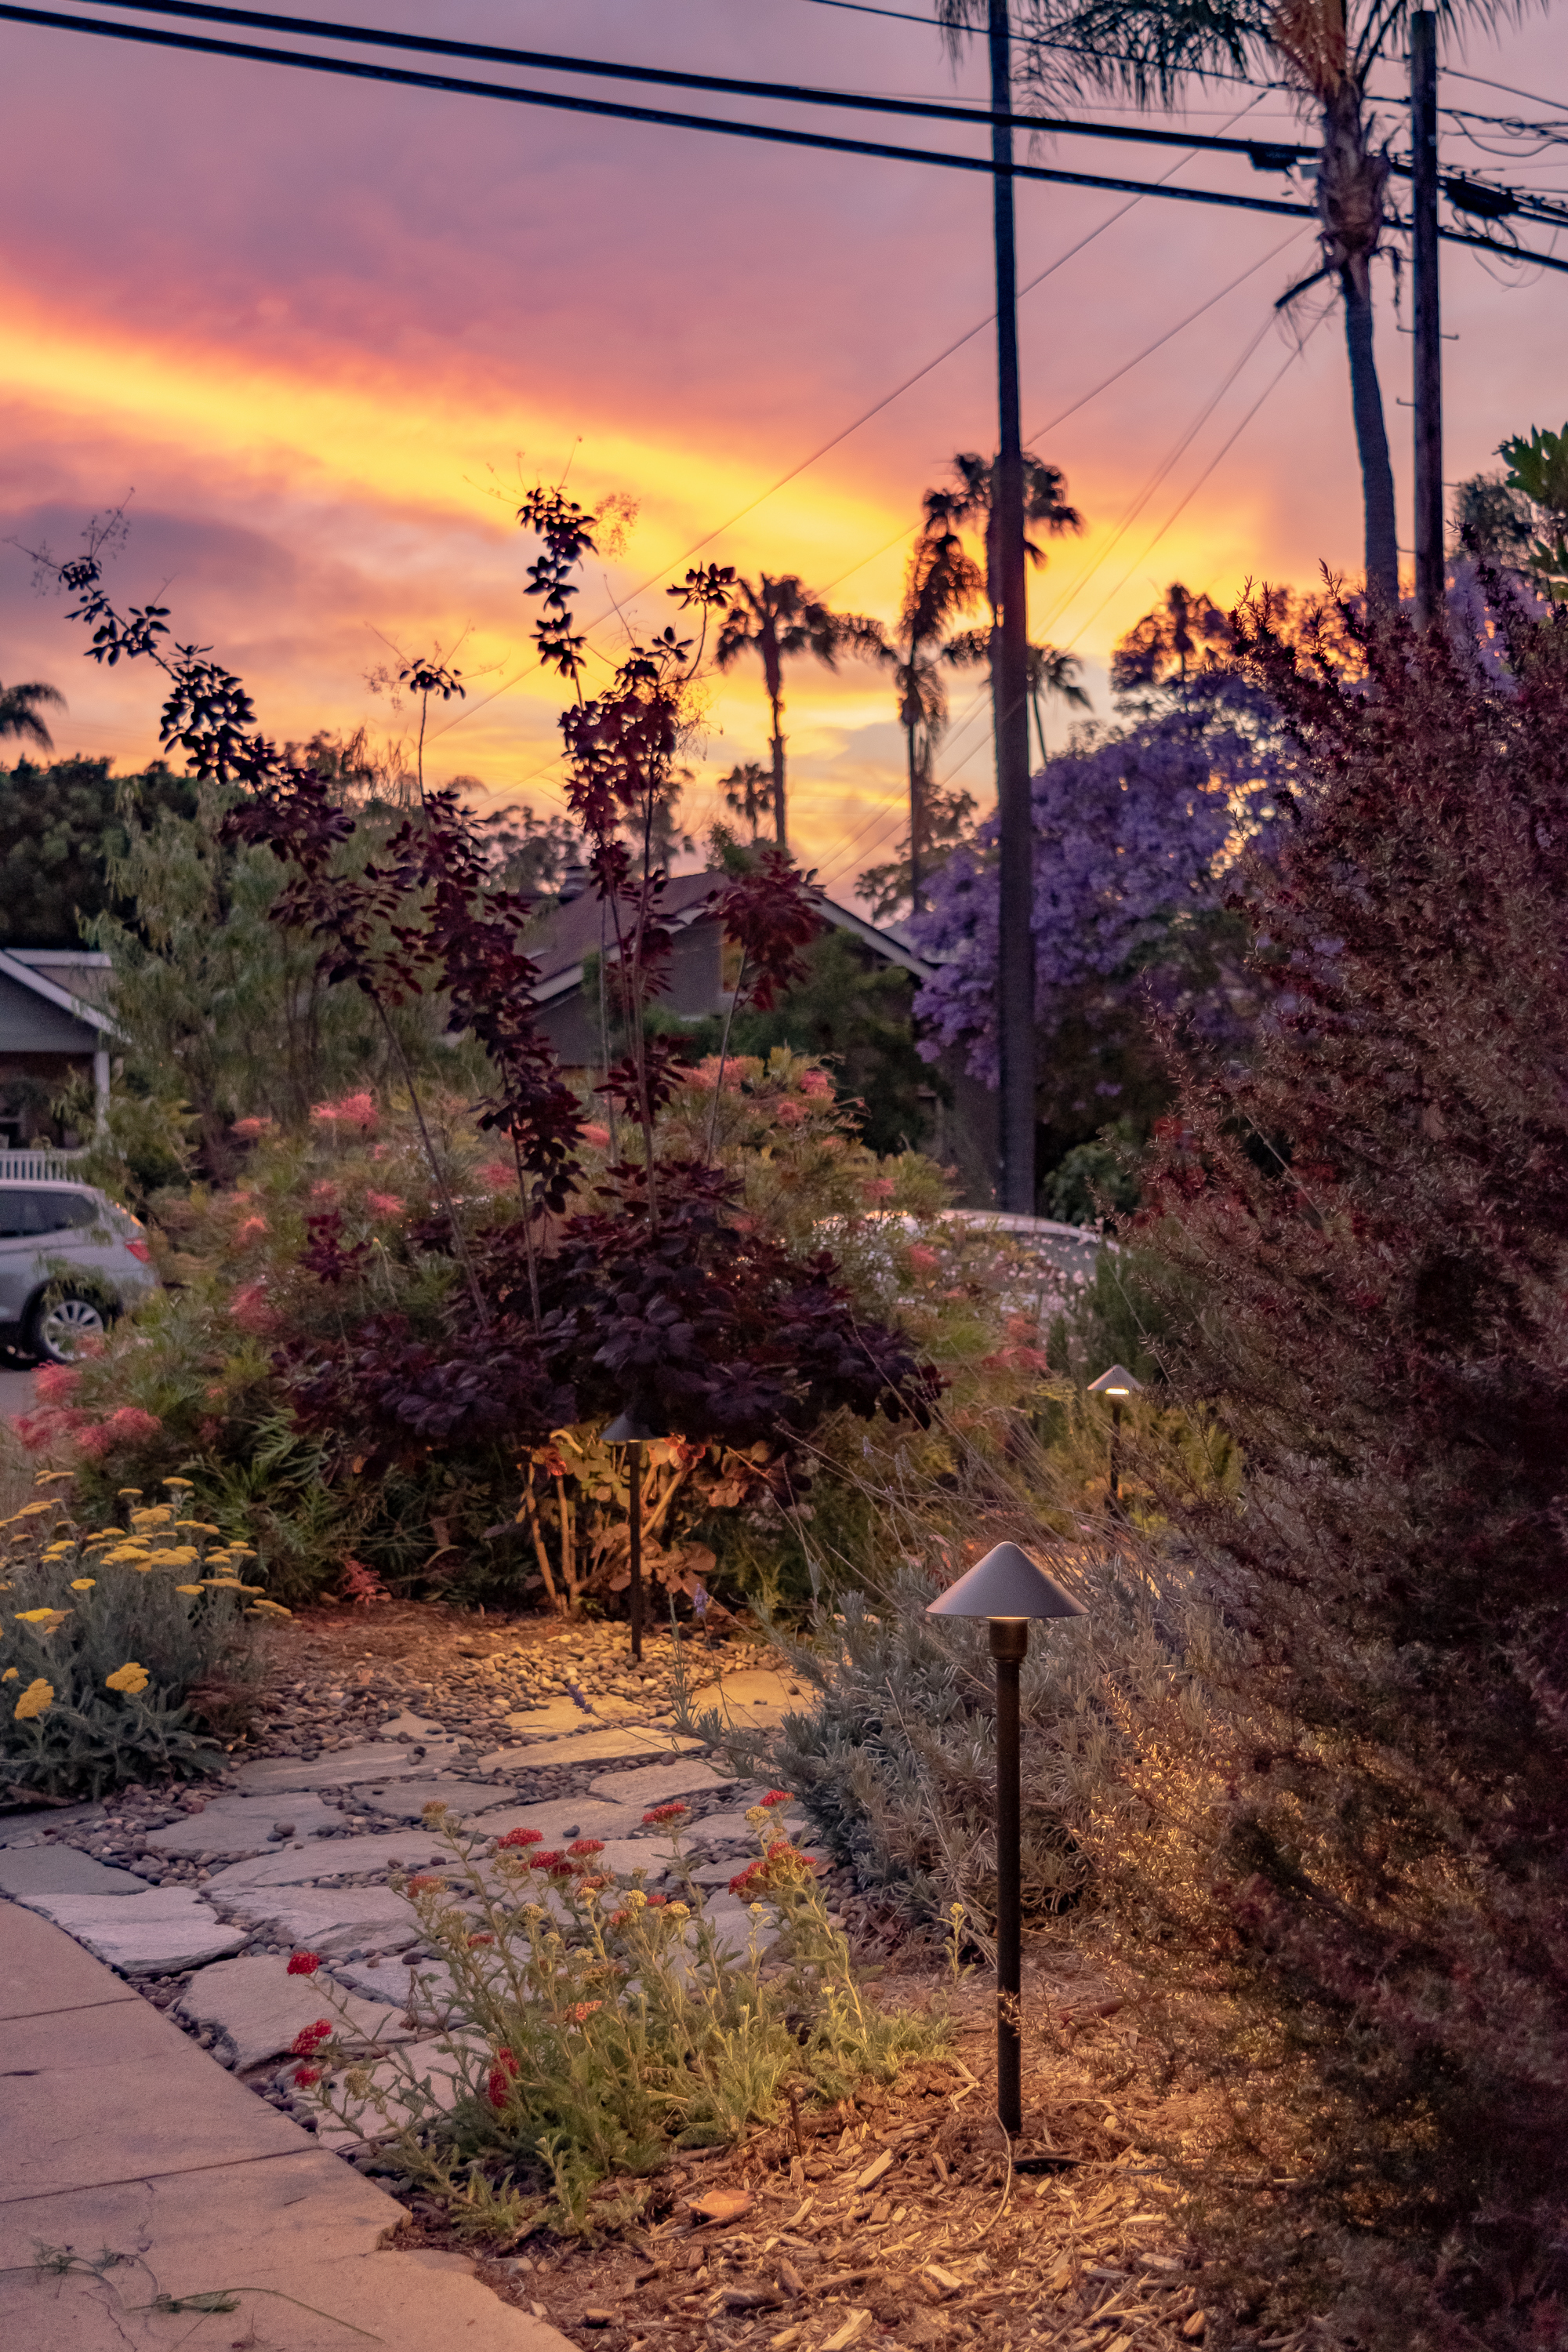
/I’ve been sharing oodles of front yard and landscape posts (get ‘em all here) and the icing on the landscape cake is always lighting. I installed the lights only a couple of weeks ago and it’s amazing how much the space has transformed in the evenings. In typical fashion, I thought long and hard about lighting, so here’s the full scoop on making our front yard garden just as pretty at night as it is during the day.

This post is in partnership with Kichler but, as always, all opinions are my own. Thanks for supporting the sponsors that keep the blogging lights on.

Why We Installed Landscape Lighting
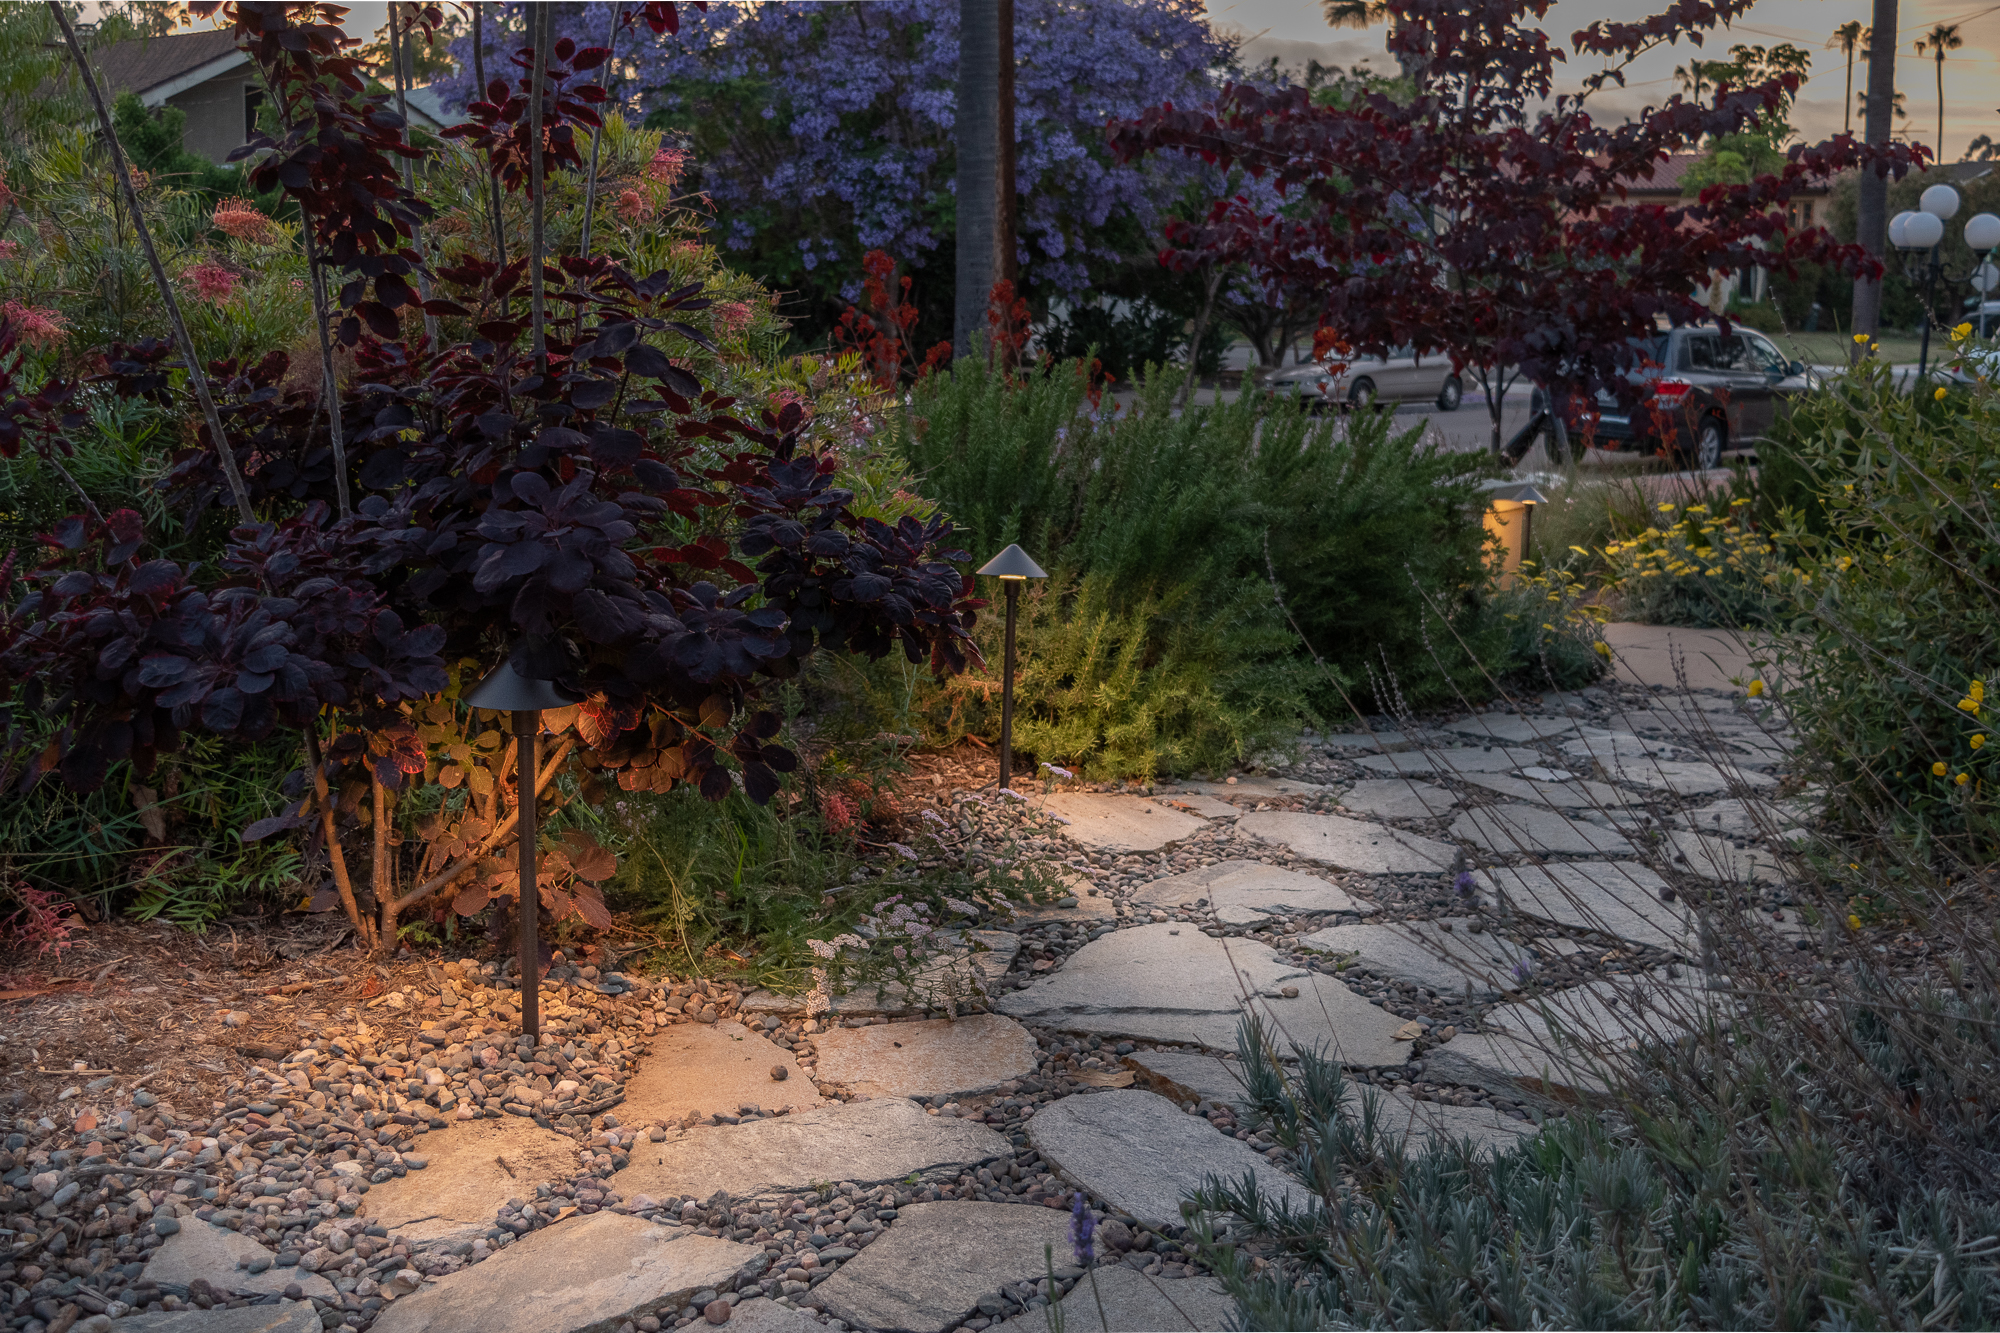
Illumination for pathways - The beauty of outdoor lighting is it serves both form and function, but I always think of function first. And the function we needed was illumination along walking paths. We don’t have an attached garage, so when we come home at night, we pull in on the side of the house, then walk along the driveway, across the flagstone pathway, and up the steps to the front porch and in the front of the house. The bummer was it was dark. I’m surprised we haven’t tripped on our way inside more often. Making a safe and comfortable walkway was my top priority.


We added path lights along the driver’s side of the car since there’s ample room for foot traffic and lights to be out of the way of our steps. On the passenger side, the cars are parked pretty close to the fence, so I didn’t want anything underfoot. So, I mounted the lights to the fence to cast illumination down on the ground.

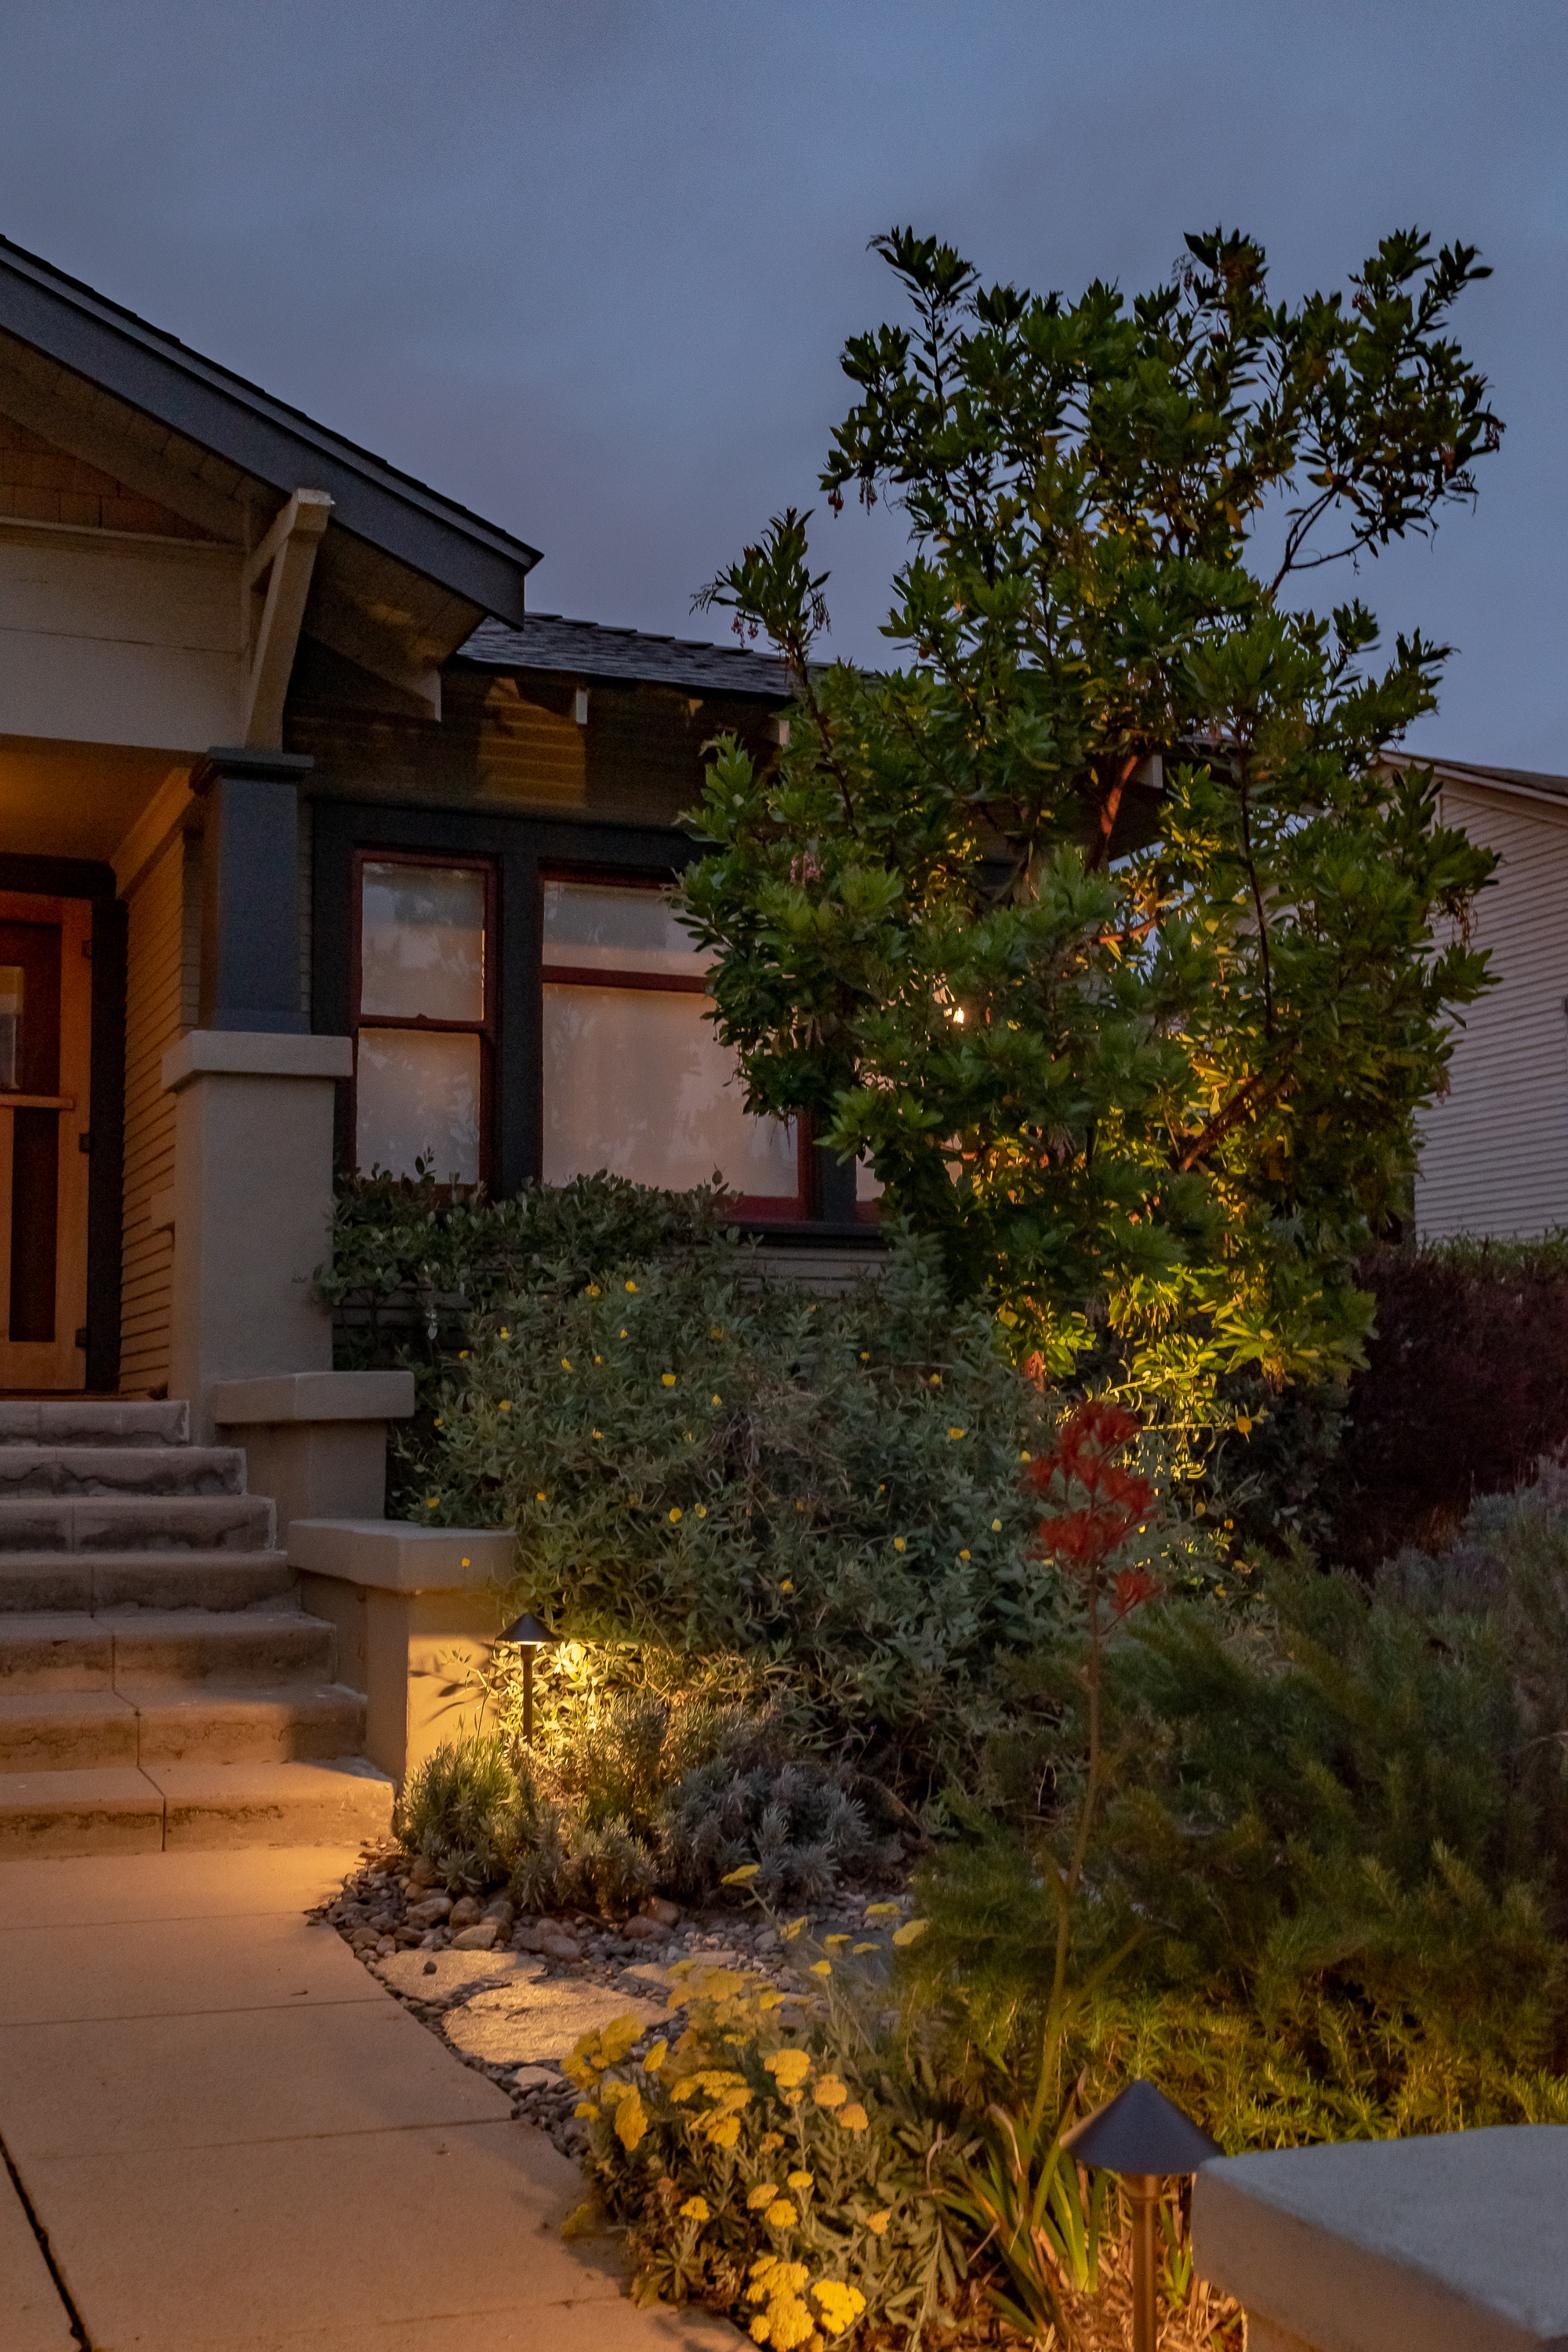
Safety on the steps - In addition to making sure we didn’t trip on our way from the driveway to the front of the house, we have two sets of stairs that we wanted to illuminate. Whenever friends left our house late at night, I’d shine a flashlight from the porch down onto the steps so nobody tripped. Now that I added a couple of path lights behind the porch columns, I don’t need to wield my giant flashlight anymore. Whew.

Provides security - Our street doesn’t have any streetlights, so the only illumination is that of people’s houses. Without any lighting at our house, there are lots of places for potential bad guys to hide. When we added lighting to the backyard (also from Kichler!) I felt so much more comfortable being able to see the backyard. Not only did I have more visibility, but a well-lit space is a good way to deter those bad guys.

Creates ambiance - While lighting serves lots of function, it’s also beautiful. The path lights cast a gentle glow on the ground and the uplighting points upwards into the trees. The trees have a soft glow that shows off the texture and adds height as the light catches on the underside of the soffit.
Not to mention, having lighting outside provides better visibility for our neighborhood cat and wildlife watching.
Why We Opted Not to Install Individual Solar Lights
When we first installed the new landscape three years ago, I installed solar path lights. I wanted something somewhat temporary because I didn’t fully know what kind of lighting we’d want. I didn’t want to go overboard nor did I want to regret not installing enough. I also liked the idea of solar lighting for its energy efficiency. I also was sure that as the plants grew, the lights would need to move and I didn’t want to be locked into my design. (Silly me, though - it turns out adding to low-voltage LED lights isn’t so hard - but more on that later).
Finding the right solar lights was really tough. So many of them are clear little boxes with tiny hats on top (you know the kind). It means that the bulb is clearly visible which I find to be too bright, too cool in color temperature, and ineffective at illuminating the ground and plants. Plus, these lights create the “airport runway” effect. You’ve probably seen yards where there are rows of bright blue-hued lights that look just kinda funny - yeah, that’s the airport runway look.

We had a few solar lights (those two weathered guys next to the fresh Kichler one) that were on their last leg. We also literally grew out of our solar lights. When the plants grew to full size, they became too tall for the solar lights to get any sunshine, so most of them just stopped working. In order to get evening illumination, the lights would need to be in open spots with lots of sun - an aesthetic and functionality that I wasn’t going for.
ALSO! We put solar panels on the roof, so technically, anything we plug in is solar powered. Woot!
The Lighting We Chose
The alternative to individual solar lights are hardwired lights, so that’s what we went with (low-voltage LED lights to be specific).

A year ago, I teamed up with Kichler to illuminate our back yard and I had no idea how much I would love landscape lighting. (You can see the reveal here if you scroll past my bedroom photos). Since the improvement to our dark and lightless backyard was so dramatically better, I knew I wanted to carry the same lights to the front yard. I was super pleased with the quality, the color temperature, the ease of install, and the look of the lights, so I went with the same ones again!
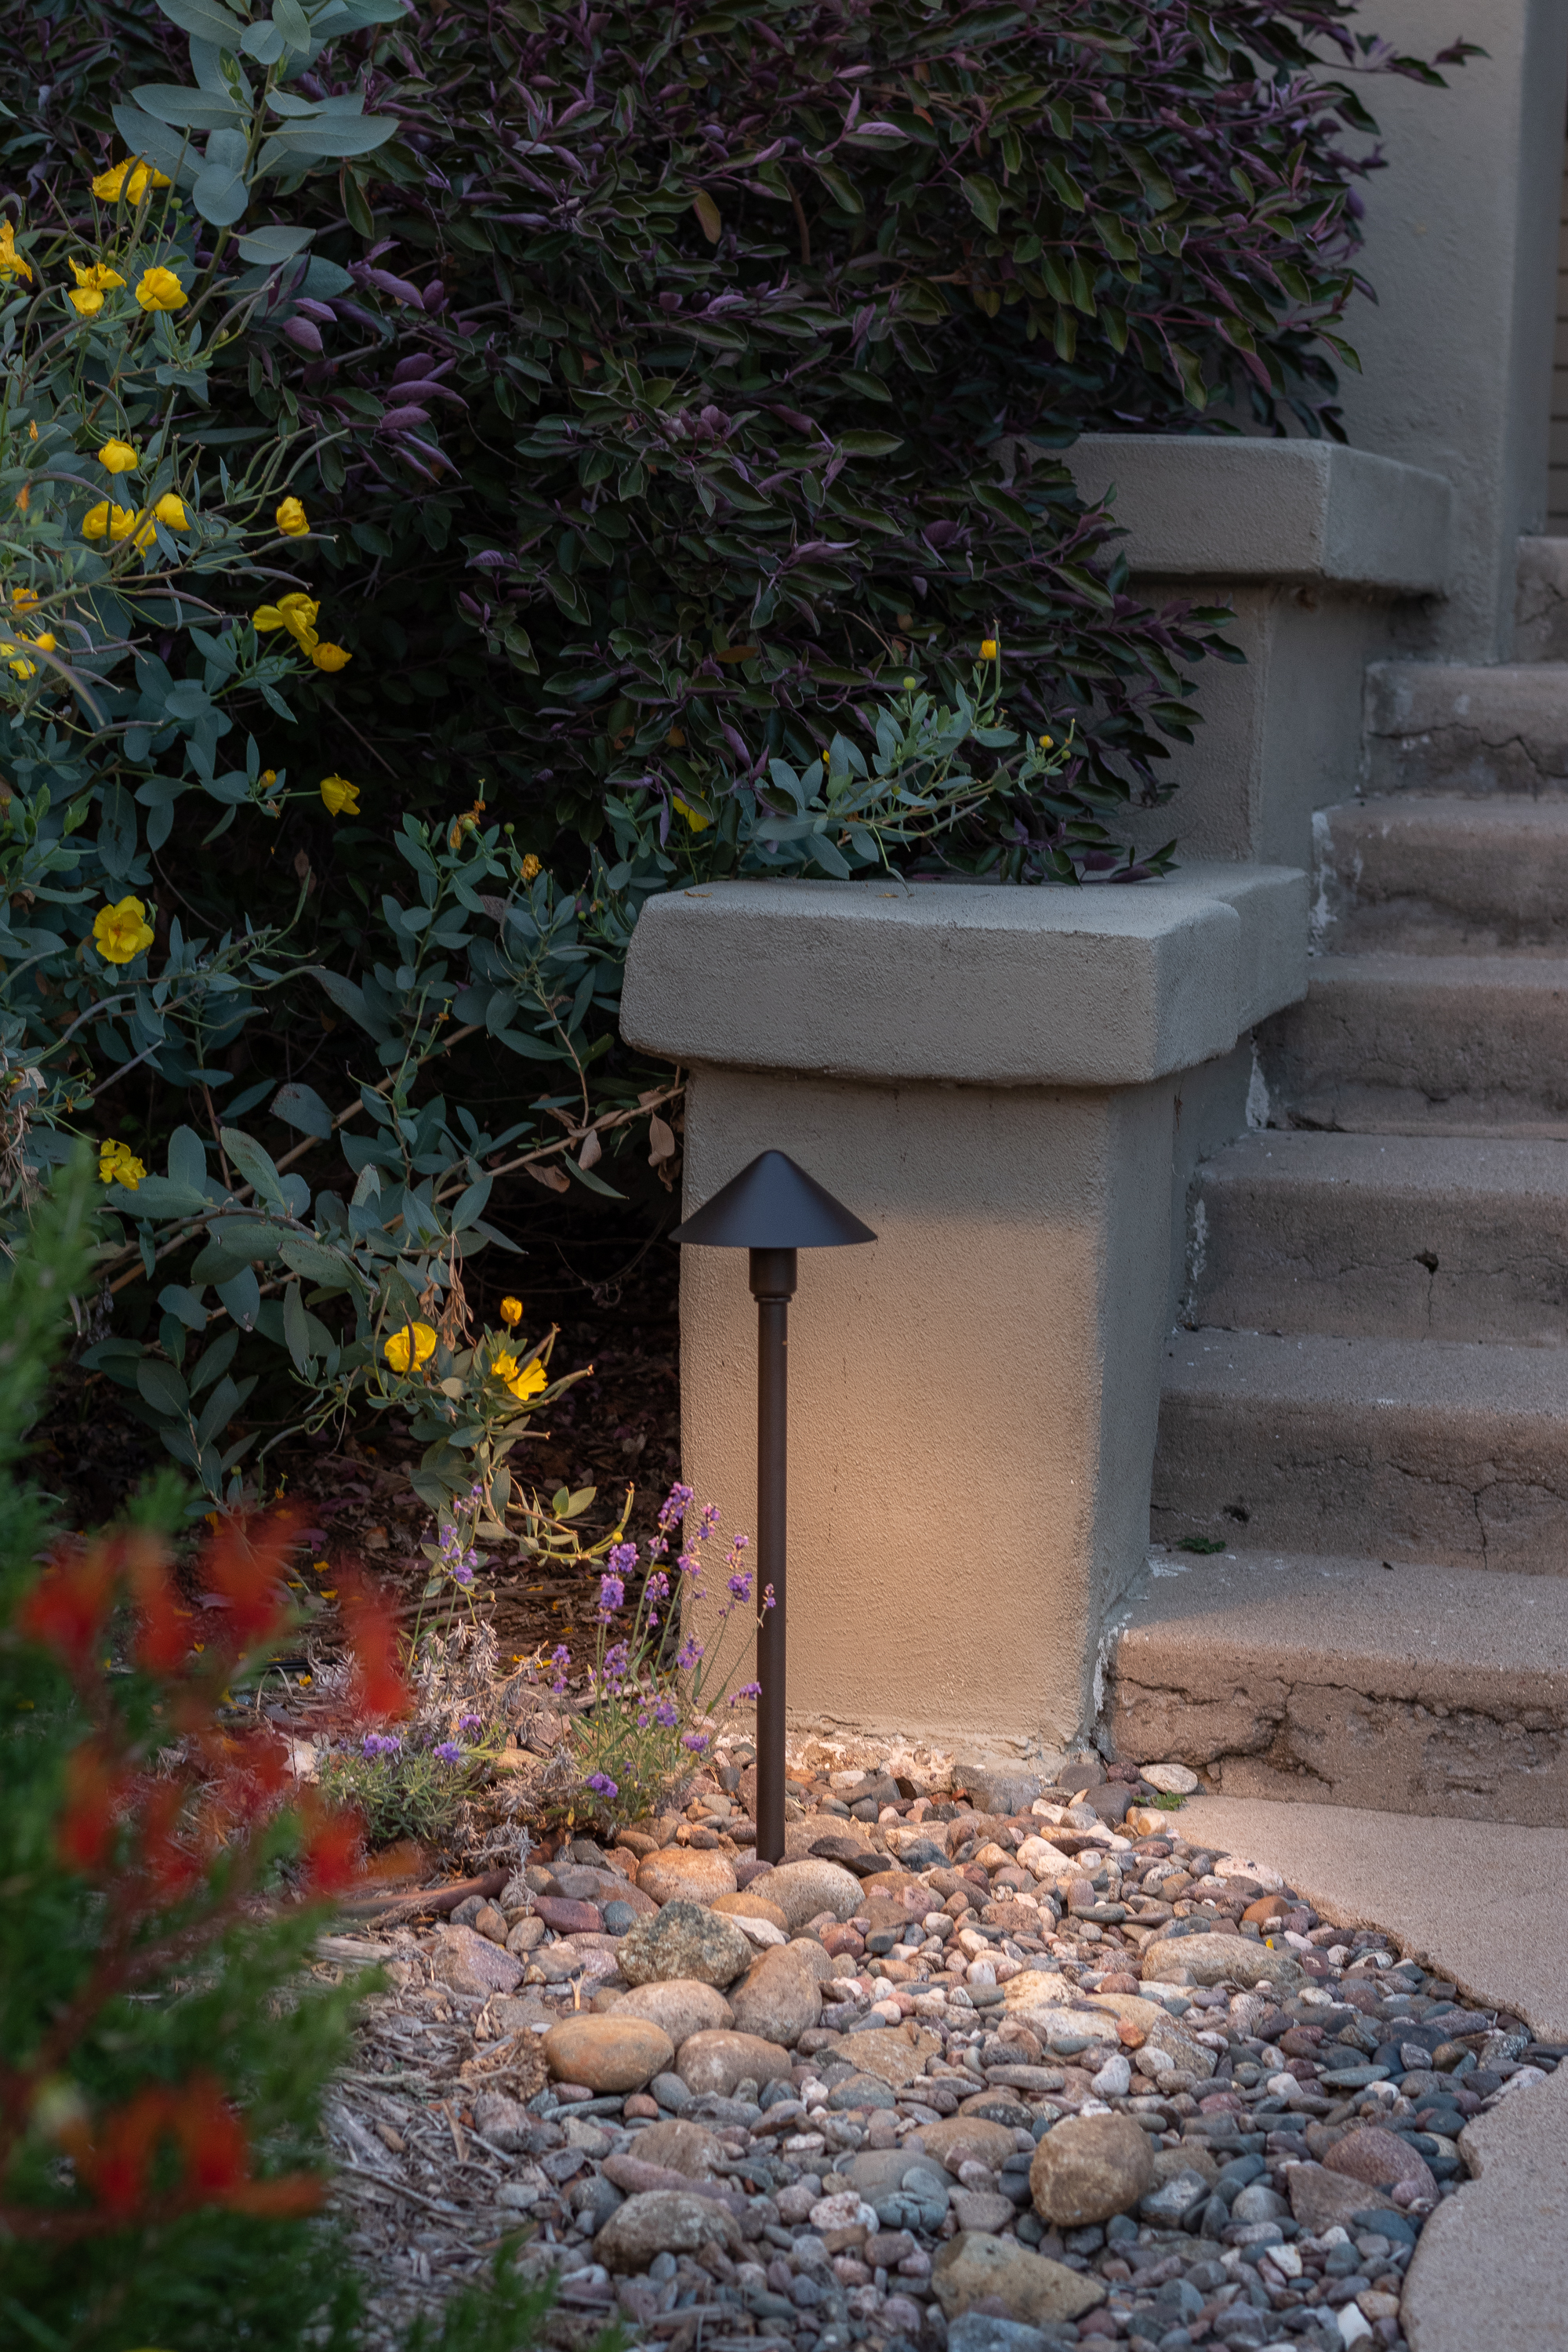

Kichler has a TON of lighting (see their catalog here). I started with function, then refined the form. Since the focus was on illuminating pathways, I looked at their path lights and decided on the fundamental path light in bronze. For the lights to illuminate the trees and bounce light off the walls, we went for the small accent lighting with adjustable lumens. These little lights come with magic wands - I kid you not. With the tap of the magnetic wand, the lights adjust between three different light intensities. Learn more about this magic here.
If you know me, you know I’m all about making as low of an impact on our planet as possible. And these lights are energy efficient! The LED bulbs consume very little energy, don’t get hot like old lights do, and last for decades. Win win win! Low voltage systems that power the LED bulbs use very little power making them a cost and energy saving alternative to some of the energy hog lighting available out there. Remember when I calculated the energy use of everything in my house? Check out where our backyard outdoor lights are on the energy use graph. While they are low energy already, we make sure to use as little as possible by putting them on timers and only being on when we need them. Plus, the solar panels on our house make anything we plug in super efficient and powered by the sun!
How to Install Landscape Lighting
Landscape lighting admittedly intimidated me a bit. There’s some electrical science involved that I really didn’t want to mess up and cause any accidents. However, my pals at Kichler helped out by drawing up a plan and calculating the load and needs for my space. If you hire this project out, an electrician or landscape design company would be able to put your mind at ease to be sure everything is safely powered. However, it is a DIYable project if you do the research on voltage and the necessary math. My pal Alison breaks this down here for ya.

With Kichler’s lighting plan, a couple boxes of lights, and the assistance of my father-in-law, we tackled the front yard installation of 17 lights in about 5ish hours.

In very brief summary, landscape lighting works like this: The transformer plugs into an outlet and a super long wire feeds into the transformer. Wherever you want a light, you cut the wire, and splice the fixture’s wires into the main wire and secure everything with wire nuts. Then, you pound in a stake, mount the light, hide the wire, and enjoy your handiwork. Then, you go to the next spot, and repeat over and over and over and over. At the end, you can fine tune everything using the magic wand and adjusting where the fixture should be pointed.

The finishing touch is hiding the wires under mulch and rocks. This step is surprisingly meditative.
I’m not going to go to deep into the DIY because Alison did a great job explaining landscape lighting basics. I’ll also share some videos of my process on Instagram Stories today, too.

At the end of the install, I organized all of the refuse and categorized everything into recyclable paper and plastic, paper I’ll use for gift wrapping, reusable twist ties, reusable bubble wrap, compostable cardboard, and a tiny amount of wire pieces and non-recyclable plastic that went in the trash. That little handful in the far right box is the only stuff that went to a landfill. Cheers for recyclable and reusable packaging, Kichler!