Hashtag Bathroom Inspo

You asked for it, so the bathroom remodel is next to share!

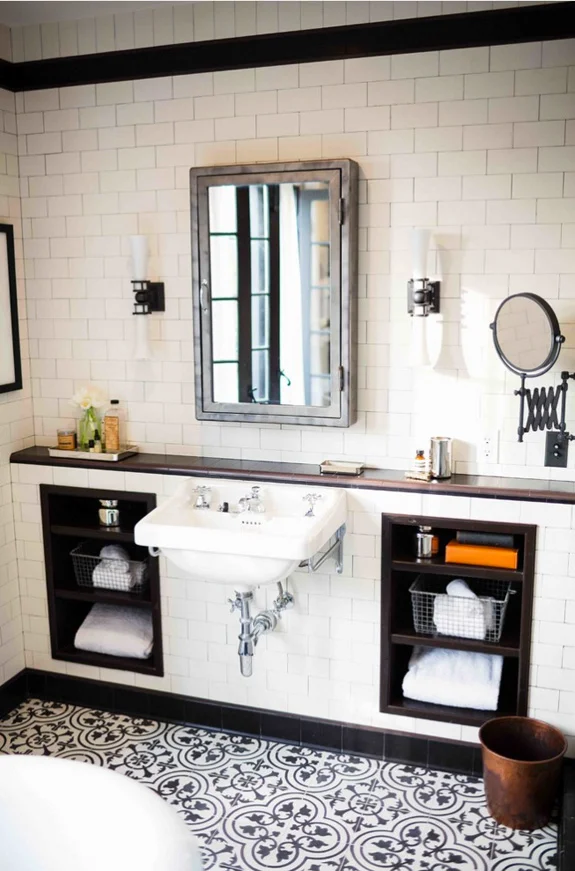
Since we were putting a new bathroom in an old house, I wanted the design to pay homage to the old house charm. I'll never know what the original bathroom looked like before we got our hands on it, so the design options were vast. Should I do classic black and white or colored tiles? Bold or understated? Authentic period pieces or reproductions? Simple or a bit more eclectic? Entirely vintage or a mix of old and new? Minimal or snazzy?

Here are a few of the spaces I took inspiration from when designing our bathroom.

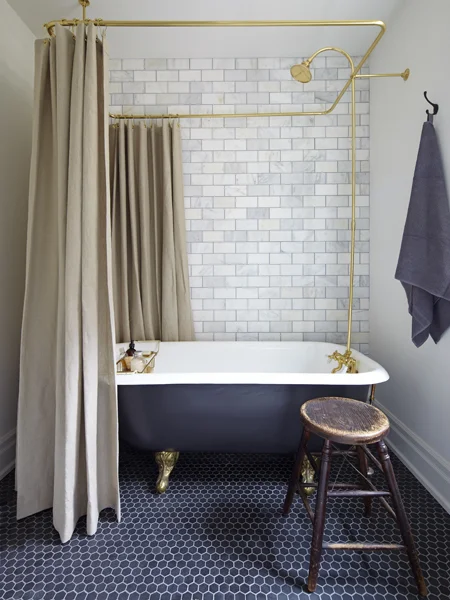
I love how soft yet high-contrast this feels. A clawfoot tub is also oh-so-dreamy. We ultimately weren't able to incorporate a clawfoot soaker in our bath remodel, but maybe there will be room in the next bathroom that we hope to add on.

Don't even get me started on my love for floral wallpaper. This Ellie Cashman paper is gorgeous. The pedestal sink is such a perfect way to show off wall details.

Source: Clay Squared

Source: Clay Squared

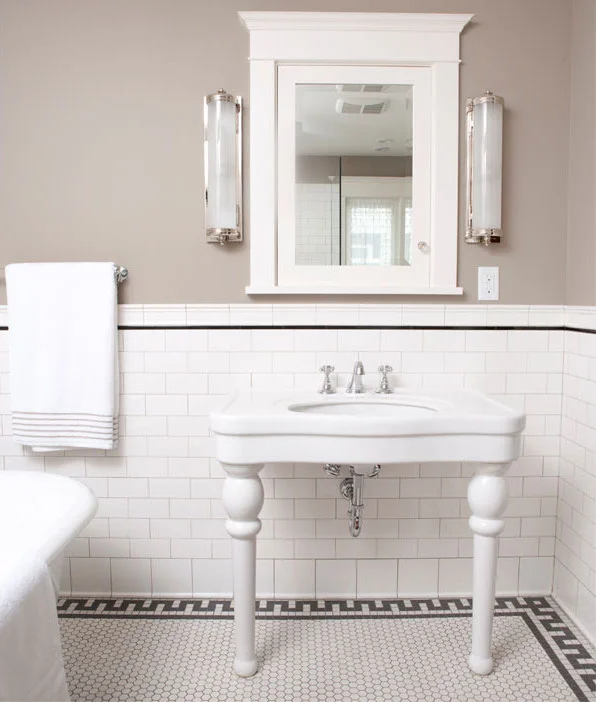
This sink with the look of turned legs is so quaint in the best way possible. The tile is understated but filled with detail. There's hex, a variation on greek key, a pencil liner, decorative cap, and subtle cove base tile. The chair-rail height tile surrounding the whole room was a must-have on my list.

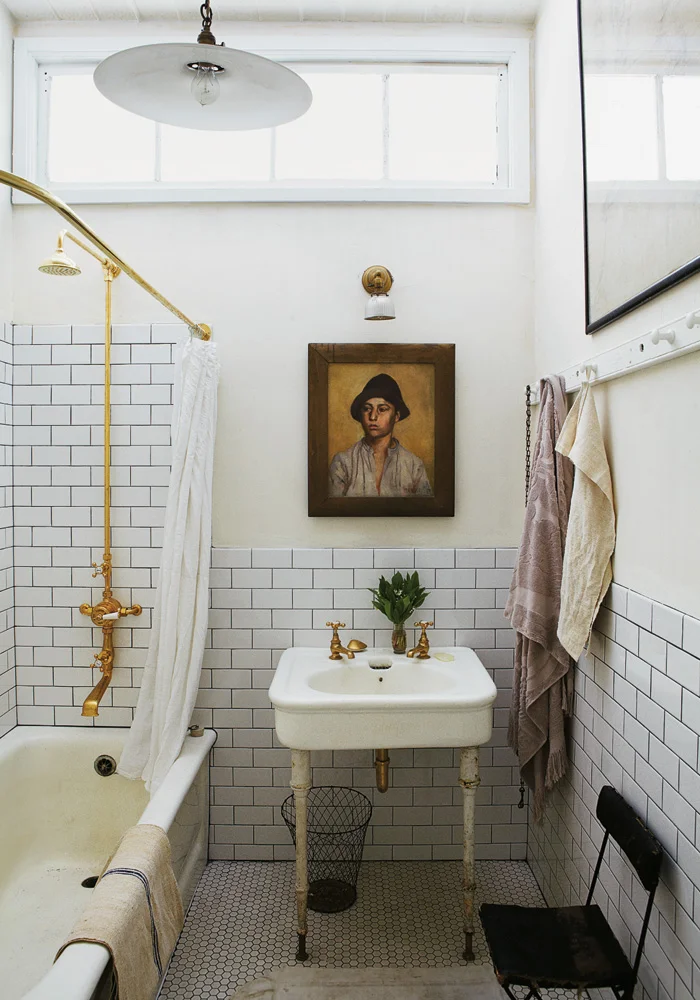
A painting in lieu of a mirror is fine by me. The tile work here is far simpler than the detailed profiles above, but it exudes character. I adore how the aged sink legs and worn tub coexist with the new hardware.

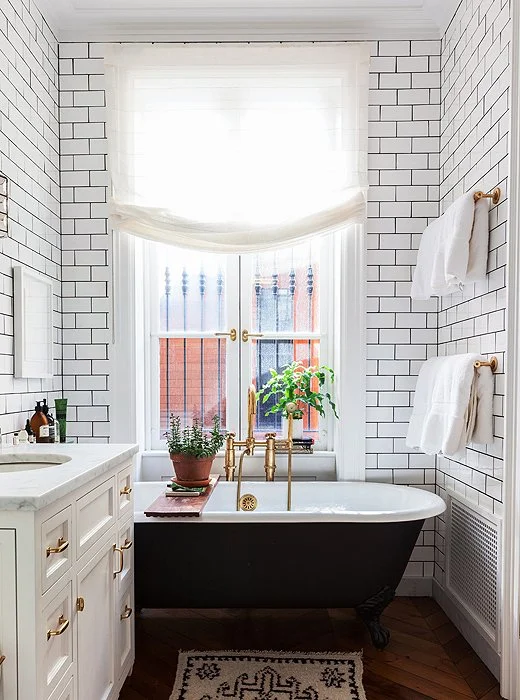
That window is perfectly gigantic. If privacy were no issue, I would have installed a window the full size of the wall.

That retro green tile is to die for, but it's all about that recessed soap dish.

Source: Unknown

Source: Unknown

The moody wall color was definitely a feature worth stealing. I think I need to add more artwork, though, because this is the bee's knees.

Why do moody walls when you can do a moody ceiling? I love how this bathroom has a bold and modern feature without sacrificing the traditional tile. 

Storage is key in small bathrooms, so why not borrow space between the studs for recessed cubbies? Our final bathroom design allowed for this, but in a slightly different variation.

I borrowed an element from each of these bathrooms, and the many others on my Pinterest board to create the bathroom that's perfect for us. Stay tuned!

Refinishing Our 100-Year-Old Oak Floors

The Gold Hive Master Bedroom Floors

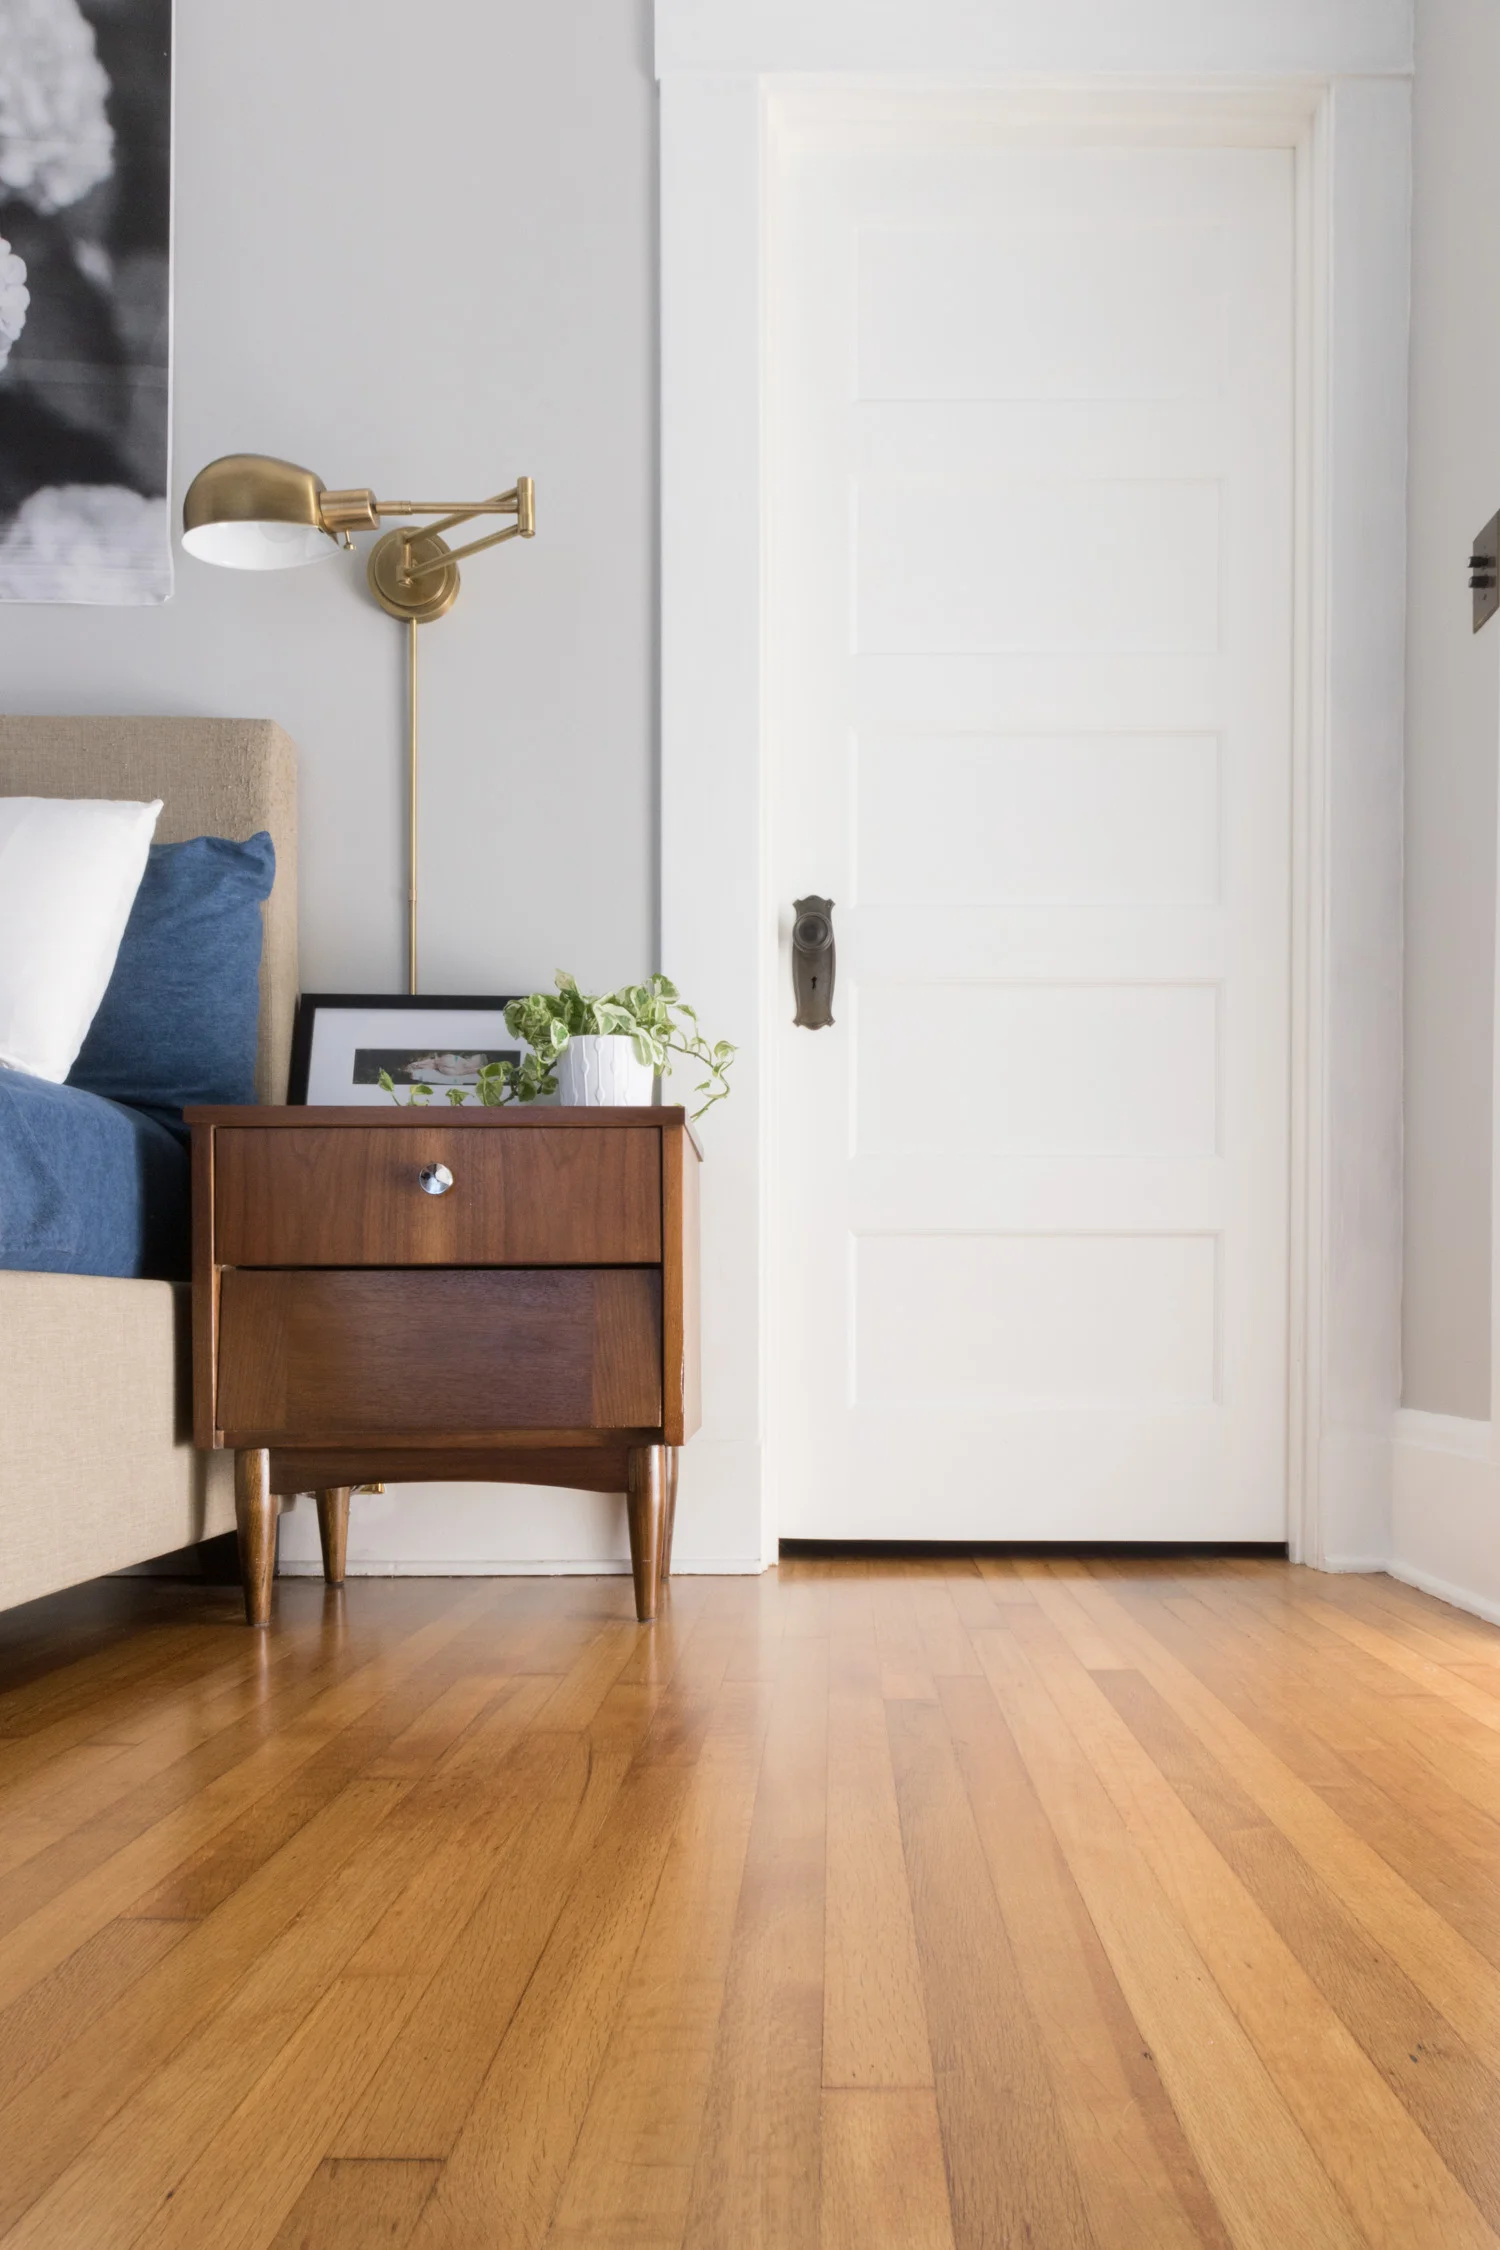
Refinishing the hardwood floors was the last step in remedying the odor issue. Once all was said and done, the smell disappeared and the flooring was revived – win win!

As a reminder, here’s what the flooring looked like.

flooringbefore

The 100-year-old rift and quartersawn white oak was actually in pretty great condition throughout most of the house. However, the urine stains (the dark spots seen above) and termite damage warranted repairs. Plus, there's no better time to restore the floors than when not living in the house - you’d have to move eeeeeeverything out off the floors otherwise.

The very first step was to make a mess. All drywall, painting, and bathroom construction (stay tuned!) occurred before the flooring crew set foot in the house. There's no sense in making that oak perfect and shiny, to then drag a bag of demo debris over it. I've heard professional painters say to paint after floor refinishing because dust can get into the paint, but I sided with the hardwood guys that said to paint first. It makes so much more sense, I mean, I've been known to drop a cup of paint from the top of a ladder.

Oops. Thank goodness for rosin paper. Once I was done spilling paint, the sanding process could begin.

That freshly sanded oak makes my heart skip a beat! I also have a crush on this sander. Ain't she a beaut? Looking back, I think that retro pale green influenced my kitchen cabinet color.

The floors had previously been refinished, but in the back of the closets was the original wax finish. It was pretty dull, but there's something so special about finding a part of the house that hadn't been messed with over the years - even if its a small bit of dingy flooring. Below, you can see the wax finish transition to the glossy polyurethane before getting sanded down. Also, note the termite damage.

All of the boards that were brittle from termites gnawing on them had to be replaced.

It's no surprise to find a few boards that are beyond repair, but the bummer was discovering that termites had eaten through the subfloor, too. It was so chewed on that I could easily poke my finger straight through to the crawl space. Half of the master bedroom flooring had to go. This is where I can't stress enough the importance of house maintenance. This back corner of the house was termite heaven because of the moisture that built up in a non-vented crawl space. There's also no record of termite treatments after 1982. People, these are BUGS inside of your floors/walls/furniture/etc. Get them out before they do this!

Local suppliers were out of the same type of flooring we have (2” x 1/2” rift and quartersawn white oak) and tried to convince us to use plain/flatsawn wood. We insisted on using the same type of cut as the existing flooring, and even though it delayed our move-in date, it was well worth the wait. Once the matching hardwood arrived, it had to acclimate to match the house's humidity.

During the acclimation time, we brainstormed how to finish the floors. The sanding did wonders for the small stains and scuffs, but the urine damage was still noticeable and would stand out even more when coated in polyurethane.

I was prepared to stain the wood a dark shade in order to hide the stains. But at the last minute, Ross made his biggest design contribution to date - he declared, "no stain!"

The ghosts of urine blemishes remain, but we couldn't be happier with the choice to keep the white oak light and natural.

After an application of wood putty and another few rounds of sanding, the floors were coated in an oil-based satin polyurethane. The finish is just shiny enough without being glossy, and its amber tones add to the patina of the 100-year-old wood. Choosing to do oil-based was in my goal of keeping with the history of the house - giving it the warm amber look and using finishes customary from years ago. But I kind of which we didn’t do the oil based poly and instead left the wood even more pure in it’s lighter hue. It’s okay, though!

We hired out the project and spent about $5k on the whole process. It was well worth it considering we were in a rush to move in and had lots of other things going on. But, I do yearn for the day when I can refinish floors myself! The Grit and Polish shared how they refinished their floors themselves and included the cost to do so here.

Once the flooring was complete, it felt like a whole new space - almost ready to be lived in. But before moved-in, there was still so much more to do. Which of those projects do you want to hear about next? The bathroom remodel? The kitchen update? More odds-and ends?

Wall Redux

Before I get into why the walls needed repair (other than to remedy the smell), I'll kick off with some old house wall 101 on plaster and lath, which is a common construction for lots of American homes at the turn of the century. There are so many other great resources that cover other wall materials and styles such as gypsum board, shiplap, etc. Turn to Chip and Joanna for all things shiplap, and refer to This Old House for all things old homes.

Wood laths are strips of wood about an inch tall that are installed horizontally and attached to the wall studs with small gaps between each strip. The plaster is then coated over the lath with a trowel and pressed into the lath until the plaster oozes between the gaps and hooks onto the back side of the lath. Imagine sloth fingers hooked over the edge of a bucket. The funny looking fingers are the plaster and the rim of the bucket is the lath. Did you click that link and "accidentally" watch 45 minutes of sloth videos? I sure did. Let's get back to the walls. This is what the back of a plaster and lath wall looks like. See the sloth fingers?

Once the plaster hardens and gets a few finishing coats, you have a wall! This construction has many perks adored by old house lovers. Unlike modern-day drywall, plaster and lath is quite thick and therefore is a great sound barrier and provides decent insulation. I particularly love how it feels more solid than drywall. It feels substantial and does nice things for the room's acoustics. When Daniel of Manhattan Nest reworked the walls in his bedroom, he doubled up two layers of 1/2" drywall to mimic the goodness of a thick plaster wall. He gets me.

All this is to say, I love my plaster walls, and would much rather repair them than replace them. The bummer with plaster is that after a few California earthquakes and 100 years of the house settling, the plaster can crack and even pull away from the lath. We had this issue in several spots, plus some pretty bad patch jobs, and lots of chipping.

The original texture was really sandy, and the previous attempts at patches were like extra coarse grit sandpaper. I was told this wall texture was created by grinding up walnuts and incorporating them into the plaster mix. The walnut consistency wasn't my ideal surface, but the old house purist in me felt we needed to keep that original texture. Once we determined that the best way to get rid of the smell was to skim coat the walls, I was glad to be able to replace the walnut walls with a smoother finish. 

Remember when I mentioned the phenomenon of "well, if we're going to do that, we might as well do this?" Well, I did it again. Since we knew the walls and ceilings were about to earn a beautiful new coating of texture and new paint, it was the perfect time to tear them open. Enter: electrical.

Here's my brief old house electrical 101: Knob and tube wiring is a pretty interesting technology made up of ceramic pieces that route the electrical wire through the walls. However, this type of wiring isn't grounded, and often can't handle modern appliances and electrical needs. This, plus the potential of a fire hazard makes this a feared technology - so much so that many home insurance companies will charge more if your house has even a little bit of this outdated wiring system. Old houses get a pretty bad rap for their old wiring, but many operate with knob and tube just fine. Our house was 90% K&T, with the other 10% being really poorly spliced additions that were more dangerous than the original electrical. The shoddy modifications and the lack of sufficient outlets led us to redo all of the electrical. 

Running new electrical through existing walls is some sort of magic trick that electricians humbly do for you. Through their sorcery, they manage to run new wires throughout the entire house and only leave a few holes behind.

Because I'm (sometimes) an old house purist, I knew that if we had to cover up the original plaster, I wanted to be sure that it was recoated with old fashioned plaster. That is until I got bids that cost as much as a Toyota Corolla. So, I changed my tune and decided that a thin coating of drywall mud would suffice.

I called a few old house neighbors to ask them for referrals to retexture all of the walls. A block away lived an older gal named Holly who when asked for a referral replied, "Are you home now? I'll be right over." No more than 12 minutes later Holly was waltzing through my front door with a paper bag full of her preferred drywall tools: a trowel, a taping knife, a mud pan, joint tape, a multipurpose tool, and joint compound. (I'd also recommend a hawk, but it bothers her wrist). Without hesitation, she took the pointy end of her multipurpose tool and carved a gash in the living room wall along the seam of the major crack. She narrated her process of cutting a v-shaped crevice in the line of the crack which would provide more surface area for the new compound to adhere to. She then filled in the crack with joint compound, layered it with joint tape, then smoothed it over with more joint compound.

With the gash in my wall and the tutorial from a woman that restored her house with her own hands, I was inspired and confident that I could retexture the walls on my own. So, I started scraping anything that was lose, and began carving into the cracks.

That multitool (seen above) was a dream. It was able to dislodge any loose pieces and I could carve into the plaster easily. The scraping process was cathartic and I even managed to get a few family members to scrape the walls with me. Thanks, guys! With Holly's confidence in me and that tool, we scraped, and scraped, and scraped until the walls looked like this.

I'd say it's finished - if I were going for a medieval French chateau look.

The process of scraping one whole room was very time-consuming, and my hands were beaten up after scraping against the sandpaper walls. (I know, gloves. Live and learn!) I was losing patience with the scraping and decided to tackle the retexturing process. Since I was just starting out, I kicked off my hours of retexturing in the closet where I could experiment with different techniques without care of how my clothes would judge my inevitable mistakes.

The process is quite simple once you get the hang of the wrist movements. I used Holly's recommended mud pan and a small putty knife to fill the big holes and cracks, then layered them with fiberglass mesh tape to add strength that would prevent cracking again. Once everything was patched, I used a trowel to scrape the walls so I could knock down any high peaks in the texture. Then, I used the joint compound mixed with a touch of water to coat a layer over all surfaces. The idea was to use enough mud to fill in all of the valleys in the texture to bring the recessed portions to the height of the peaks but not so much that you're caking everything with an inch of drywall. I worked in the closets late at night so I lost track of time and the ability to judge the quality of my work, but I'd say it turned out pretty nicely - for a closet.

I really enjoyed working with the drywall mud but I was losing energy. I was retexturing walls while also doing lots of other projects on the must do before move-in list and I wasn't moving as quickly as I hoped. The wall texturing was necessary to complete before the floor refinishing, so I was risking slowing down the progress of the rest of the renovations. So, we hired it out, and I'm so glad we did. It was completed perfectly by the pros, freed up my time to work on other projects, and ensured that all wall surfaces were completely covered up and free of smells.

The crew skim coated everything in a very light skip trowel texture to make the walls almost completely smooth. The ceilings had their fair share of cracks, and due to the horizontal nature of ceilings, they tend to crack perpetually. To prevent this, the ceilings earned fresh pieces of drywall that won't crack or peel.

dining-retexture.jpg

Once the crew was done, the walls needed to dry out, then they got a healthy coating of primer, then paint. Picking a paint color is always tricky, and white is a particularly easy color to mess up. Take these paint samples below. They all looked white on the swatches, but when compared to each other, their undertones pop and it's easy to see which ones are too blue, pink, and brown.

After the walls got a fresh skim coat of new drywall mud, I started to fancy their new hue and found myself color matching to the drywall color. Thus, we selected the swatch on the far right, Sail Cloth by Behr. With my time freed up not doing the drywall install, I was able to paint all of the ceilings and walls before move in with the help of my mom. Thanks, mom!