Bathroom Reveal

The Gold Hive Bathroom Reveal

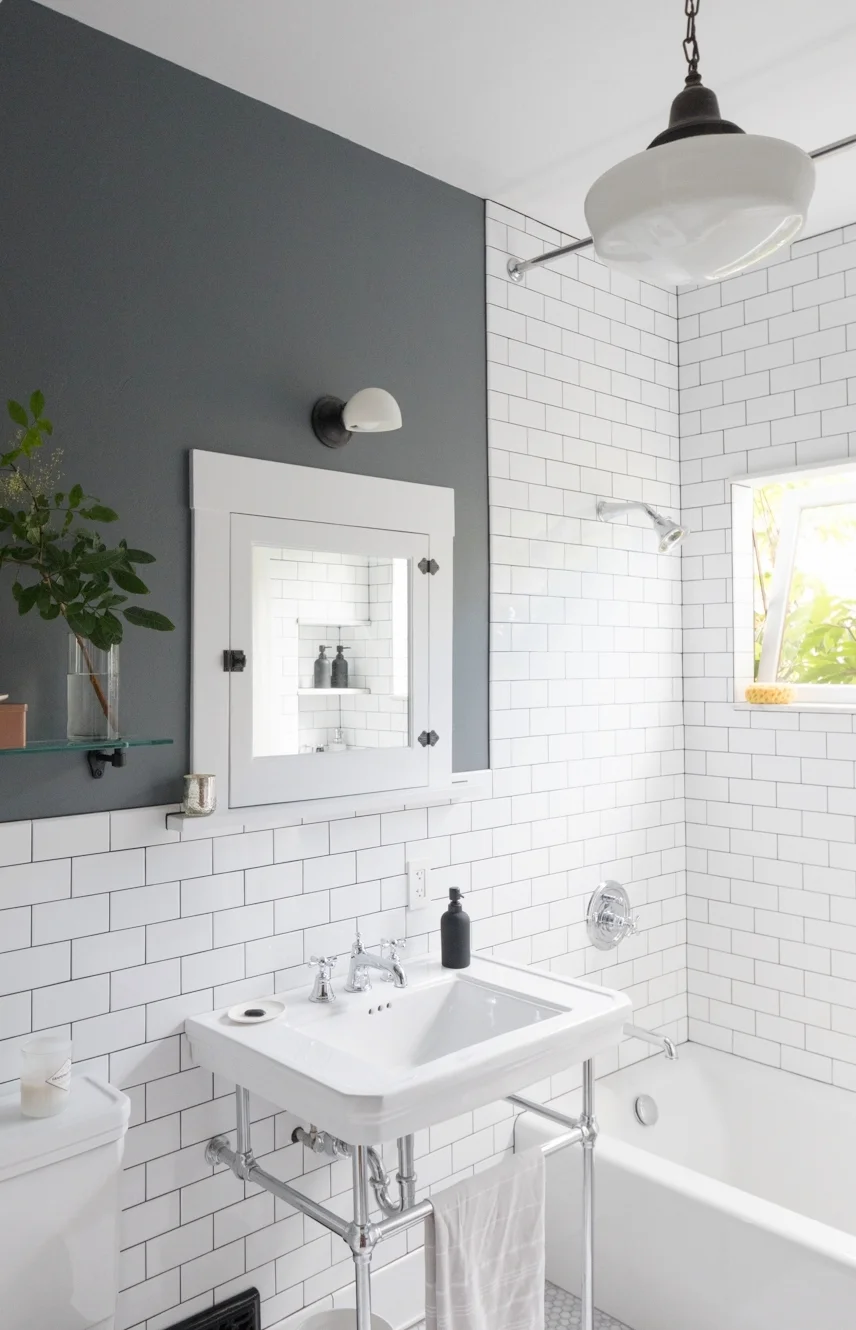
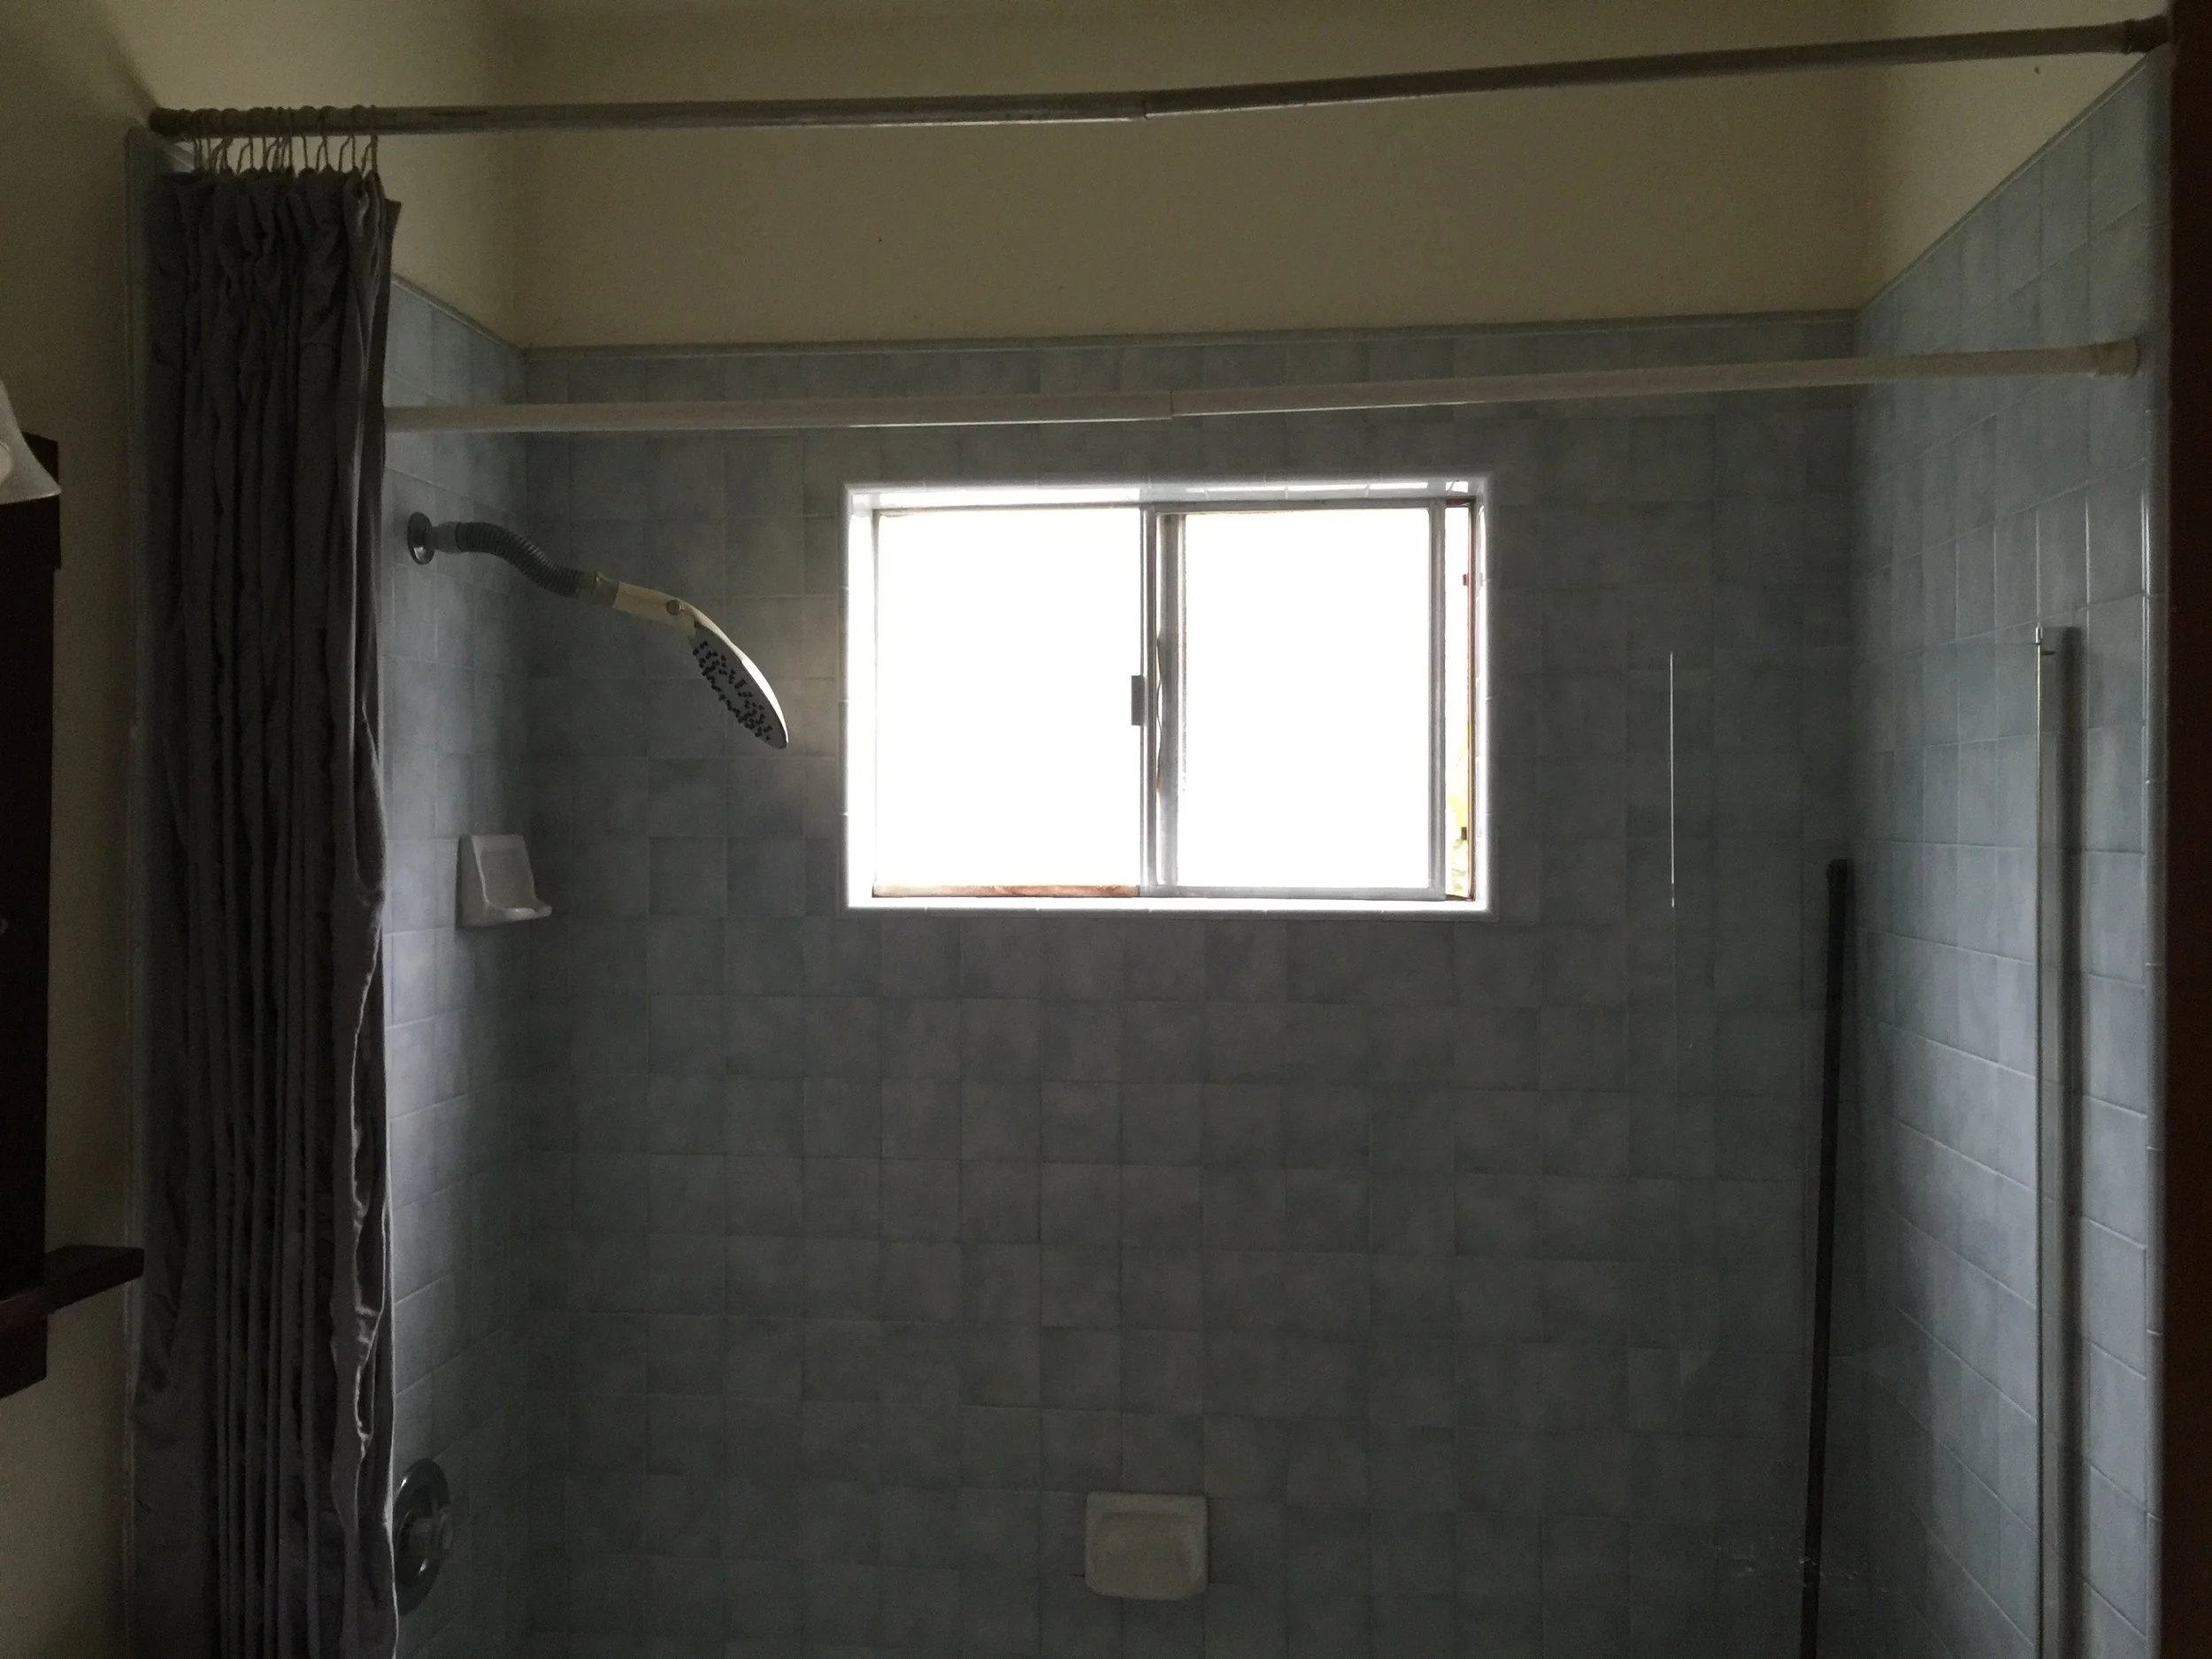
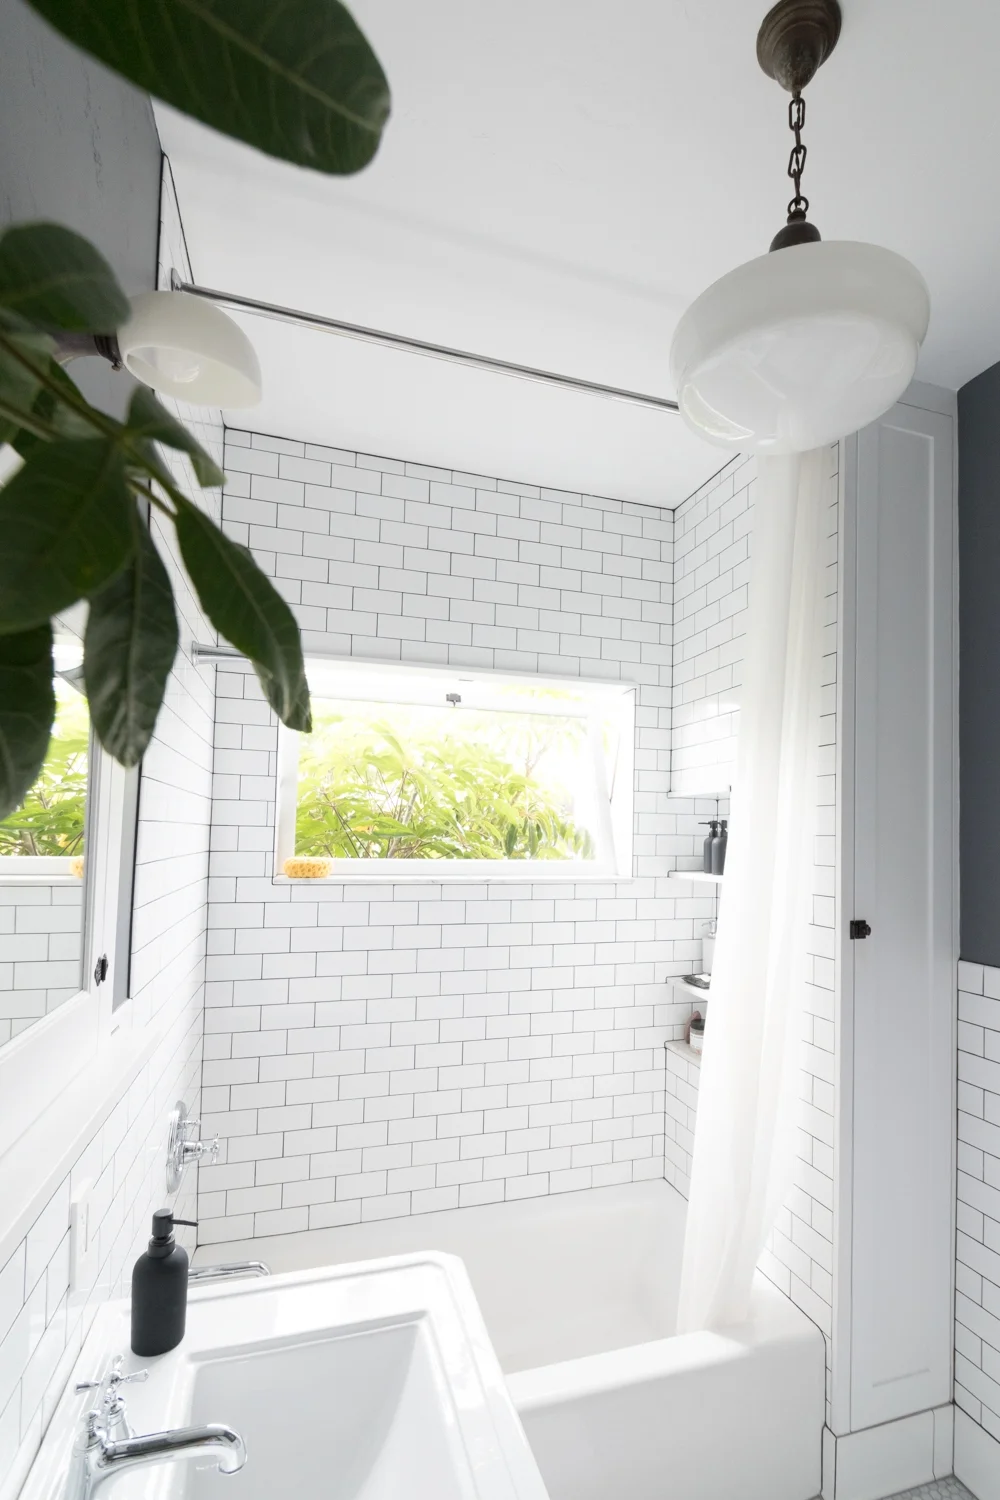
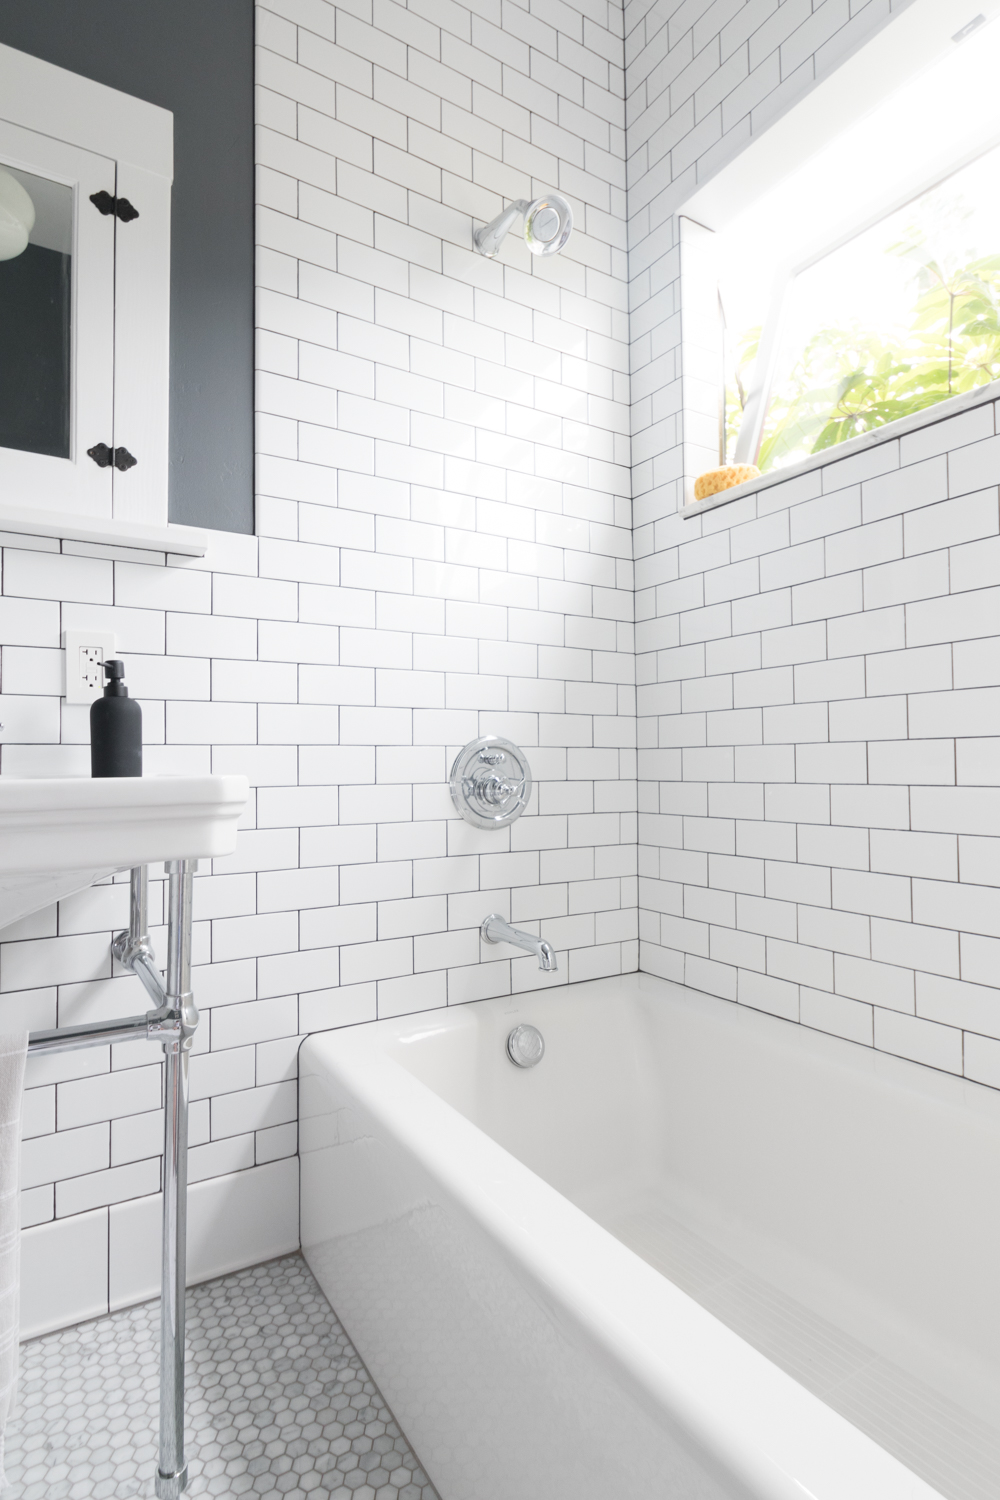
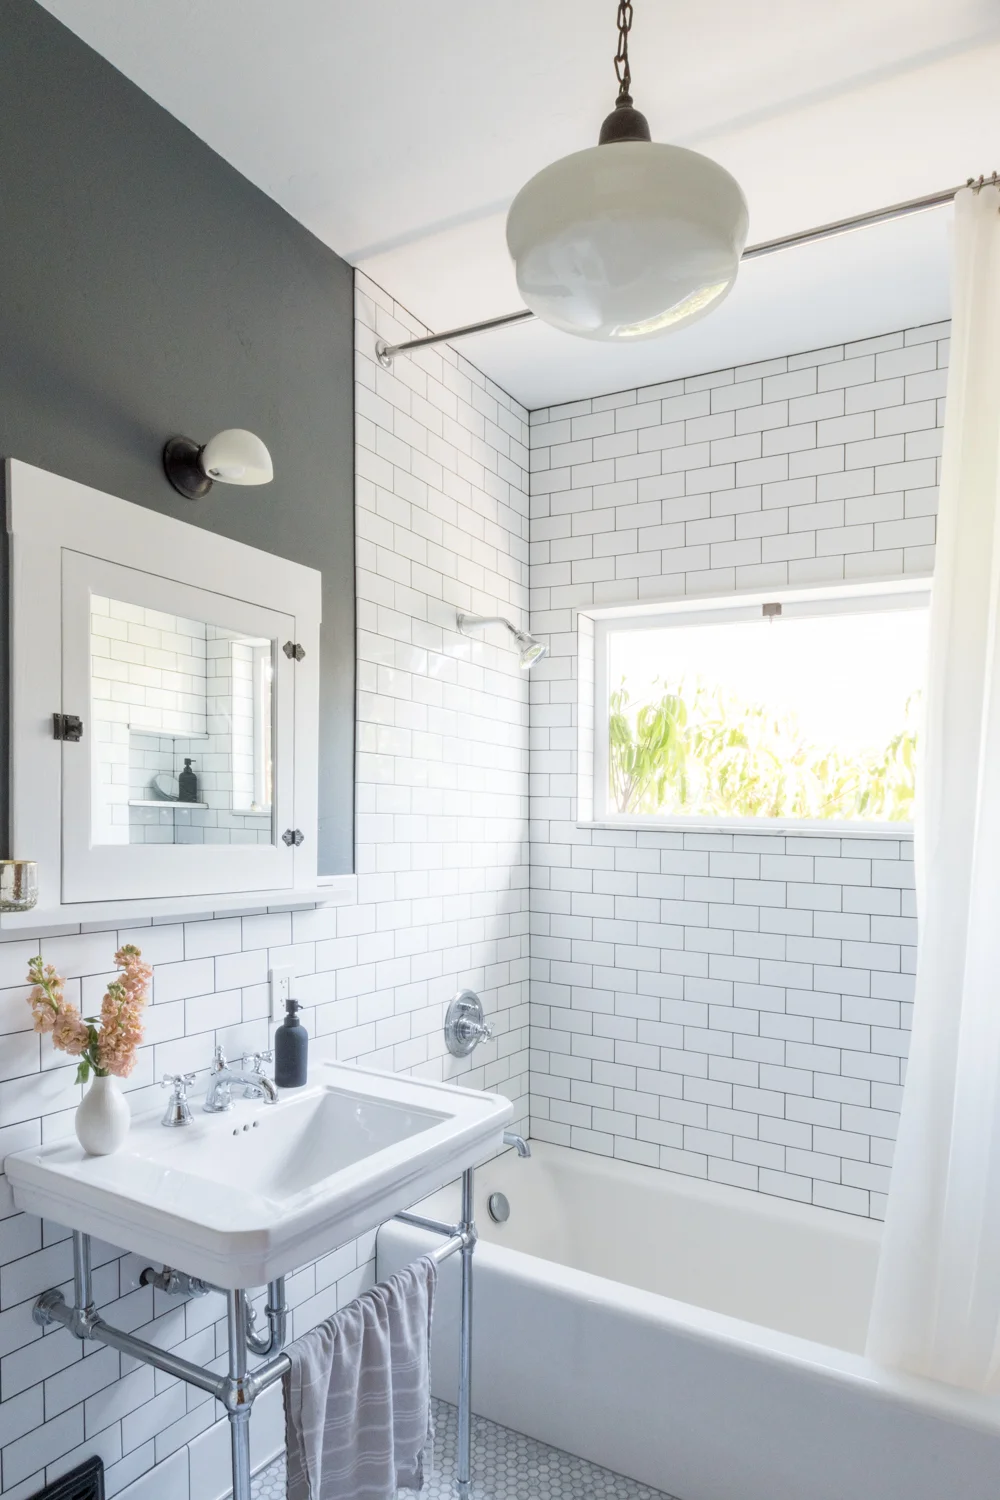
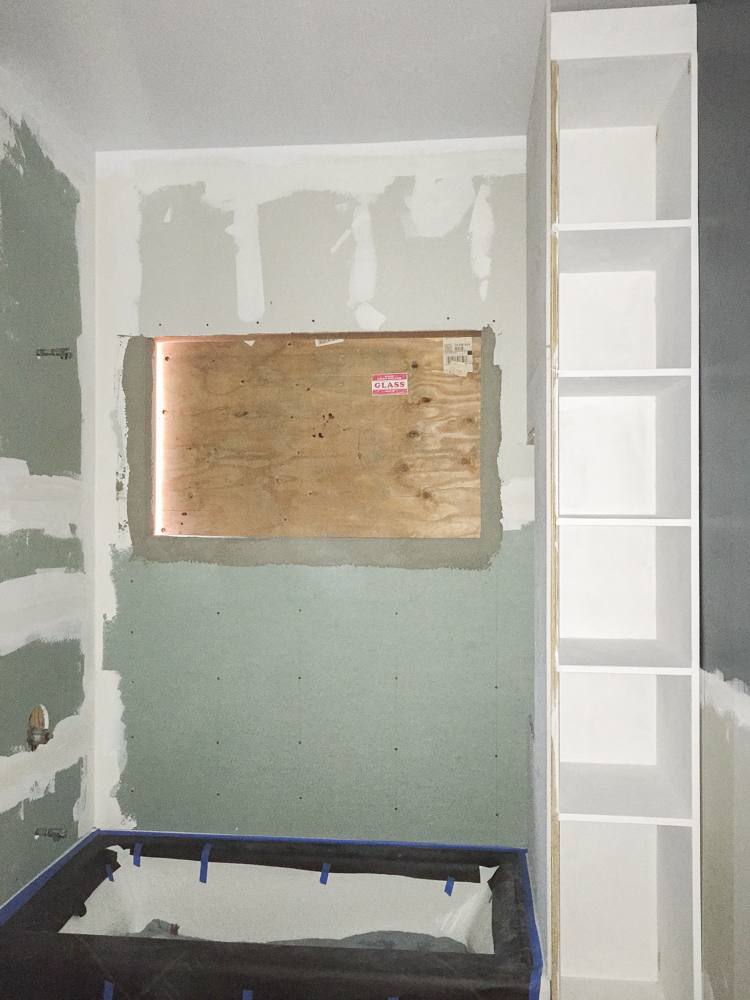
Welcome to the renovated bathroom! It was gutted and rebuilt two years ago, but it continues to evolve. Shall we take a look at what she looked like before we demolished everything?

Before Bathroom
Before Bathroom
Before Bathroom
Before Bathroom

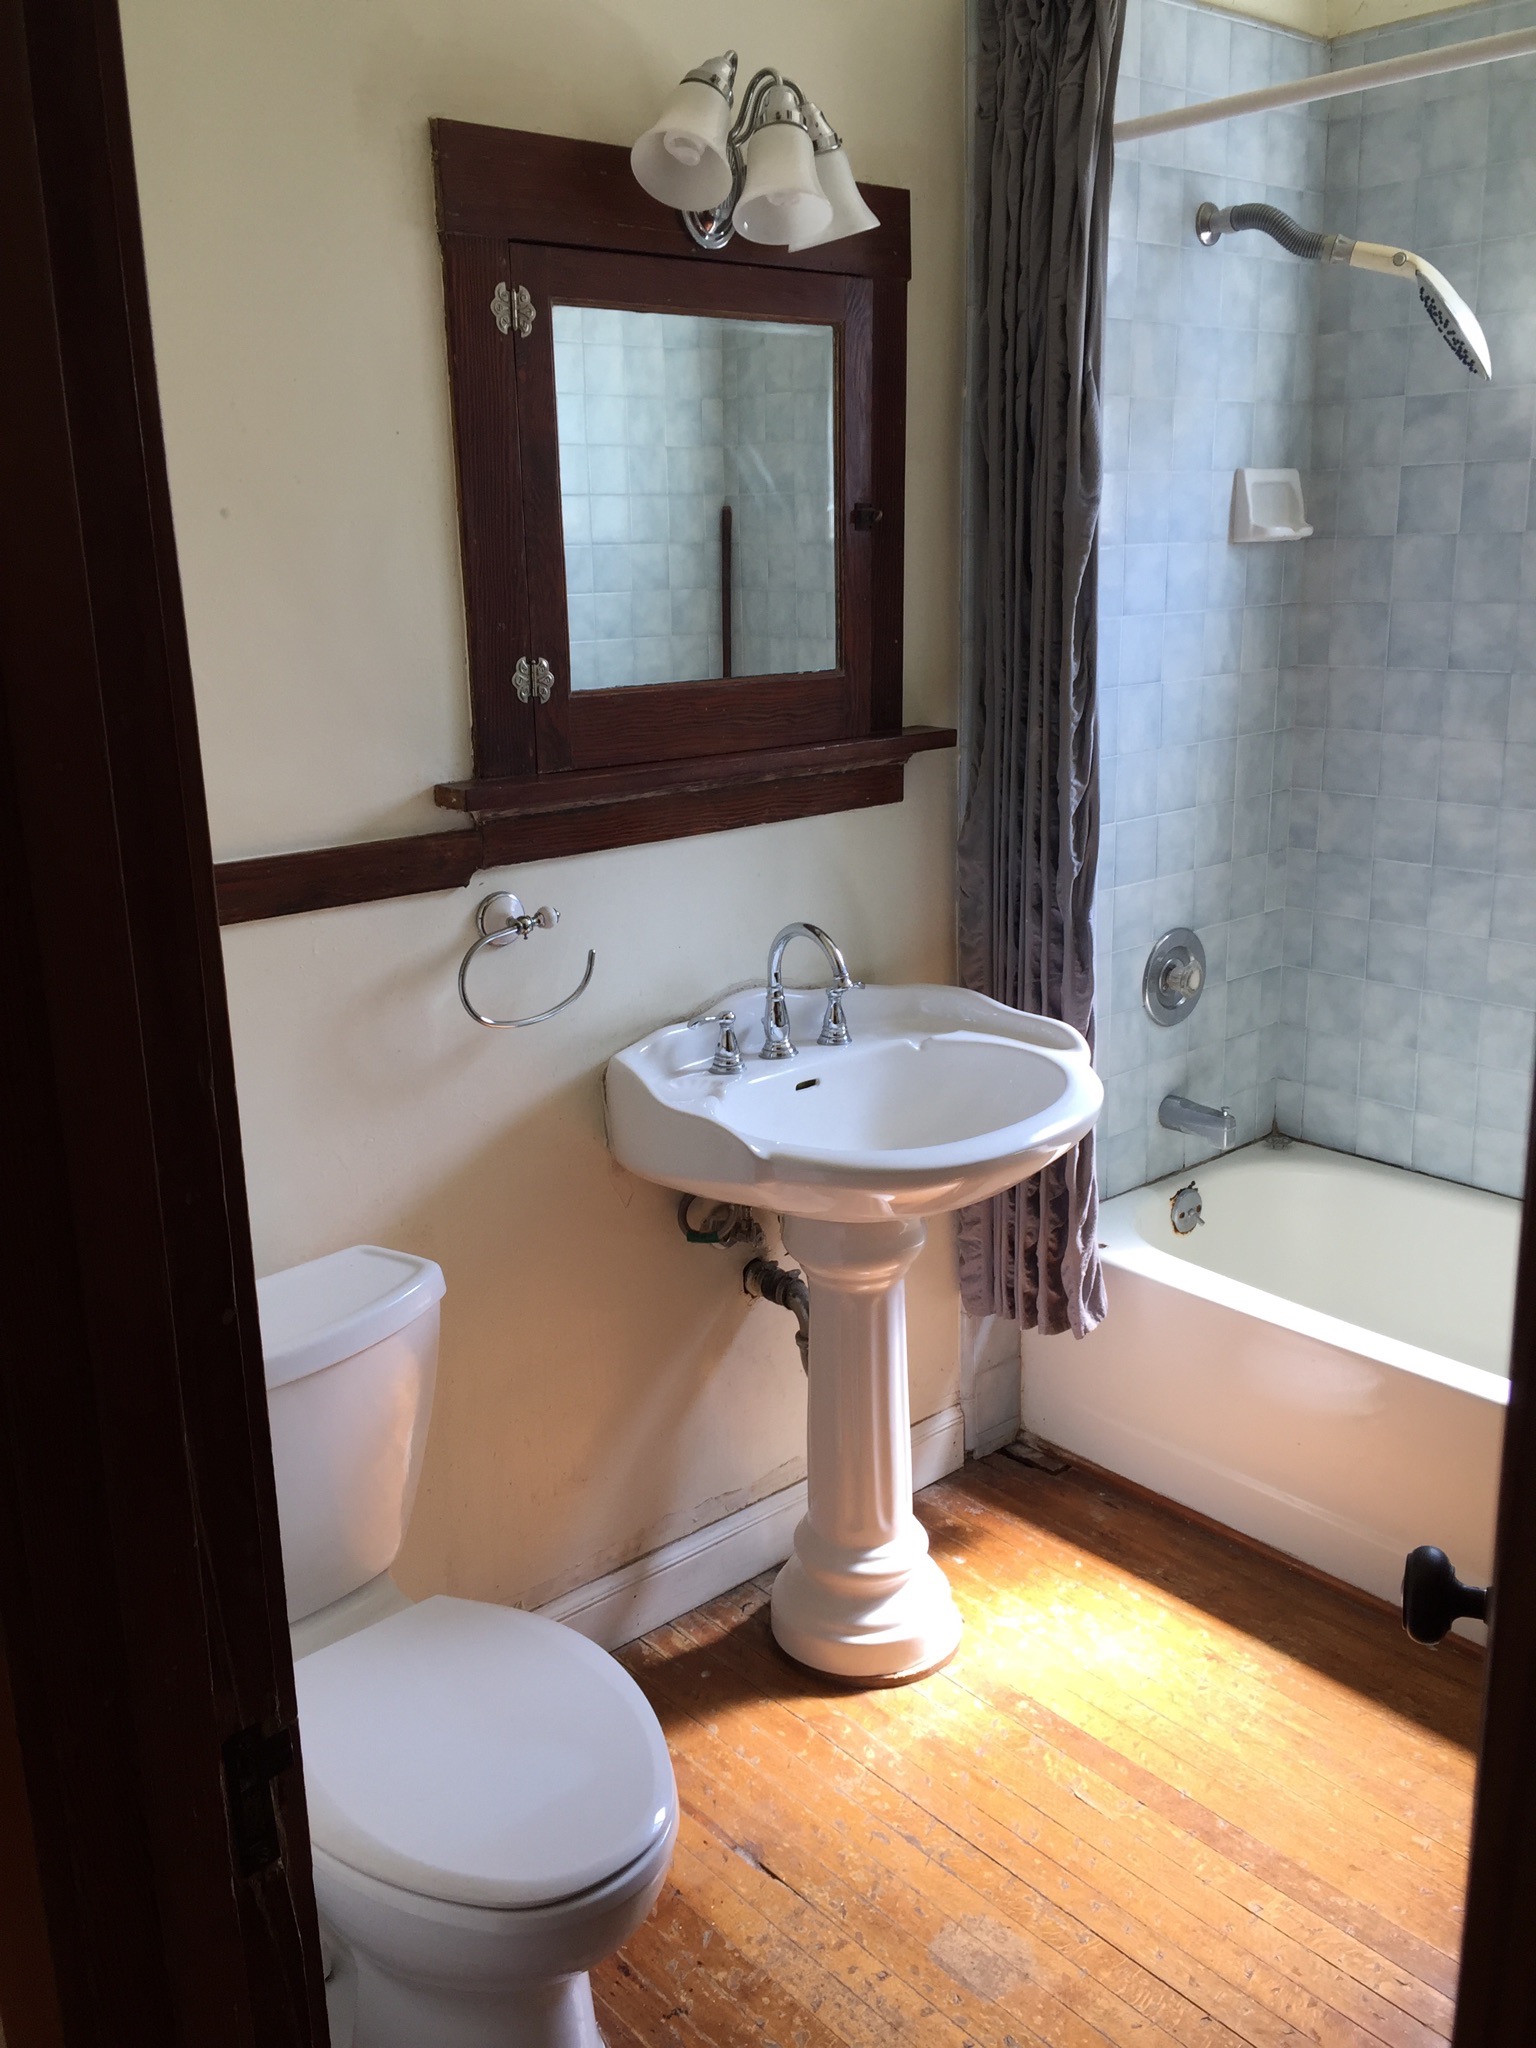
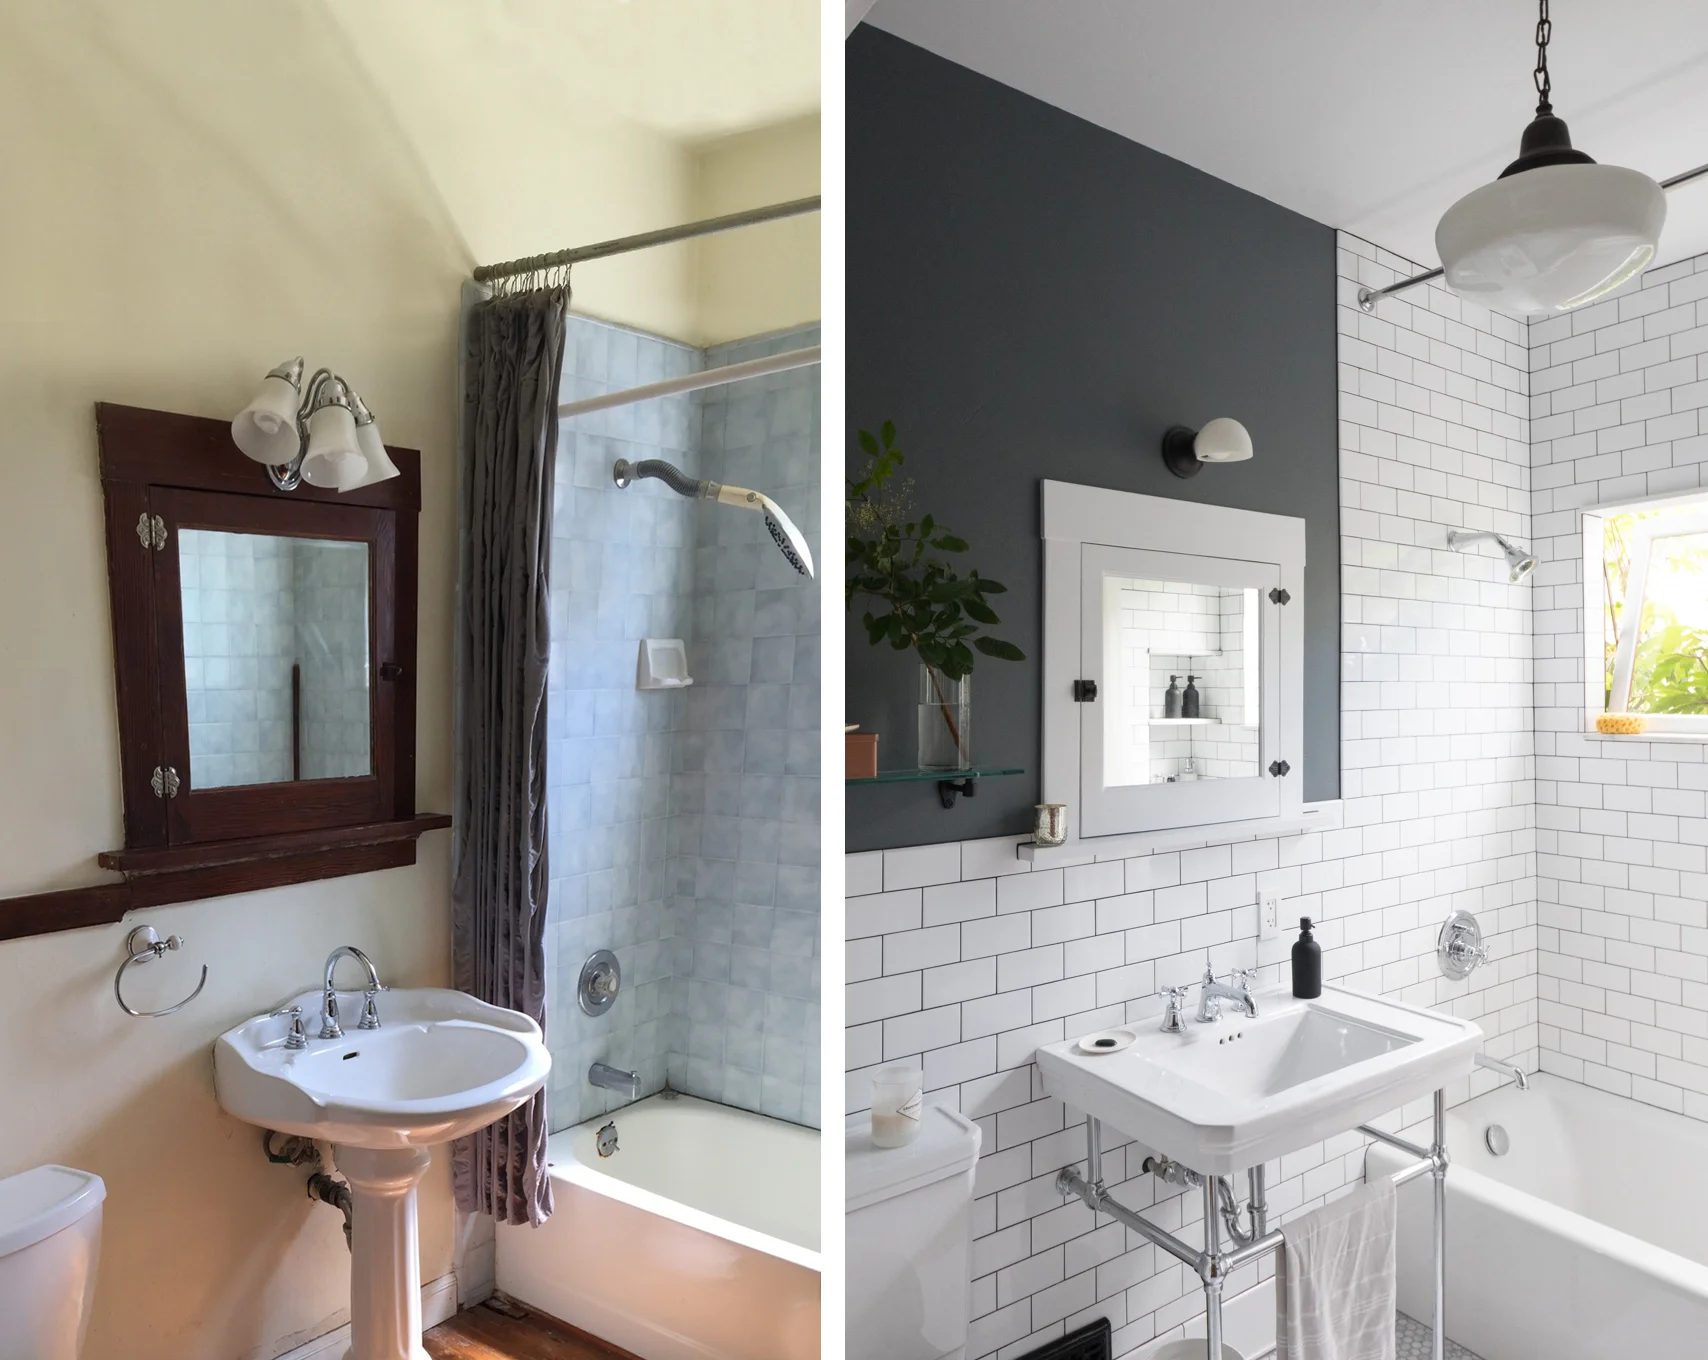
And for that satisfying side-by-side, I give you this.

before and after

This is our one and only bathroom in the house and it's been serving us so well after we did a number on it. As a refresher, here are all of the posts I've written about the bathroom so far:

  1. The inspiration

  2. The design plan and layout

  3. Gutting the whole room

  4. Installing a custom wood window in the shower

  5. Getting creative with storage

  6. Sourcing a console sink

  7. Tile layout and design

  8. Selecting artwork

2017 Sept reveal-0348.jpg

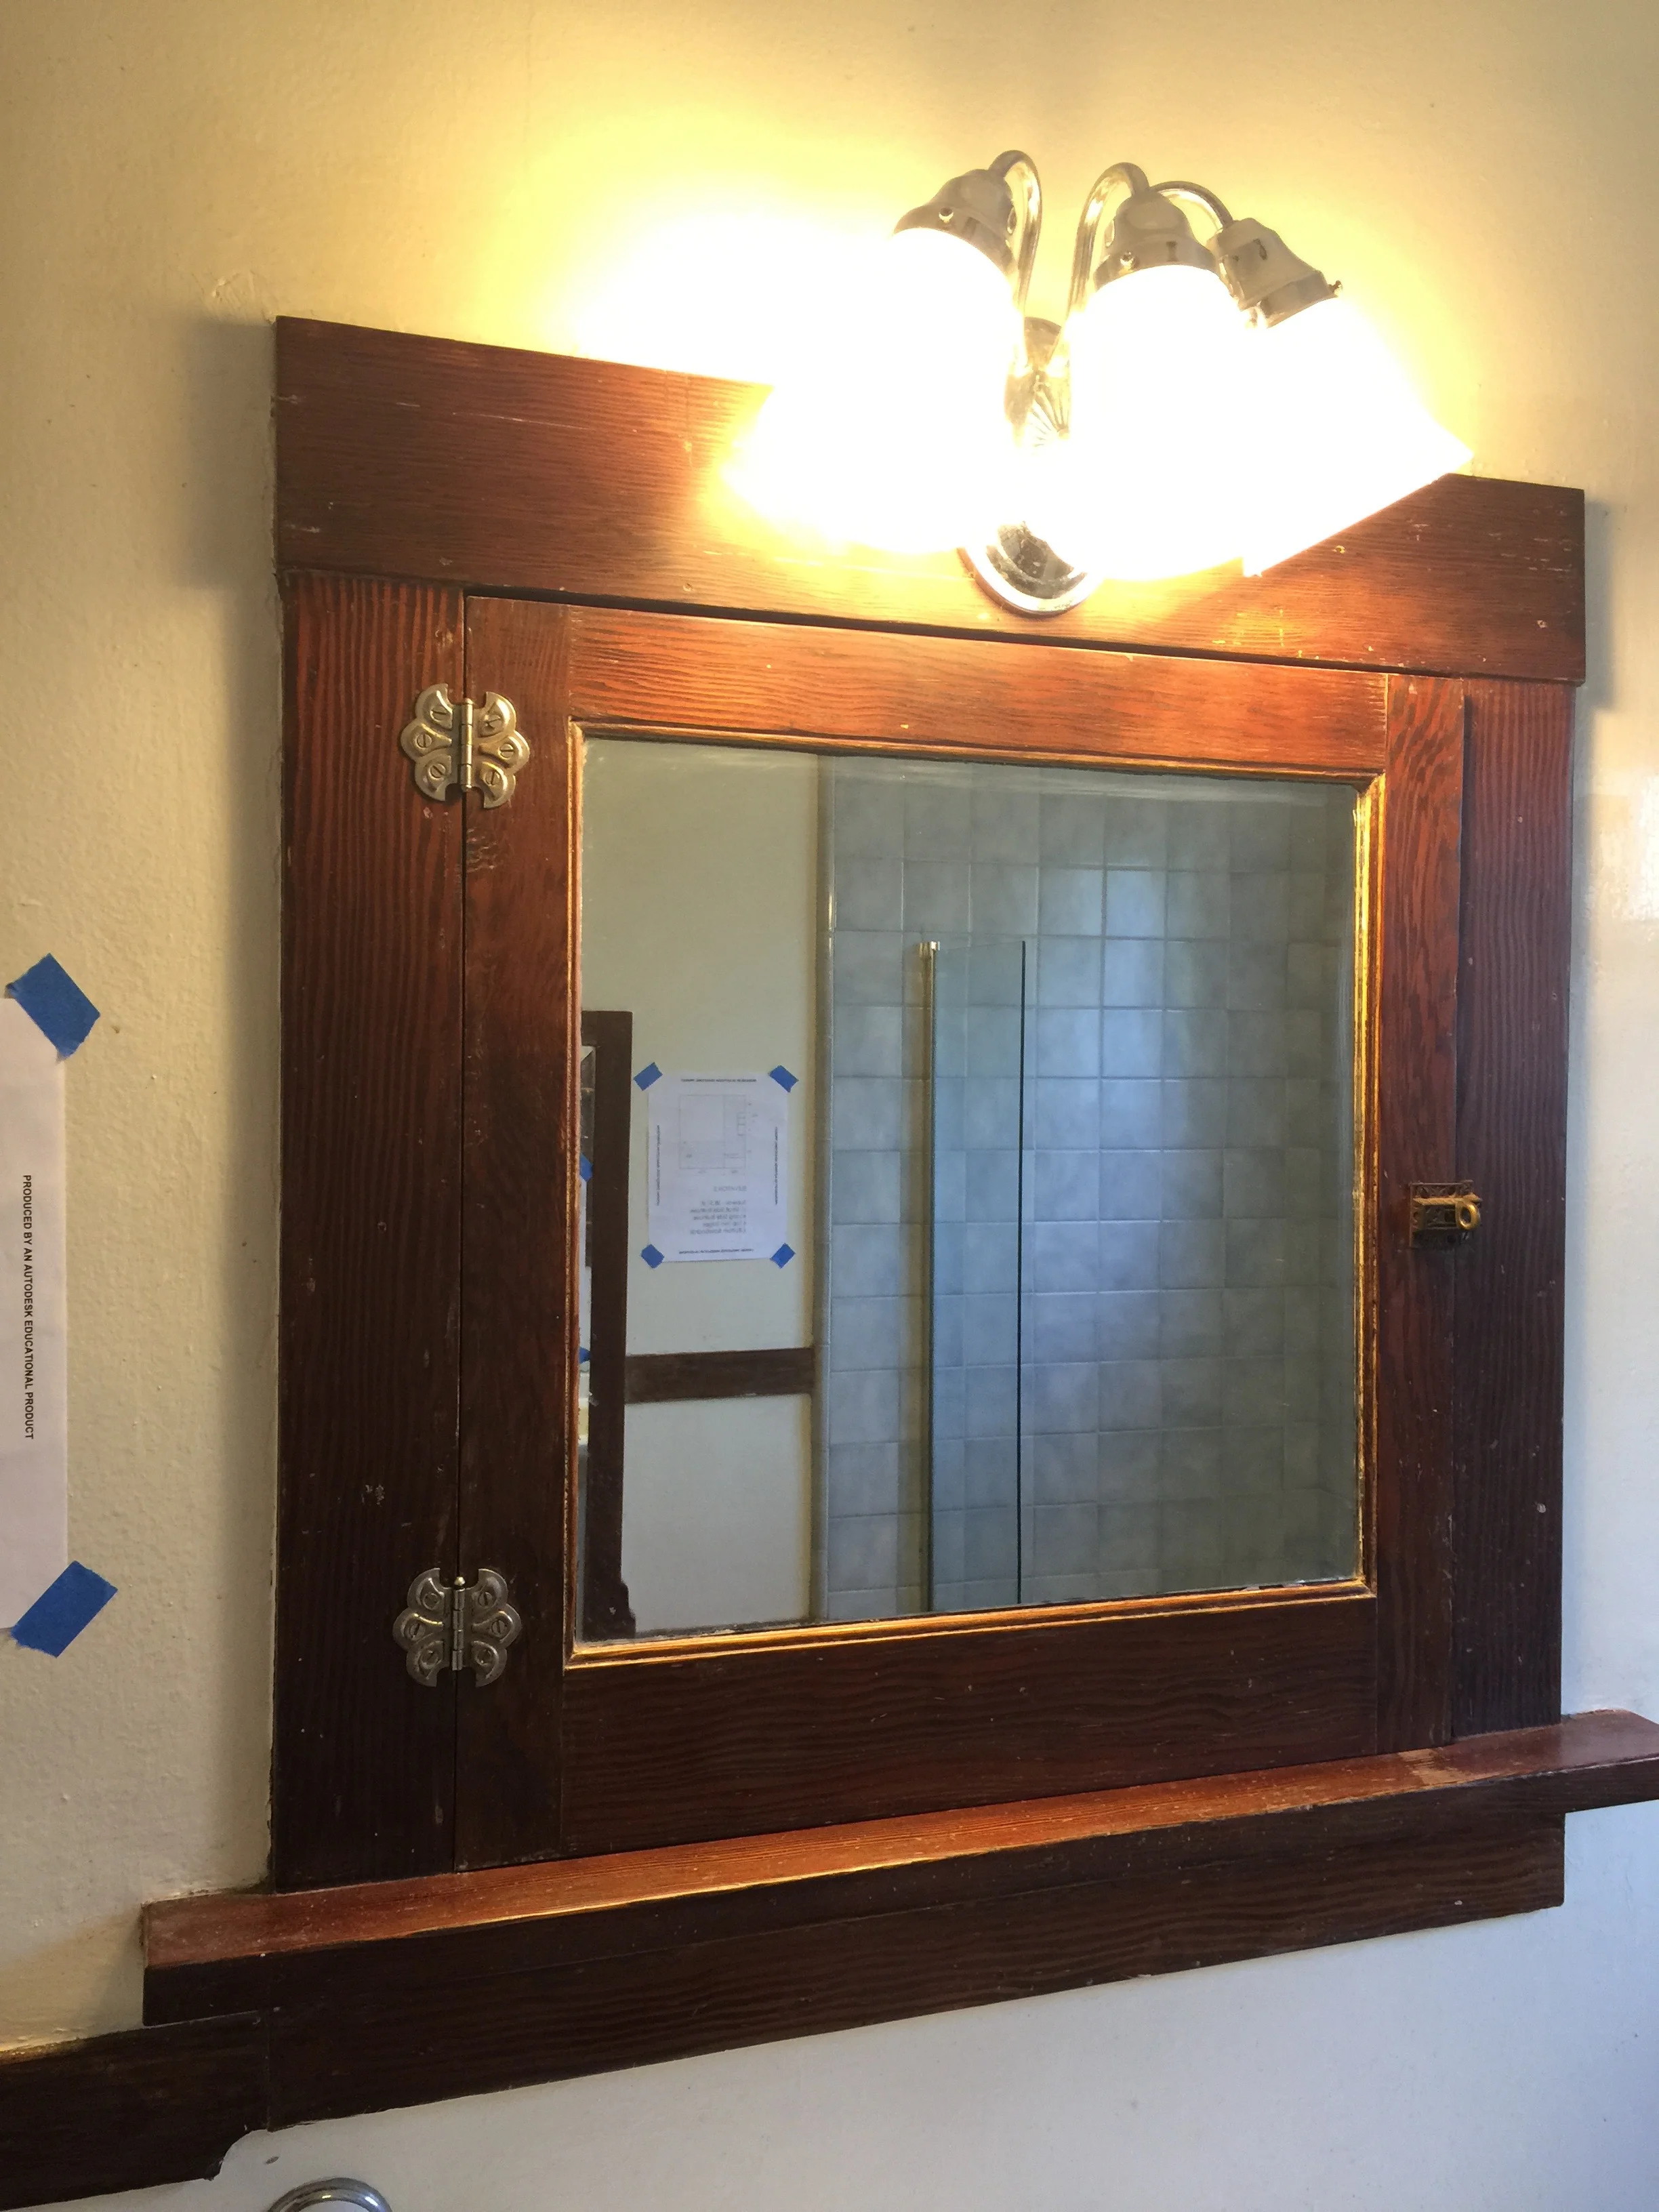
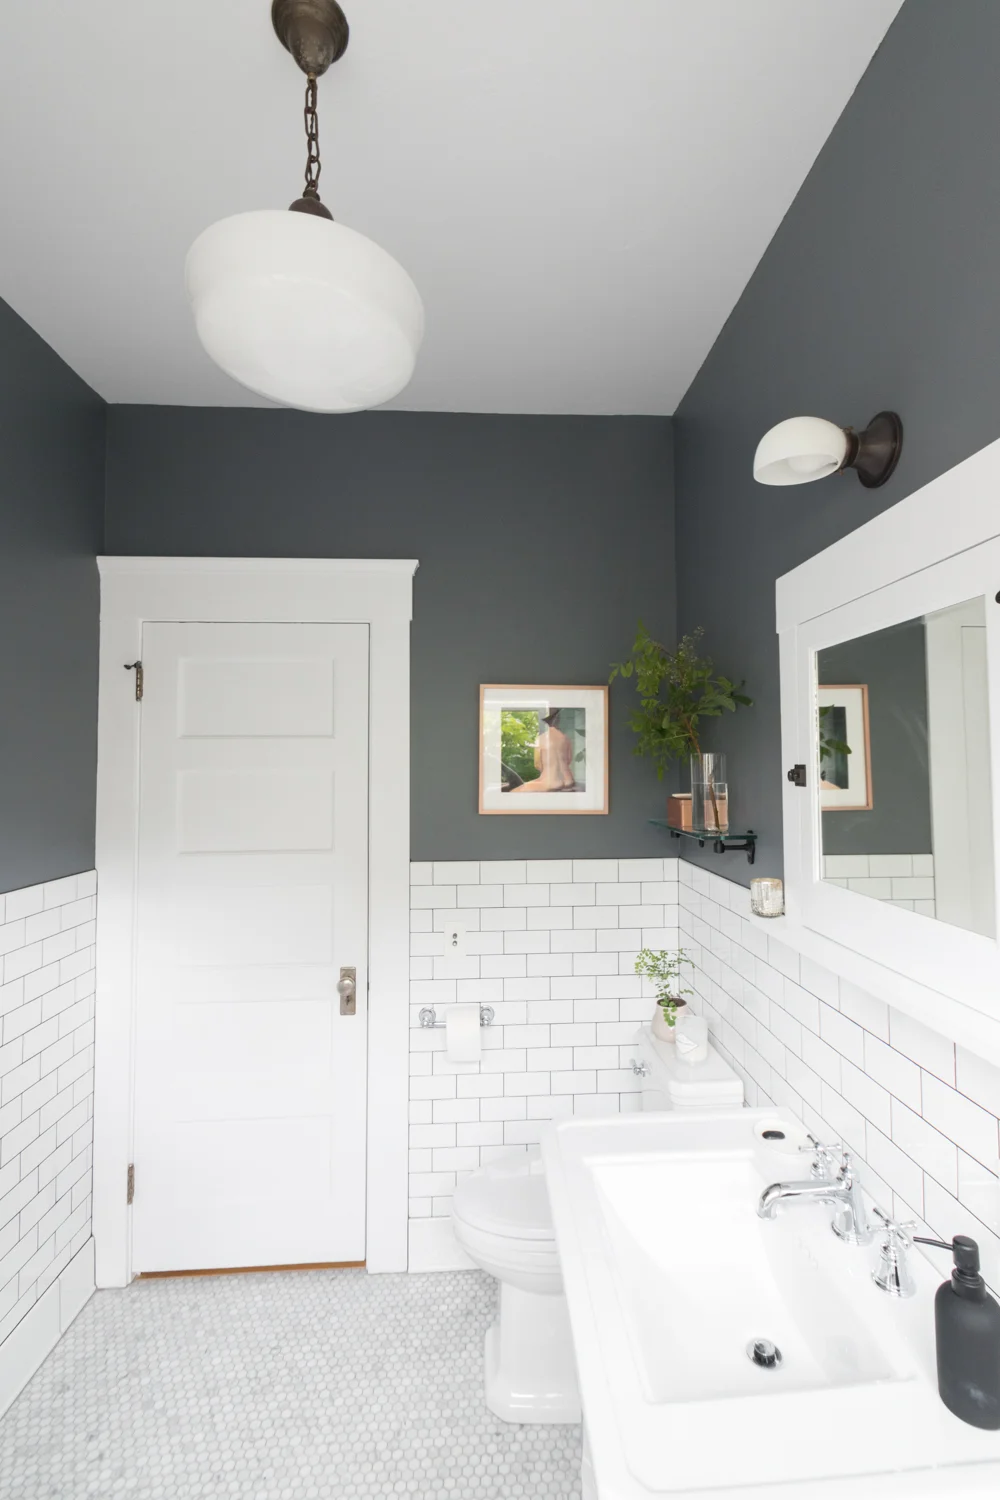
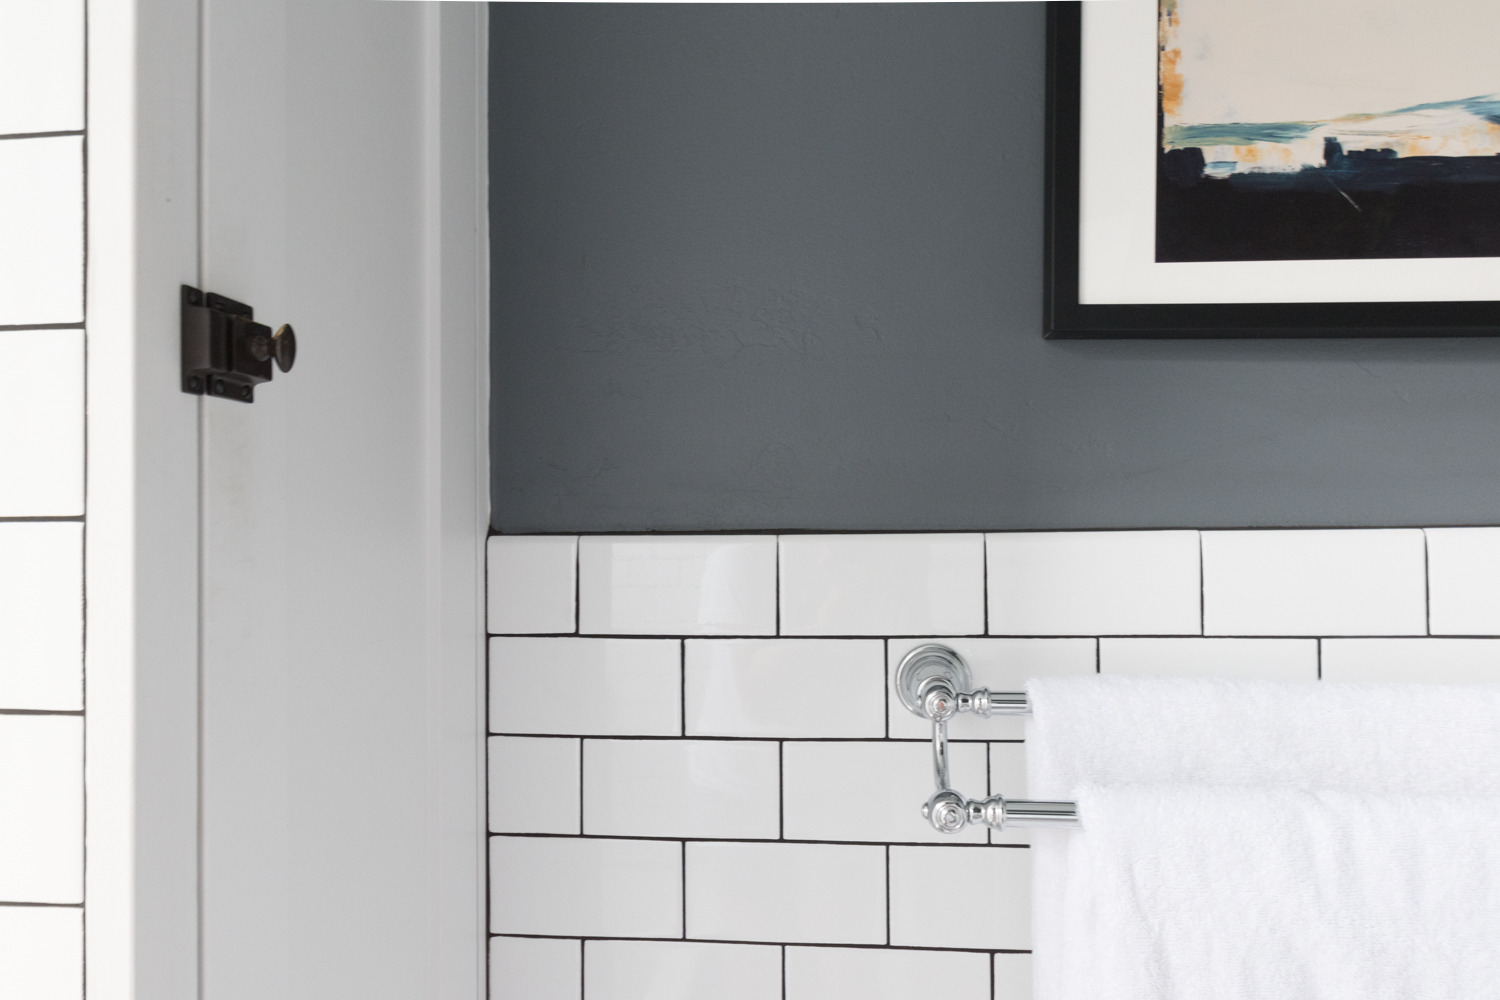
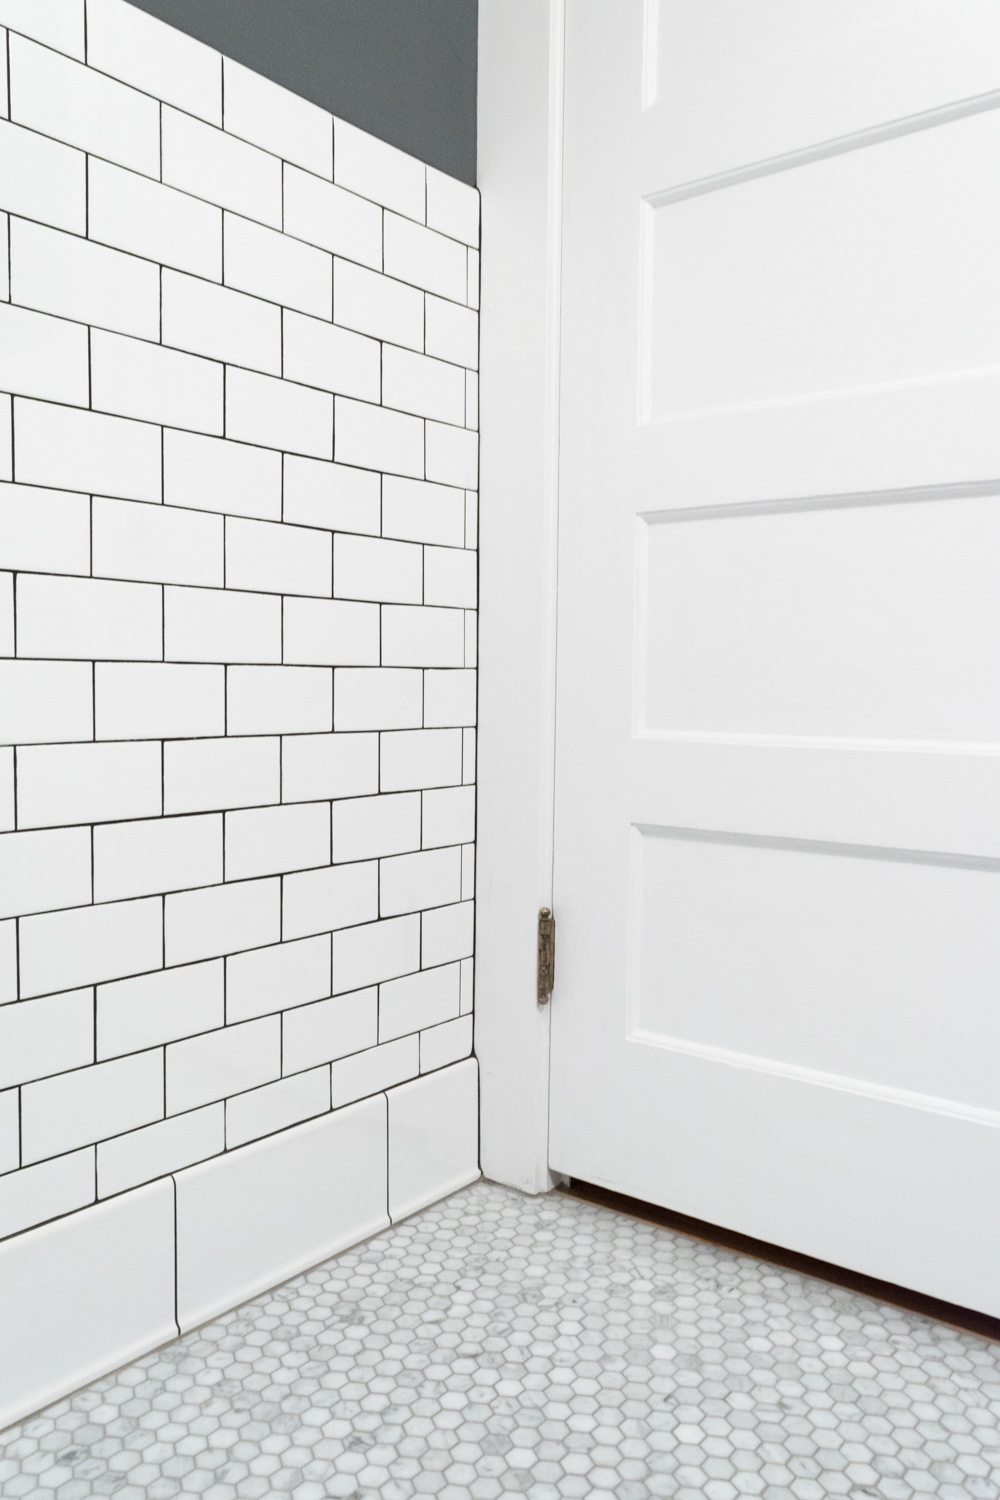
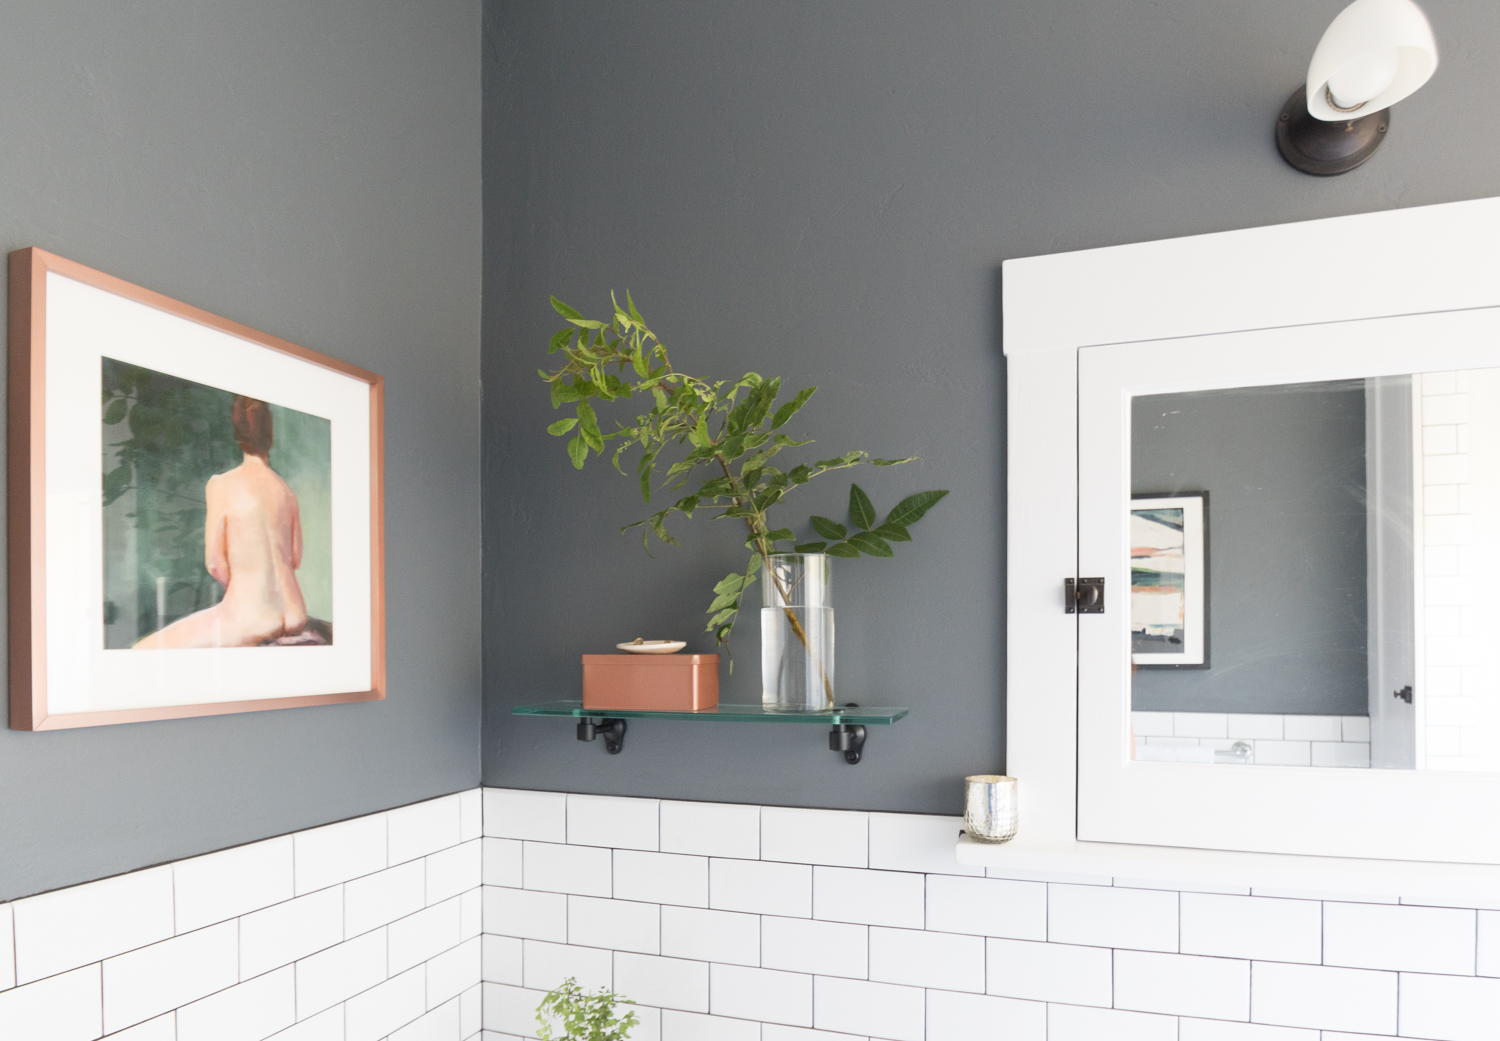
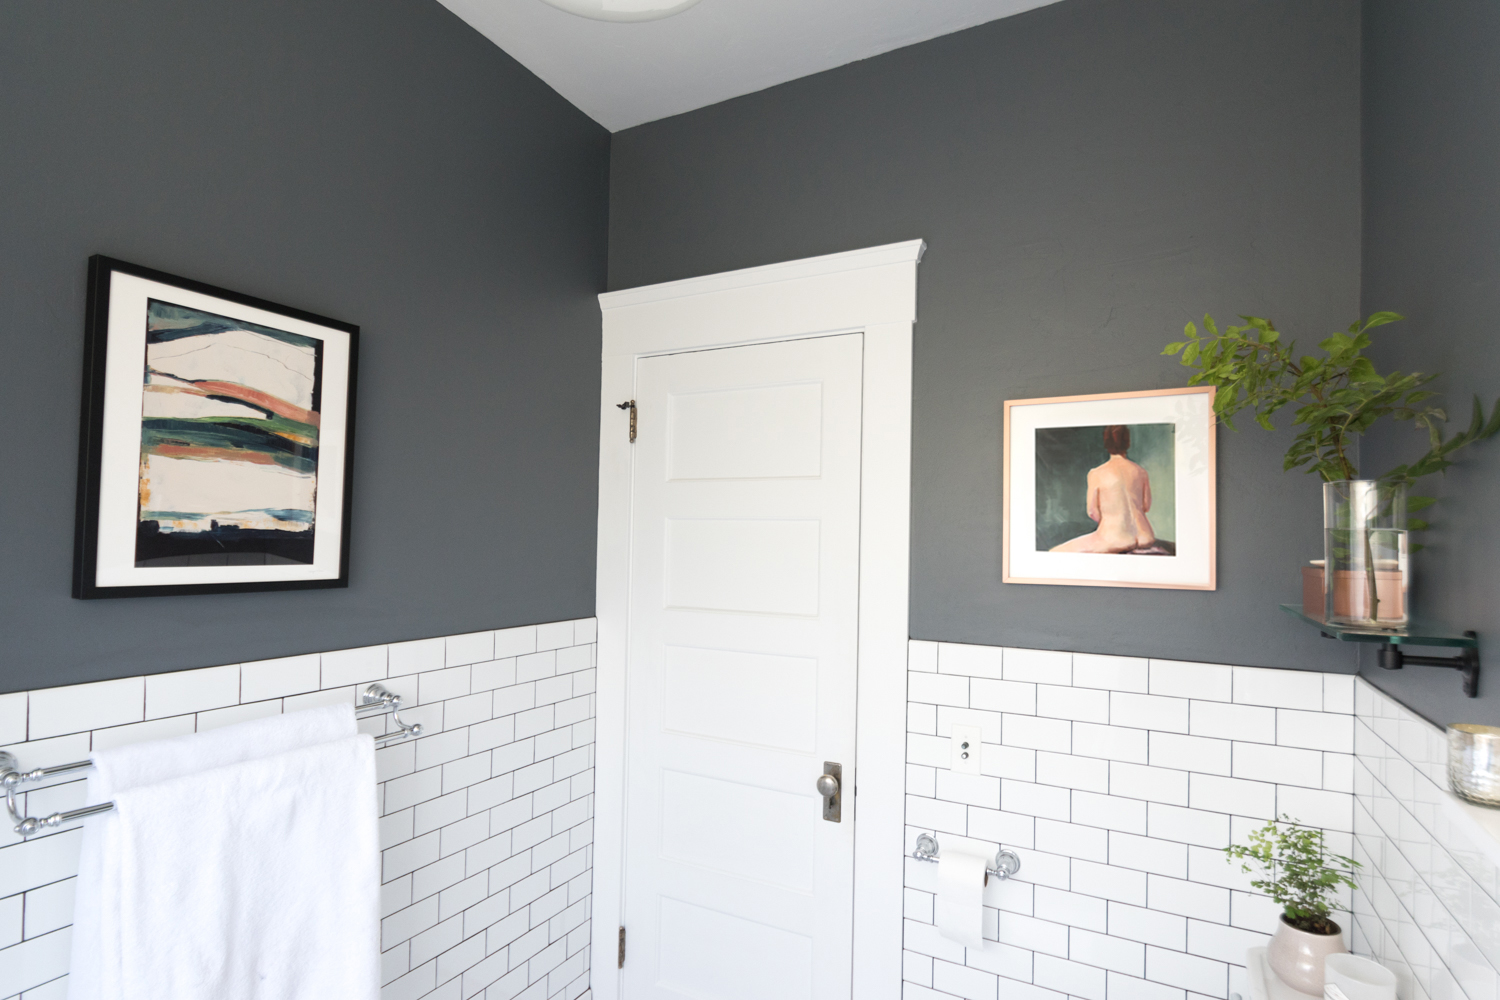
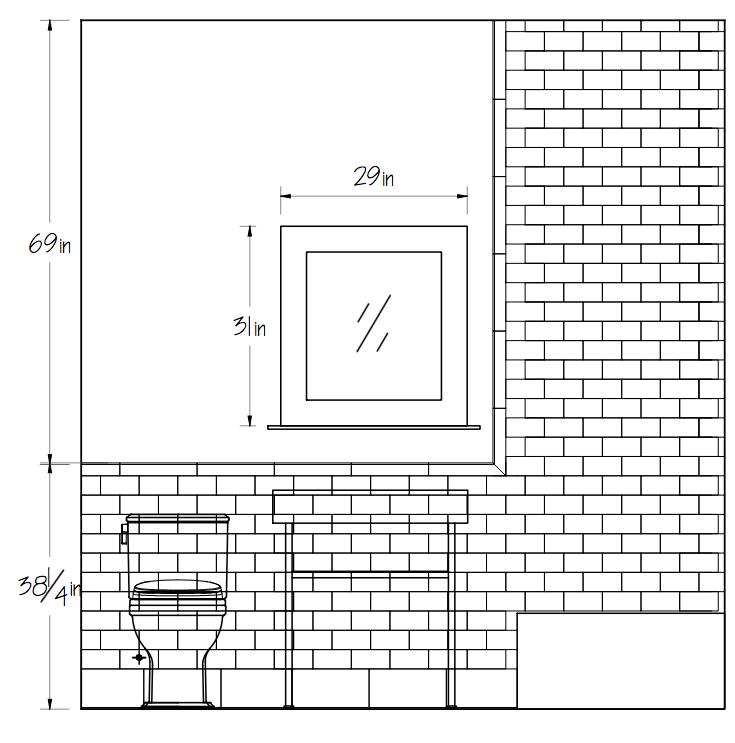
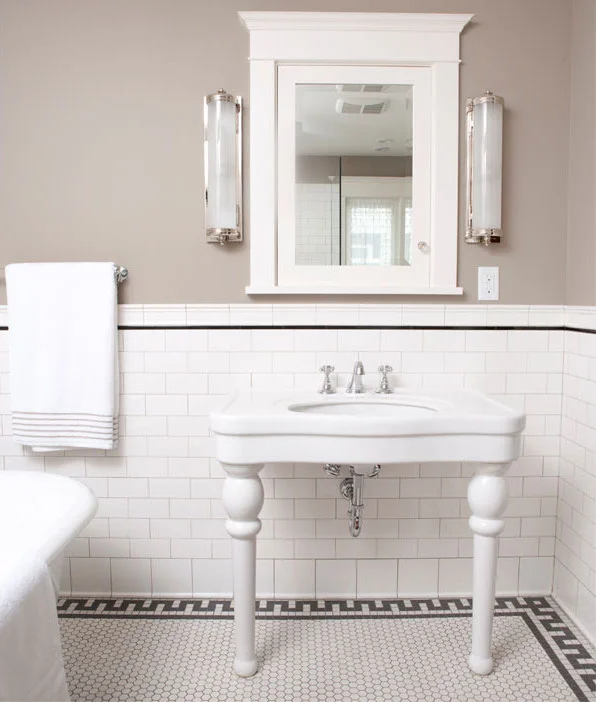
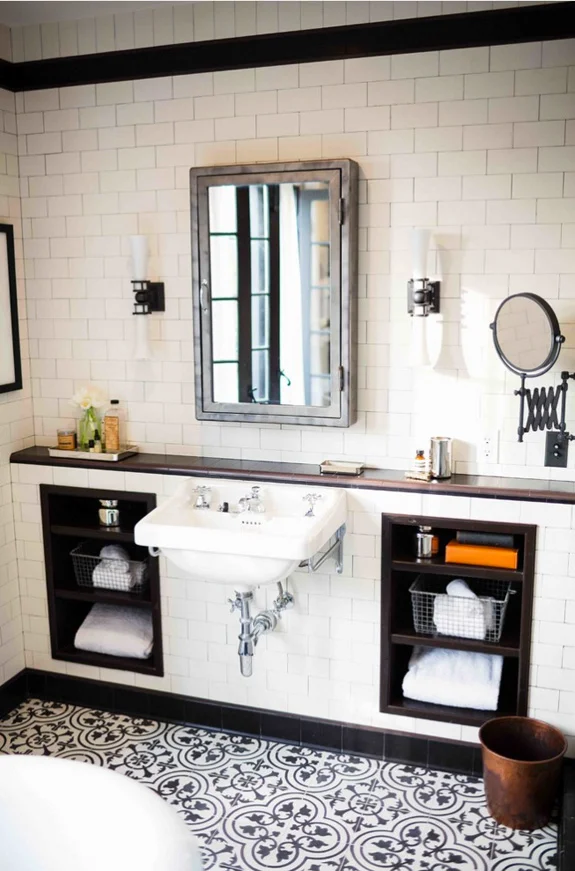
We gutted the whole room and the only elements that were worth saving were the door, and the medicine cabinet. They got a good cleaning and a fresh coat of white paint that was custom color matched to the white tiles.

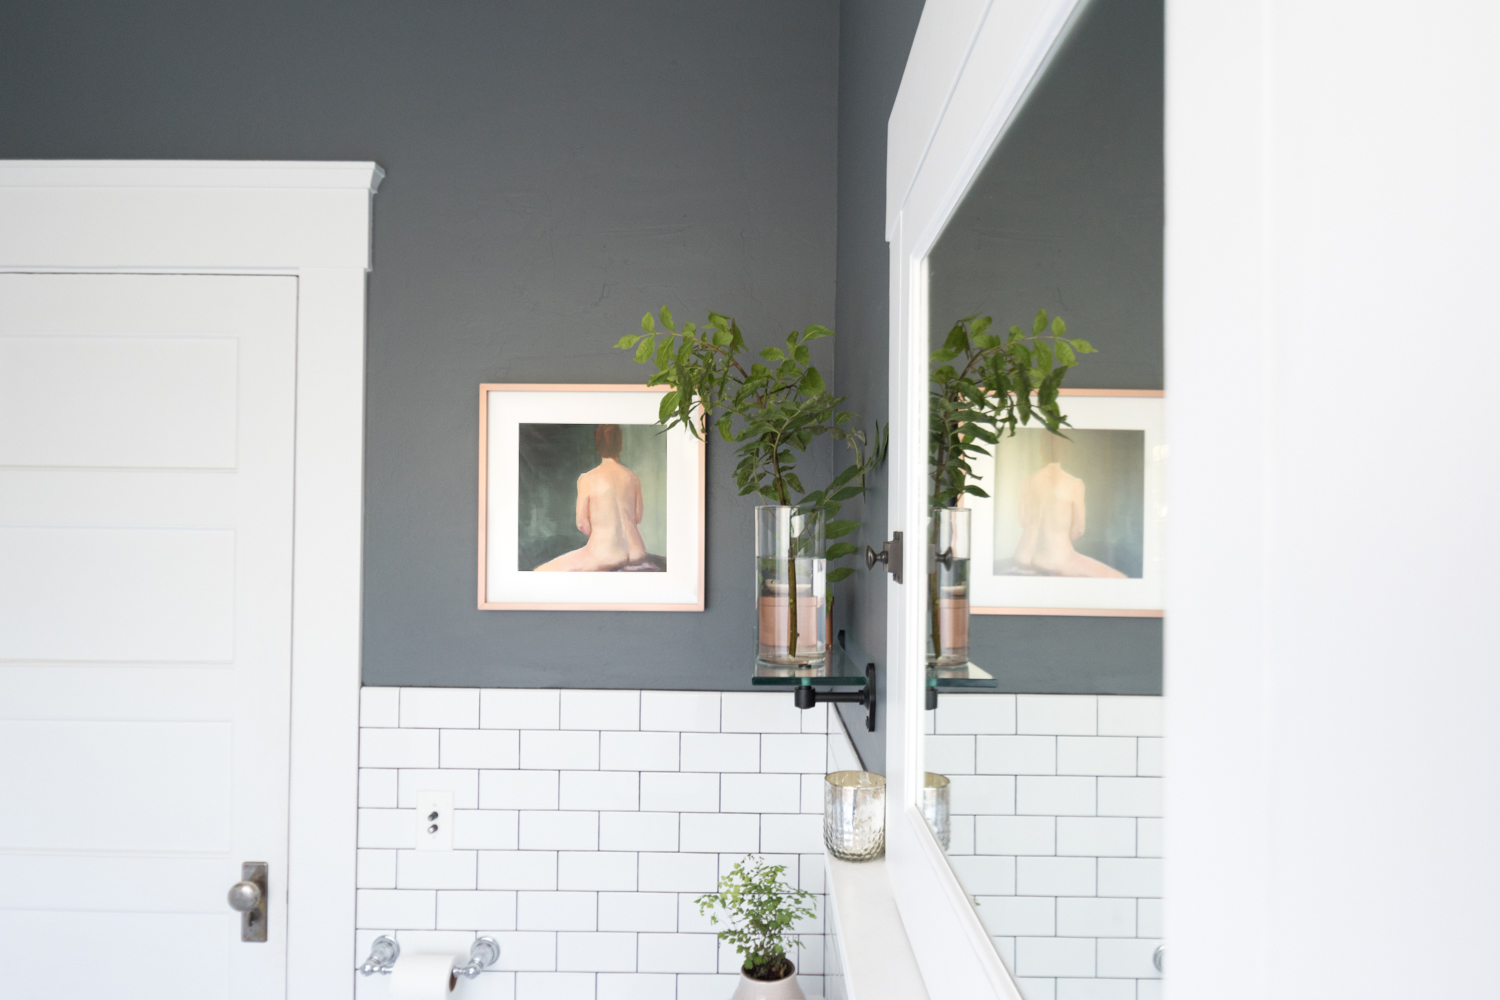
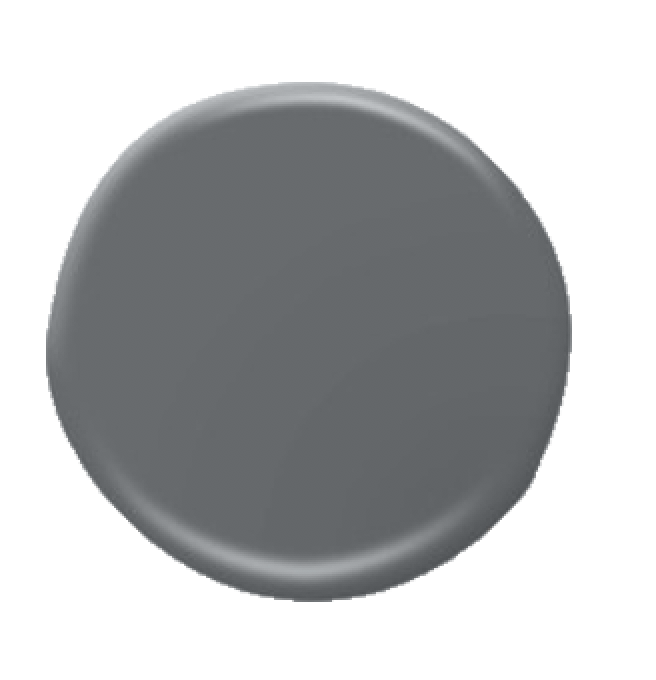
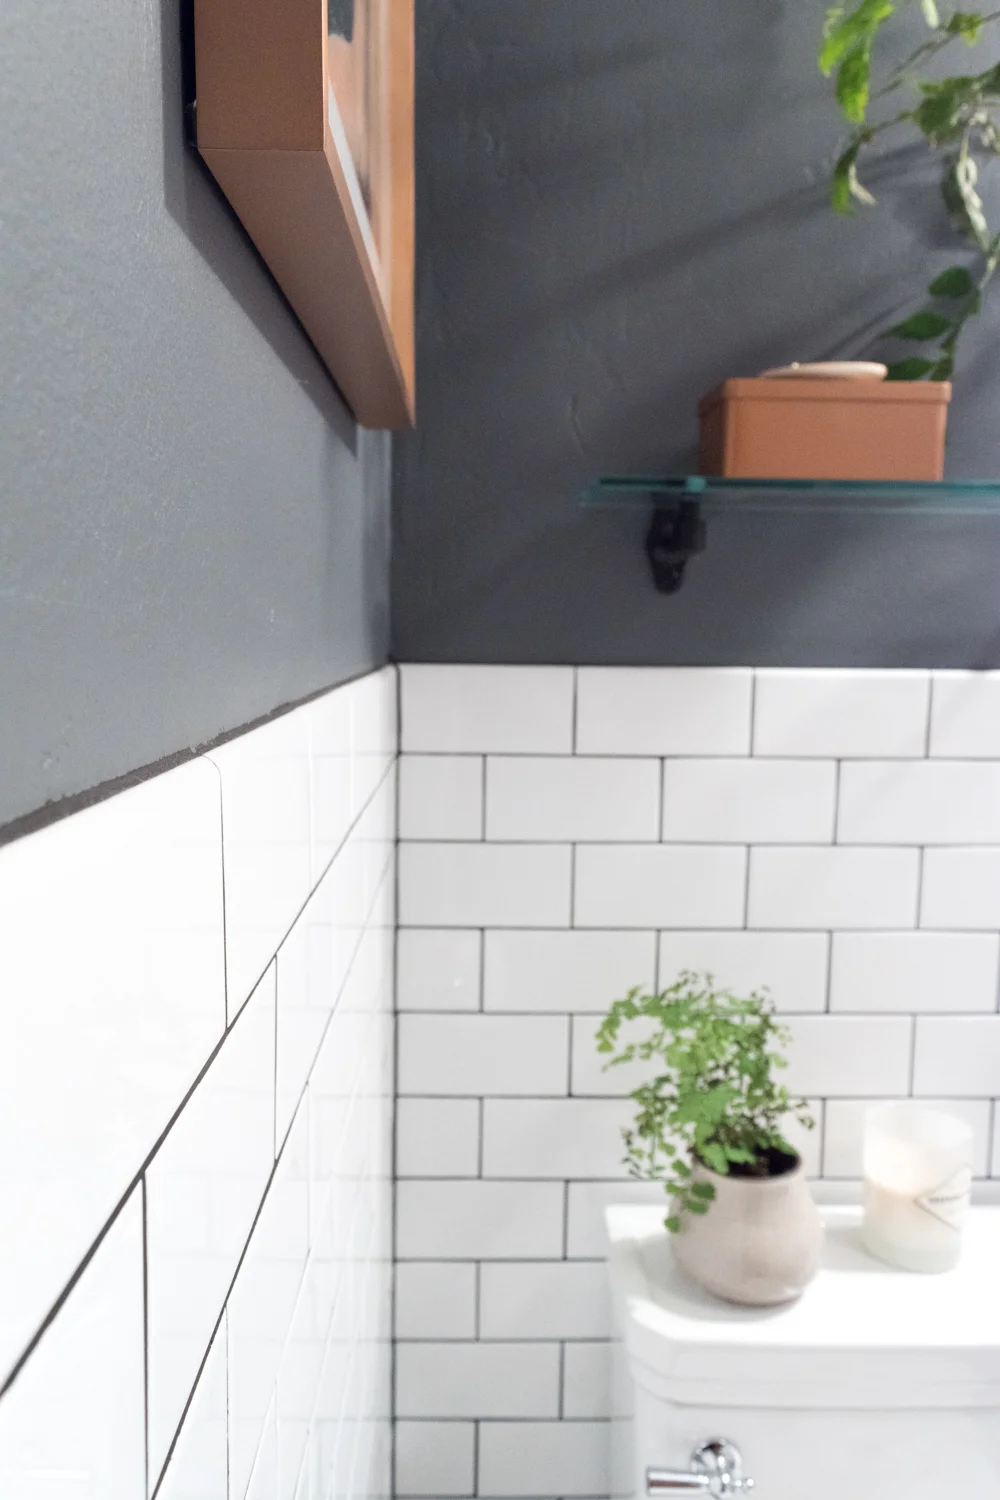
The walls were coated in Behr's Antique Tin which is the perfect deep grey that's neither too blue nor too warm.

The Gold Hive Bathroom After
The Gold Hive After

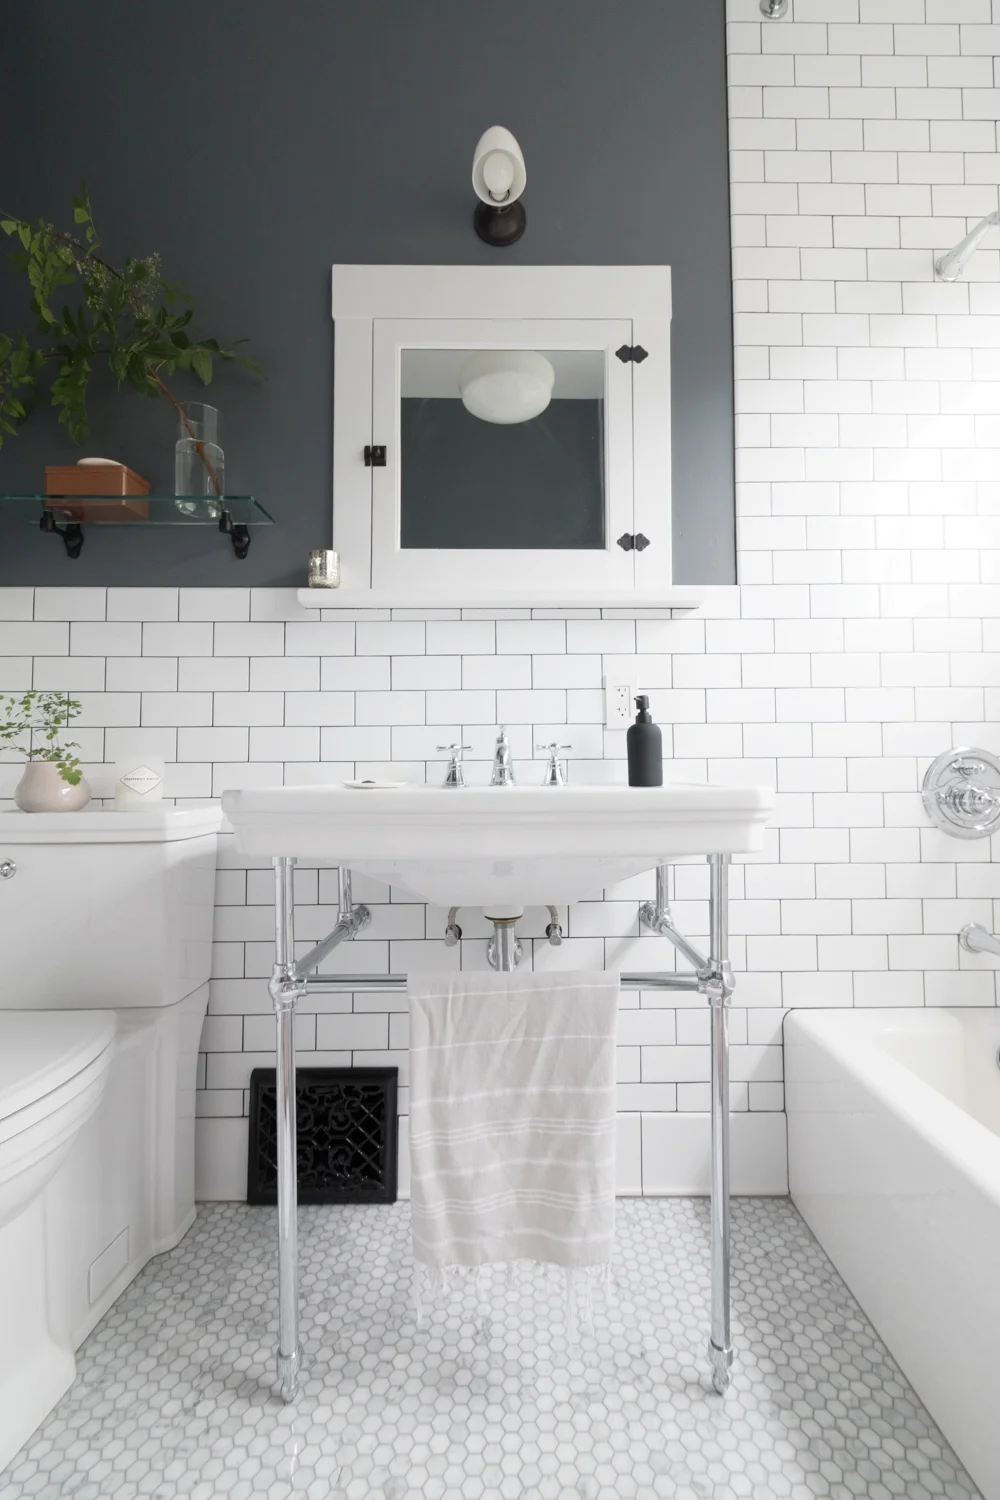
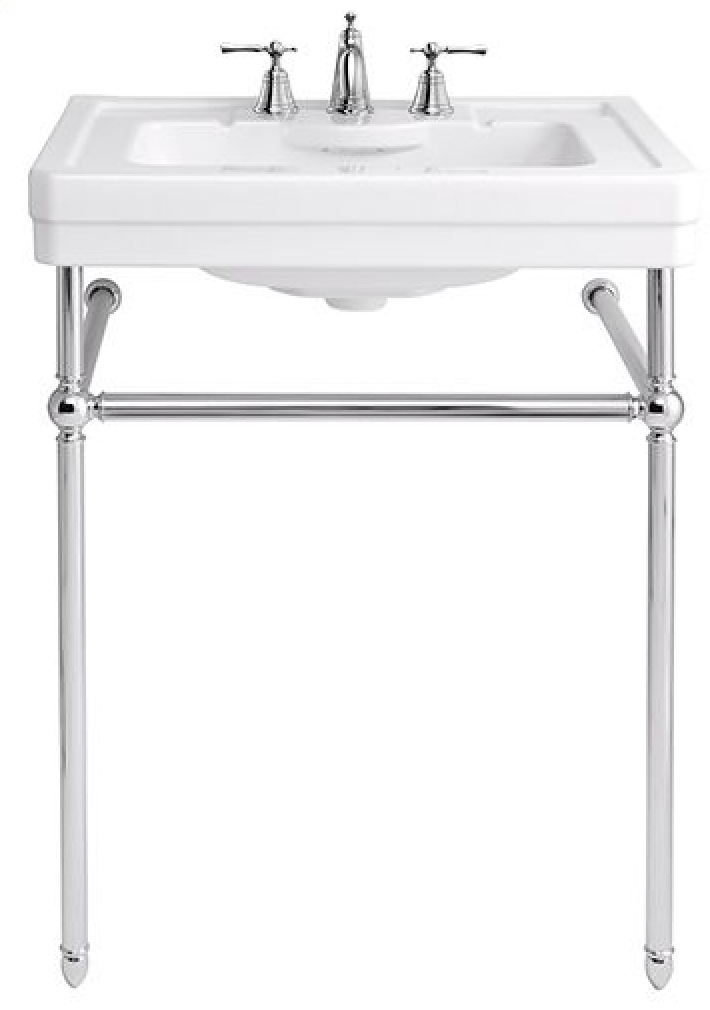
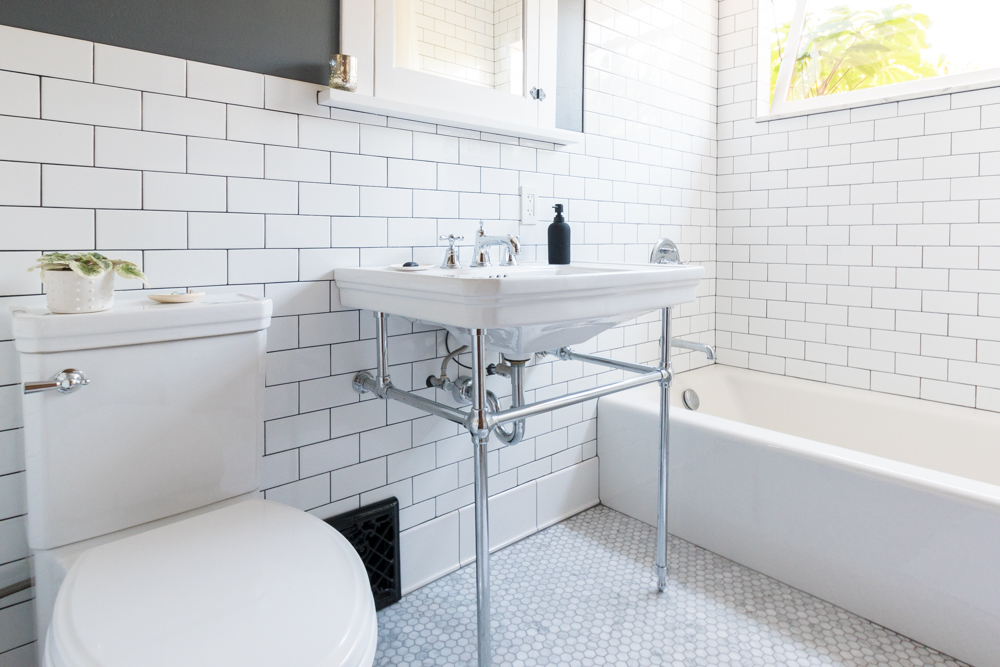
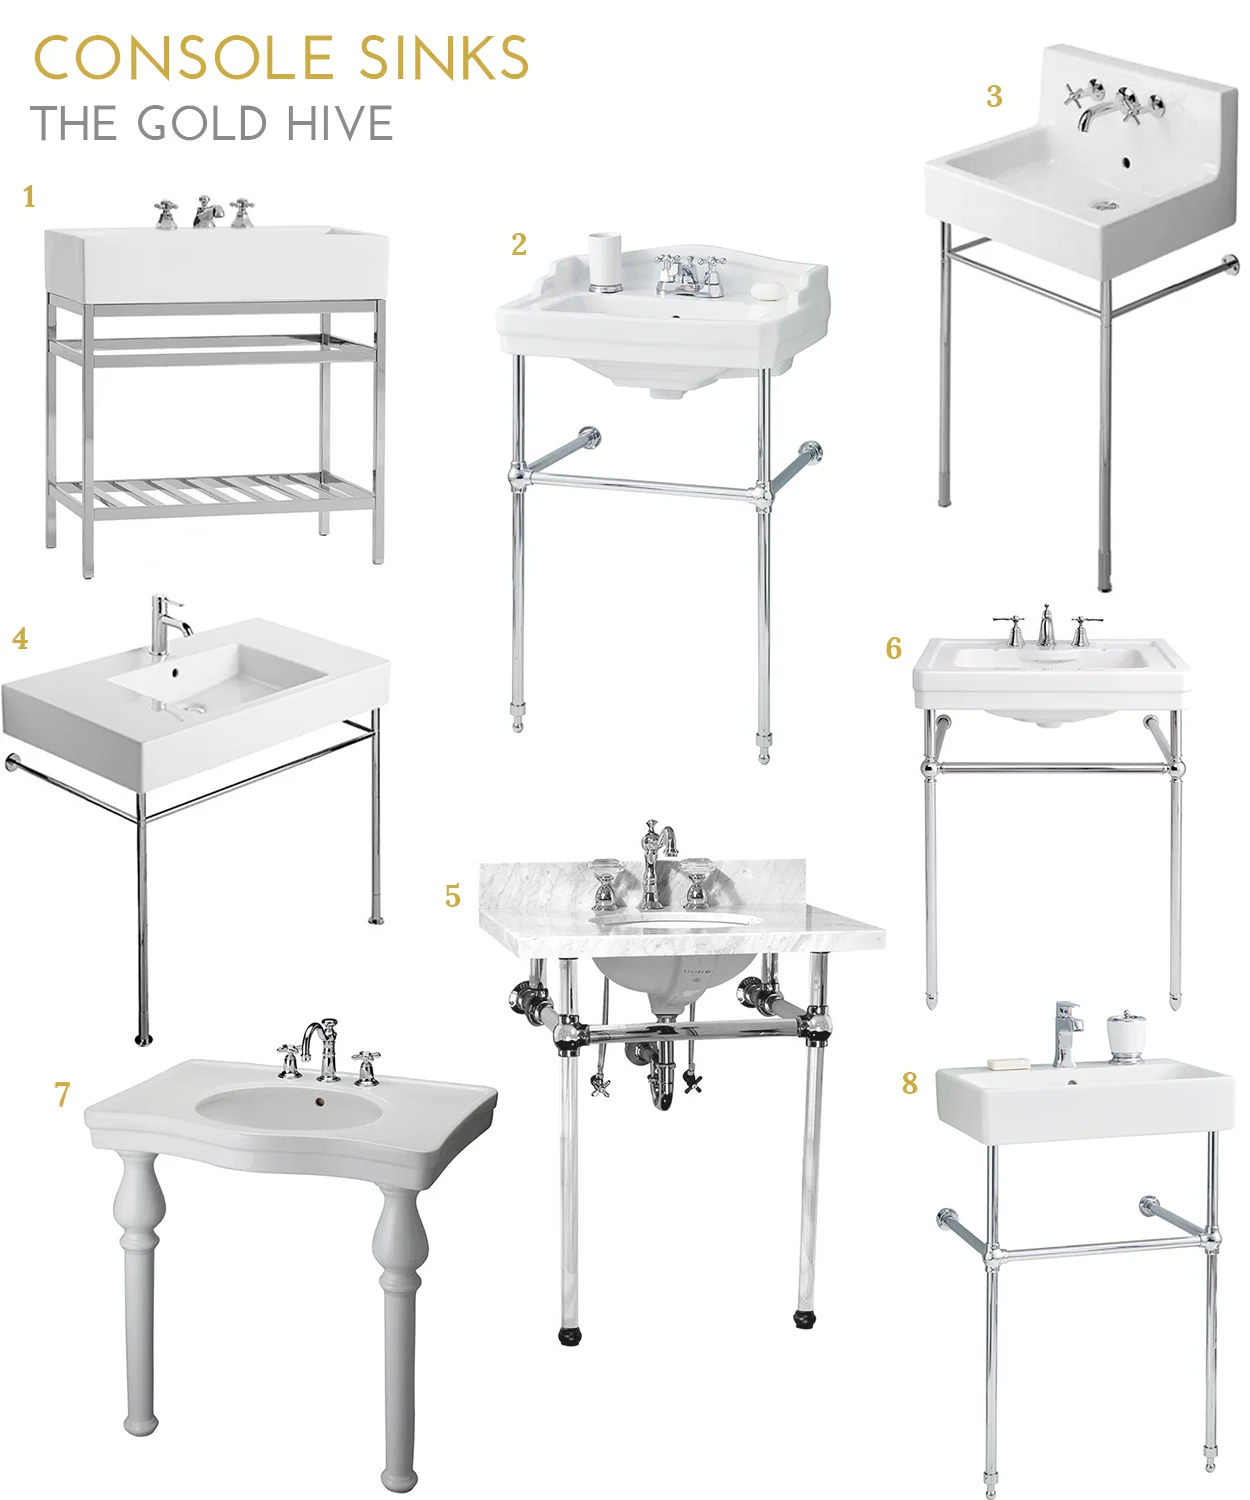
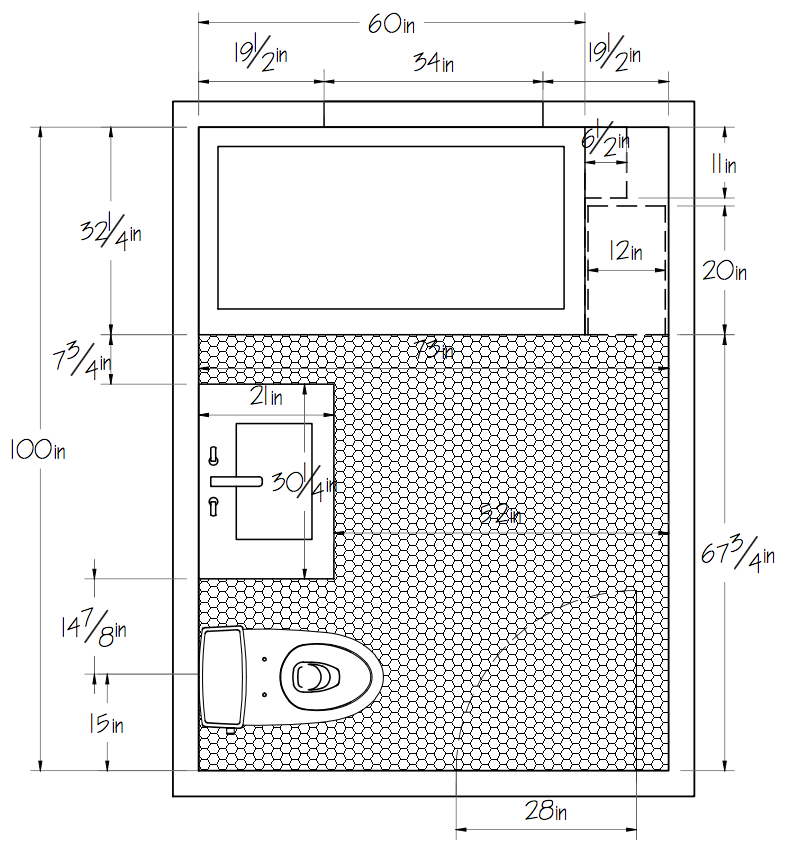
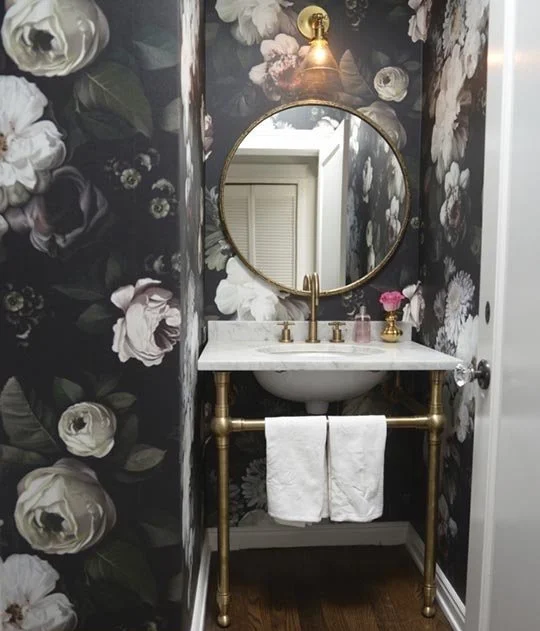
The console sink sits front and center in the bathroom. We opted for a console-style sink that would keep things open and airy. I waffled between a few styles before picking this leggy chrome beauty.

The Gold Hive Bathroom After

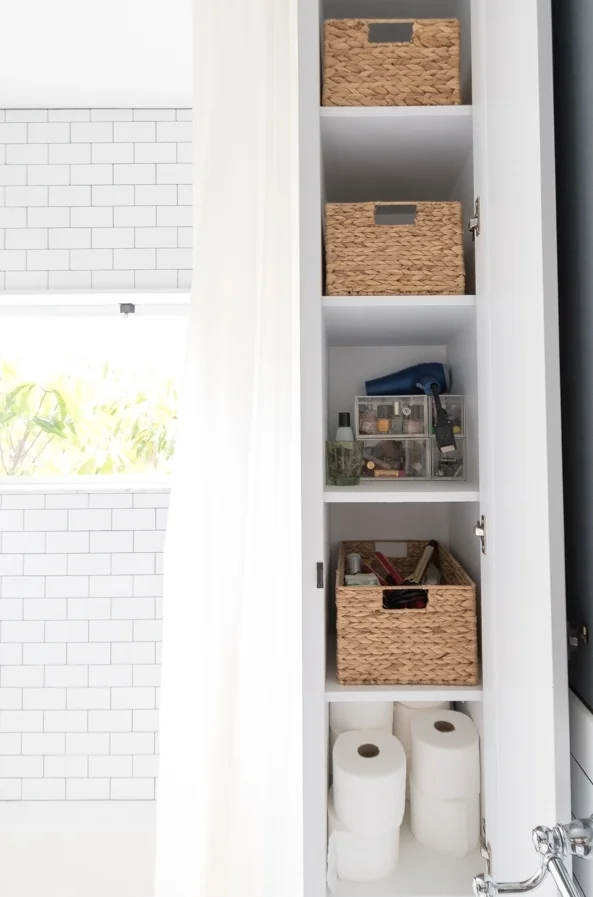
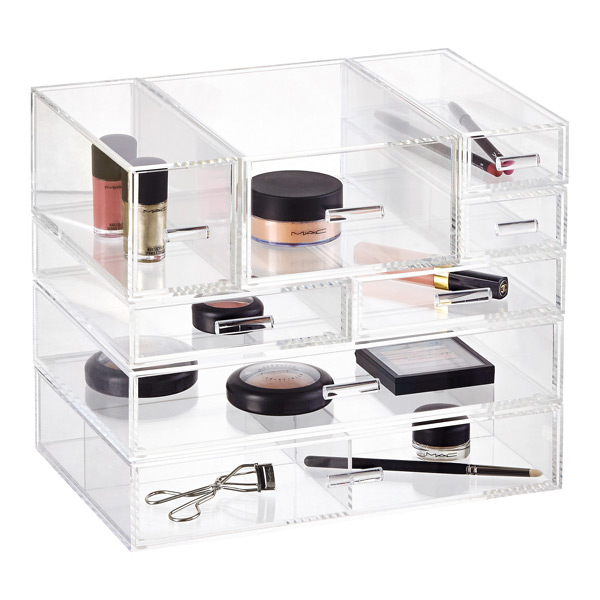
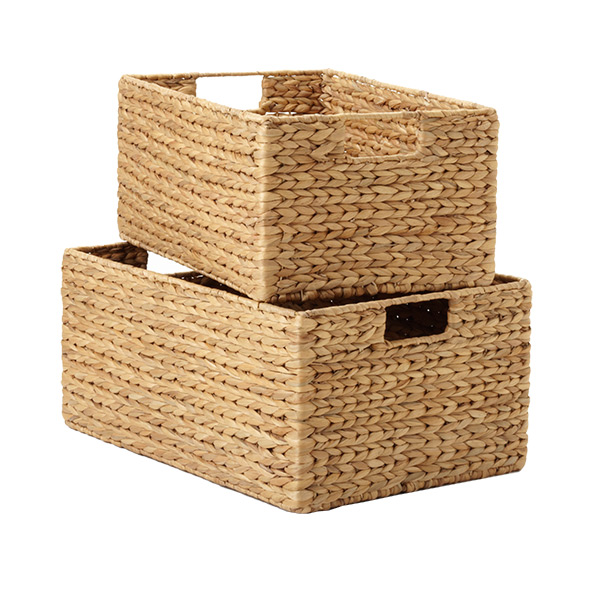
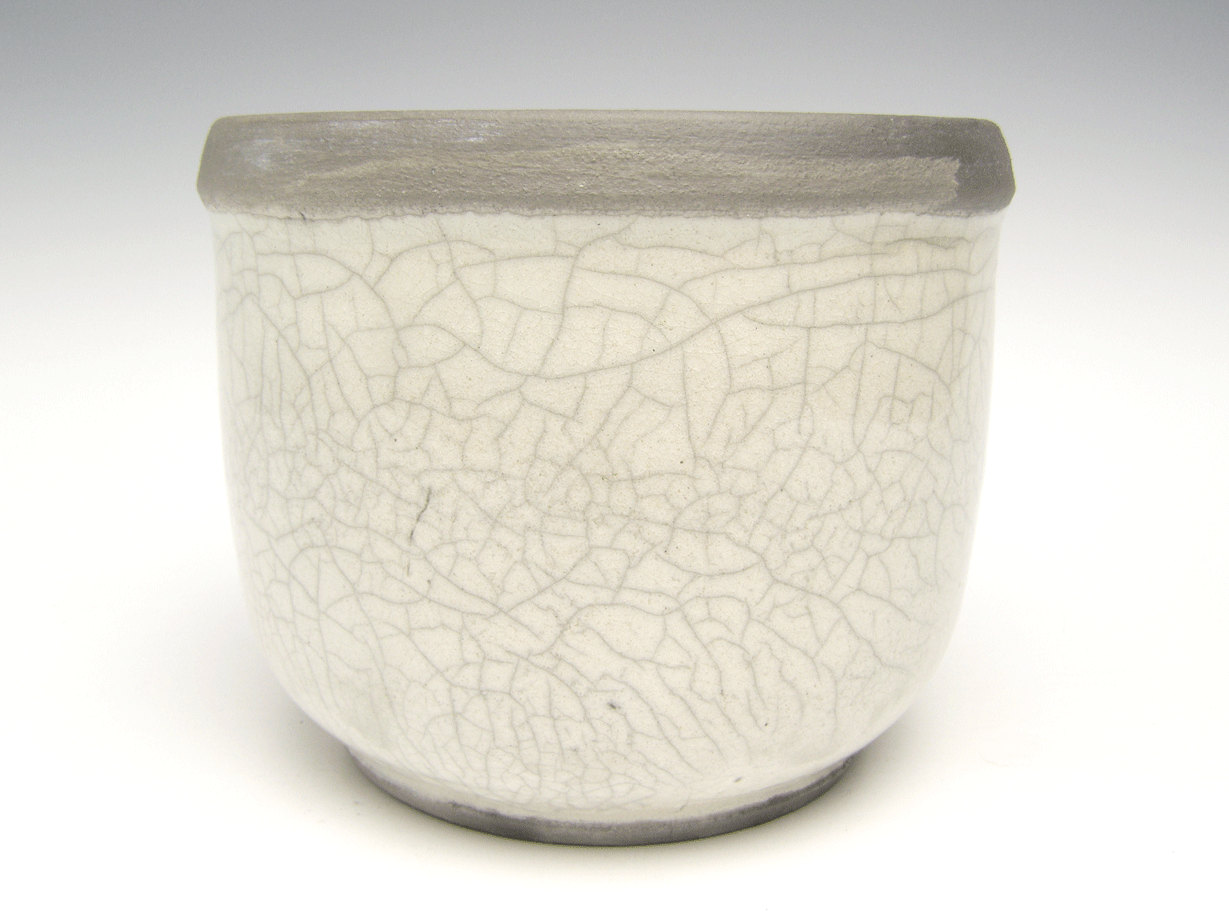
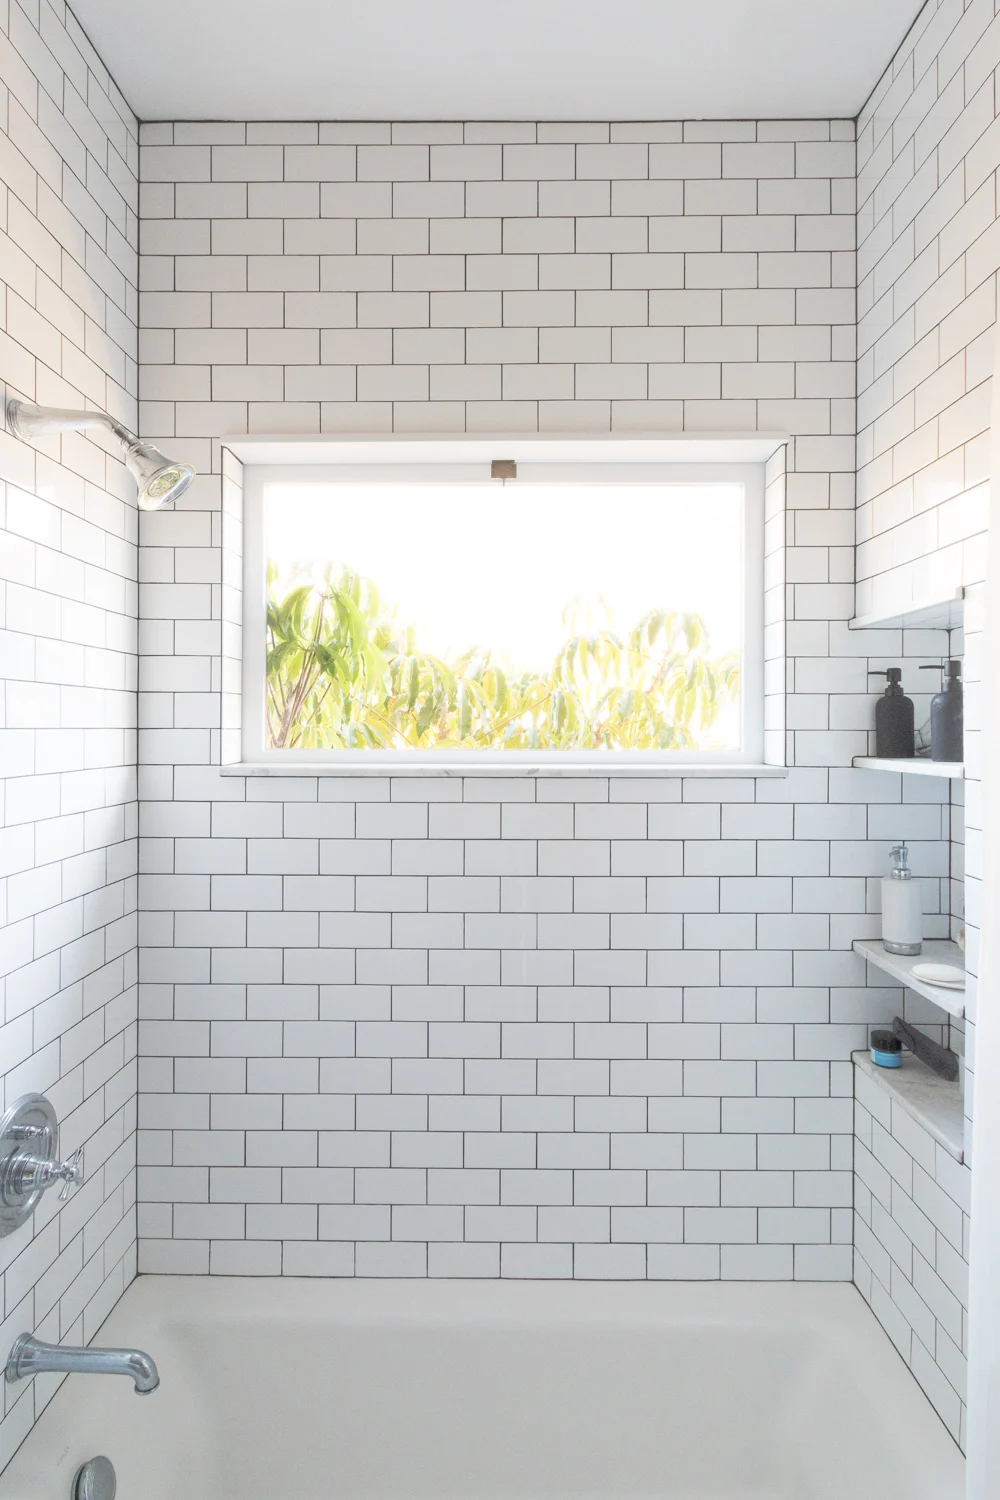
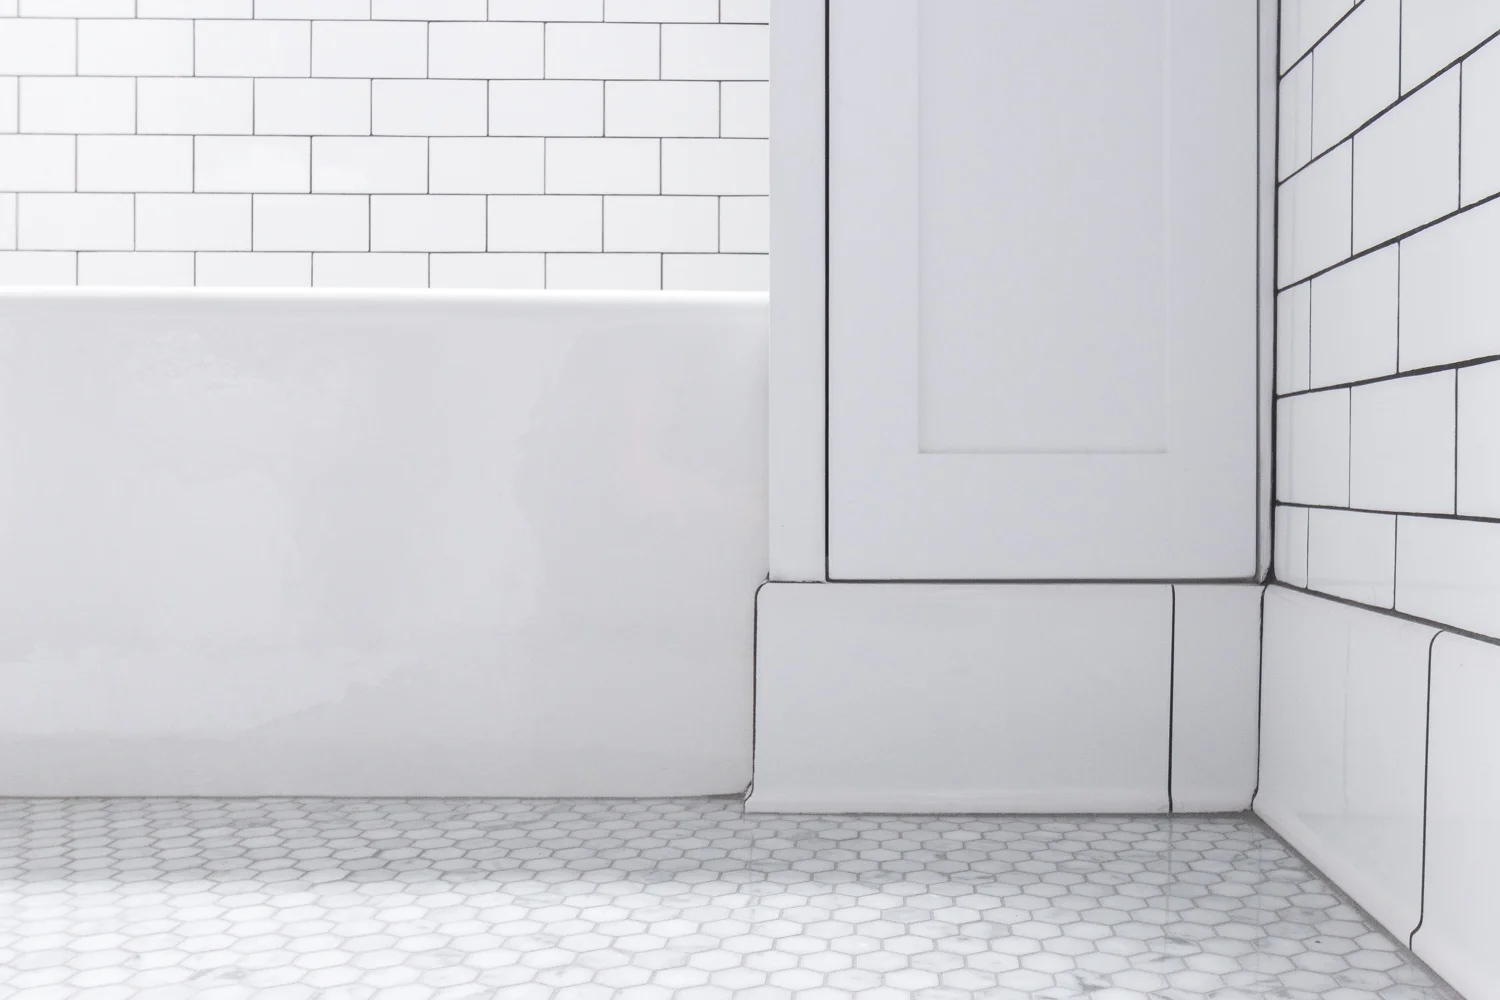
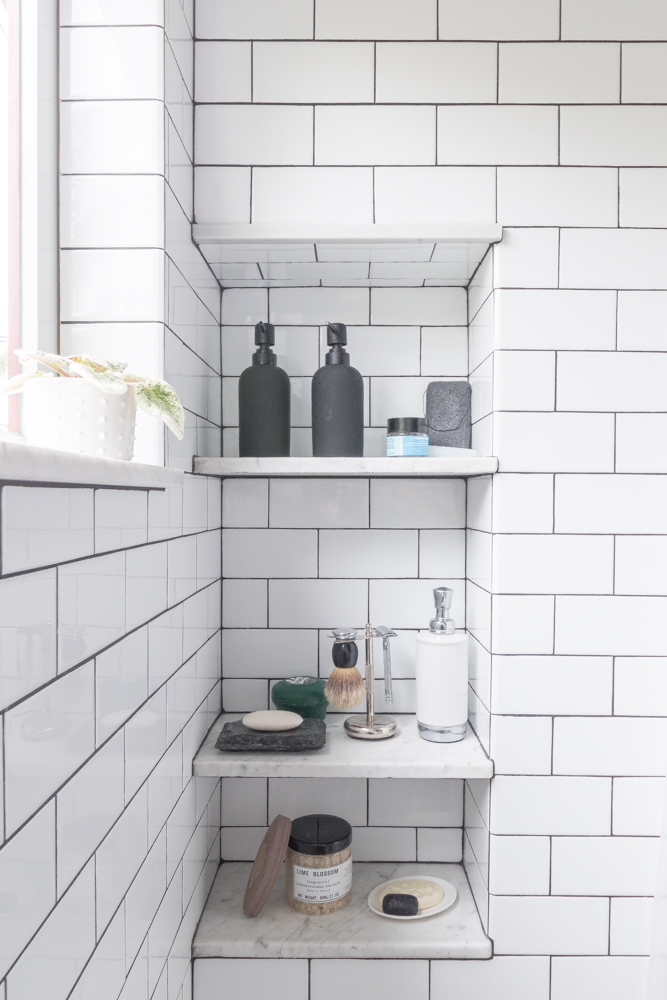
Since it's clear that the sink can't be used for storage, we built a spiffy cabinet at the end of the tub. Baskets hold all of our toiletries, and then more storage is accessible from inside the shower for our shampoos.

2017 Sept reveal-0424.jpg
The Gold Hive Bathroom After

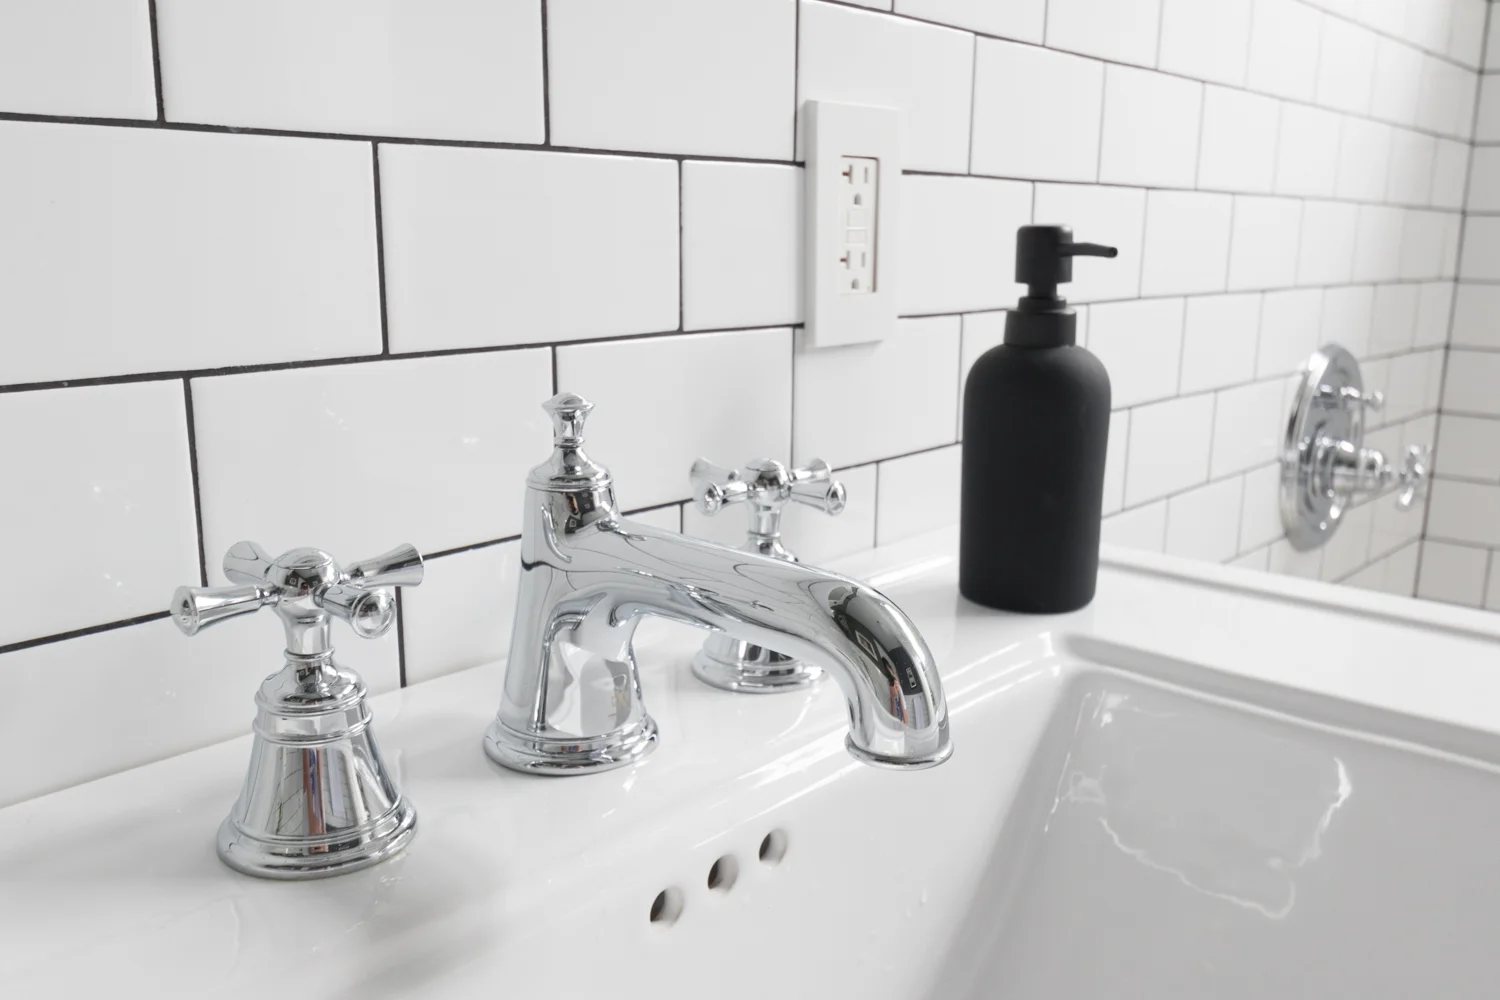
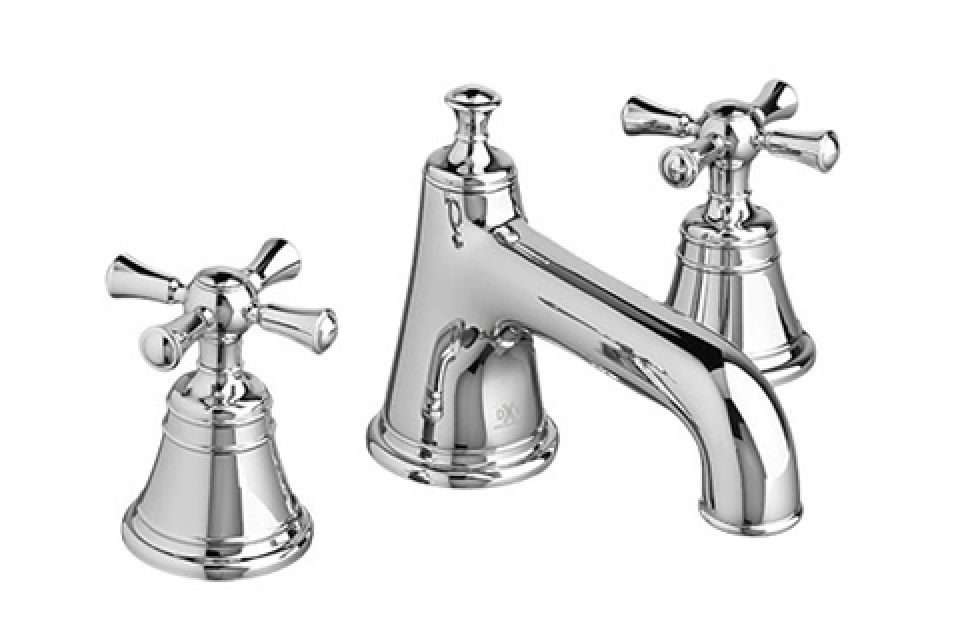
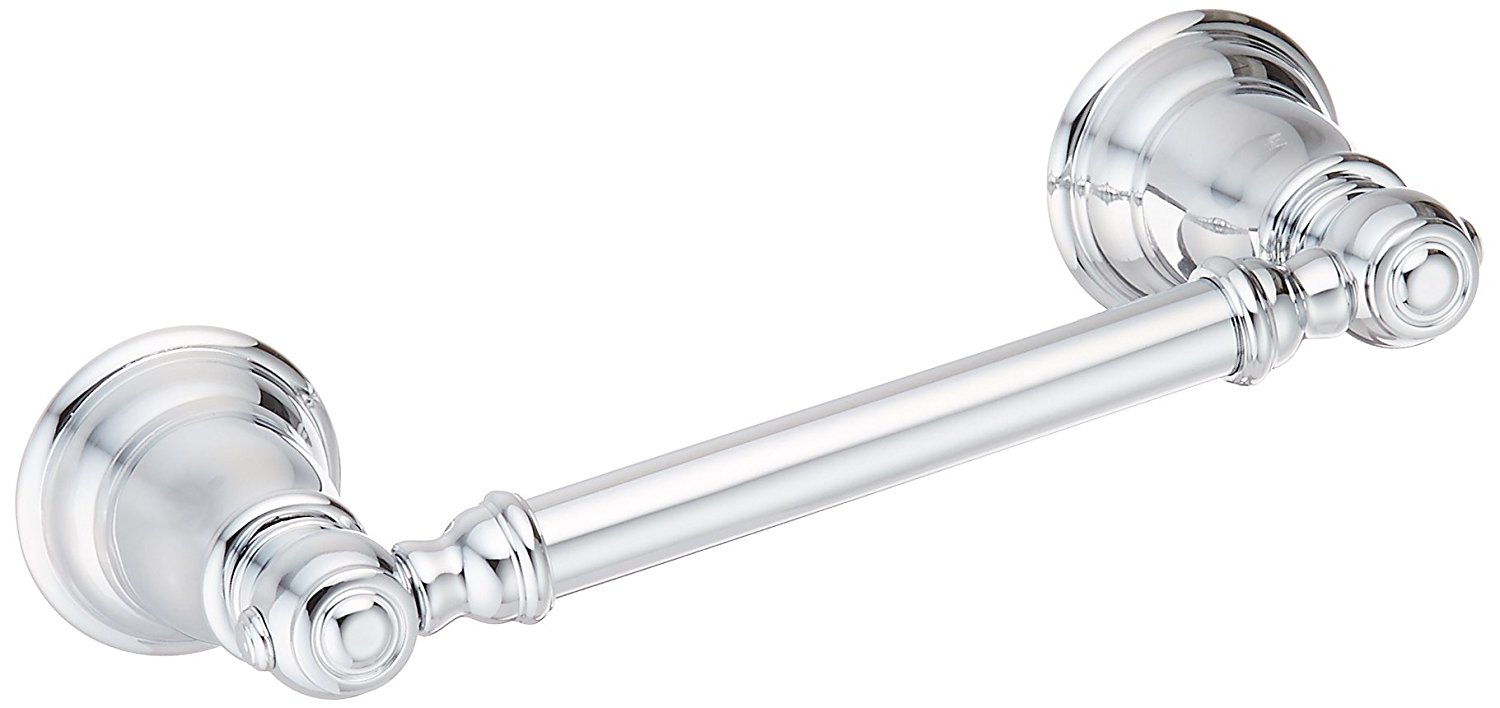
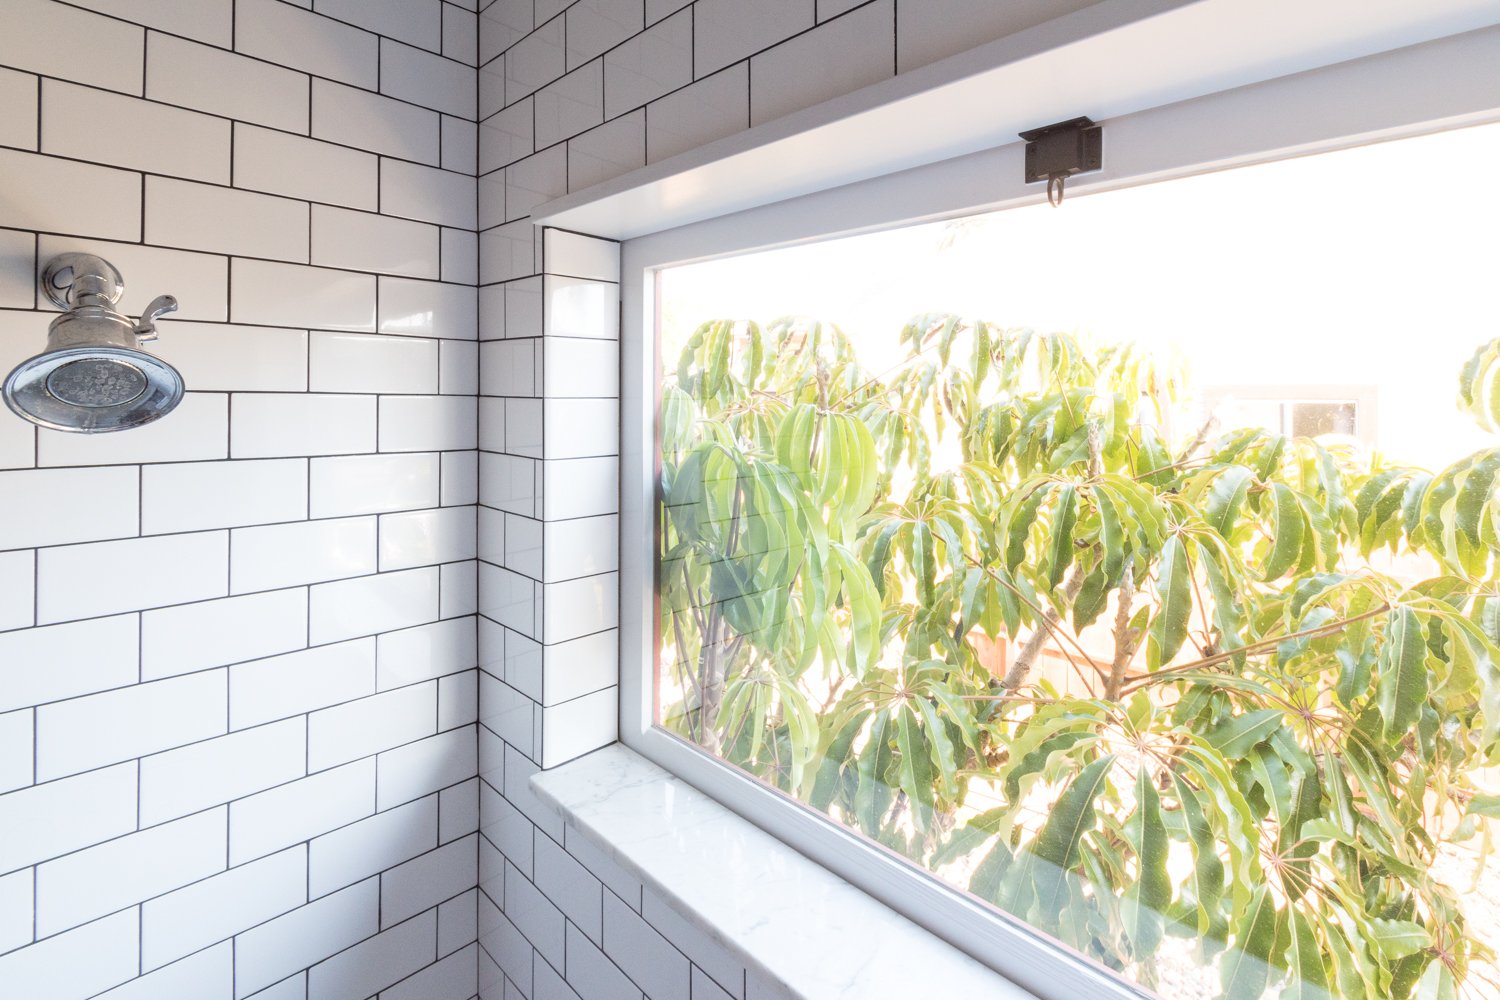
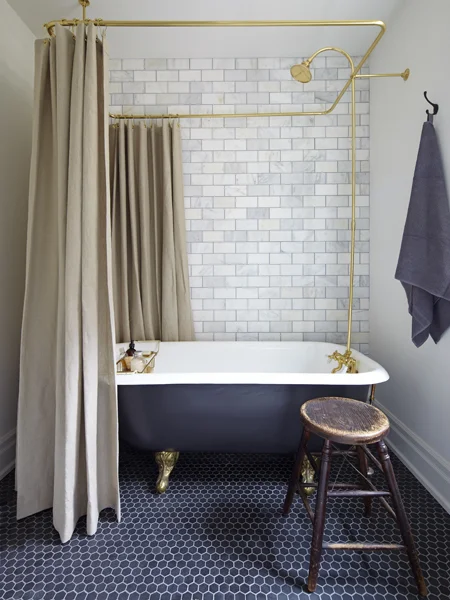
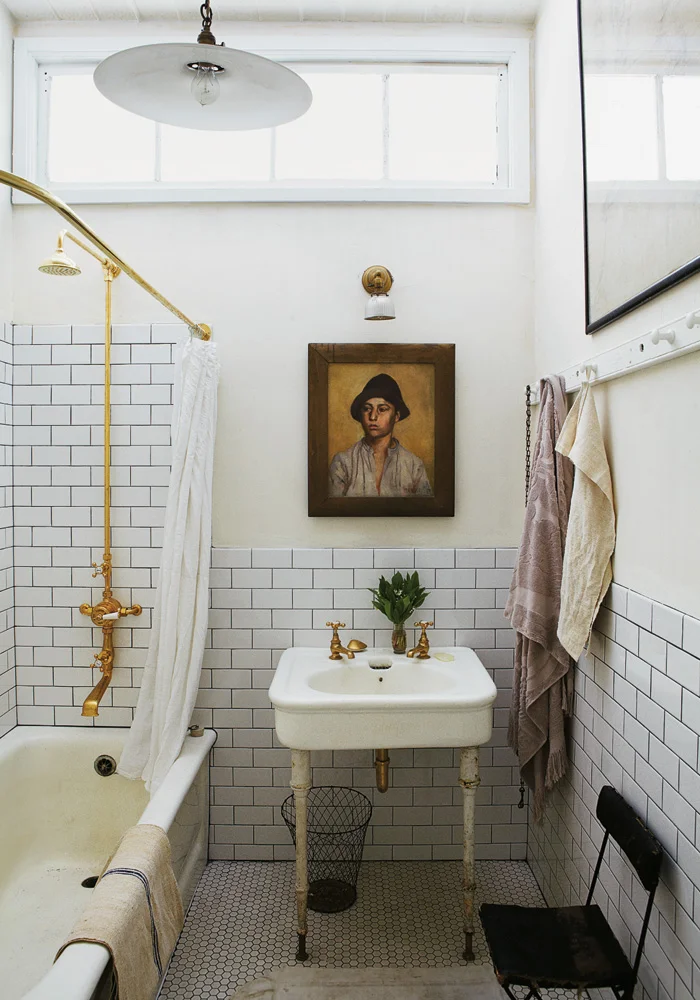
The plumbing fixtures on the sink and in the shower are all from the DXV by American Standard Randall line. They are good reminders that we're in an old house with their vintage-y vibes.

The Gold Hive Bathroom After
The Gold Hive Bathroom Reveal

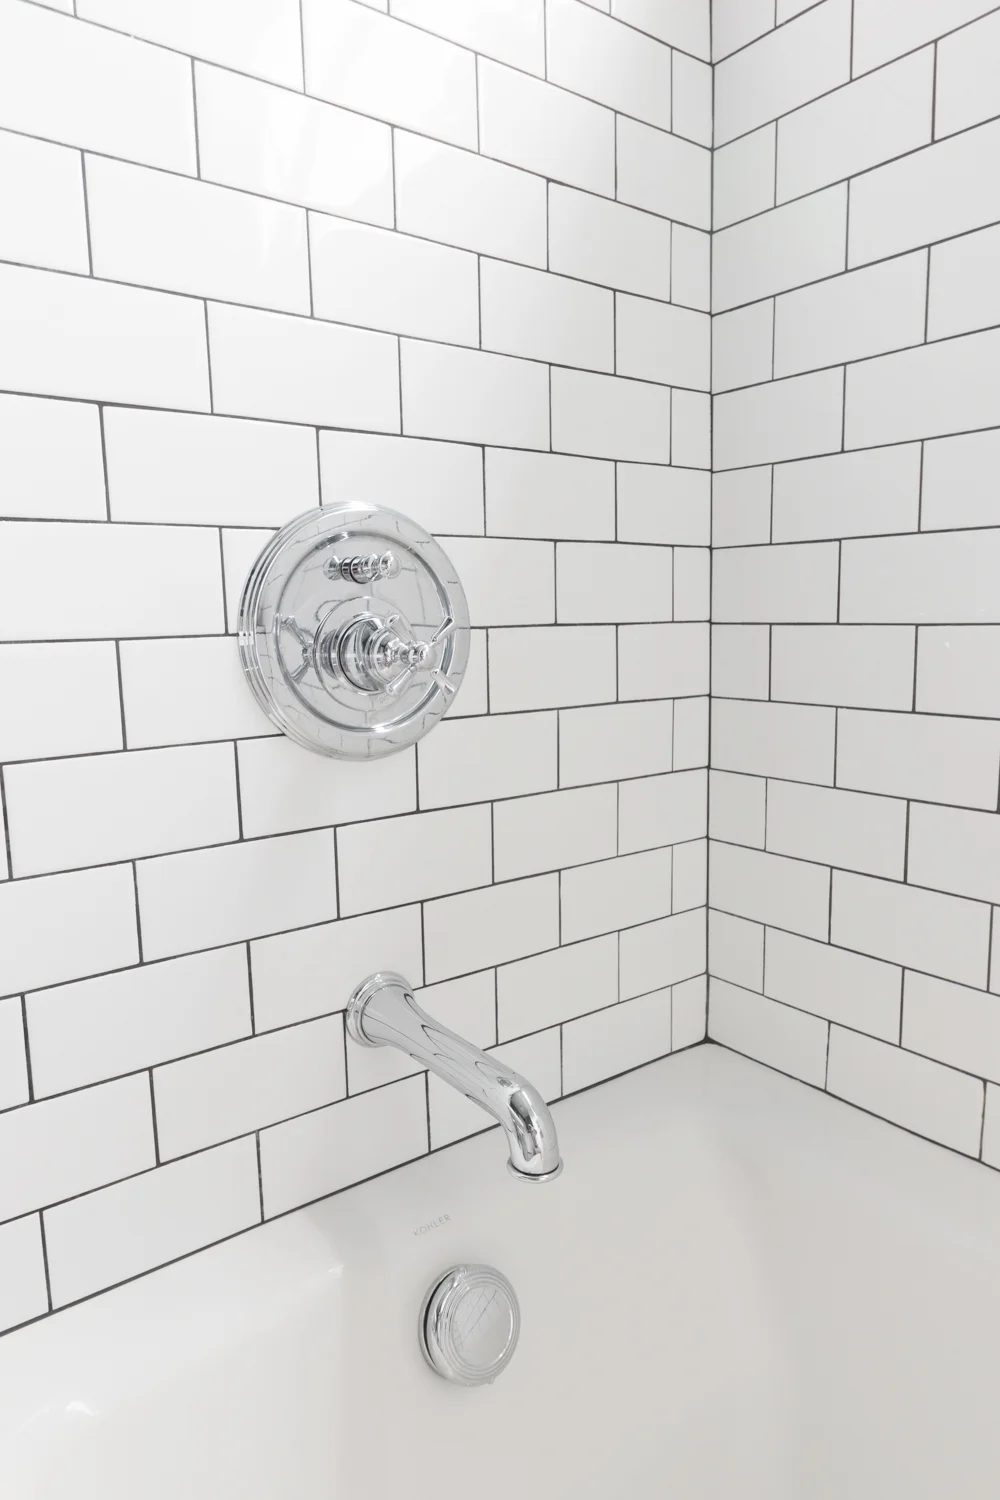
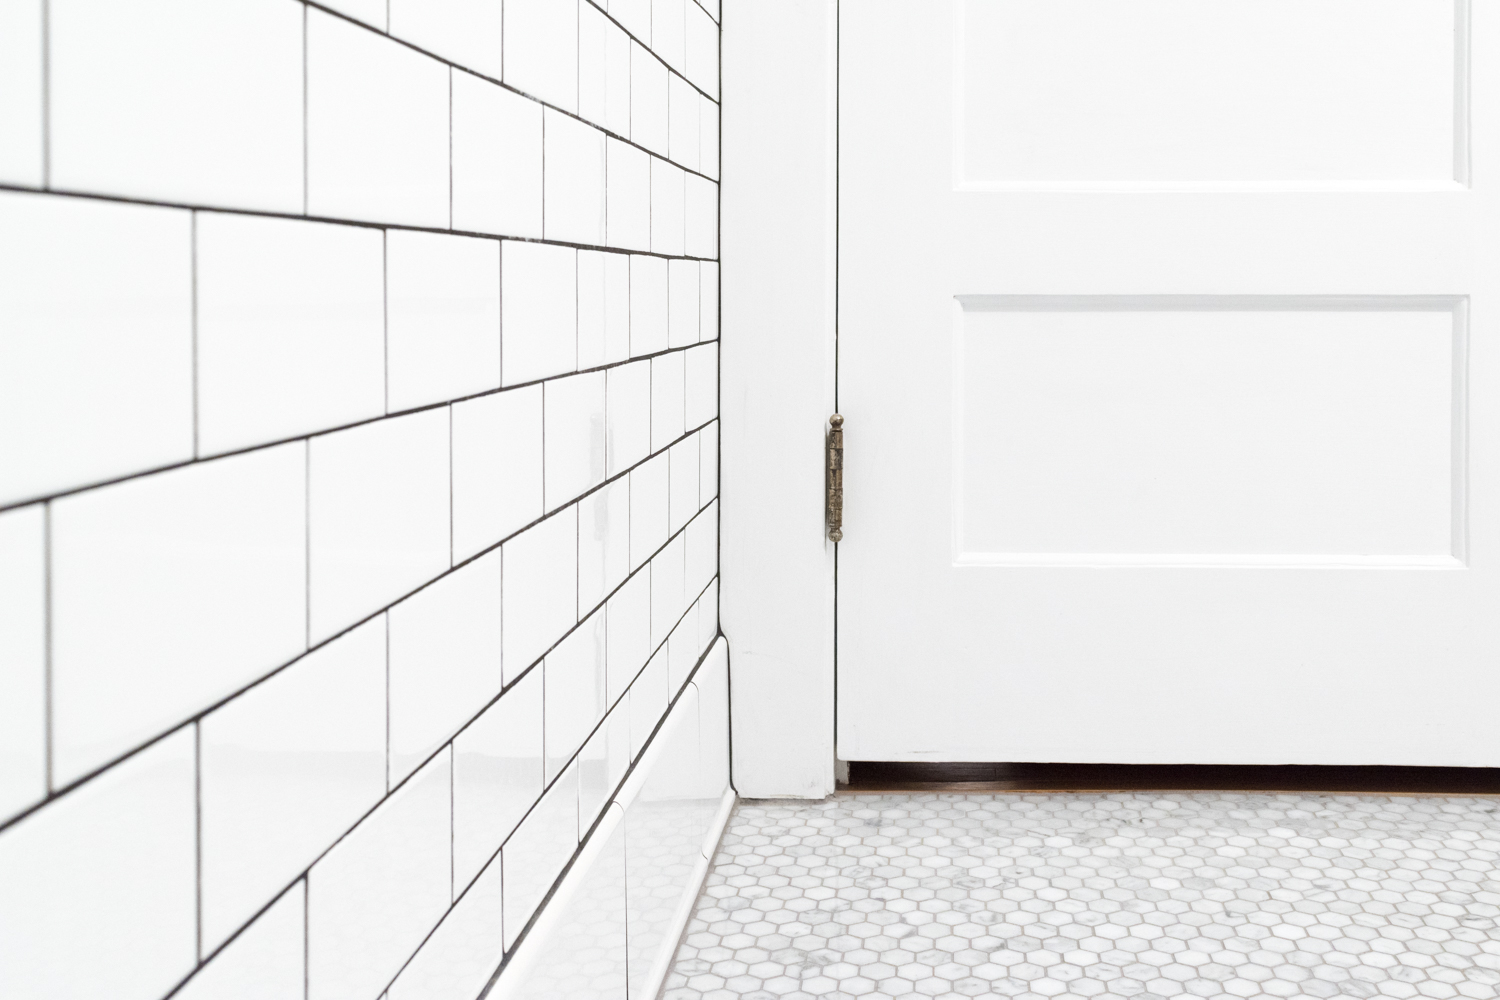
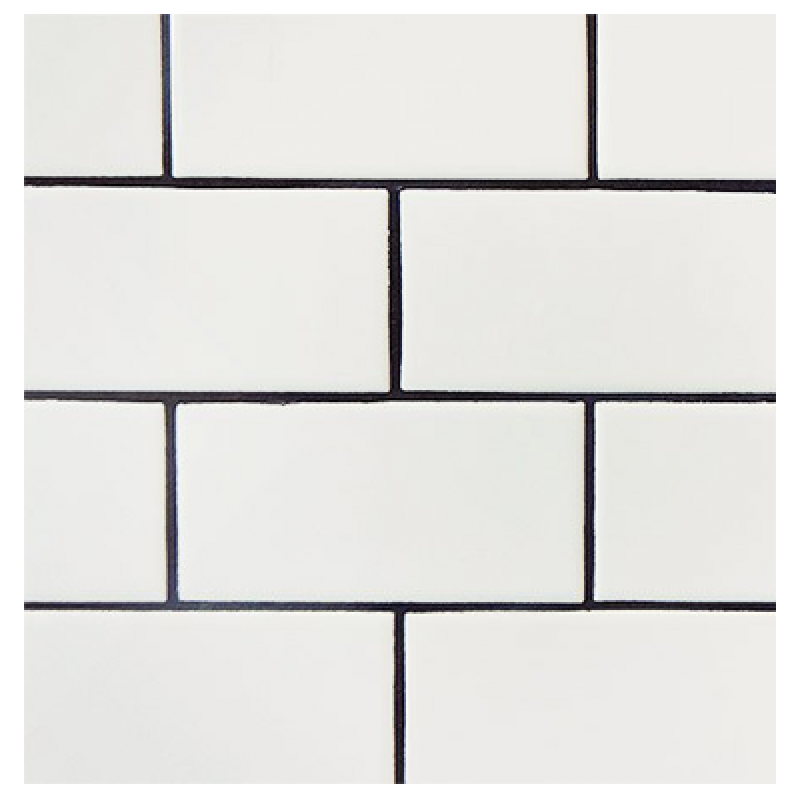
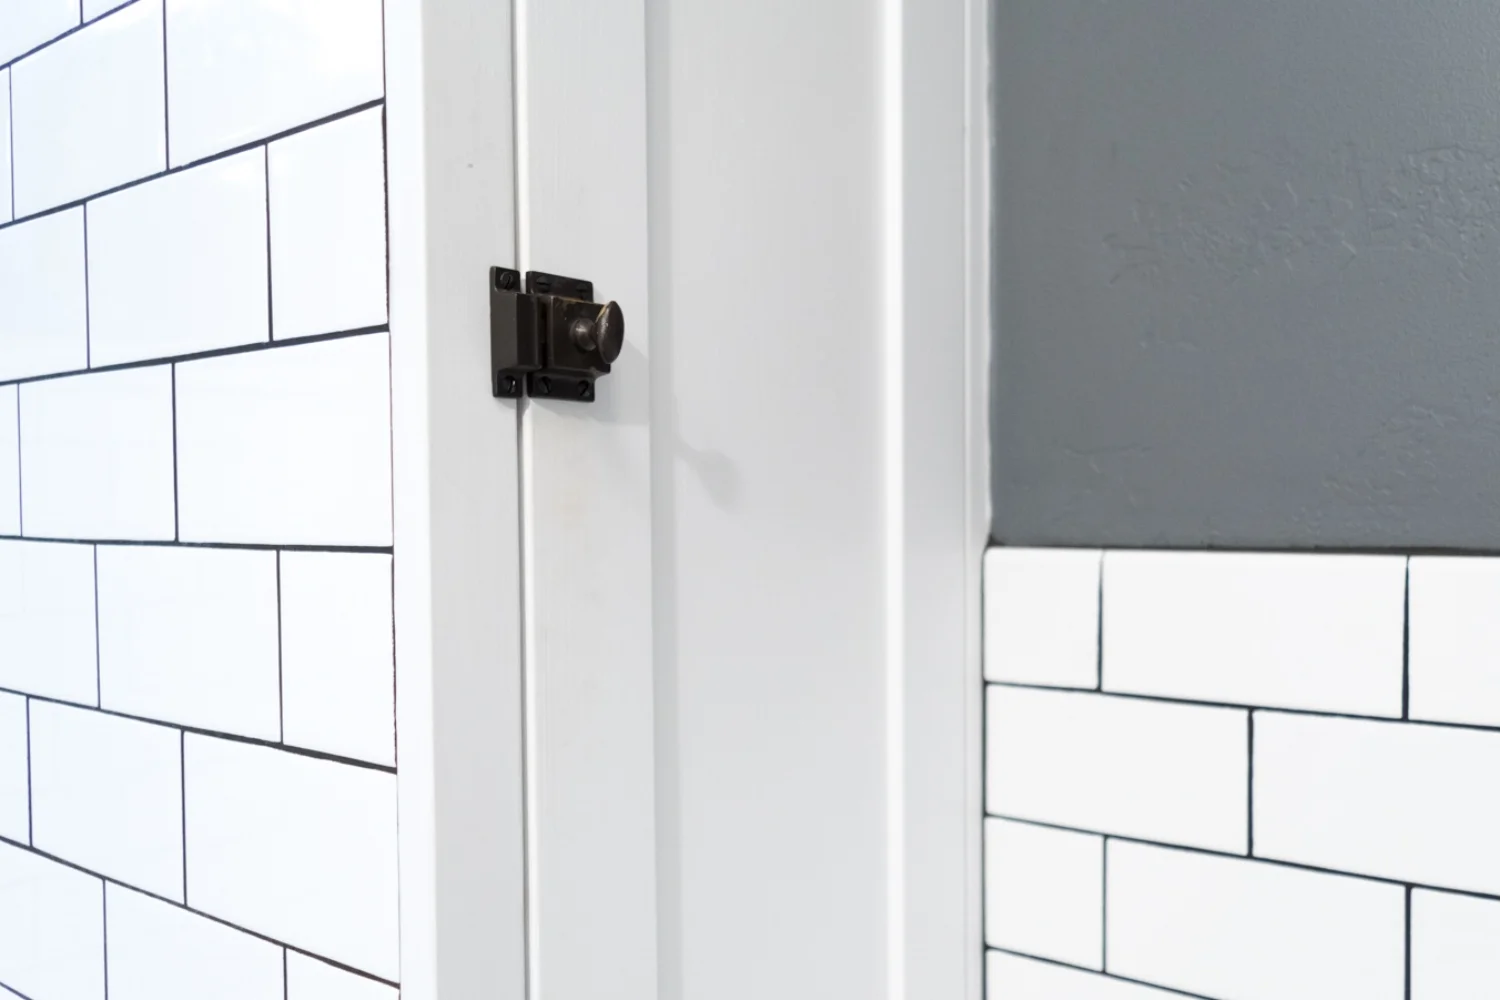
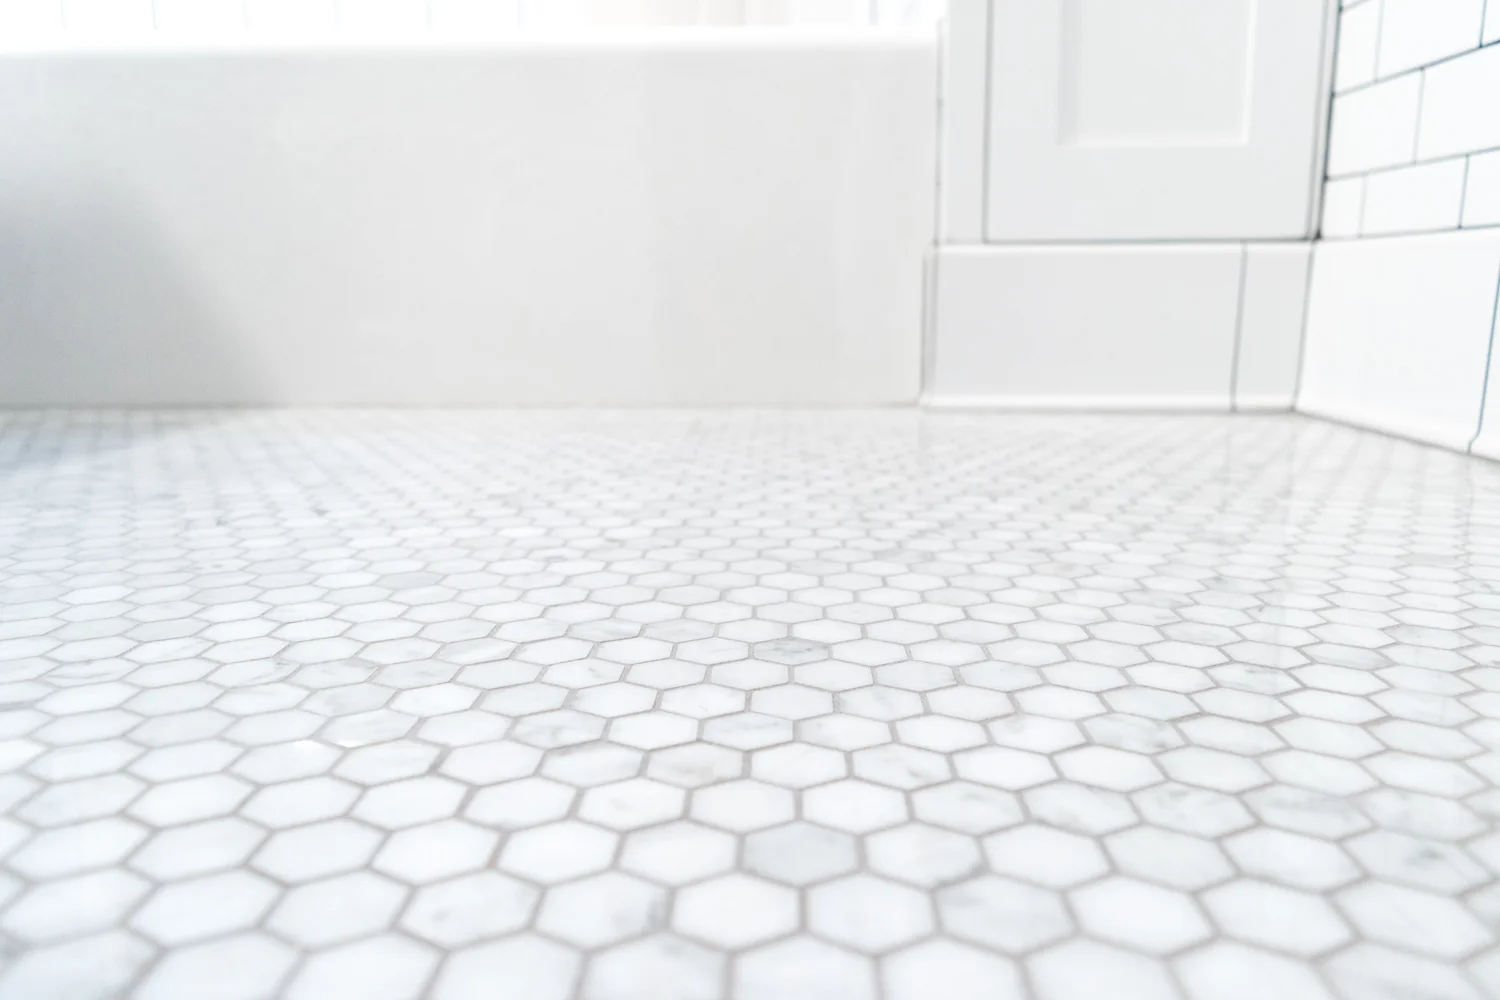
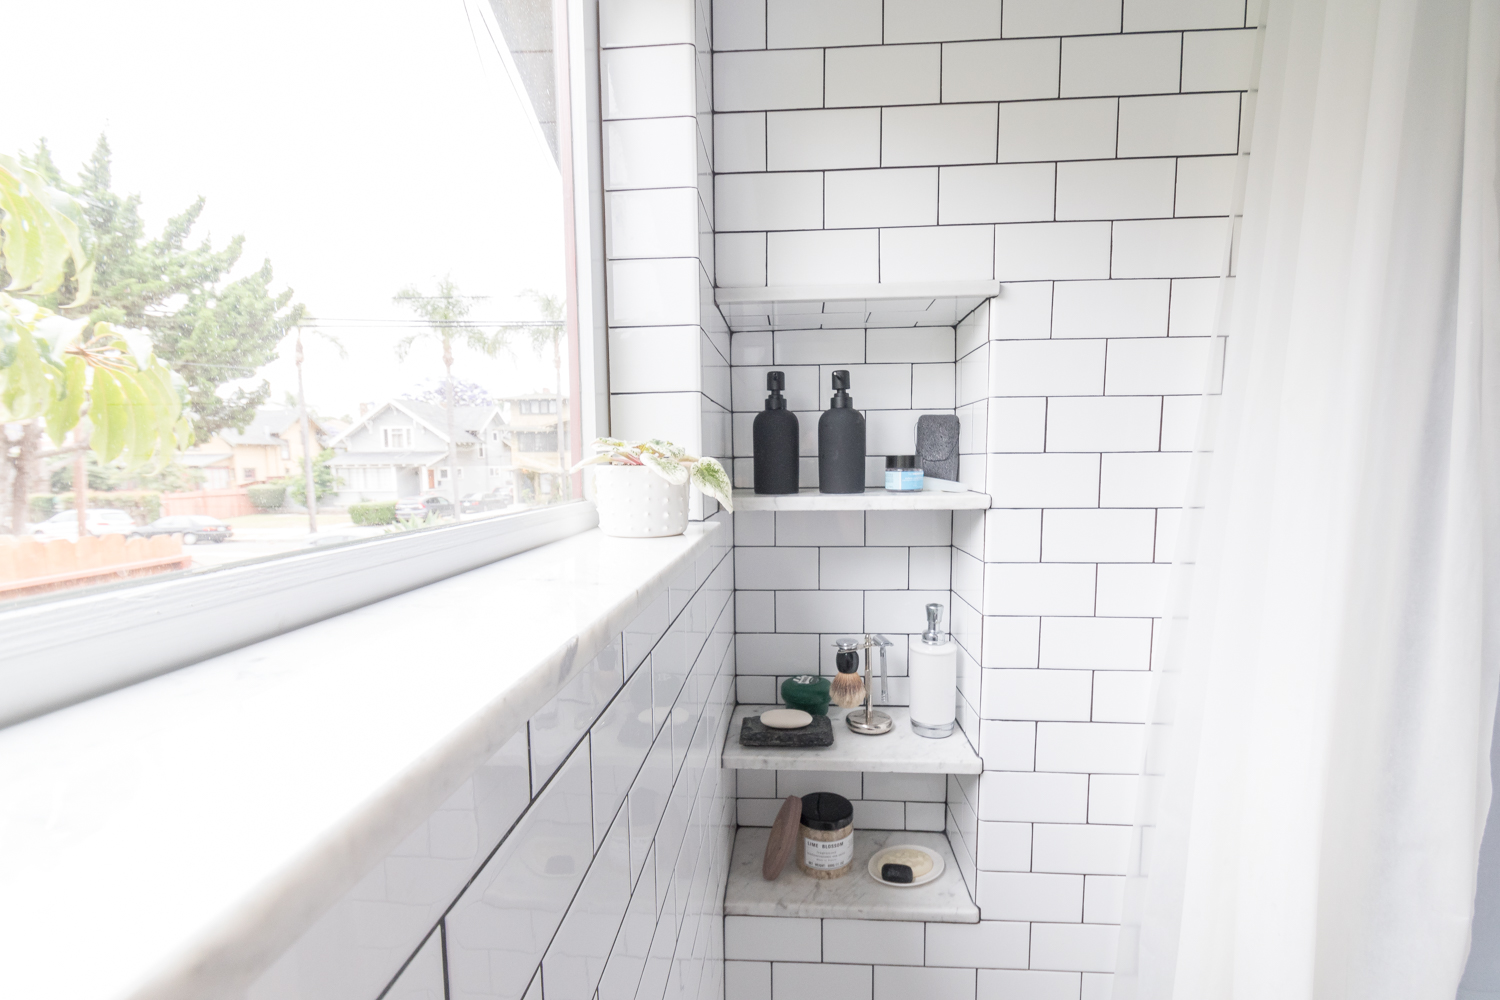
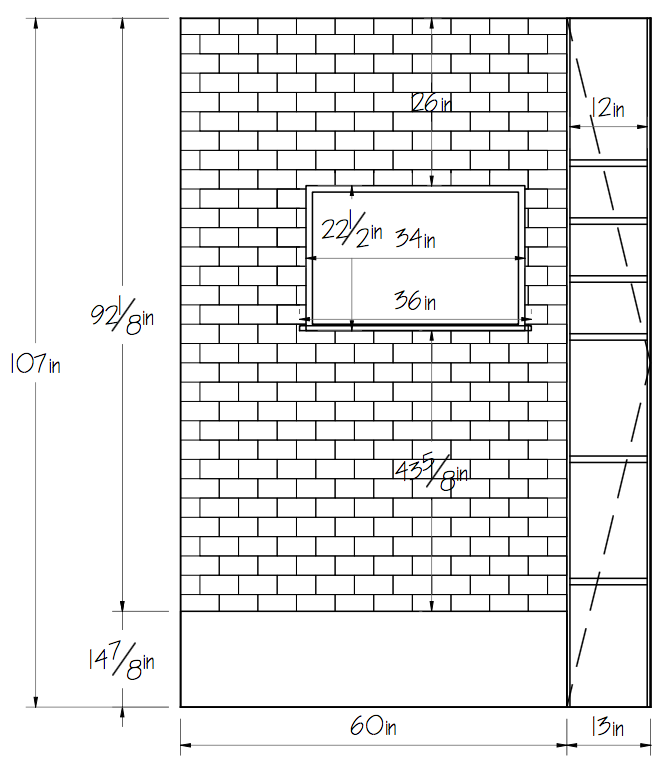
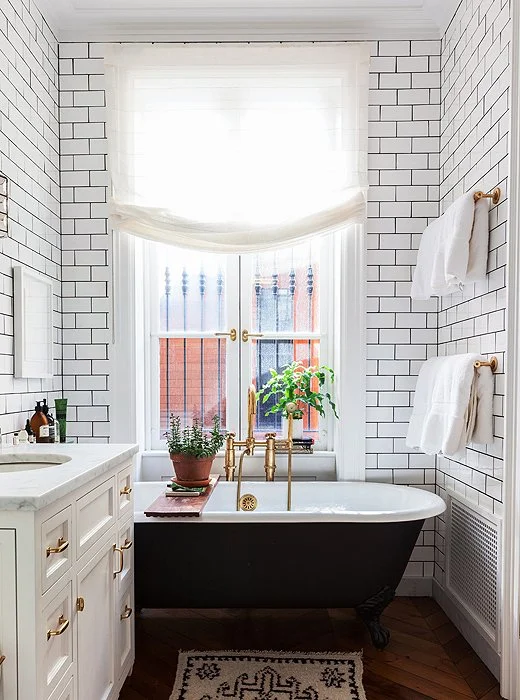
The tile is the star of the show in this bathroom. We went for a simple subway tile and a bullnose edge detail on the walls. The dark grout was a must and I couldn't be happier with how crisp and clean it looks two years later. The marble hex flooring gives just a touch of sophistication without making the space feel too precious.

The Gold Hive Bathroom After

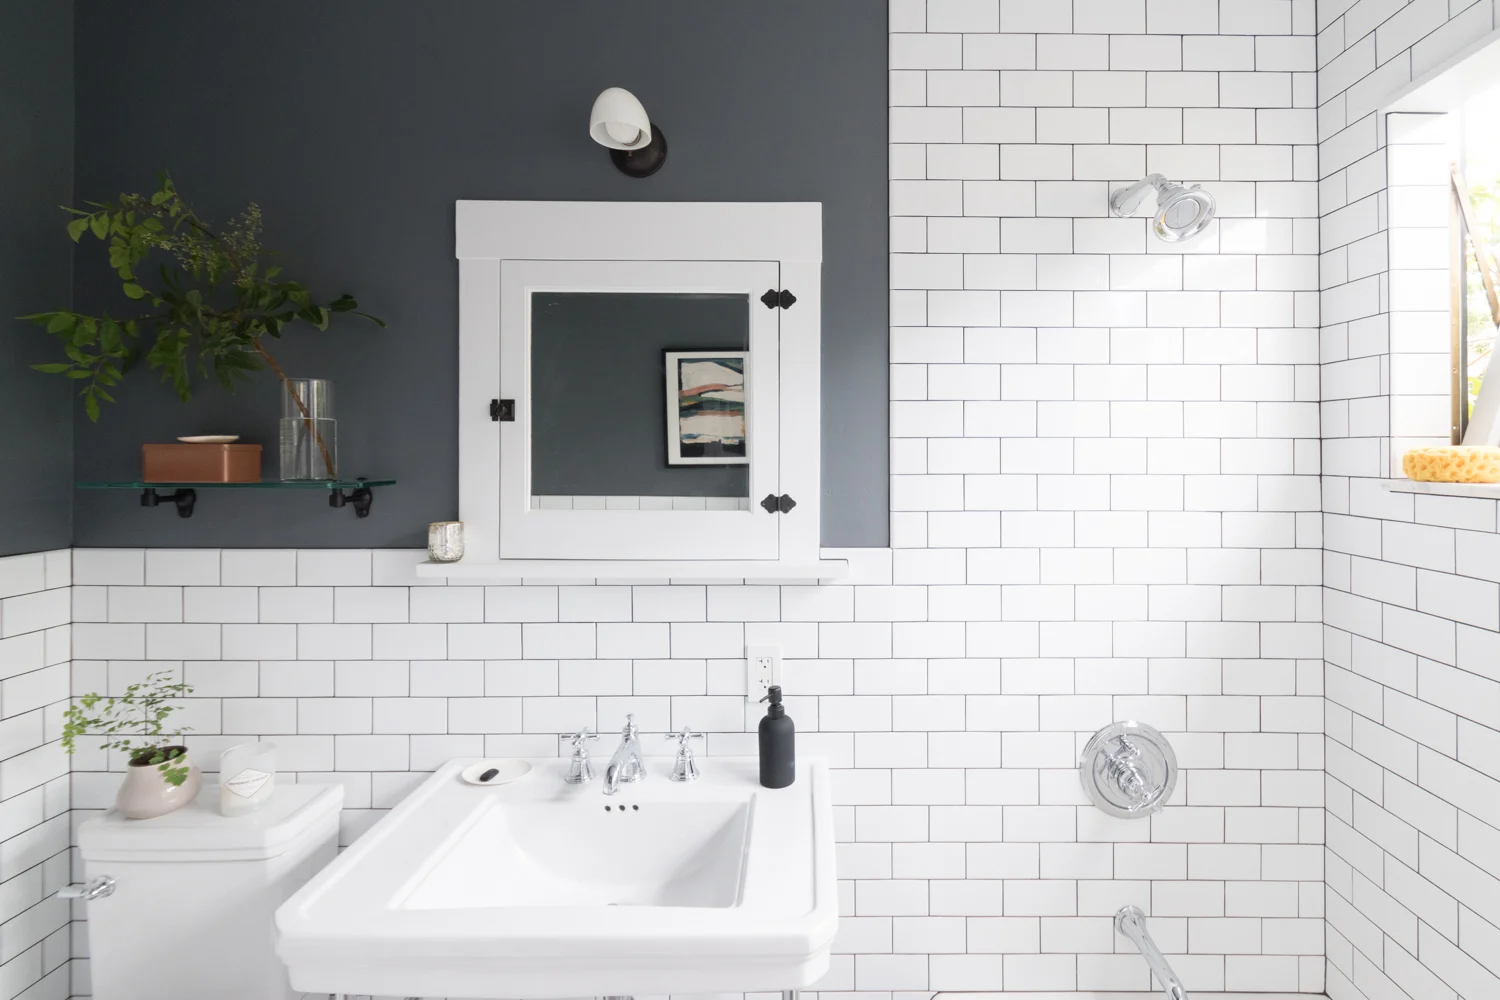
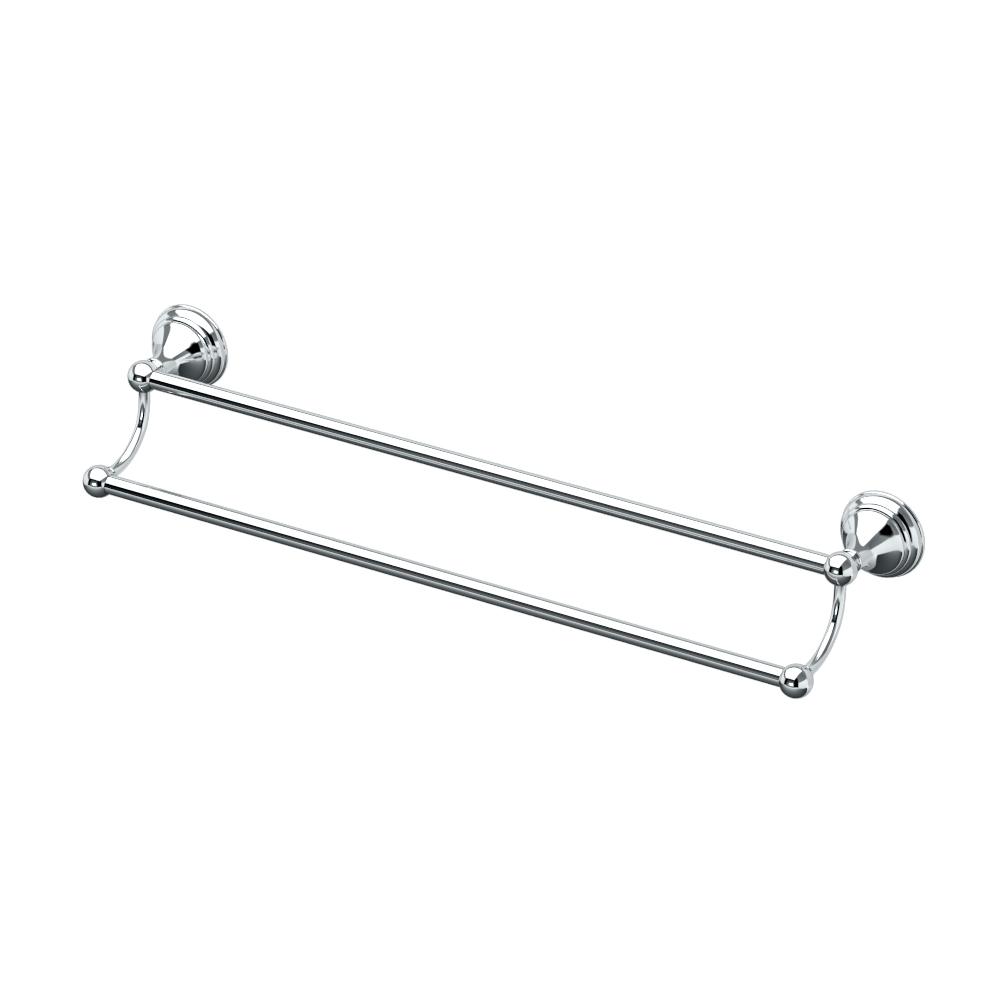
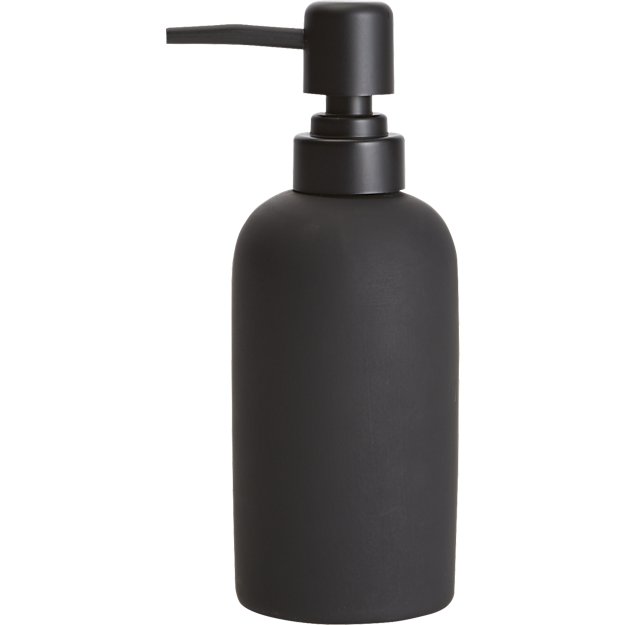
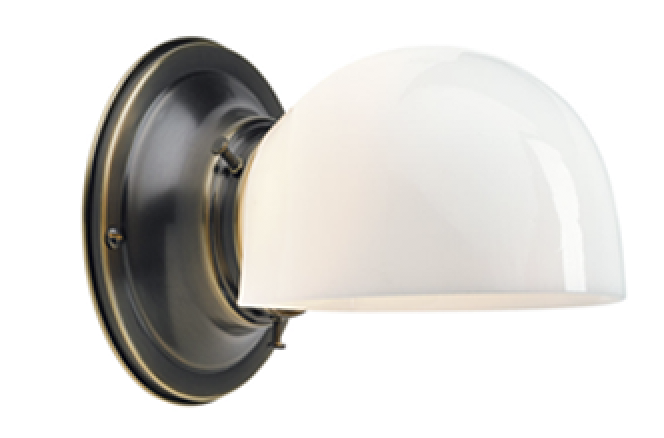
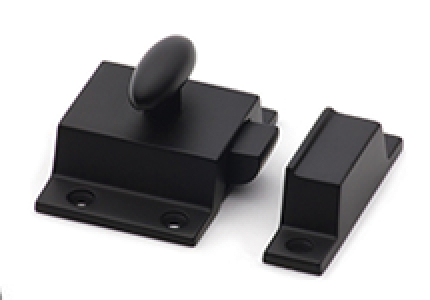
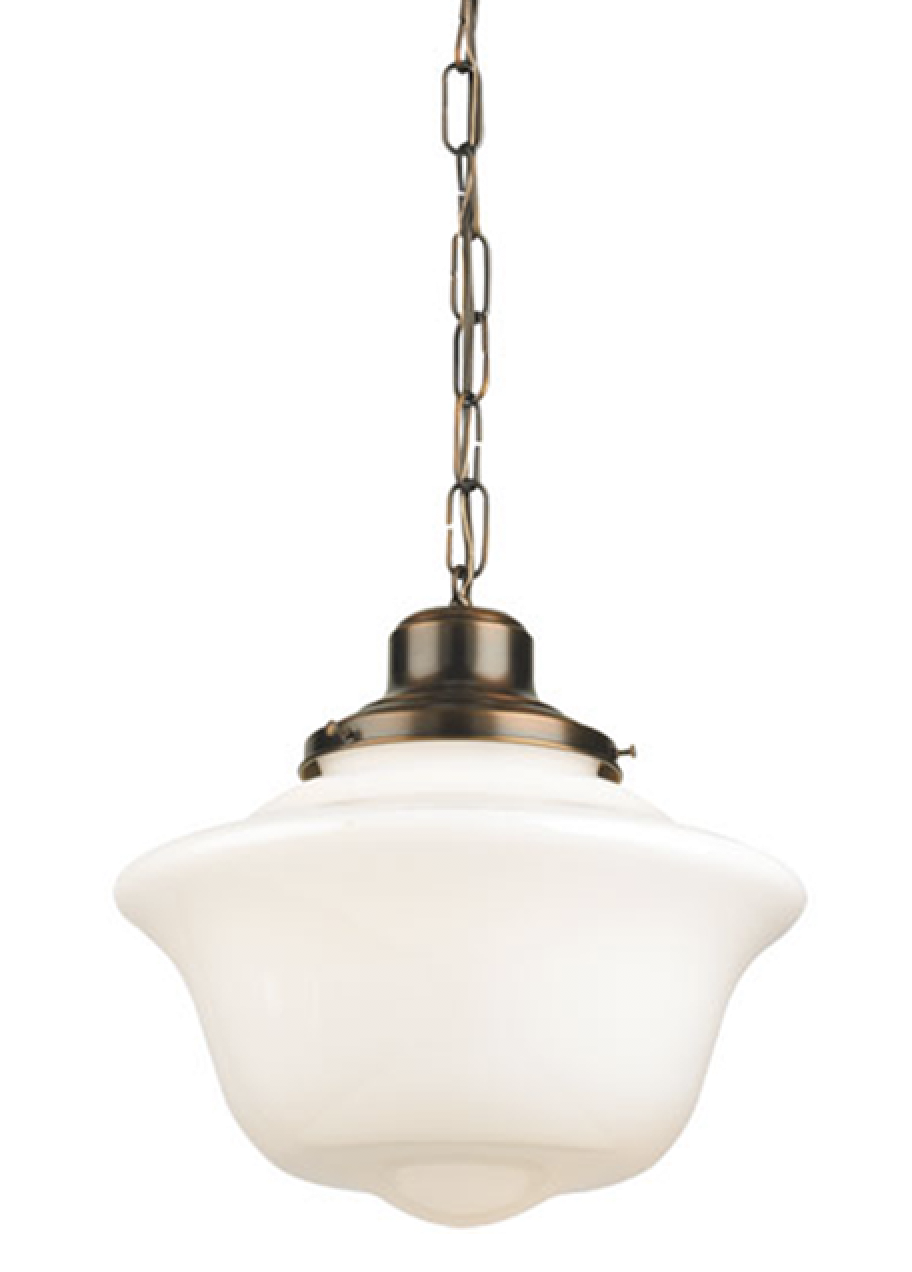
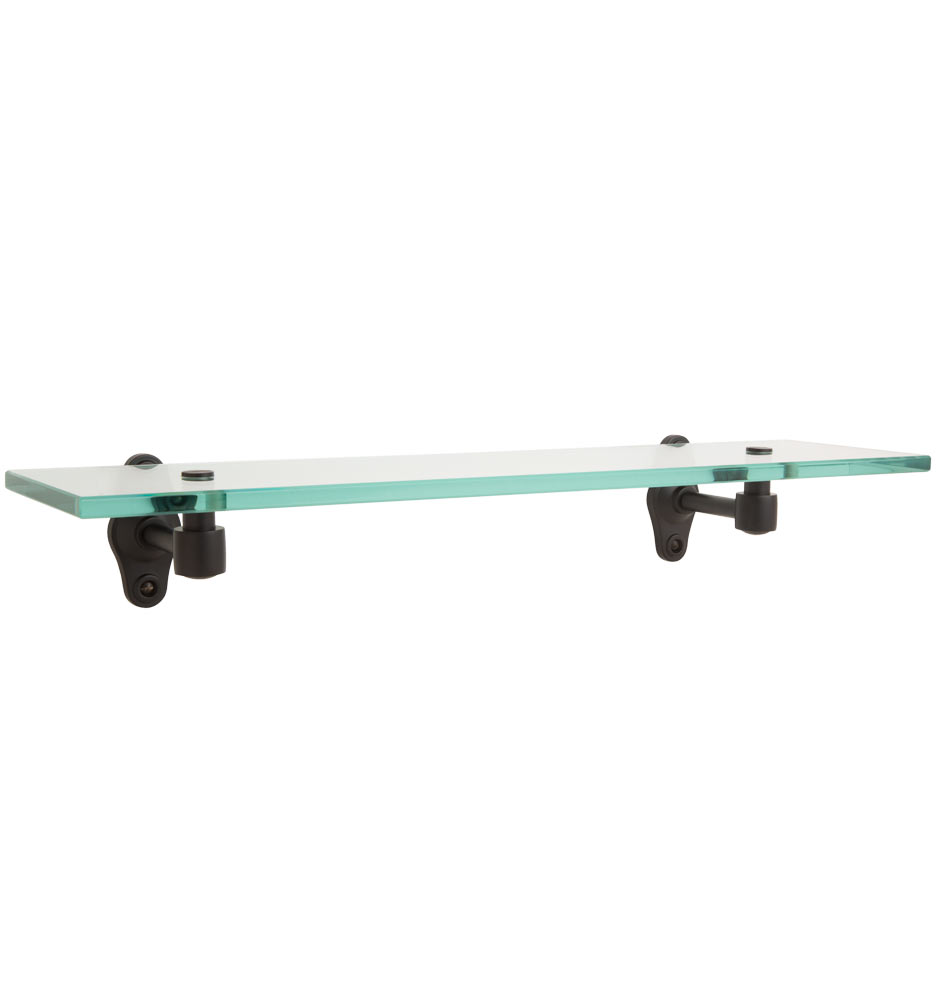
I'm definitely a fan of mixed metals. We did chrome throughout with black accents. The light fixtures are both vintage brass that have earned a dark patina after years of aging. The window hinges are brass and will continue to patina over time.

The Gold Hive Bathroom After

The bathroom previously didn't have an air vent, so when we decided to add one, I wanted an old vent with some pizzazz. I found this wall vent at a local architectural salvage shop covered in paint and rust. After a trip to the powder coater it came back with the most glossy black finish. 

2017 Sept reveal-0371.jpg

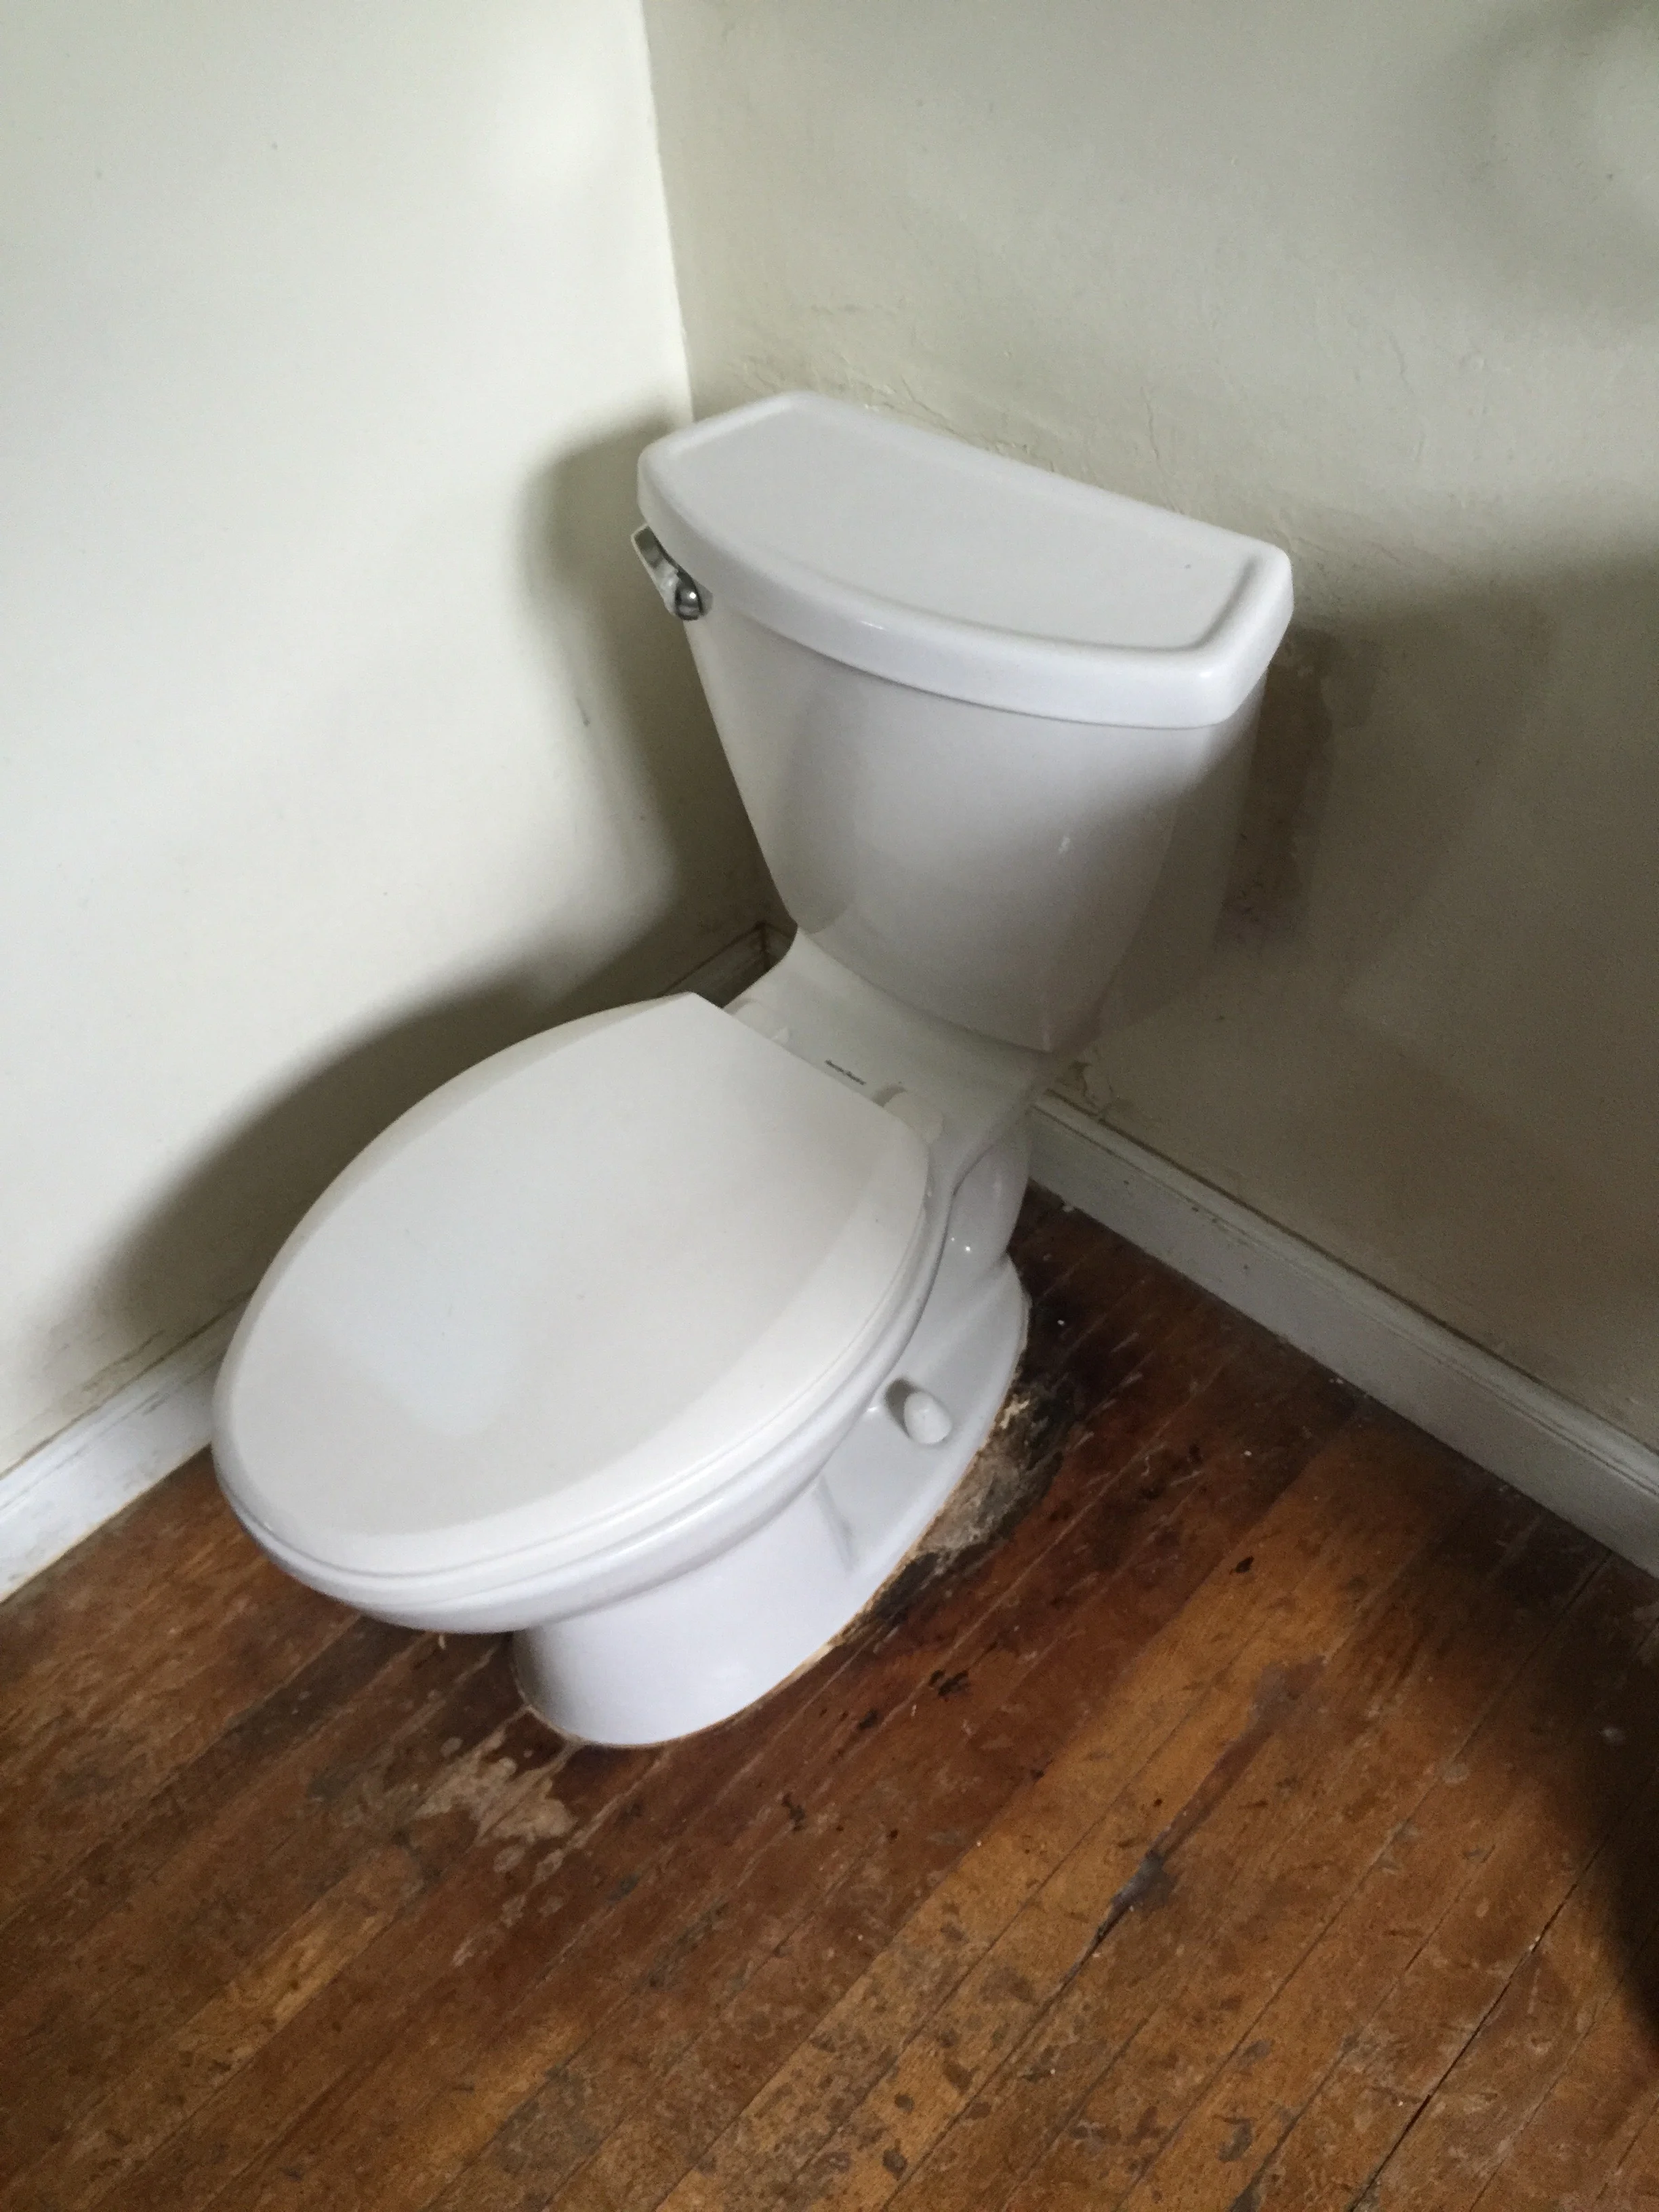
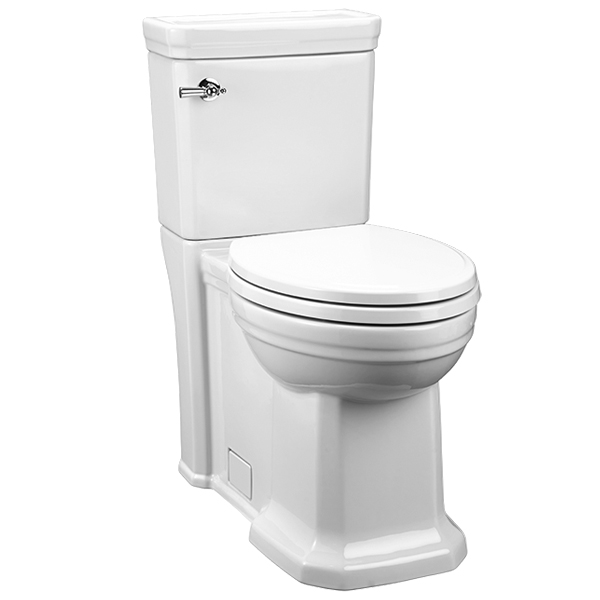
Notice on the side of the toilet that you don't see the curvy shape defining the route of all of your flushed items? We went with a skirted (or concealed trapway) toilet which makes such a visual difference.

2017 Sept reveal-0382.jpg

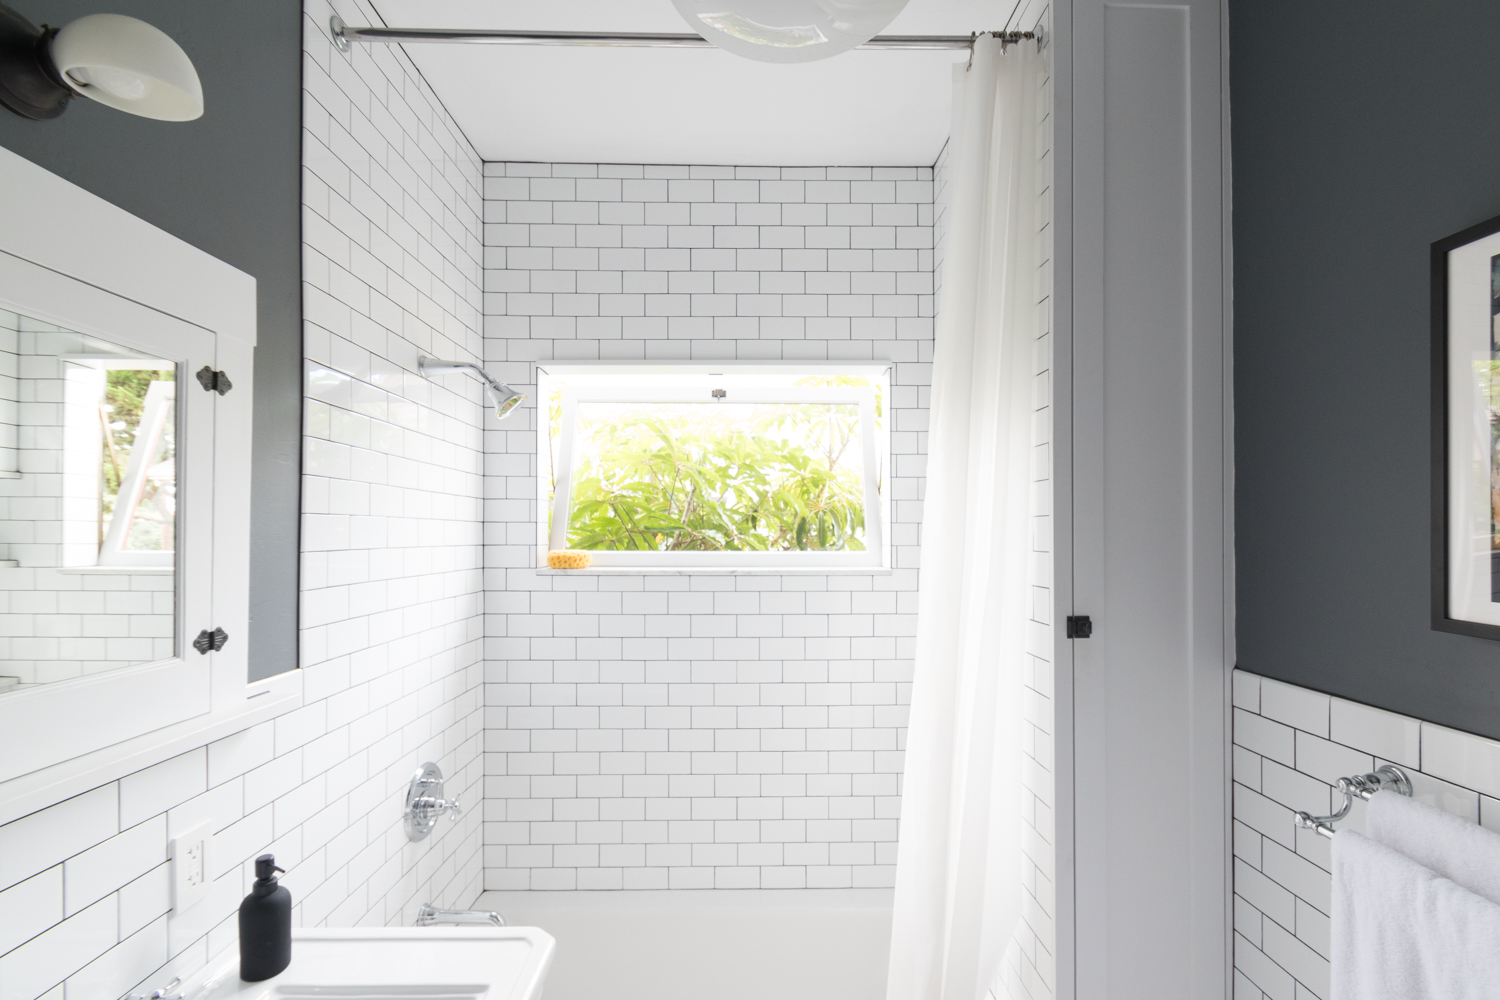
Can we talk about that window for a second? The previous bathroom had a lil' frosted glass one with an aluminum frame that was corroded and didn't open. This 45"x26" custom wood window brings in so much light and lets out all of the steam and moisture after a hot shower. The oversized window with a transom-style opening is one of my favorite features of the whole bathroom.

2017 Sept reveal-0383.jpg
The Gold Hive Bathroom After

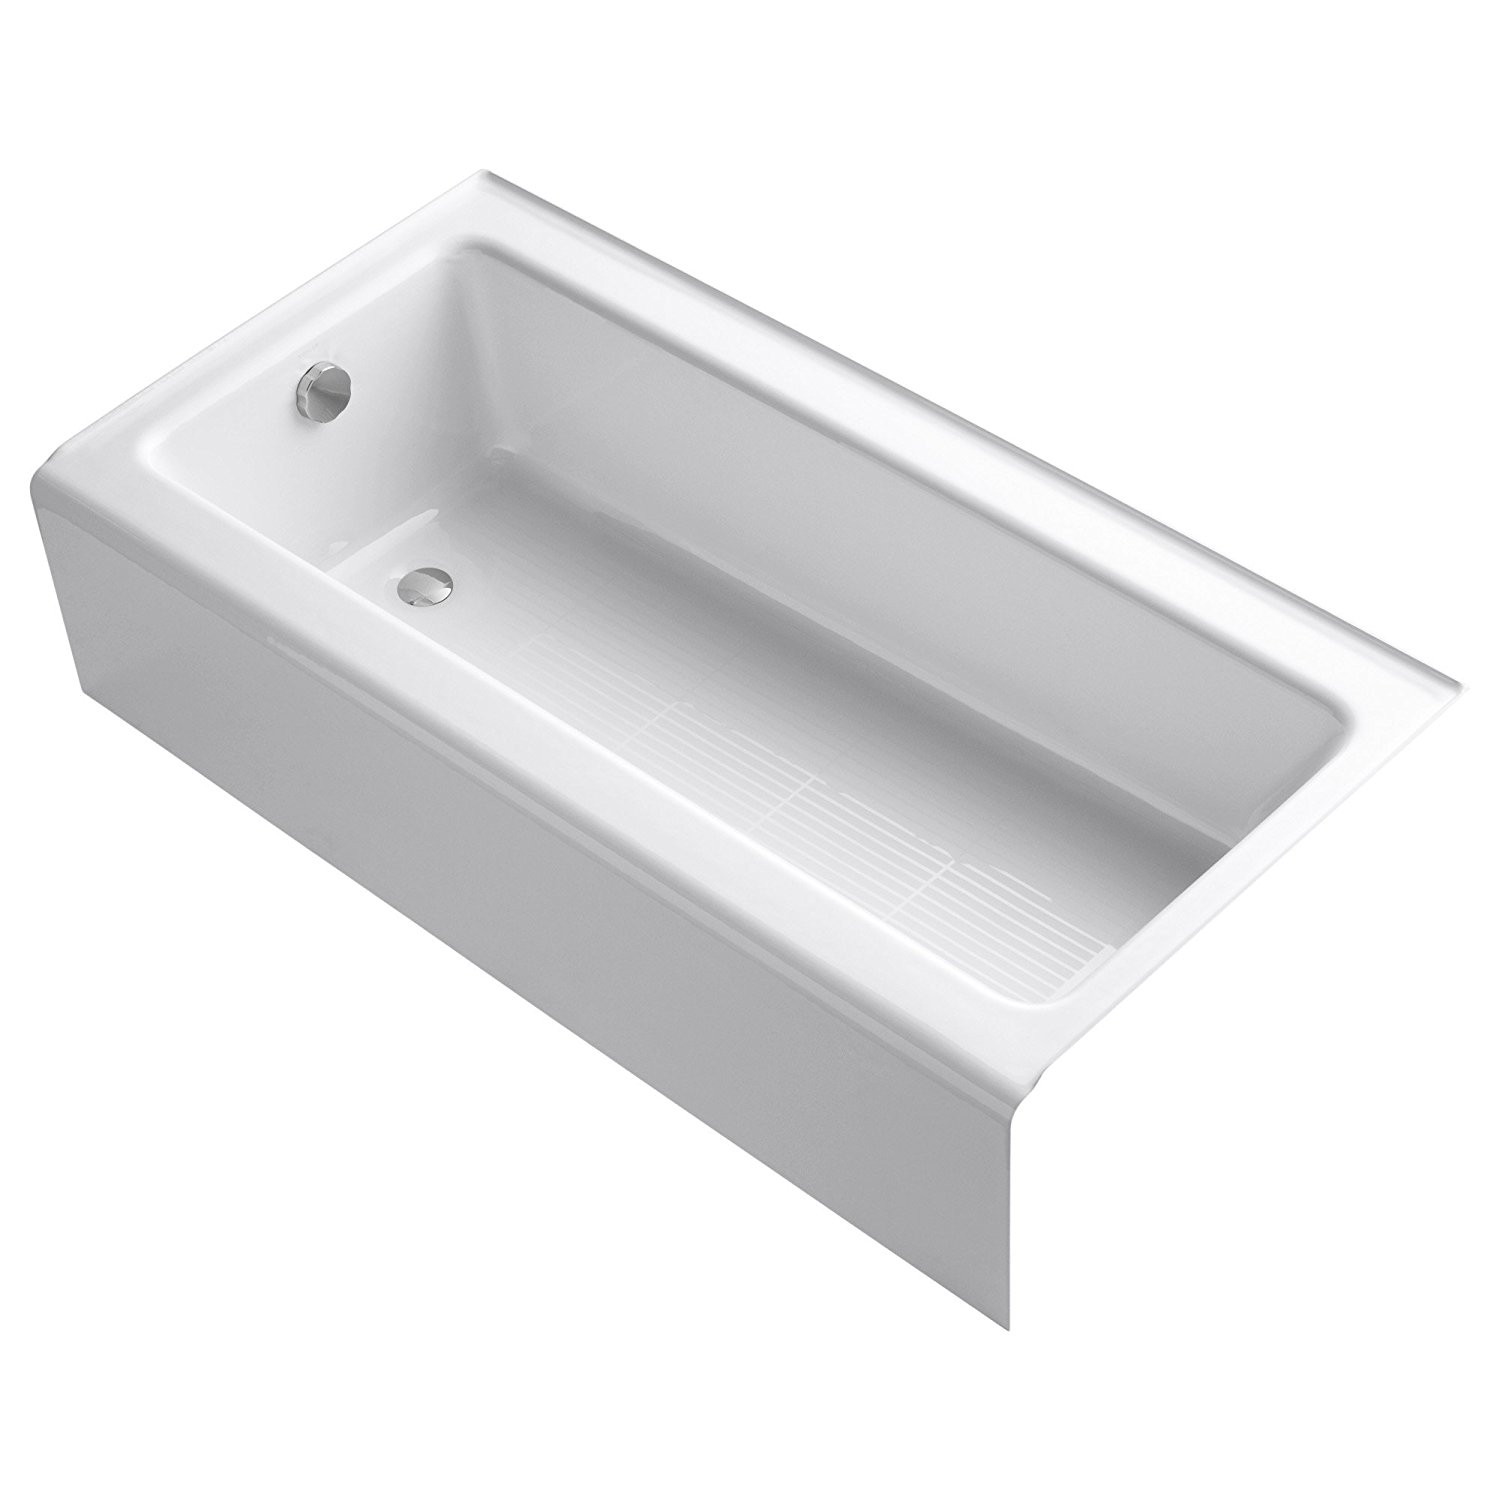
We opted for a cast iron tub from Kohler (as opposed to acrylic) and I love how solid it feels. There's no flex underfoot, it keeps tub water warm longer, and it's the right material for our old home. This particular tub is a favorite because of the flat apron which was hard to come by within our budget.

The Gold Hive Bathroom After

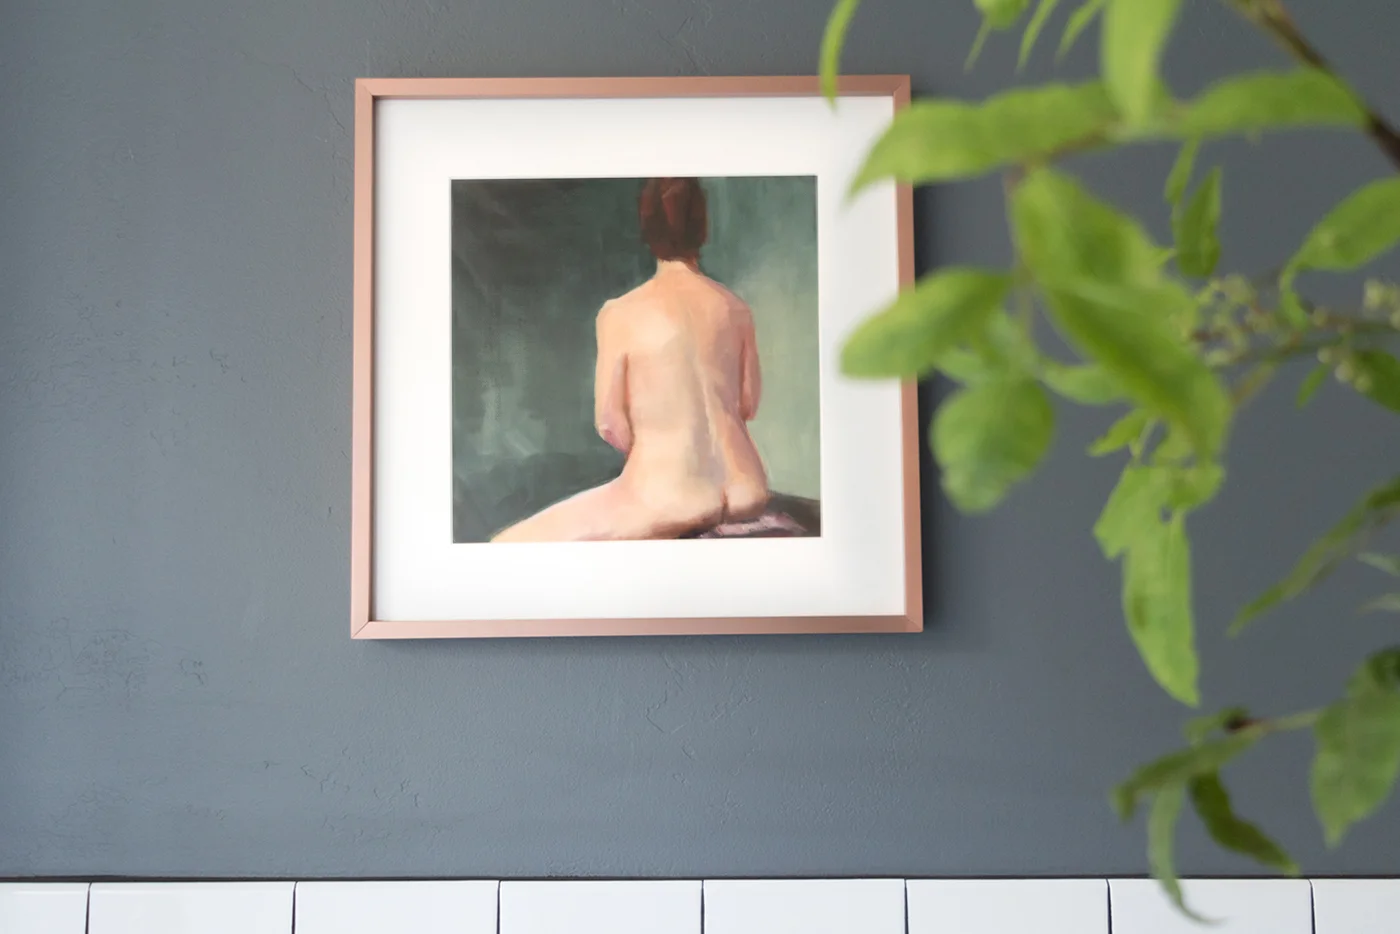
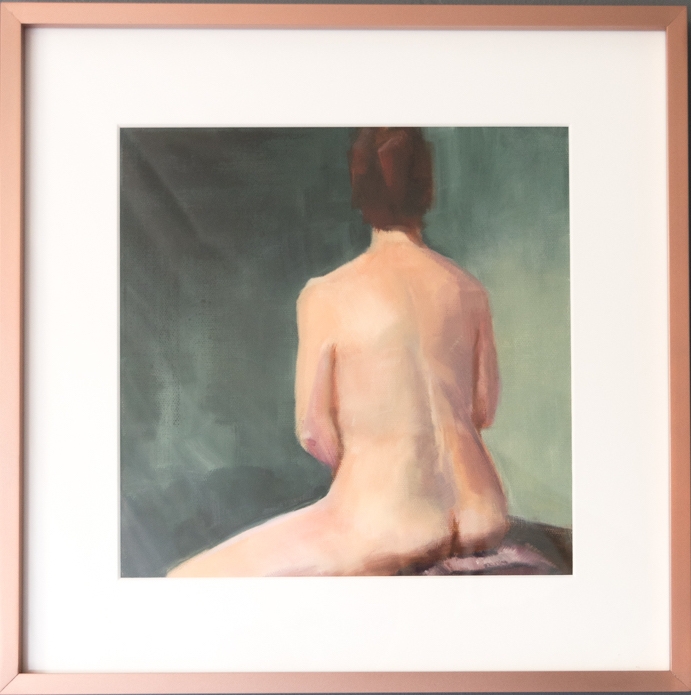
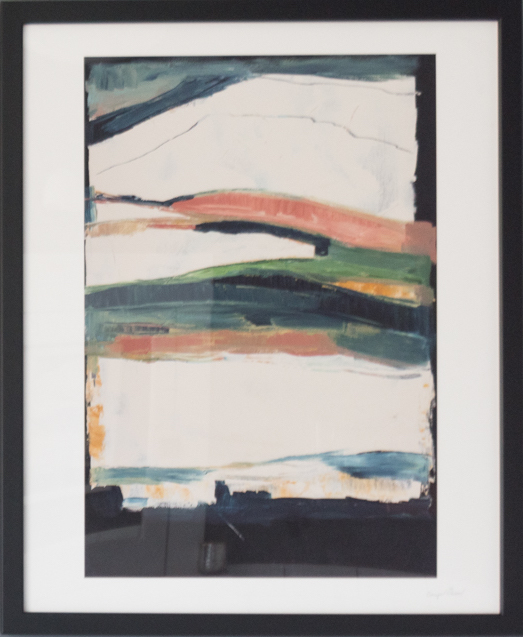
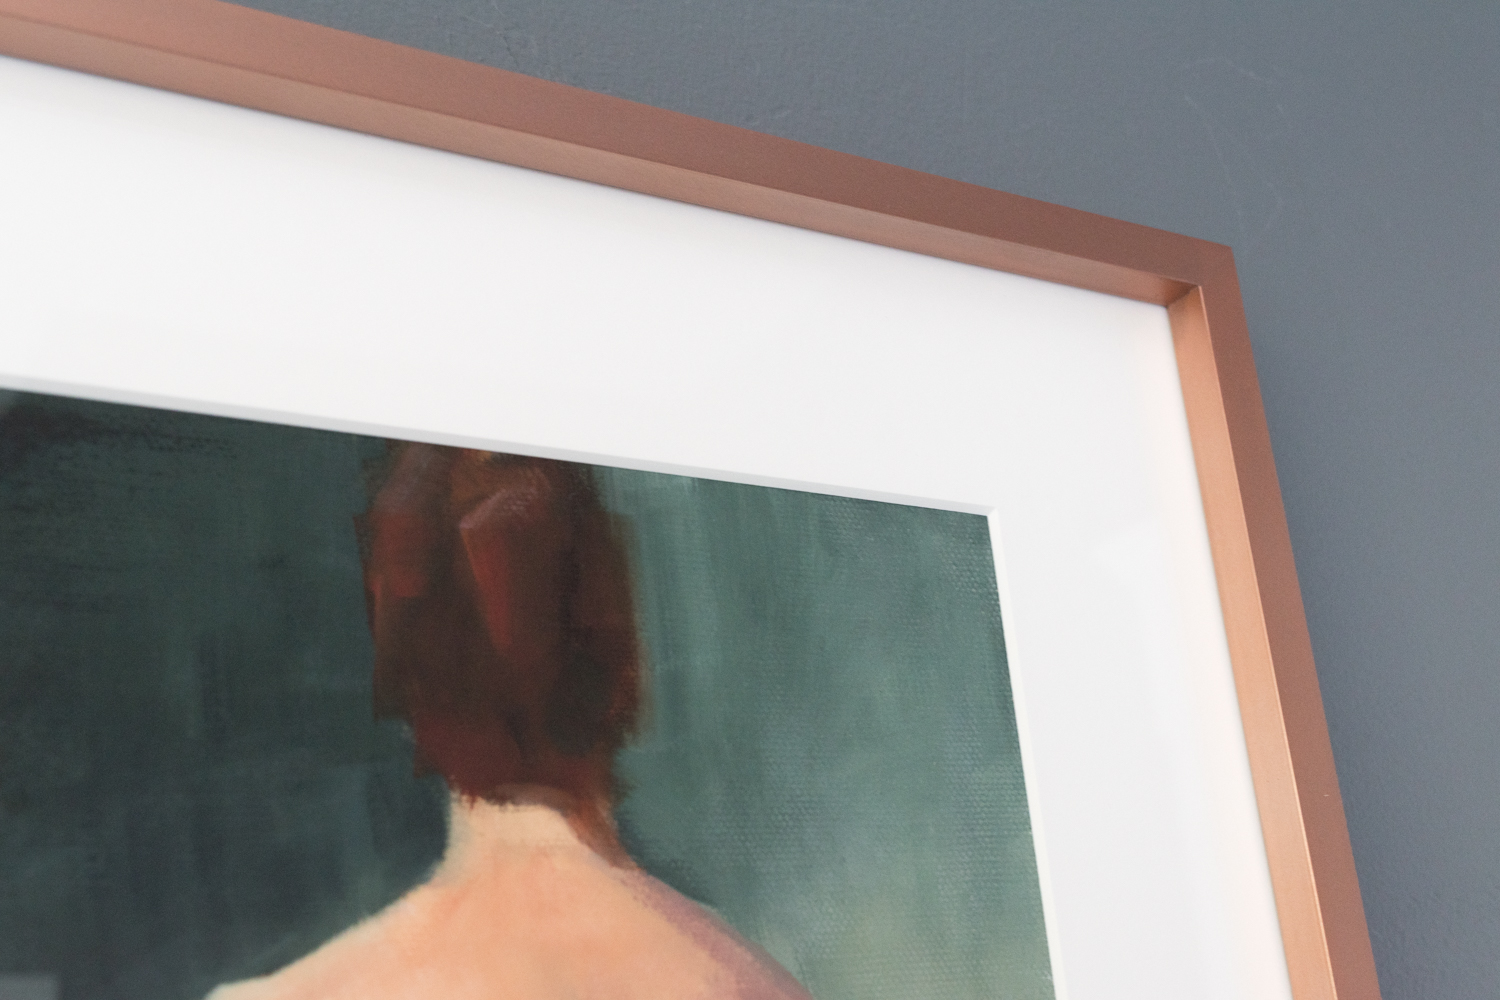
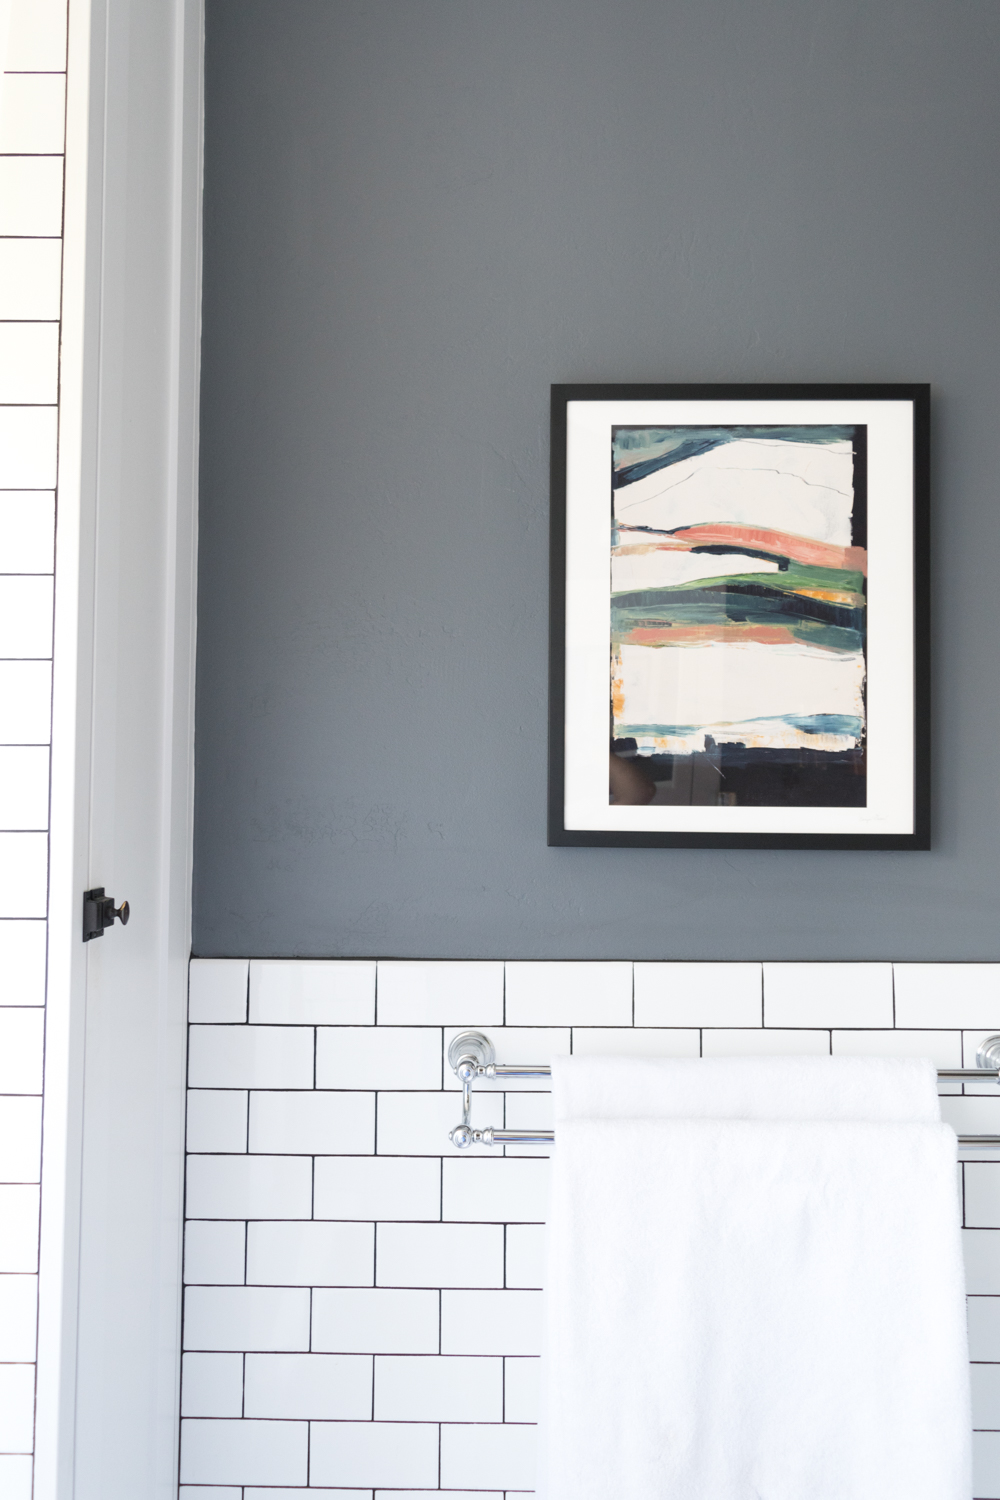
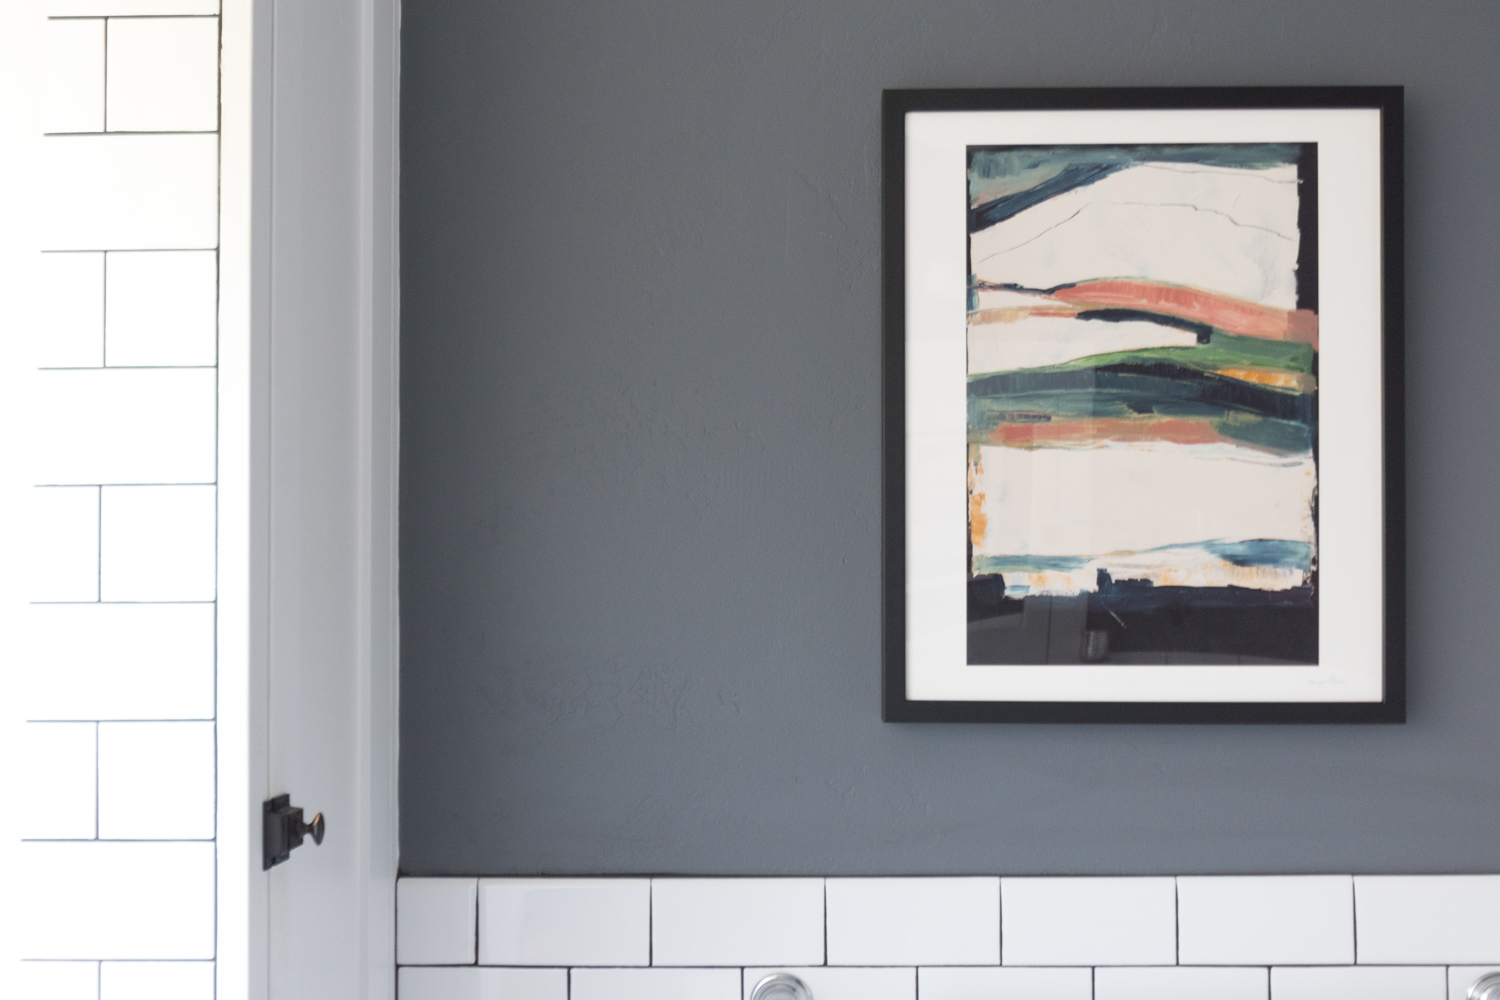
How about that artwork? I feel like it was painted just for this bathroom.

The Gold Hive Bathroom After

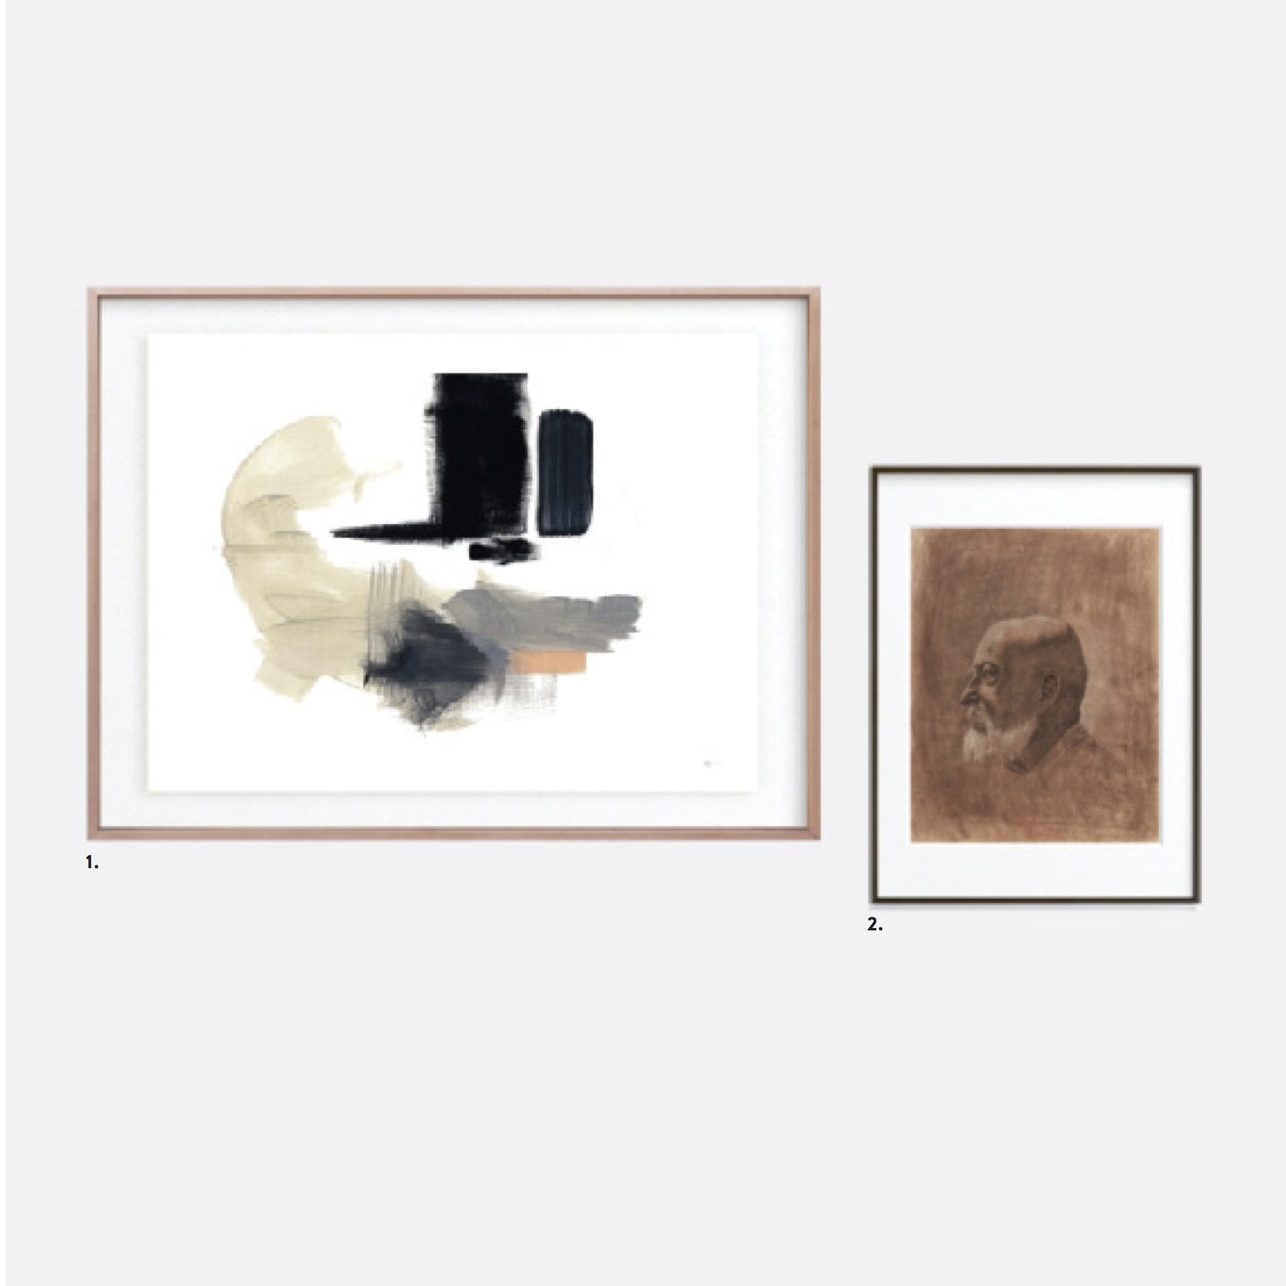
I really could go on and on about this space! For all of the posts about the bathroom, click here. And to shop the room, click on the product images below!

Get The Look

Note that a few of the pieces in our bathroom are vintage, so I linked to similar ones.

Classic Tile in the Bathroom

If you saw my post about the bathroom inspiration, you'll remember that it was chock full of classic vintage vibes complete with subway tile, marble, and contrast grout. Thus, that's exactly what we went with when we gutted and remodeled the bathroom two years ago.

Subway tile in the bathroom The Gold Hive

I already knew I wanted subway tile, and even considered crackled, textured, and irregular styles before ultimately deciding on these crisp white ones from the Tile Shop (which are currently on sale). But, it's not as simple as just picking the tile. Below I'm sharing our thought process for tile design.

Pattern

Running Bond Offset tile pattern subway in bathroom The Gold Hive

We did a simple running bond pattern throughout. There are actually several ways to lay a subway tile in a subway kinda way. Check out the examples here. Since we were going with a dark grout, I chose a pattern that didn't have as much movement as say the 1/3 offset.

Layout

Subway tile to the ceiling in a shower

I can't stand when tile doesn't go to the ceiling in a shower. I know, it isn't necessary. It can be a waste of money to tile 3 feet above your head where no water will splash, but I really am a sucker for fully tiled showers.

chair rail heigh subway tile in the bathroom

Since I was already going for lots-o-tile in the shower, we decided to surround the rest of the bathroom walls mid-way to a chair rail height. This look helps me to feel like I'm living in The Knick. The medicine cabinet determined how high we would go, since I didn't want it floating above the tile, nor drowning in it. For reference, the tile stops 50" up the wall.

Finishing

bullnose subway tile bathroom The Gold Hive

We nearly did a decorative cap around the top of the chair rail, but ultimately nixed it when we didn't like how it terminated at the edges. So, we did a simple bullnose along the top edge of the same-sized tile as the field tiles. I like that this modernizes some of the other vintagey-vibes in the room. For the base, I went with a baseboard skirting that finishes off the space with just a lil' bit of detail.

base molding tile bathroom dark grout The Gold Hive

Grout

Dark grout on Subway Tile

Contrast was the name of the game with the wall tile, so we did a deep charcoal to make the pattern pop. Also, dark grout doesn't run the risk of looking dingy. Win!

grey marble tile floors in bathroom

The flooring had lots of texture in its marble veining and hexagon shape, so we went with a gray that would neutralize the pattern. We went with Delorean Gray

Accents

For the window ledge and the niche shelves, we installed a few pieces of marble slabs. They are gorgeous and the perfect material for a solid surface to rest our toiletries atop of. Plus, they tie in to the marble floor.

Marble sill and shelves in shower subway tile

There are so many details that go into laying tile and ensuring that you're forever happy with the pattern, but I opted to keep this post pretty simple. If you want the specifics, let me know!

For more on the bathroom renovation progress click here! And to get all of the sources and see the full reveal, click here.

Subway Tile in vintage bathroom

Selecting Paired Art for the Bathroom

There's no doubt that the artwork you pick for your home can make a big difference in the feeling of your space. Choosing the right combination of pieces can be difficult, but luckily there's help!

This post is in partnership with Minted!

Minted sourcing artwork from designers

Even the design-blogger-and-art-school-graduate can have a hard time finding just the right pieces. I struggled for months with sourcing the art for the bathroom walls.

Here's what I was working with:

1. The all-white space with oodles of tile can come off as sterile and cold. The room yearned for artwork that would add some warmth but would maintain the dark moody vibe of the wall's paint color.

2. Since I had two adjacent walls to fill, the art needed to complement each other without being too matchy matchy.

3. We wanted pieces that felt special but not so in-your-face-dramatic that we'd grow tired of them.

I played with some dark landscapes, several abstract shapes, and a few portraits but wasn't in love with any combos. Luckily, my friends at Minted stepped in to help me out. And they can help you, too!

In addition to selling beautiful printed and custom art, Minted has a great team of designers that listen to all of your needs and wishes, and then translate the vision into proposed artwork and a mockup of your space. Their styling services were particularly helpful for me when I was looking for two pieces that would work well together on adjacent walls.

Here's what they proposed for our bathroom after I outlined my wishes:

Minted Gallery Art Option How to Choose Artwork

OPTION 1: Edgy

1. Embrace by R studio
standard format in rich black wood frame

2. Sitting Still by Jennifer Daily
standard format in matte brass frame

Minted Gallery Art Option How to Choose Artwork

OPTION 2: Moody

1. Melting Glacier by Caryn Owen
white border in rich black wood frame

2. Bath by Sue Prue
matted in matte copper frame

Minted Gallery Art Option How to Choose Artwork

OPTION 3: Classic

1. Tahitian Pearl No. 3 by Julia Contacessi
white border in matte brass frame

2. Arches by Ilze Lucero
float mounted in matte brass frame

Minted Gallery Art Option How to Choose Artwork

OPTION 4: Contemporary

1. Imbue by Lindsay Megahed
matted in matte brass frame

2. Black 03 by Catilustre
standard format in matte black frame

Minted Gallery Art Option How to Choose Artwork

OPTION 5: VINTAGE

1. Untitled 2 by Jaime Derringer
float mounted in matte copper frame

2. Human One: Anton by Colin Stuart
standard format in matte black frame

Aren't those combos great? I narrowed the options down to #1, #2, and #5 pretty quickly, but got hung up on the decision for a few days. Sitting Still, in #1 is just so perfectly dark and Human One: Anton in #5 is so striking! I think I need to find a spot for Anton somewhere else in my house.

Minted how to pick artwork

We ultimately went with option 3: moody. I am just so tickled with Bath by Sue Prue! I already love pretty lady artwork so this nude was the perfect addition to the collection. The background feels like it was made for my walls.

Minted art how to pick artwork frames

And that frame! I really don't think I would have ever selected the copper frame, but I'm so glad Minted did the decision making for me. I'm smitten with the warmth it adds to the room and how it brings out the skin tones in the painting.

Minted frames and artwork selection help

It also magically matches my copper tin that I previously planned to replace with a wooden one. Not anymore!

Minted how to pick artwork and work with a designer

Speaking of matching elements, both the warm tones in the frame and deep blues of Bath are seen in Melting Glacier by Caryn Owen. Again, aren't those blue-green-greys perfect for the walls? Minted really knows what they're doing.

Minted how to select paired artwork

The view from the shower is the best for admiring the two prints at the same time. They are different subject matters, by different artists, and in different frames, yet they feel like they are friends.

Minted artwork getting help from a designer

I scanned Minted's website for hours but never would have come up with this art print and frame combo. If you want help from a professional designer, I highly recommend you check out Minted's styling services that start at $75. It includes not only a design plan but also a discount on your art order!

Are you an indecisive design professional, stylist, or home renovation professional like me? The art trade program is a great resource for complimentary design help and discounts on art products for your professional projects.

Minted getting help picking artwork

Happy art hunting! And, don't forget this important art hanging PSA from Emily Henderson.

A Console Sink Collection

We lucked out with extra space in the bathroom to carve out lots of storage so we were able to nix the vanity and opt for a console sink. With all of our toiletries in the cabinet, the sink could be just a sink - no need for a bulky vanity taking up visual space in a small bathroom.

The Gold Hive Console Sink

During our sink hunt, the priority to was to get as much work surface area as we could for the space we had (so we opted for this one). But if that isn't your number one goal, how about acrylic legs? wall-mounted faucets? turned legs? shelves? or marble? I've collected my favorite console sinks from a few different online retailers - each with some different features.

The Gold Hive Console Sinks

1. Mason Apothecary $999 / 2. Essex $714/ 3. Vero Wall Mount plus legs $731 / 4. Vero $582 / 5. Templeton $823 / 6. Mason $699 / 7. Milano $706 / 8. Nuo $739

Those are all great brand new sinks, but there’s nothing like an authentically antique sink. Shop available vintage sinks with the button below.

We have #6, the Mason console from Signature Hardware. We've been using it as our primary bathroom sink for two years and it's holding up beautifully - even fared well after I left a hot curling iron on it for 8 hours by accident. Doh!

For more of the bathroom renovation progress check out the inspiration, the plans, the demo, the recessed shelves and storage cabinet, and the window. There's still more to come, so I'd recommend you subscribe.

But, Where Do You Keep All of Your Things?

Bathroom storage is a biggie. In all of the infomercials of people in dramatic black and white reenactments spilling their toiletries all over the bathroom floor or in House Hunters when a couple is tripping over each other trying to both get ready in the morning, they all exasperatedly exclaim how they need more storage in their bathroom. We've all been there, amiright?

I try my hardest to live minimally and own as few makeup products as possible, but we all have stuff to store. Without a vanity to hide all of our things in, we carved out a nice spot in the corner of the room to store all of our goodies.

The Gold Hive Bathroom Storage

To revisit, here's the layout we played with during the design stage (the finished dimensions changed a bit).

Bathroom plan view

See that chunk of space at the end of the tub in the upper right corner? That pocket is the answer to all of our storage woes. The 6.5" deep space became what I call "wet storage" and is accessed from the shower/tub. The 12" wide section is our "dry storage" that opens into the main part of the bathroom. The goal was to create as much hidden storage as possible so things didn't sit on the sink or the edge of the tub. Also, I'm one of those people that decants my shampoo into an unbranded bottle aiming to see as few product labels as possible - sorry toiletry brand graphic designers.

With these terrible photos, you can see how the whole thing came together.

The Gold Hive Bathroom Storage Progress

Before the storage unit construction began, the window was sized, the subfloor was rebuilt and prepped for tile, electrical was put in, rough plumbing was installed, walls got cement board, and the floor was tiled.

The Gold Hive Bathroom Storage Progress

When we were interviewing contractors for this project, 85% of them said that adding this storage unit was a bad idea. They said that the weight of the tile would pull on the cabinet and the only way to prevent it was to make the unit super strong by building a wall between the tub and the shelves, which would only leave 5” of usable storage space. I refused to accept that, and the contractor we ultimately hired agreed that my cabinet dreams could indeed come true.

Well, the bathroom remodel wrapped up two years ago and the storage unit is in perfect condition! 

Kim and Scott of Yellow Brick Home did a similar cabinet at the foot of their tub awhile after we installed ours. They used the wall and pre-made cabinet method - but did so much better a job than any of those doubtful contractors could have done. Either route works!

The Gold Hive Bathroom Storage Progress

A big part of what made this cabinet strong is we opted to permanently install the shelves, rather than adjustable boards that we can move up and down along pegs. The permanently affixed shelves hold the whole piece together from top to bottom. I don't have the luxury of resizing the cubbies, but that's perfectly fine for our needs.

The Gold Hive Bathroom Storage Progress

We also took the cabinet all the way to the ceiling. Which is storage heaven, and gives it extra rigidity being tied into the floor, ceiling, and wall.

The Gold Hive Bathroom Storage Progress

The wet storage earned marble shelves to create three cubbies to rest shampoo bottles. The marble sits on top of the row of tile and gets wedged in on all three sides by the second row atop the slab.

Here she is - two years later and still going strong.

The Gold Hive Bathroom Storage

The original plan was for the shower niches to be 6.5" deep, but I found a remnant slab at a local stone yard that was 8" deep, so why not! Each shelf varies in height from 8" to 14" tall to allow for different sized bottles. The whole recessed niche is 19" above the edge of the tub so its low enough that the bottom shelf can be reached while soaking in the tub, yet not so low that we're bending down to grab things while showering.

The Gold Hive Bathroom Storage

I talked about the tile in this post, but I just have to point out this detail at the bottom of the cabinet with the base tile wrapping underneath the door. Love.

The Gold Hive Bathroom Storage

The bottom shelf is 23" tall to allow for the toilet brush, plunger, and cleaning supplies. The rest of the shelves are 13" tall. It's the perfect size for these baskets and this modular acrylic storage. With 17" of depth, I can fit 24 rolls of toilet paper easily within reach. Any deeper and it would be hard to reach anything in the back of the shelves.

The Gold Hive Bathroom Storage

The concealed storage and the tucked away shower niches give all of our toiletries some privacy. Yet, whenever guests ask "Where are all of your things?!" I proudly open up the cabinet and pull back the shower curtain to reveal the shampoo bottles. Which kinda defeats the purpose of designing a hidden niche and a concealed cabinet. oops!

The Gold Hive Bathroom Storage

You can read about all the rest of the bathroom elements by clicking the button below. Then, subscribe so you can follow along when we add another bathroom to the house in 2019!

Installing a Custom Wood Window in the Shower

Installing a Custom Wood Window in the Shower

The window in our bathroom is perhaps the star of the show. Not until I got to bathe right next to the great outdoors did I come to fully appreciate how great a window in the shower is. And boy is it great! We had a custom wood window installed and while some people would disagree with this approach, I wouldn’t change a thing!

Read More

Taking The Bathroom Down To The Studs

I've been distracted with working on week 1 and week 2 of the One Room Challenge (this week's update coming Thursday!) so I've left you hanging since first introducing you to the bathroom remodel. Sorry! But, we're back and headed into demo.

As a refresher, here's what the bathroom looked like.

The Gold Hive Bathroom Before

Since most everything was leaking, rusting, failing, sinking, or otherwise not super pretty, nearly all had to go. But as an old home lover, original features don't get ripped out that easily. Only a few elements had been there for a century. The original medicine cabinet would need patching and cleaning, but it could get freshened up to be a real stunner. The hardwoods were original but were rotten beyond repair rotten and couldn't be salvaged. The bathroom door and trim were original and would definitely stay. So, those keepers would get saved, but  the rest of the bathroom would go.

The Gold Hive Bathroom Before

That tubular thing in the crawlspace is our HVAC, but it reminds me of the dragon in The NeverEnding Story.

The Gold Hive Bathroom Remodel

Isn't a wall of exposed lath so pretty? It's like my very own Agnes Martin installation.

It isn't uncommon during remodels to demo only select parts of the room. You don't always need to pull all the drywall down and demo into the attic and crawlspace like we did. Yet, demo only happens once, so it's the only chance to expose everything and repair anything. With evidence of bigger problems, and knowing the plumbing has been there for a century, we didn't hesitate to take everything out to start from scratch.

A contractor that I interviewed to do the project proposed putting the new floor tile directly on top of the existing hardwood. Let me count the ways that it was not a good option. 1. Adding tile on top of existing flooring would leave a perfect place to stub my toe walking into the bathroom with the floor an inch higher than the hallway. 2. The hardwoods and the subfloor were visibly rotting, so adding a new floor atop certainly wouldn't resolve that issue. 3. The plumbing would have never been revealed to see how corroded it was.

The Gold Hive Bathroom Before

Yum.

Thank goodness we didn't heed the advice of that contractor because those 100-year-old pipes were at the end of their life. We also found that the vent pipe had a big crack down the back of it.

The Gold Hive Bathroom Before

Also, inside of the exterior wall, we found a beehive. A hive! 

The Gold Hive Bathroom Find

I suspect that the bees found a hole in the exterior wall and started to build their home, only to get locked out when someone noticed the buzzing and sealed their entrance. I saved the honeycomb but have yet to find a use for it. Any ideas?

Even though we spent a bit more time gutting the whole room, we've gained so much peace of mind having fresh materials. I realize most renovators know that the advice to layer new material on top of failing material isn't the smartest move, but if you ever had any doubt, let this be a lesson. You just might find a beehive!

For more bathroom progress, click the link below, and then subscribe for more - I’ll be adding a new bathroom in 2019!

Bathroom Plans

Last week I shared some of the inspiration for our bathroom. The collection of images made a few must-have elements pretty clear: subway tile with dark grout, moody walls, hex tiles, marble, and period-appropriate finishes.

The Gold Hive Bathroom Mood Board

SOURCES: paint / medicine cabinet (ours is original) / faucet / hex tile / sconce (ours is vintage) / cabinet latch / pendant (ours is vintage) / register (ours is vintage) / subway tile / grout / console sink

We had a pretty good idea of the plans for the bathroom, but small tweaks were made over the course of the renovation. The below designs were drafted early on, so don't take these measurements as an exact blueprint of the finished product. Rather, a starting point for where we were headed.

The Gold Hive Bathroom Plan View

The layout of the existing bathroom had no reason to be changed. I like having the toilet tucked in the corner, the sink has ample room around it, and the tub configuration allows for storage at the foot of it. Many bathrooms like this are only 60" wide which gives the tub just enough room to fit wall to wall. Since we had another foot of space, we could have gotten a longer tub to stretch the length of the room, but we opted to make two spots for storage, seen in the upper right corner of the above image. The little square that measures 6.5" deep is accessible from the shower. A perfect place to nestle bottles of shampoo without having them on display.

The Gold Hive Bathroom South View

The 13" space on the right is a cabinet for toiletries, refill bath products, cleaning supplies, and more. I think it's my favorite feature in the whole bathroom.

The window shown here is a sizable improvement from the existing one, but we ended up going even bigger!

The Gold Hive Bathroom East View

Because the sink is floating in between the toilet and the tub, I didn't want a traditional vanity. I think vanities are really pretty when they look like built-in cabinetry as an extension of a wall. But on their own, vanities can look like boxes floating in the middle of a room. Thus, we opted for a console sink that visually opens the space. Sure, we gave up storage, but I'm a-okay with that. Neither Ross nor I own a lot of products for primping, so the storage at the end of the tub is perfectly adequate for us.

Other than a few tweaks, those are the plans for the bathroom! If you want to jump two years into the future, you can see the finished bathroom here and here and here.

For more bathroom progress, click the link below then subscribe so you don’t miss out when I add a bathroom in 2019!

Hashtag Bathroom Inspo

You asked for it, so the bathroom remodel is next to share!

Since we were putting a new bathroom in an old house, I wanted the design to pay homage to the old house charm. I'll never know what the original bathroom looked like before we got our hands on it, so the design options were vast. Should I do classic black and white or colored tiles? Bold or understated? Authentic period pieces or reproductions? Simple or a bit more eclectic? Entirely vintage or a mix of old and new? Minimal or snazzy?

Here are a few of the spaces I took inspiration from when designing our bathroom.

I love how soft yet high-contrast this feels. A clawfoot tub is also oh-so-dreamy. We ultimately weren't able to incorporate a clawfoot soaker in our bath remodel, but maybe there will be room in the next bathroom that we hope to add on.

Don't even get me started on my love for floral wallpaper. This Ellie Cashman paper is gorgeous. The pedestal sink is such a perfect way to show off wall details.

Source: Clay Squared

Source: Clay Squared

This sink with the look of turned legs is so quaint in the best way possible. The tile is understated but filled with detail. There's hex, a variation on greek key, a pencil liner, decorative cap, and subtle cove base tile. The chair-rail height tile surrounding the whole room was a must-have on my list.

A painting in lieu of a mirror is fine by me. The tile work here is far simpler than the detailed profiles above, but it exudes character. I adore how the aged sink legs and worn tub coexist with the new hardware.

That window is perfectly gigantic. If privacy were no issue, I would have installed a window the full size of the wall.

That retro green tile is to die for, but it's all about that recessed soap dish.

Source: Unknown

Source: Unknown

The moody wall color was definitely a feature worth stealing. I think I need to add more artwork, though, because this is the bee's knees.

Why do moody walls when you can do a moody ceiling? I love how this bathroom has a bold and modern feature without sacrificing the traditional tile. 

Storage is key in small bathrooms, so why not borrow space between the studs for recessed cubbies? Our final bathroom design allowed for this, but in a slightly different variation.

I borrowed an element from each of these bathrooms, and the many others on my Pinterest board to create the bathroom that's perfect for us. Stay tuned!