
A Built-In Buffet Refresh
/The dining room sold me on our little craftsman bungalow when I first saw the built-in buffet, the plate rail, the picture rail, the swinging door, and the room dividers. Swoon! But, I ended up just putting random tchotchkes behind the leaded glass, and filled the drawers with junk. It was nothing to write home about and I feel bad for neglecting it for so long. So, I gave it a quick weekend refresh!
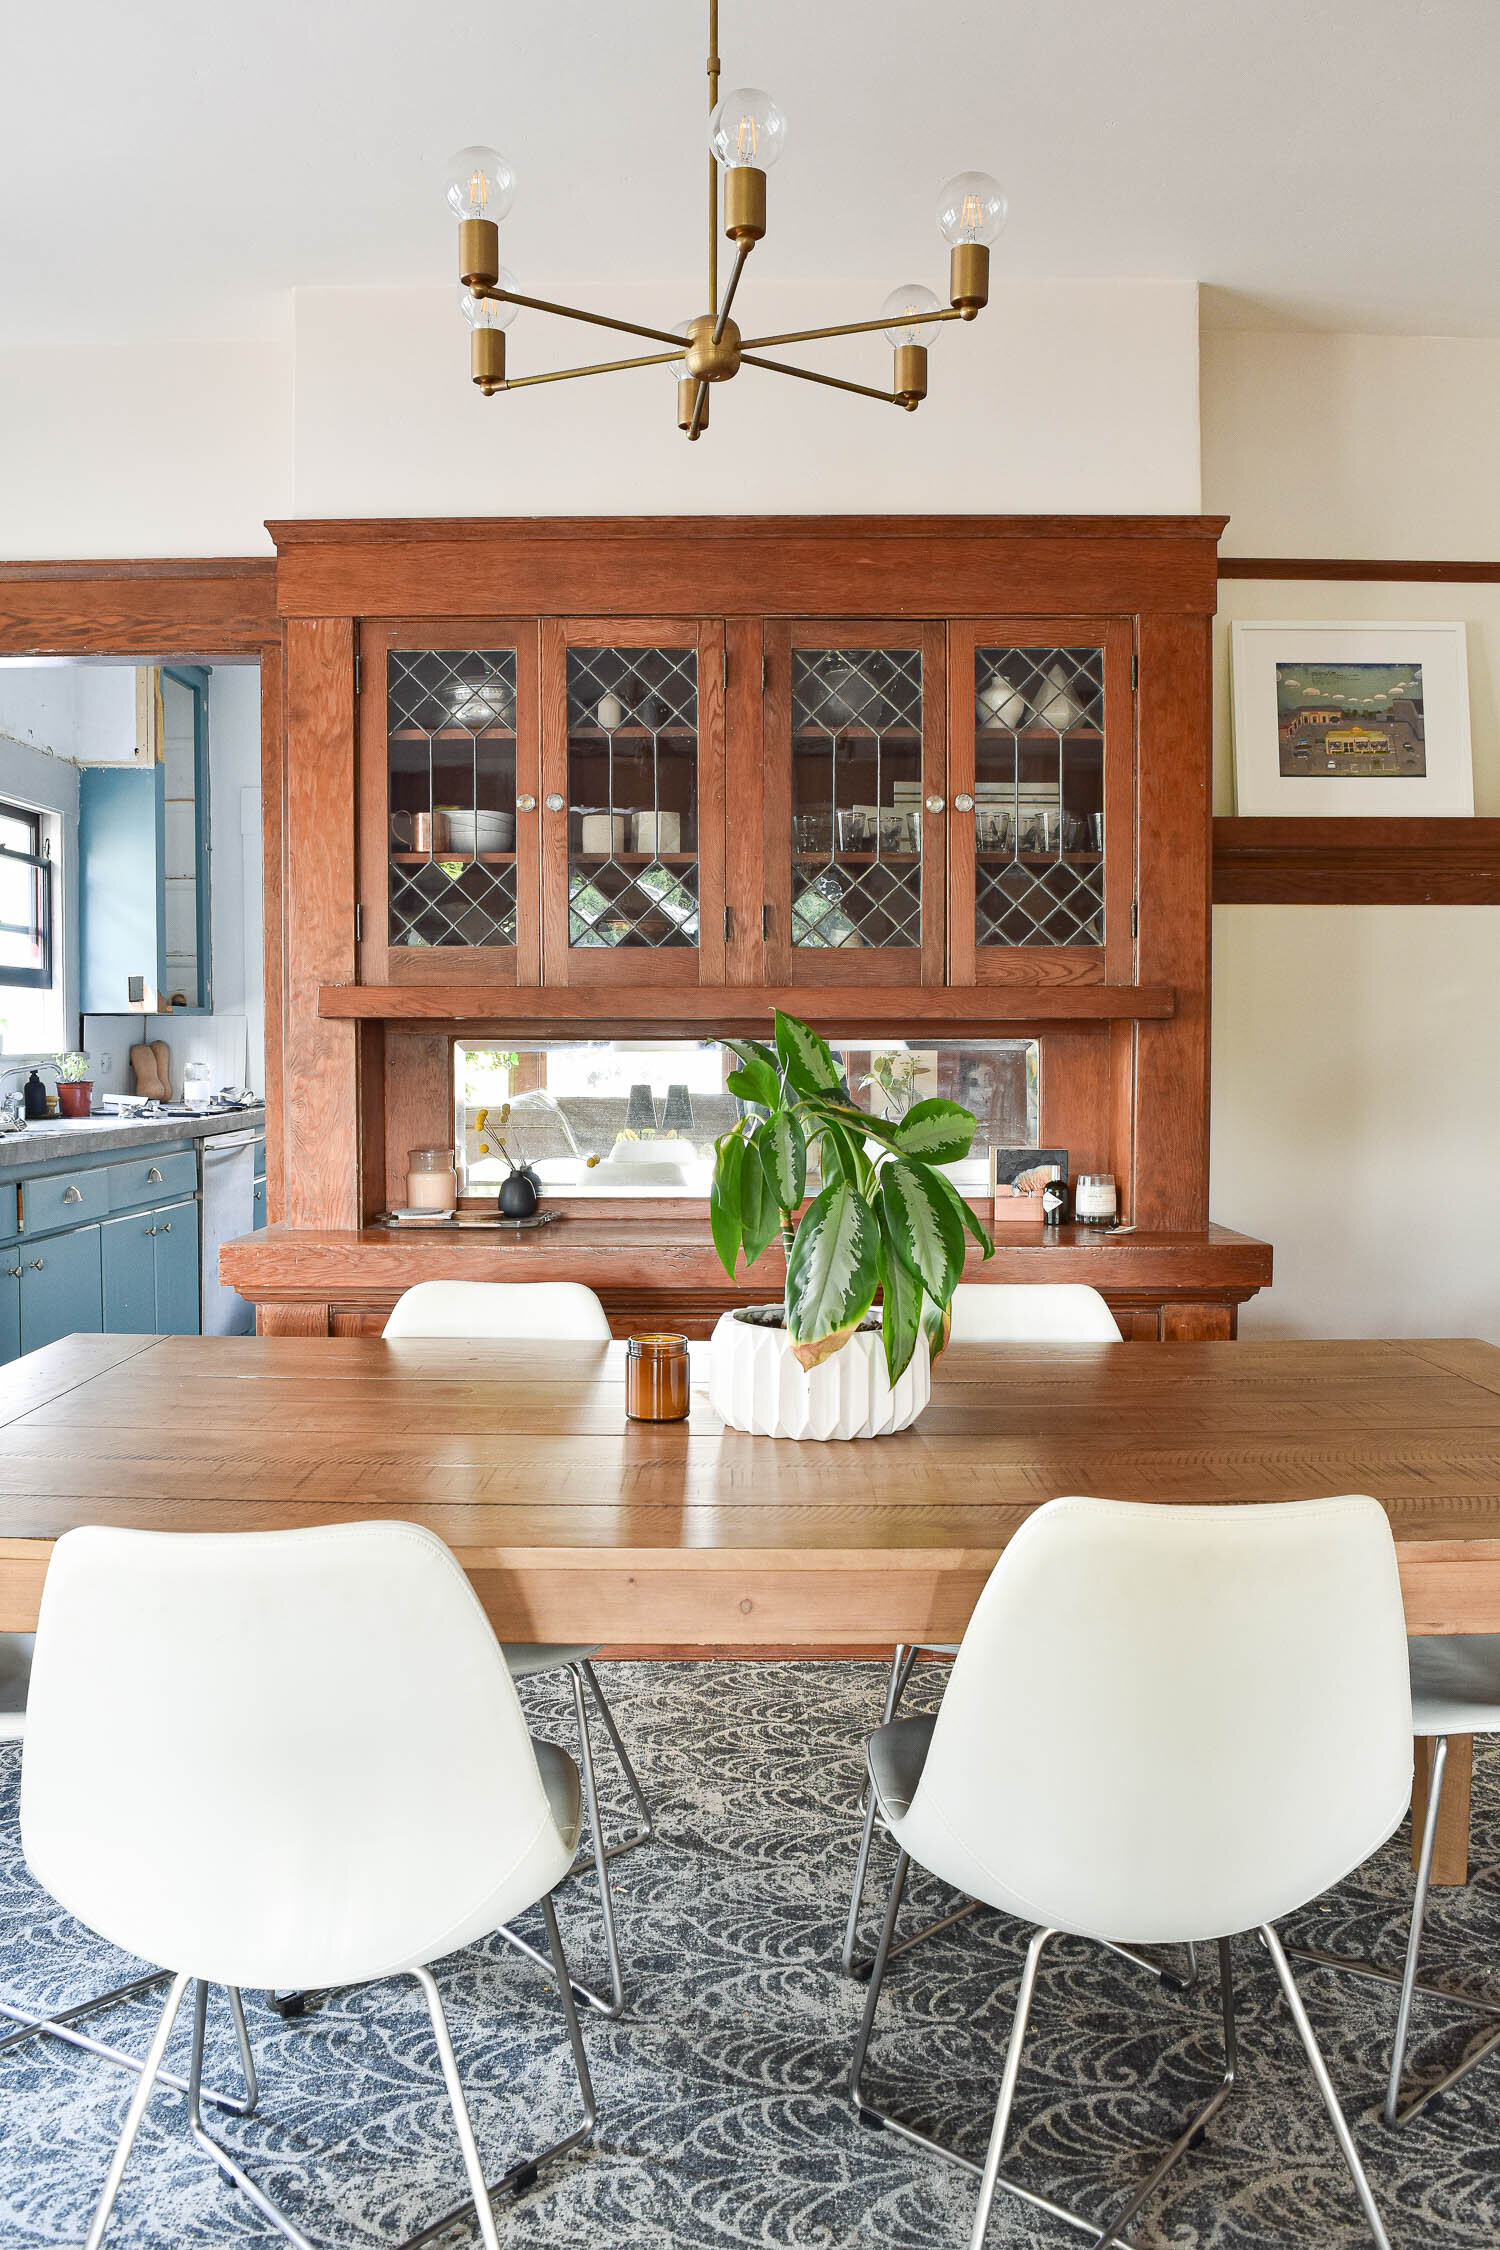
The impetus for this project is because I hope to use the built-in for kitchen storage while we renovate our cooking space. The drawers will be perfect for utensils, napkins, and cooking tools because I can hide them behind the wood drawers. The cabinets will be good spots for pots and pans that we’ll still try cooking with. And the upper storage unit behind the pretty leaded glass will hold bowls, plates, cups, and the like.
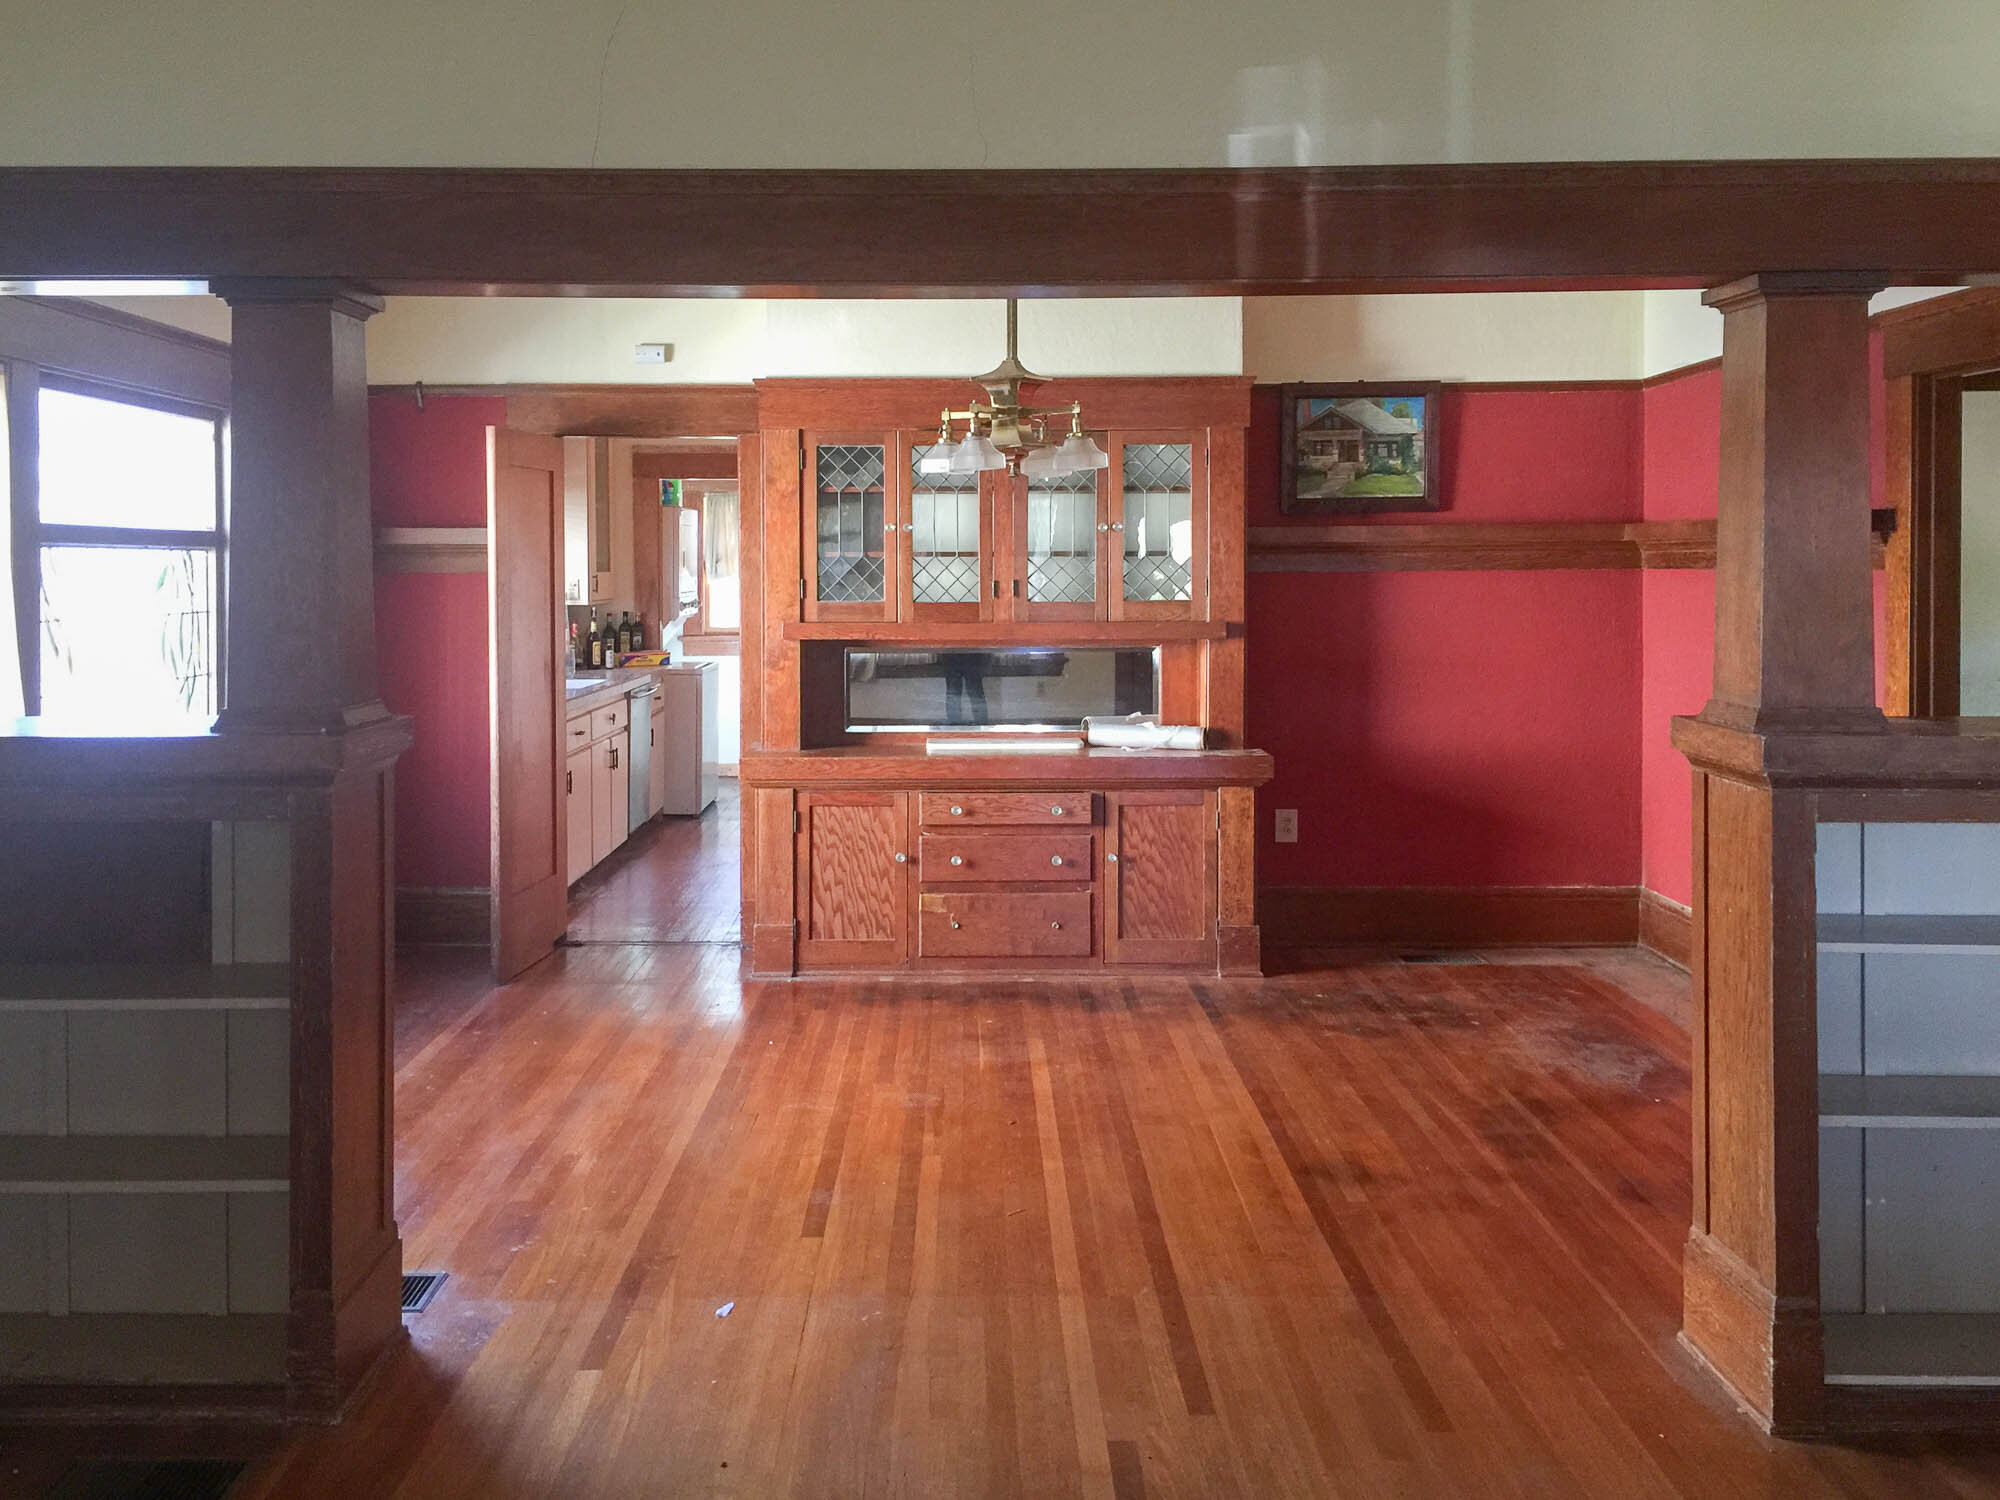
Here’s what she looked like before.
It was certainly fine! But definitely not intentional.
For fun, here’s the before before before.
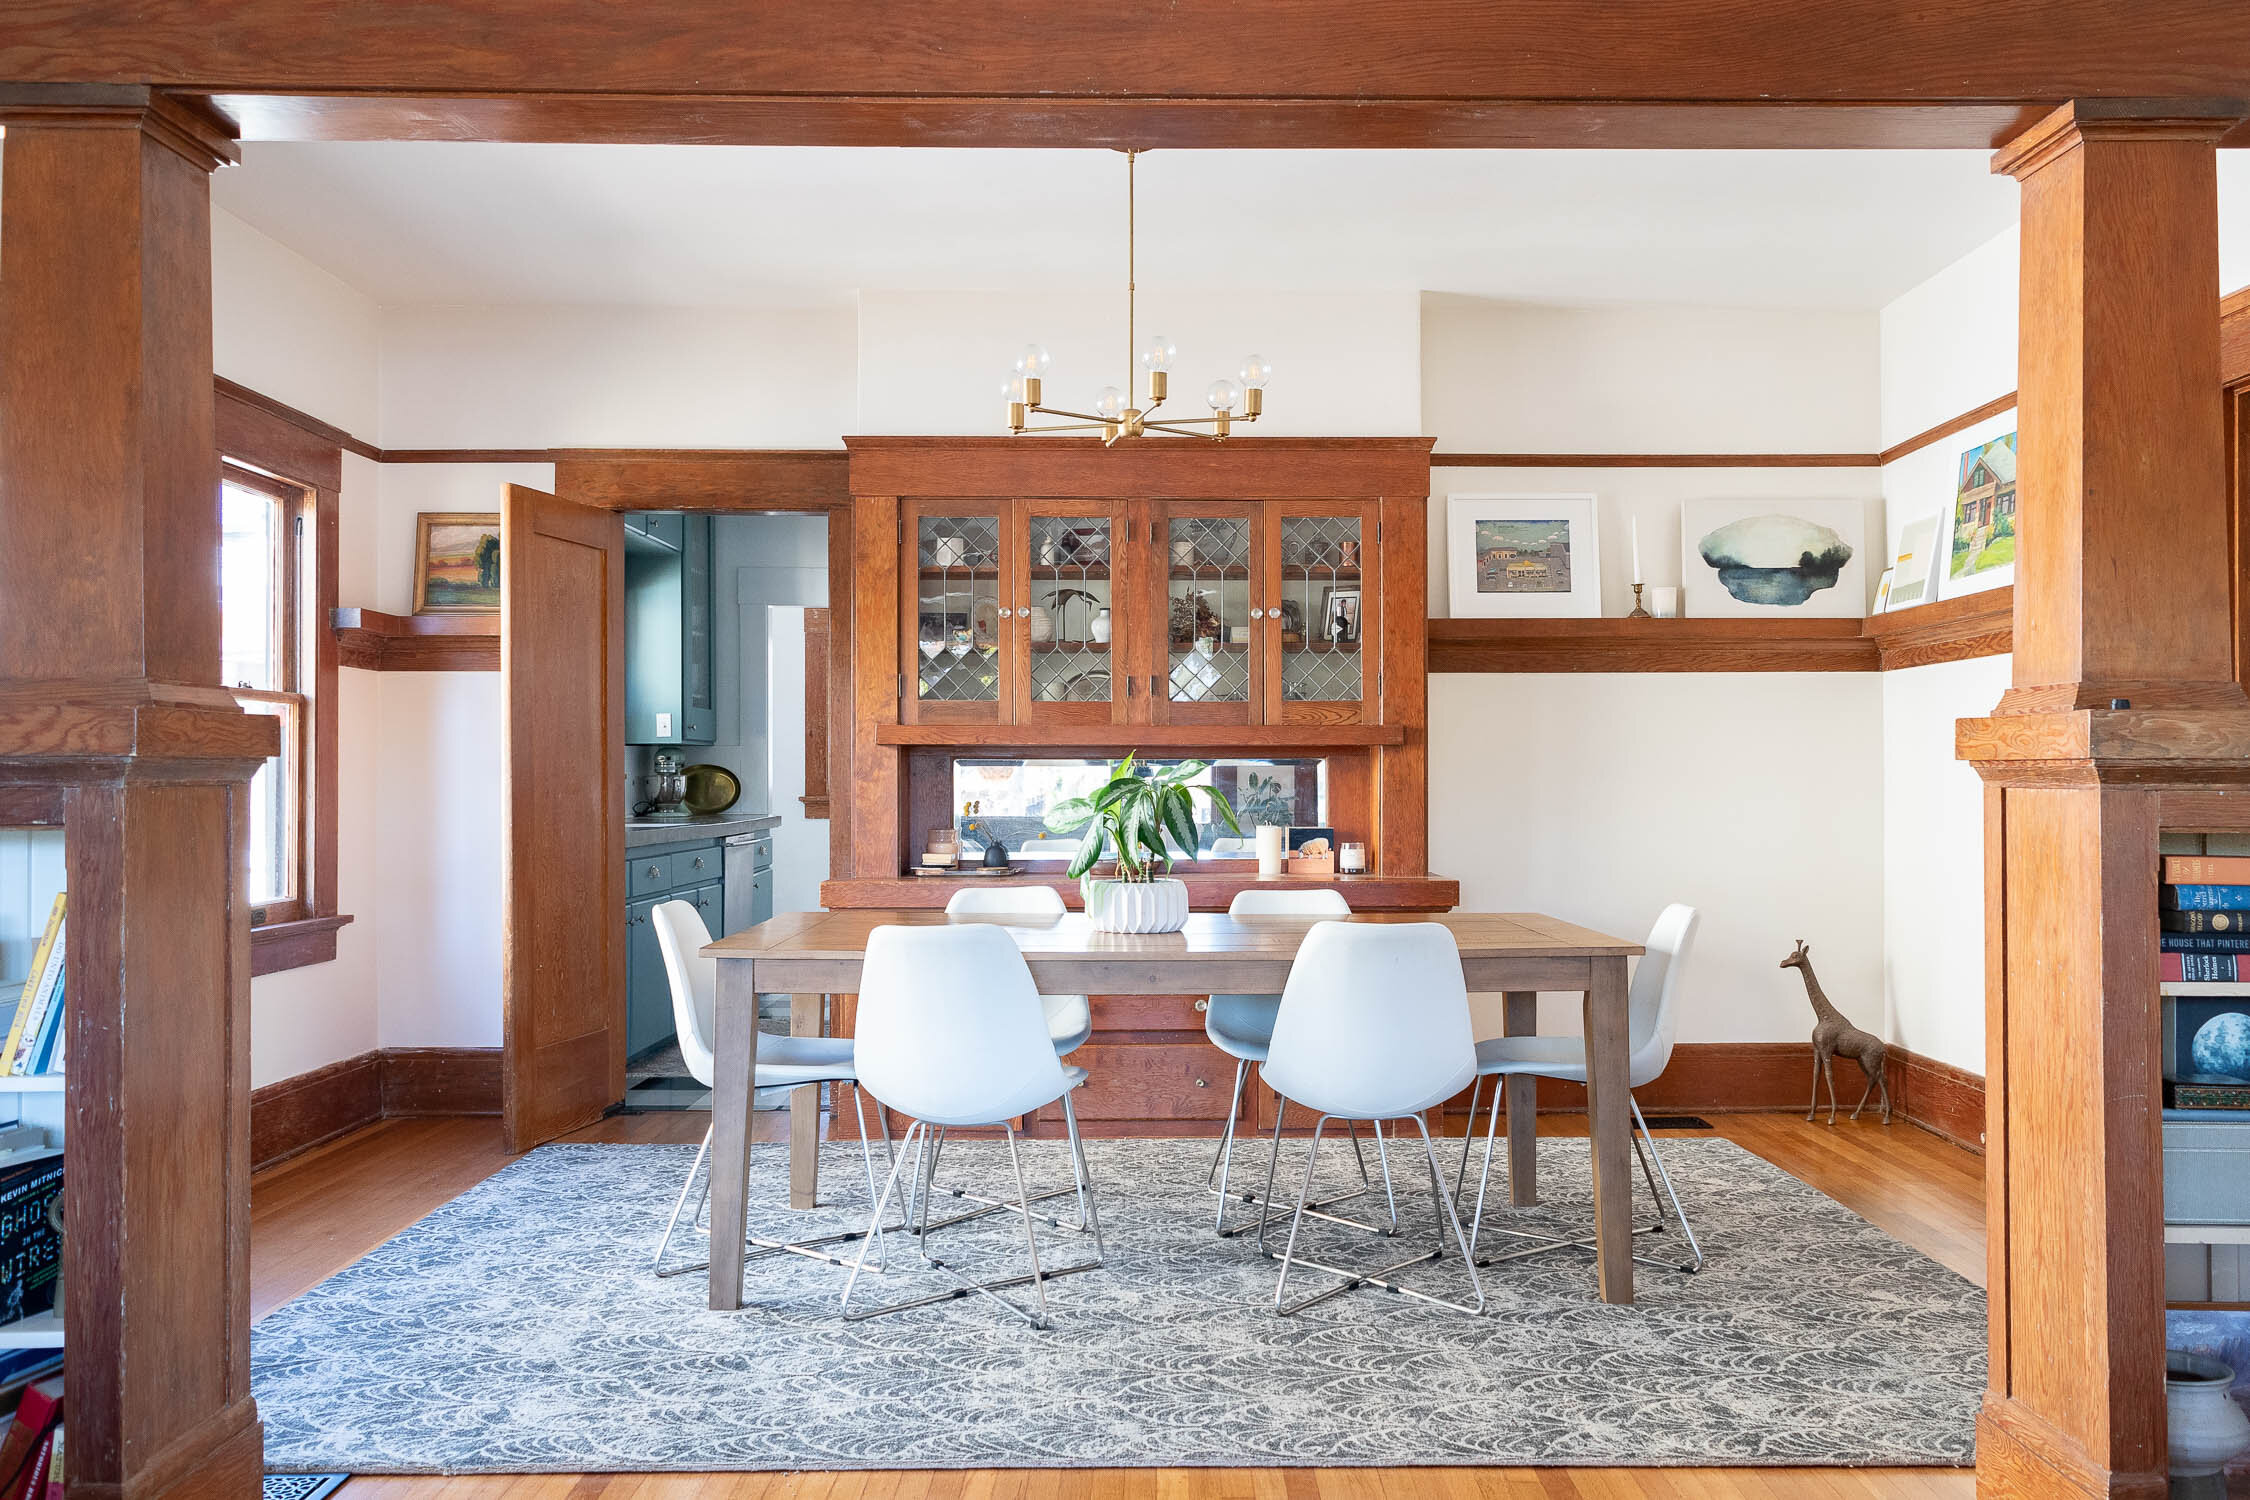
She’s sure changed! (and I have plans for even more changes - but let’s not get ahead of ourselves)
Before moving in kitchenwares, I needed to move out the tchotchkes. That thing was full of all of the odds and ends that I liked enough to keep them but not so much that I wanted to display them throughout the house. It was full of candles, old art projects, my wedding bouquet, a picture frame I got at an estate sale but never replaced the photo of the stranger, the beehive we found in the bathroom wall, old house parts, and just dust.
The drawers and cabinets became my Monica Geller Secret Closet because it was the perfect spot to hide things whenever I needed to do a photoshoot or didn’t have a home for the odds and ends. Anyway, what I’m saying is once we moved in, I just gunked it up and never did anything about it.
So, I purged and reorganized, then cleaned the insides. For the drawers, I used Cathy’s trick for making old wood drawers slide easier and I’m upset with myself for not doing it sooner.

The bottom drawer was missing BOTH of the handles so to open it I had to pry it open with the tips of my fingers. Let’s just say I rarely opened that drawer. To remedy my scratched up fingers and put the drawer to use, I salvaged a few knobs when I went to the Long Beach Flea Market. I found two that looked to be a near match for $10 and then popped them on the drawer in under 5 minutes. It only took me five years to do the most basic of projects.
When we retextured and painted the walls, I didn’t pay any attention to the inside of the cabinet. I honestly don’t know why. Maybe I figured I’d do it another day? I probably thought I’d do it a week later - not five years later. So it just sat there with a sad smoker’s teeth creamy white-yellow color for all this time. It always clashed the with off-white walls and rubbed me the wrong way, so I decided to paint it while it was empty!
I considered painting the interior a crisp bright white like I did on the inside of the bookcases in the living room, but then I felt like it would make the wooden shelves stand out in a weird way. They already break up the pattern of the leaded glass, so I didn’t want to emphasize that more. So, I decided to go dark. I put a few different hues to the test in a Photoshop rendering like I did when I considered painting the dining room dark, but it was still a tough call. It’s hard to really see it all because the leaded glass has so much texture and is really reflective.
So, I just decided to paint one section and see how I like it. I have GALLONS of paint in the garage, but none of them were the right color. The closest would have been the dark greys I used on the mural in the office, but I wanted something with a warm undertone to blend well with the warm brown-orange hue of the woodwork.

When I was at the hardware store I swung by their reject paint to see what goodies they have. This is a great spot to look for discounted paint especially if you aren’t picky about colors. Habitat for Humanity ReStore or your local Buy Nothing Group are both good resources for finding unwanted paints at cheap (or free) prices.
I didn’t find anything that worked for me, so I got a small sample size of a color I liked (Behr Brown Velvet). I had considered a dark burgundy or similar deep warm tone, but then I decided to opt for more of a brown. When I was still at home, I used my paint fan deck to find a color that most closely matches the tone of the wood shelves when they’re in shadows. I wanted the illusion of the wood blending into the backside of the cabinet so I went for the shady tone rather than the well-lit hue. I’m normally opposed to trying to paint things brown to look like wood, but I made an exception for this small shadowy area. And, I’m not trying to make it look like wood, rather I’m trying to not draw attention to the paint. I think the brown lets the actual wood show off more!

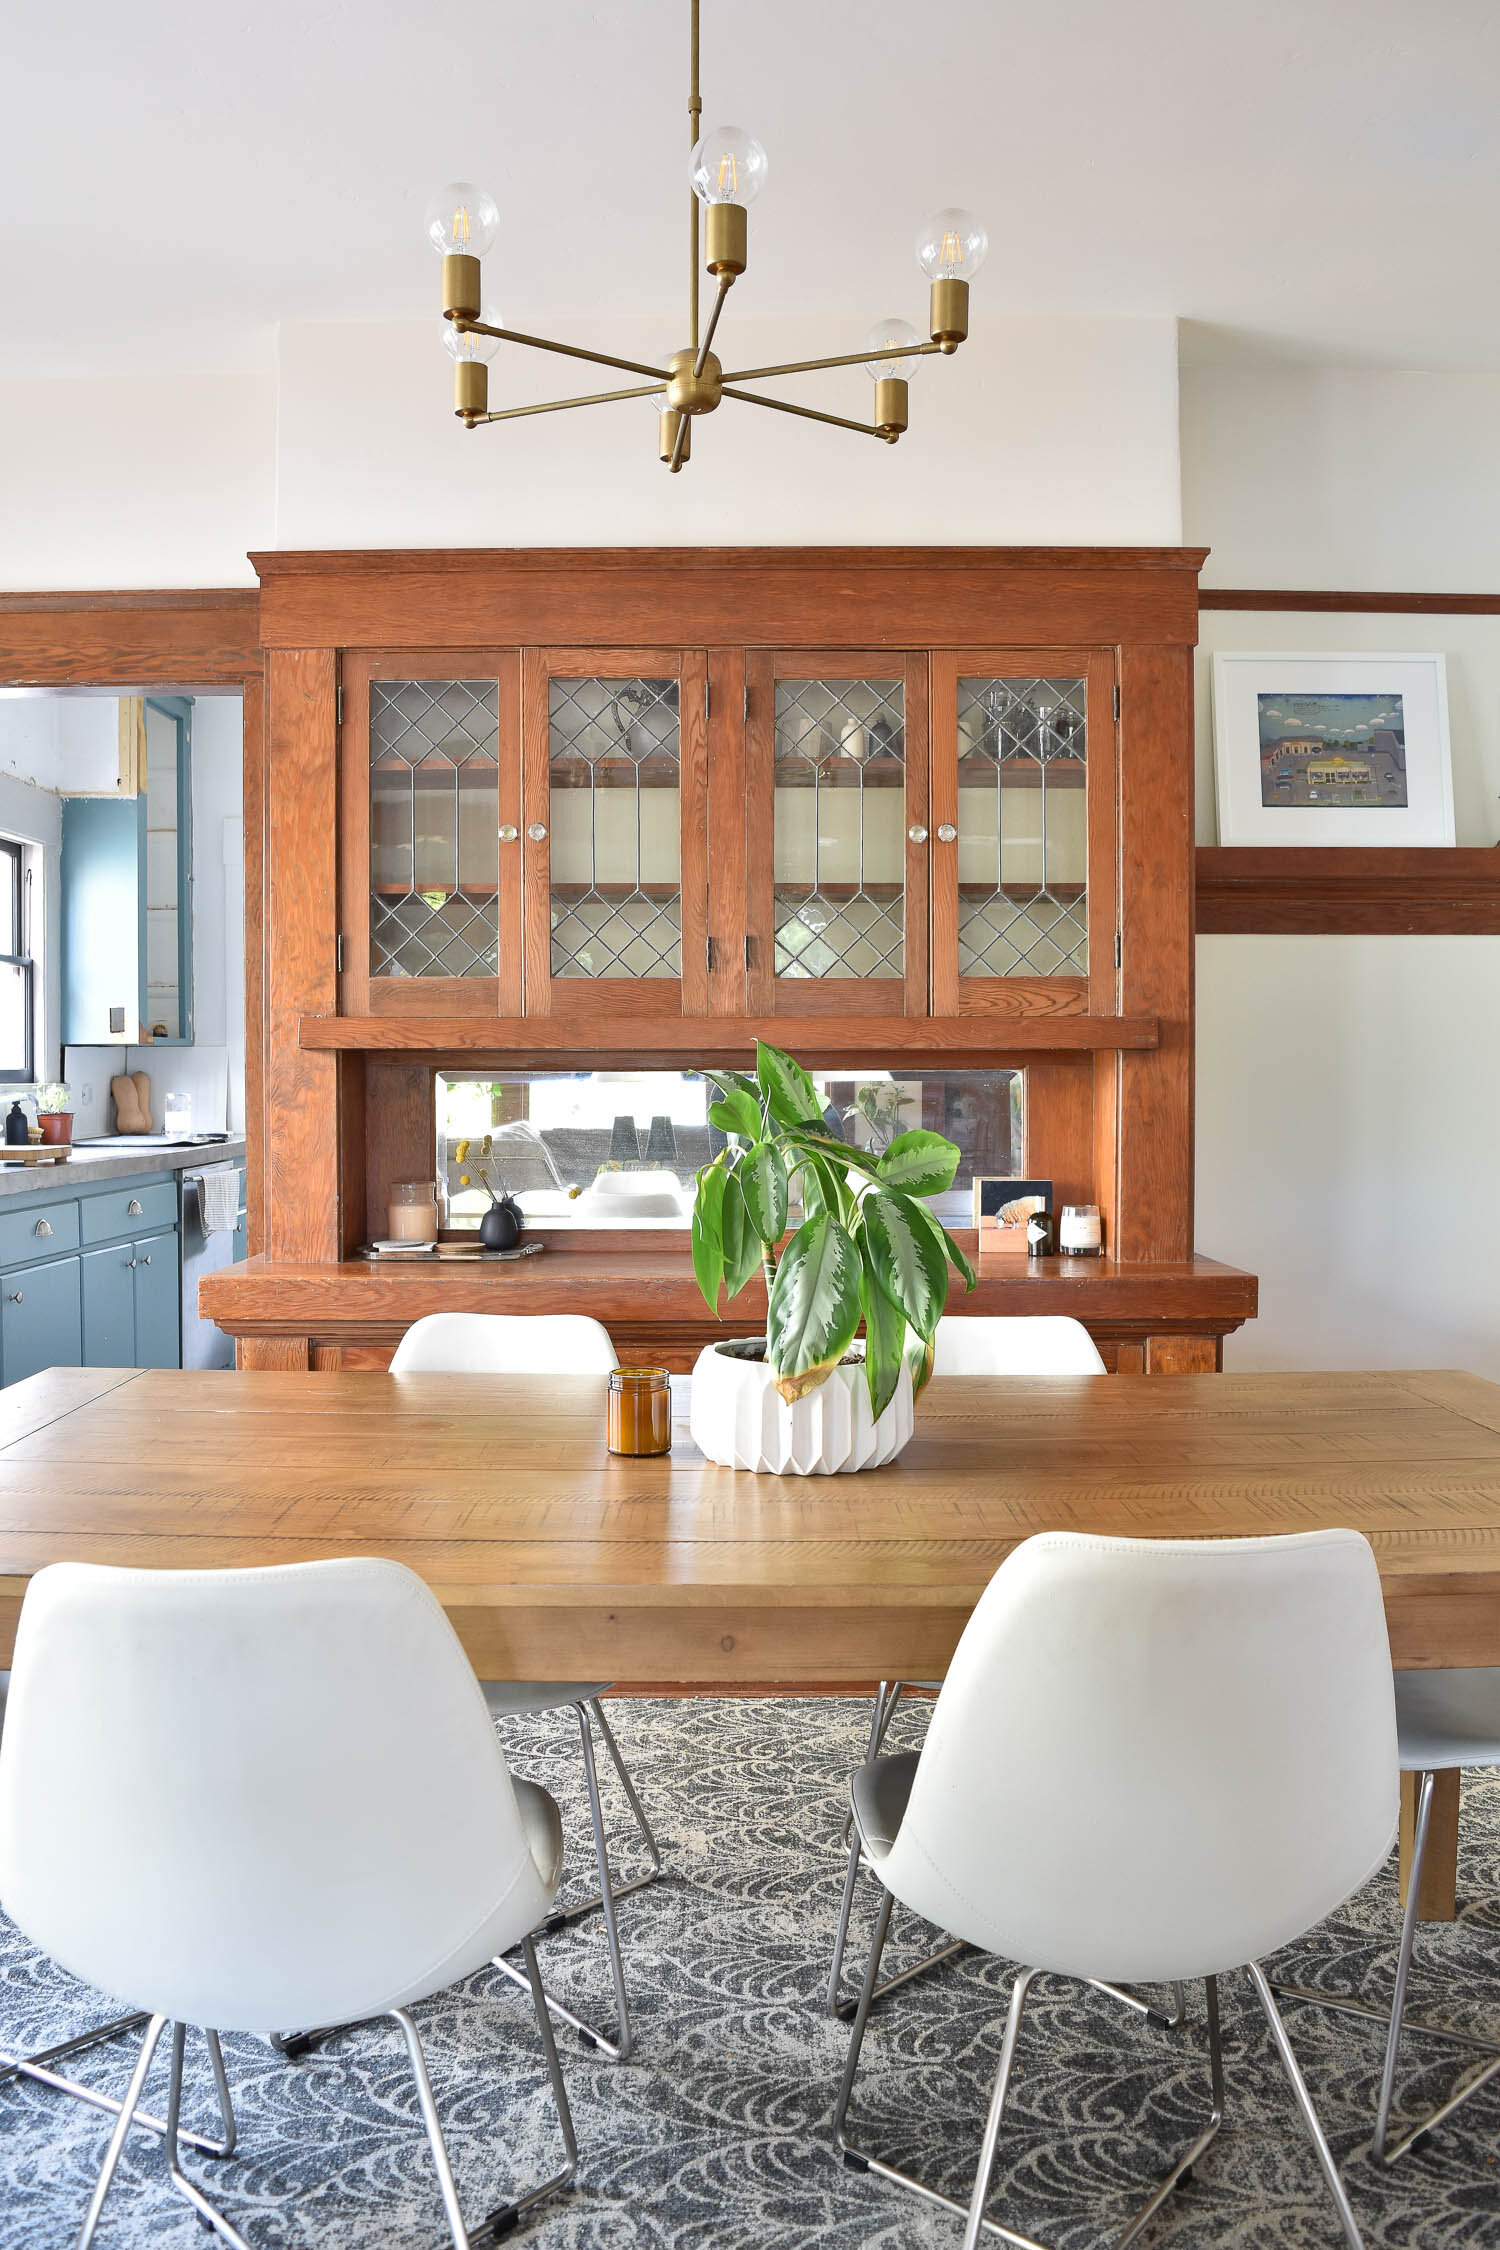
So, I went for it painting just one section first to see if I liked it. See how the paint looks like a continuation of the shadowed part of the underside of the wood shelf?
The old Ashley would have stopped with just one section painted and left it there for a week as I “decided if I liked it” which is just an excuse for being indecisive. But, I committed and said, “it’s not so bad, let’s keep going.” Then, before I knew it, the whole thing was painted. Huzzah!
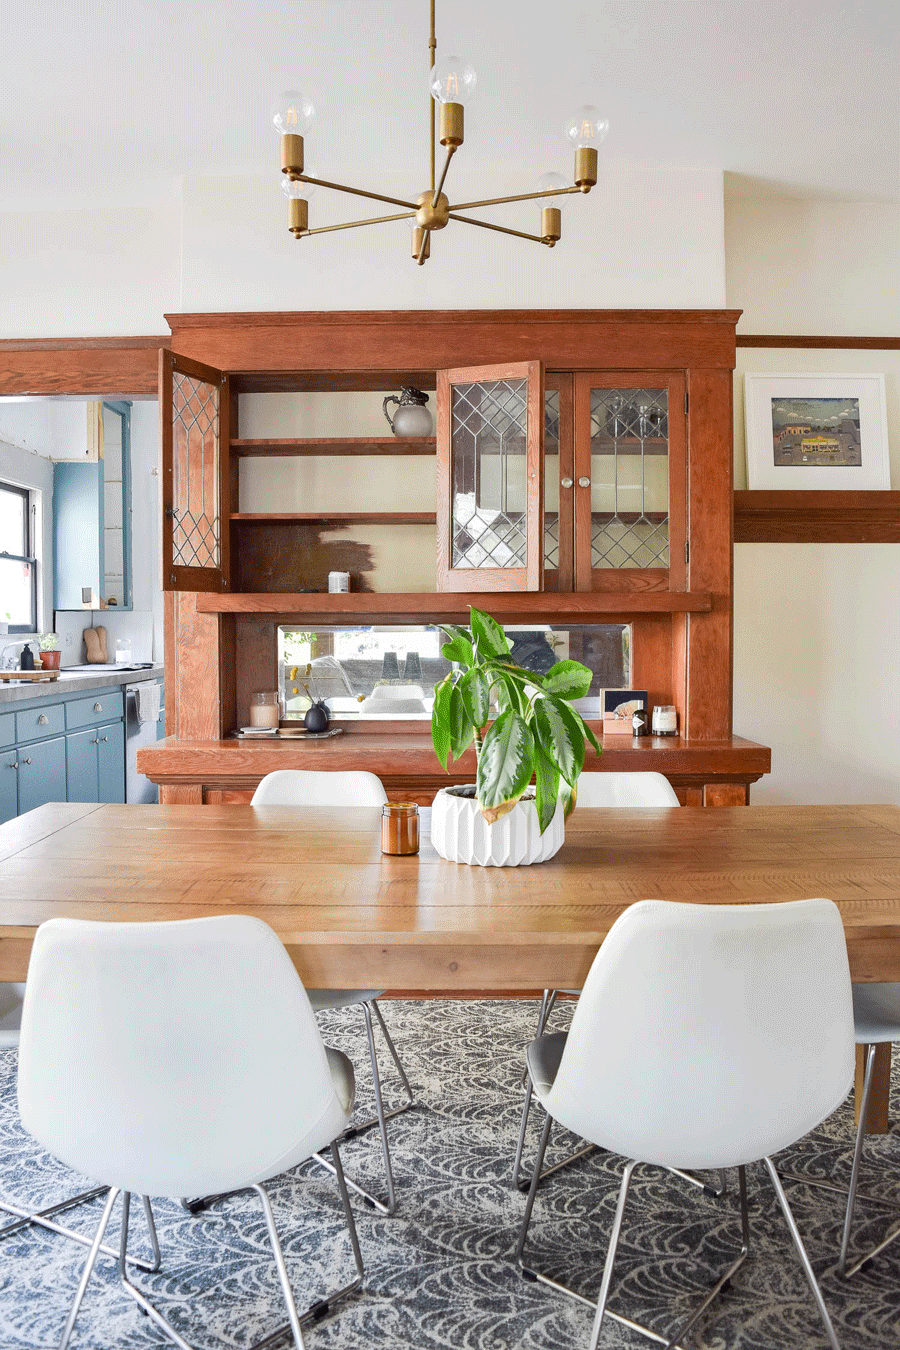

And I don’t hate it! I like that it grounds the cabinet and makes the buffet look like its one piece that’s the focal point of the room, rather than a semi-built-in cabinet that’s just attached to the wall of the dining room. I dig it.
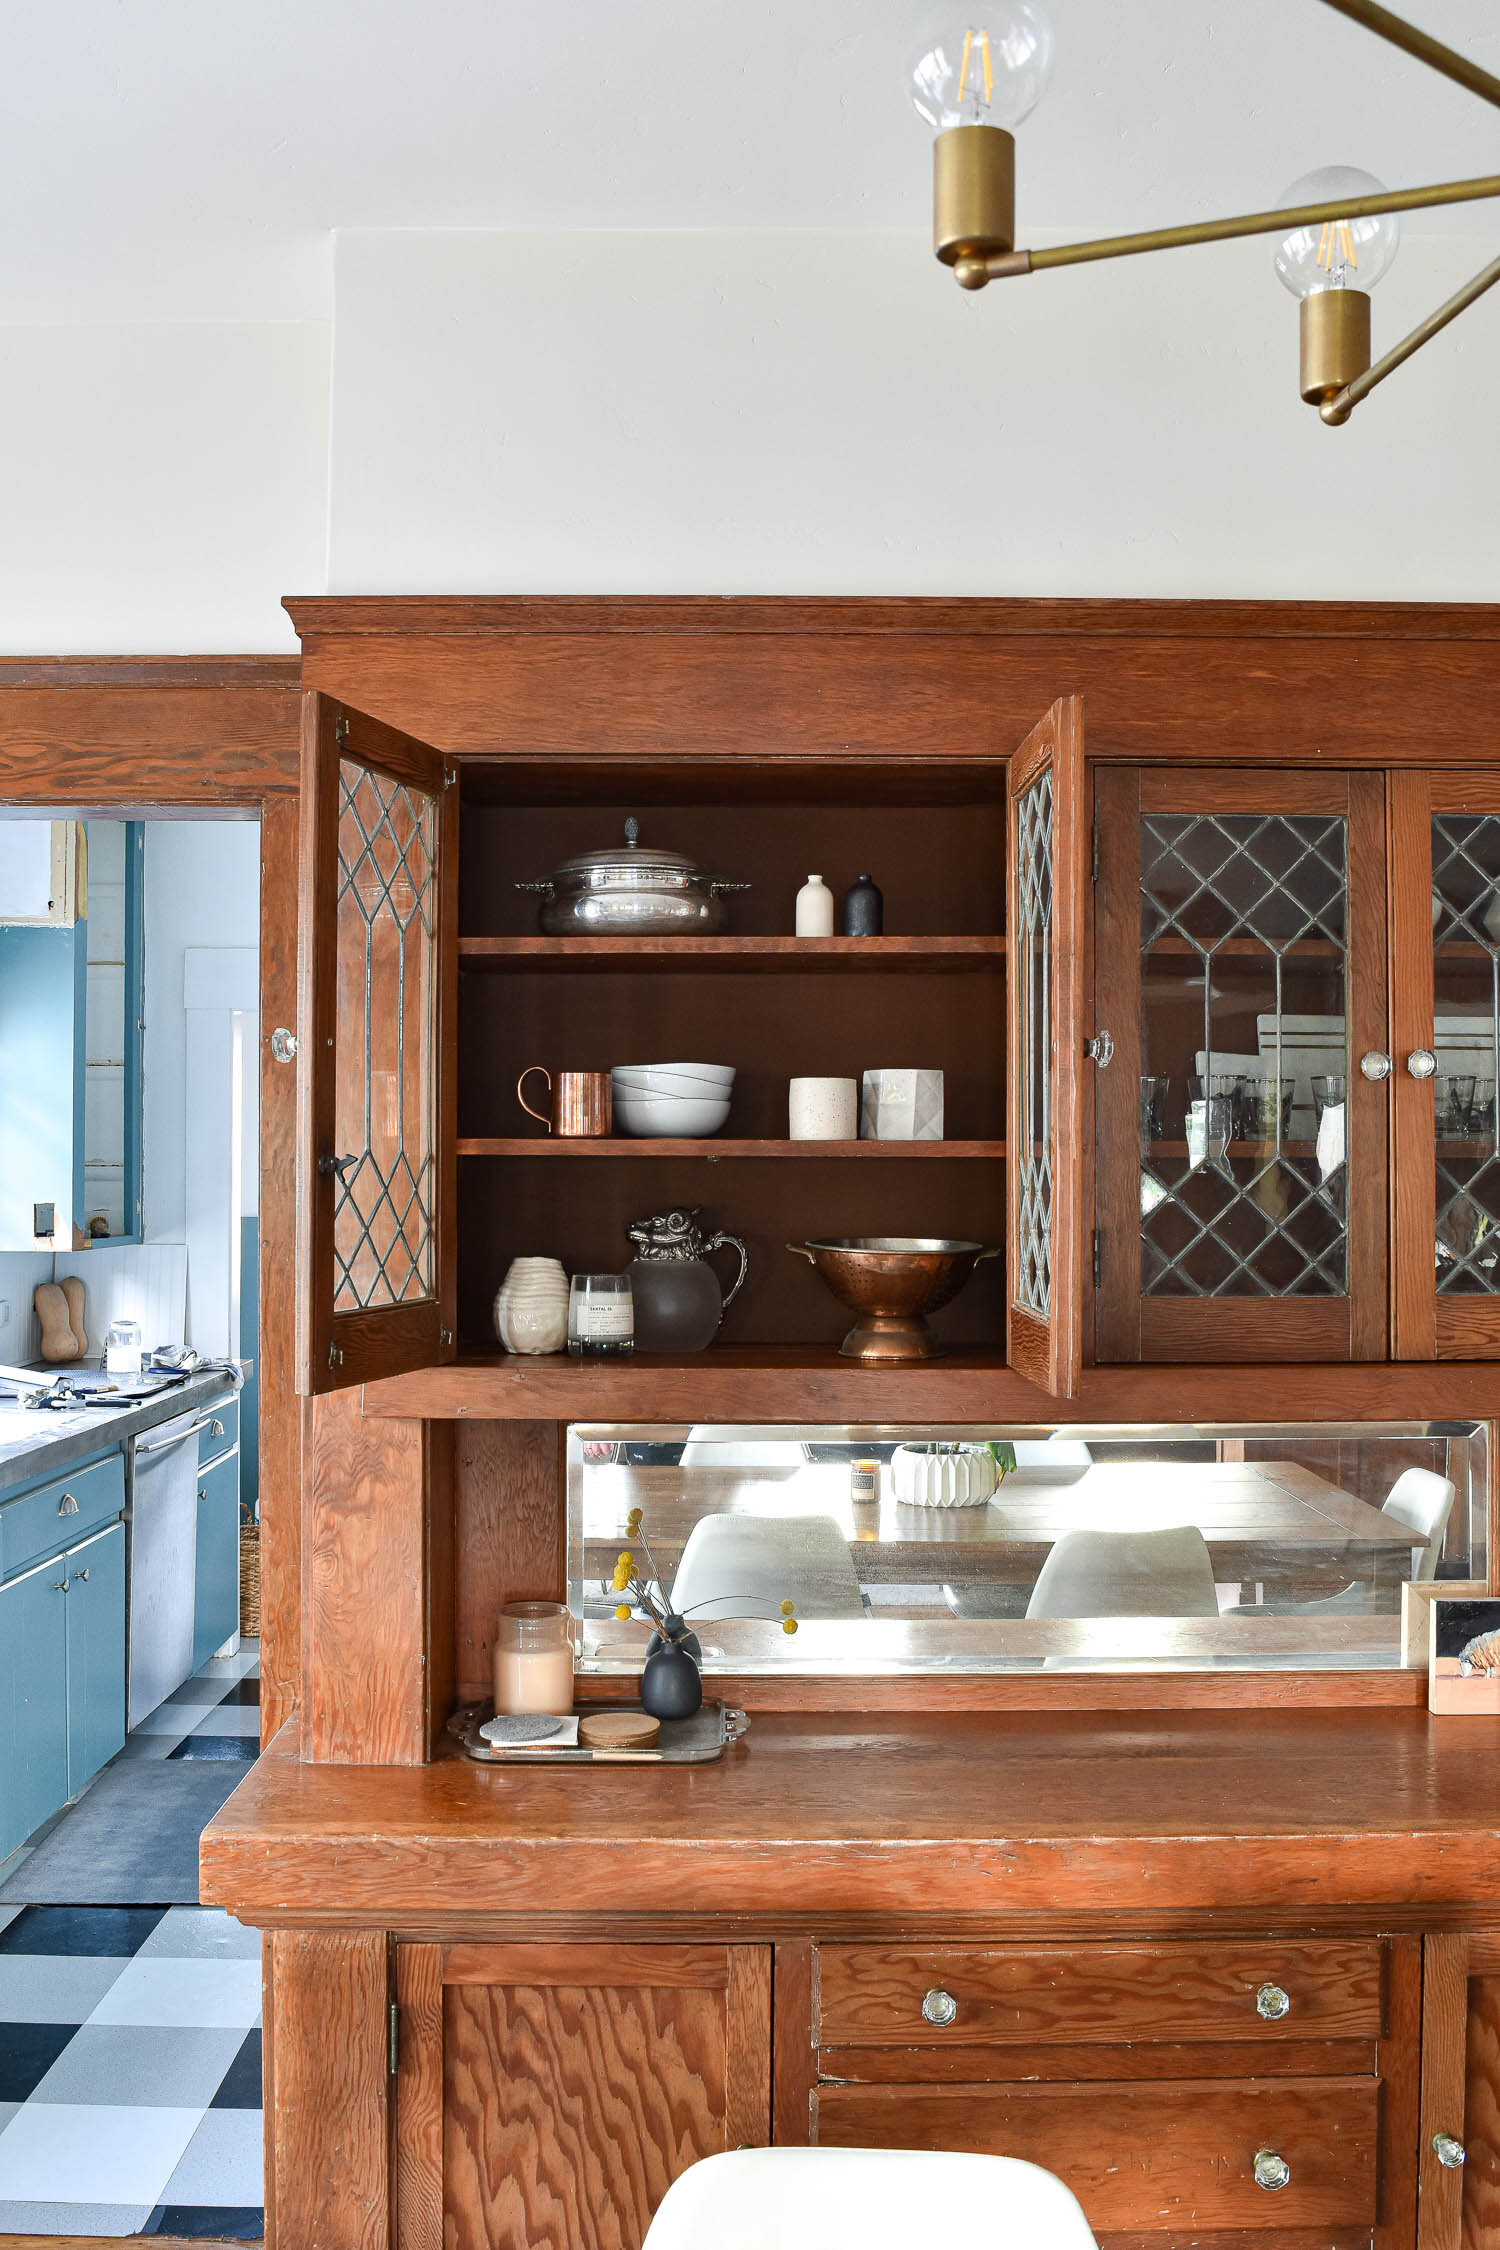
It looks so velvety, no?!
For the sake of photos, I plopped in a few items. While I was at it, I polished that silver piece in the corner with the easiest and natural silver polishing trick. The white pieces definitely stand out the most so I think I need to get more serious about collecting more white pottery. In the meantime, I’ll fill the cabinets with kitchenwares and get focused on this slow-going kitchen renovation!
Will I change it one day? Probably. Because I’m like that. I might yearn for more color one day and go bold! Lots of people suggested wallpaper, which I had considered but I’m positive you wouldn’t even be able to see it behind the leaded glass. It’d just get lost and/or make the shelves look cluttered without getting to enjoy the pattern.

The final step in the refresh is fixing the cabinet that has been ajar ever since we moved in. The cabinets close and stay shut with simple ball catches. The door has a cylindrical piece set flush in the top of the door, then inside of it is a spring and a ball that sits atop the top edge. When closed, the ball pushes down when it hits the frame and then pops up into a concave catch that’s installed inside the frame opposite the ball. It’s terribly simple but sounds complicated when I spell it all out. The ball in my cabinet went missing so I ordered this replacement. The bummer is the ball isn’t tall enough to lock into the catch. I think the door settled and the original ball was just plain larger. I’d like to say that I problem solved this, but I haven’t - yet. I went to my local Architectural Salvage for a replacement but haven’t found the right size yet. I’ll hunt around and keep you posted.

There you have it. A longwinded explanation of a simple update.


