A Year of Margot Calendar + A Free Template Download
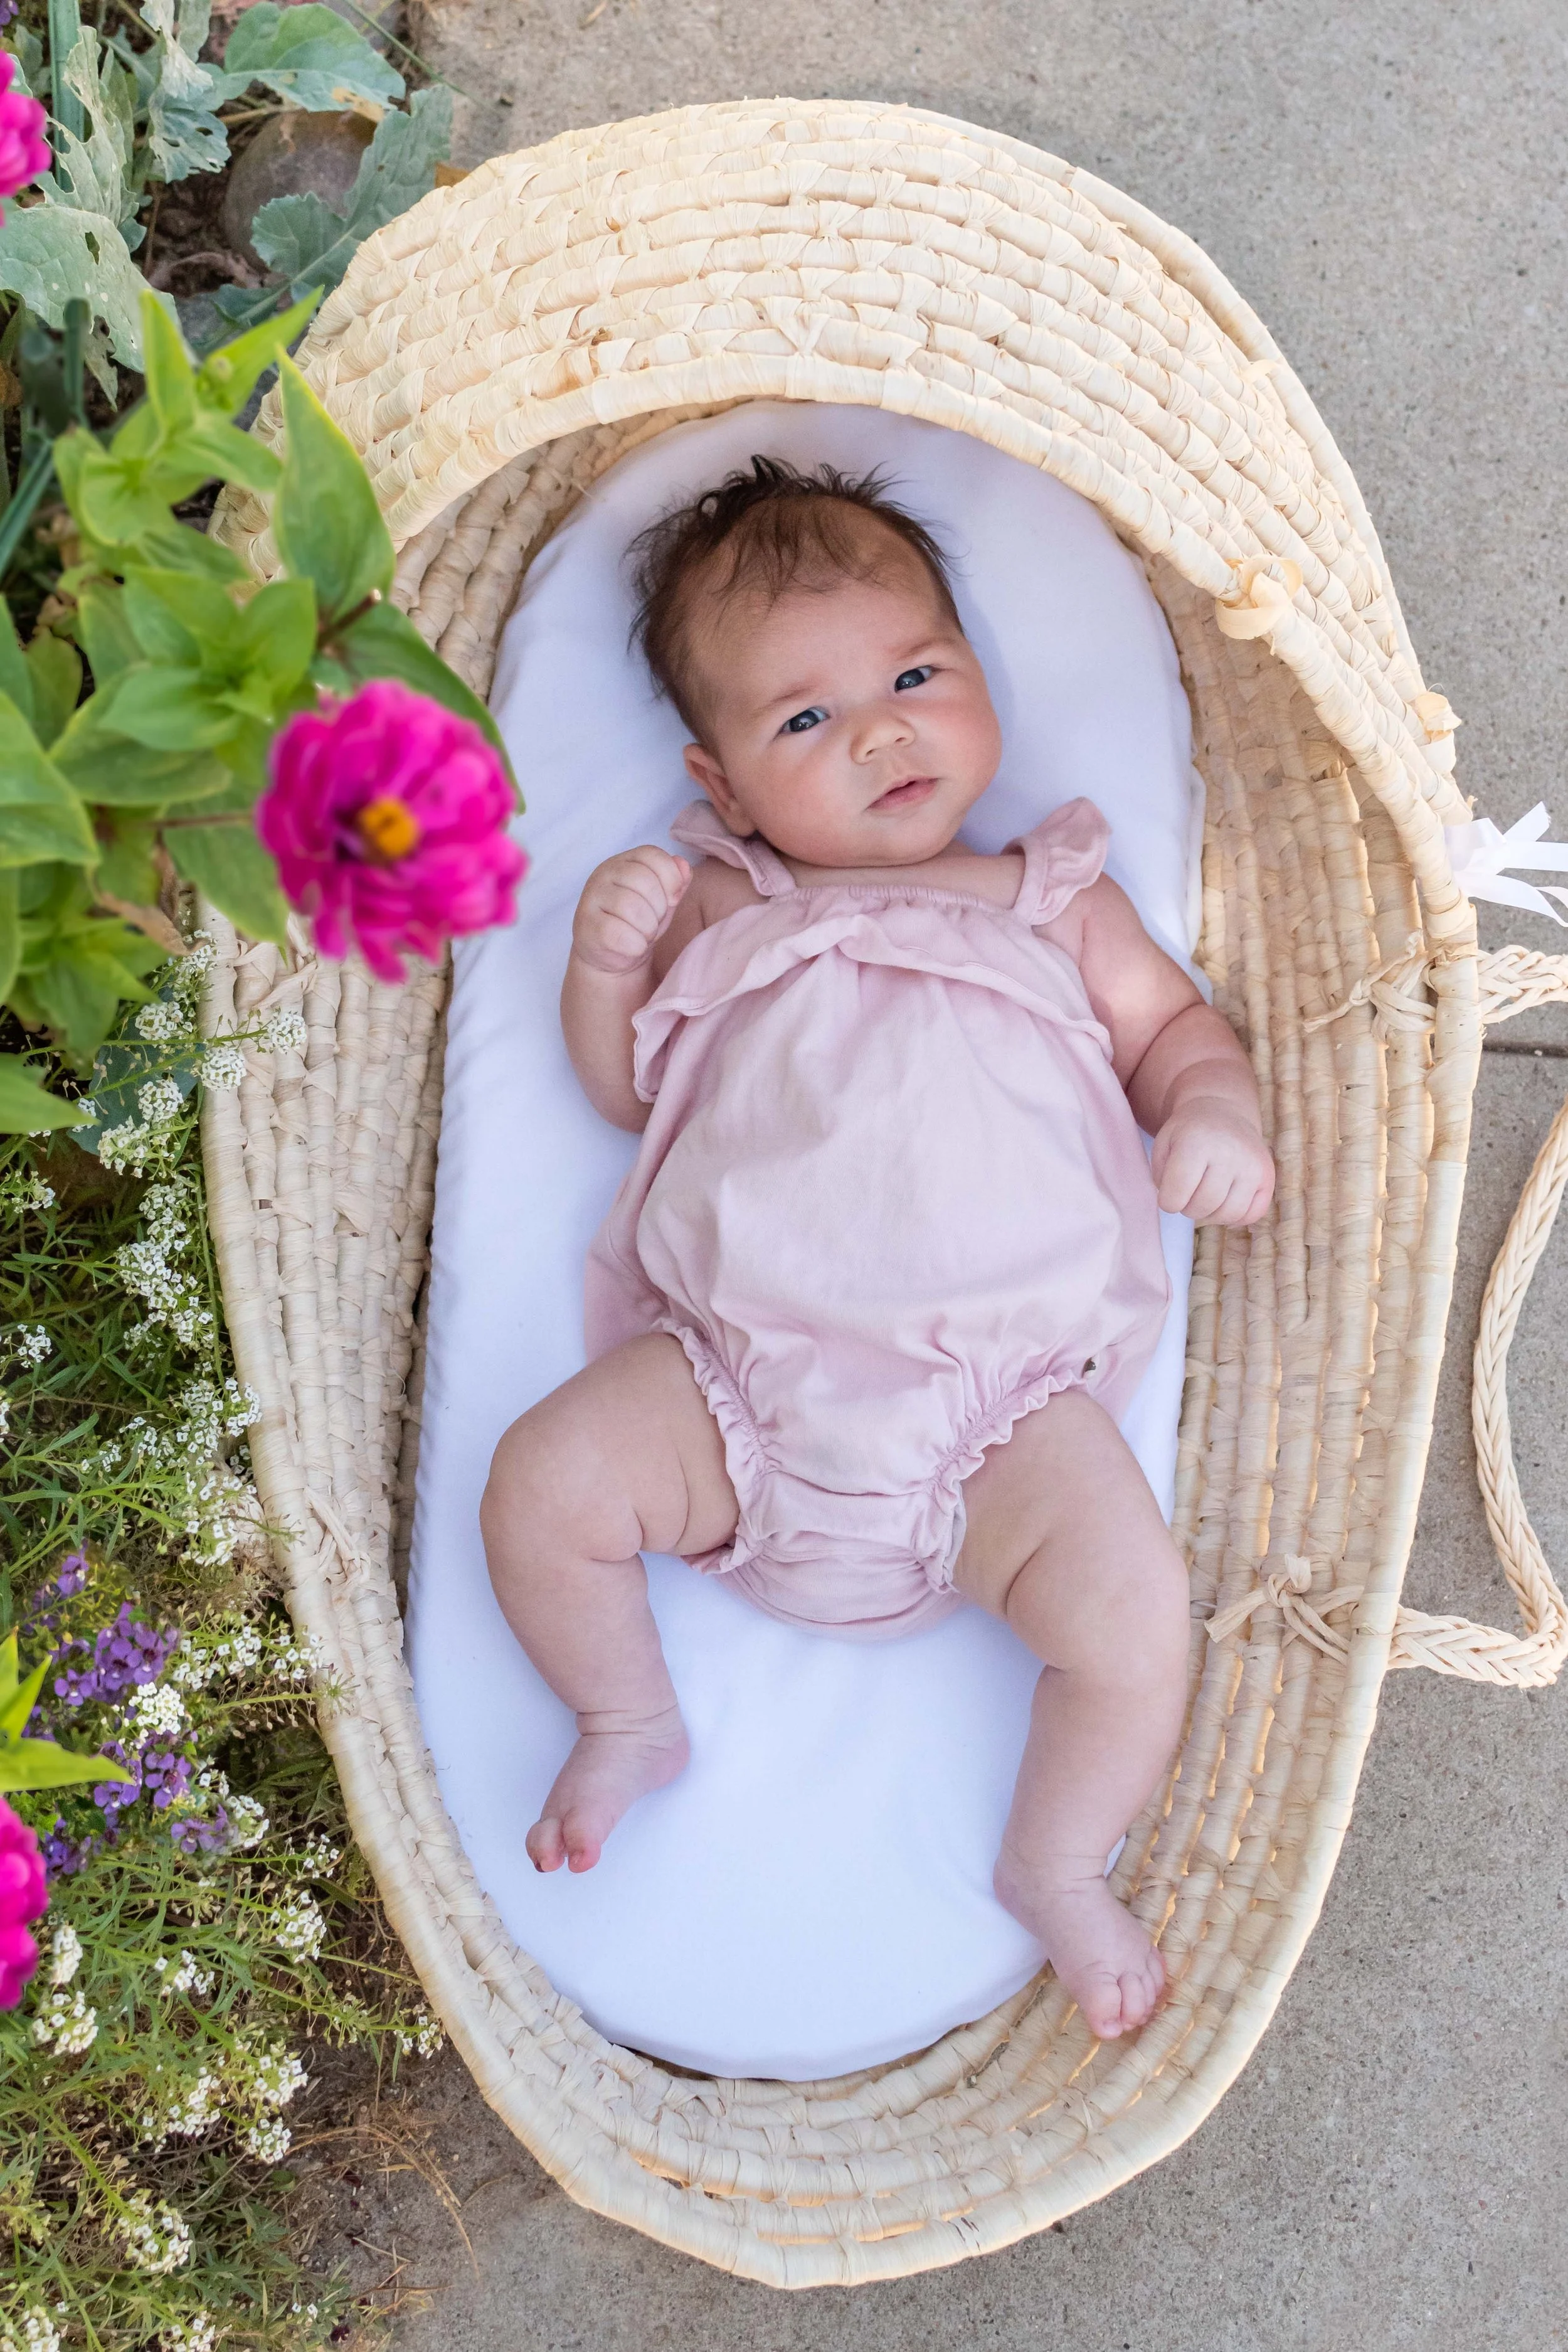
/Margot is a plump little 4-month-old and I love comparing her growth to just mere weeks earlier. I take oodles of photos every day, but I’ve been snapping monthly photos with a consistent theme to really see how much she’s growing and changing. I treasure the photos and the little calendar I’ve been building each month.
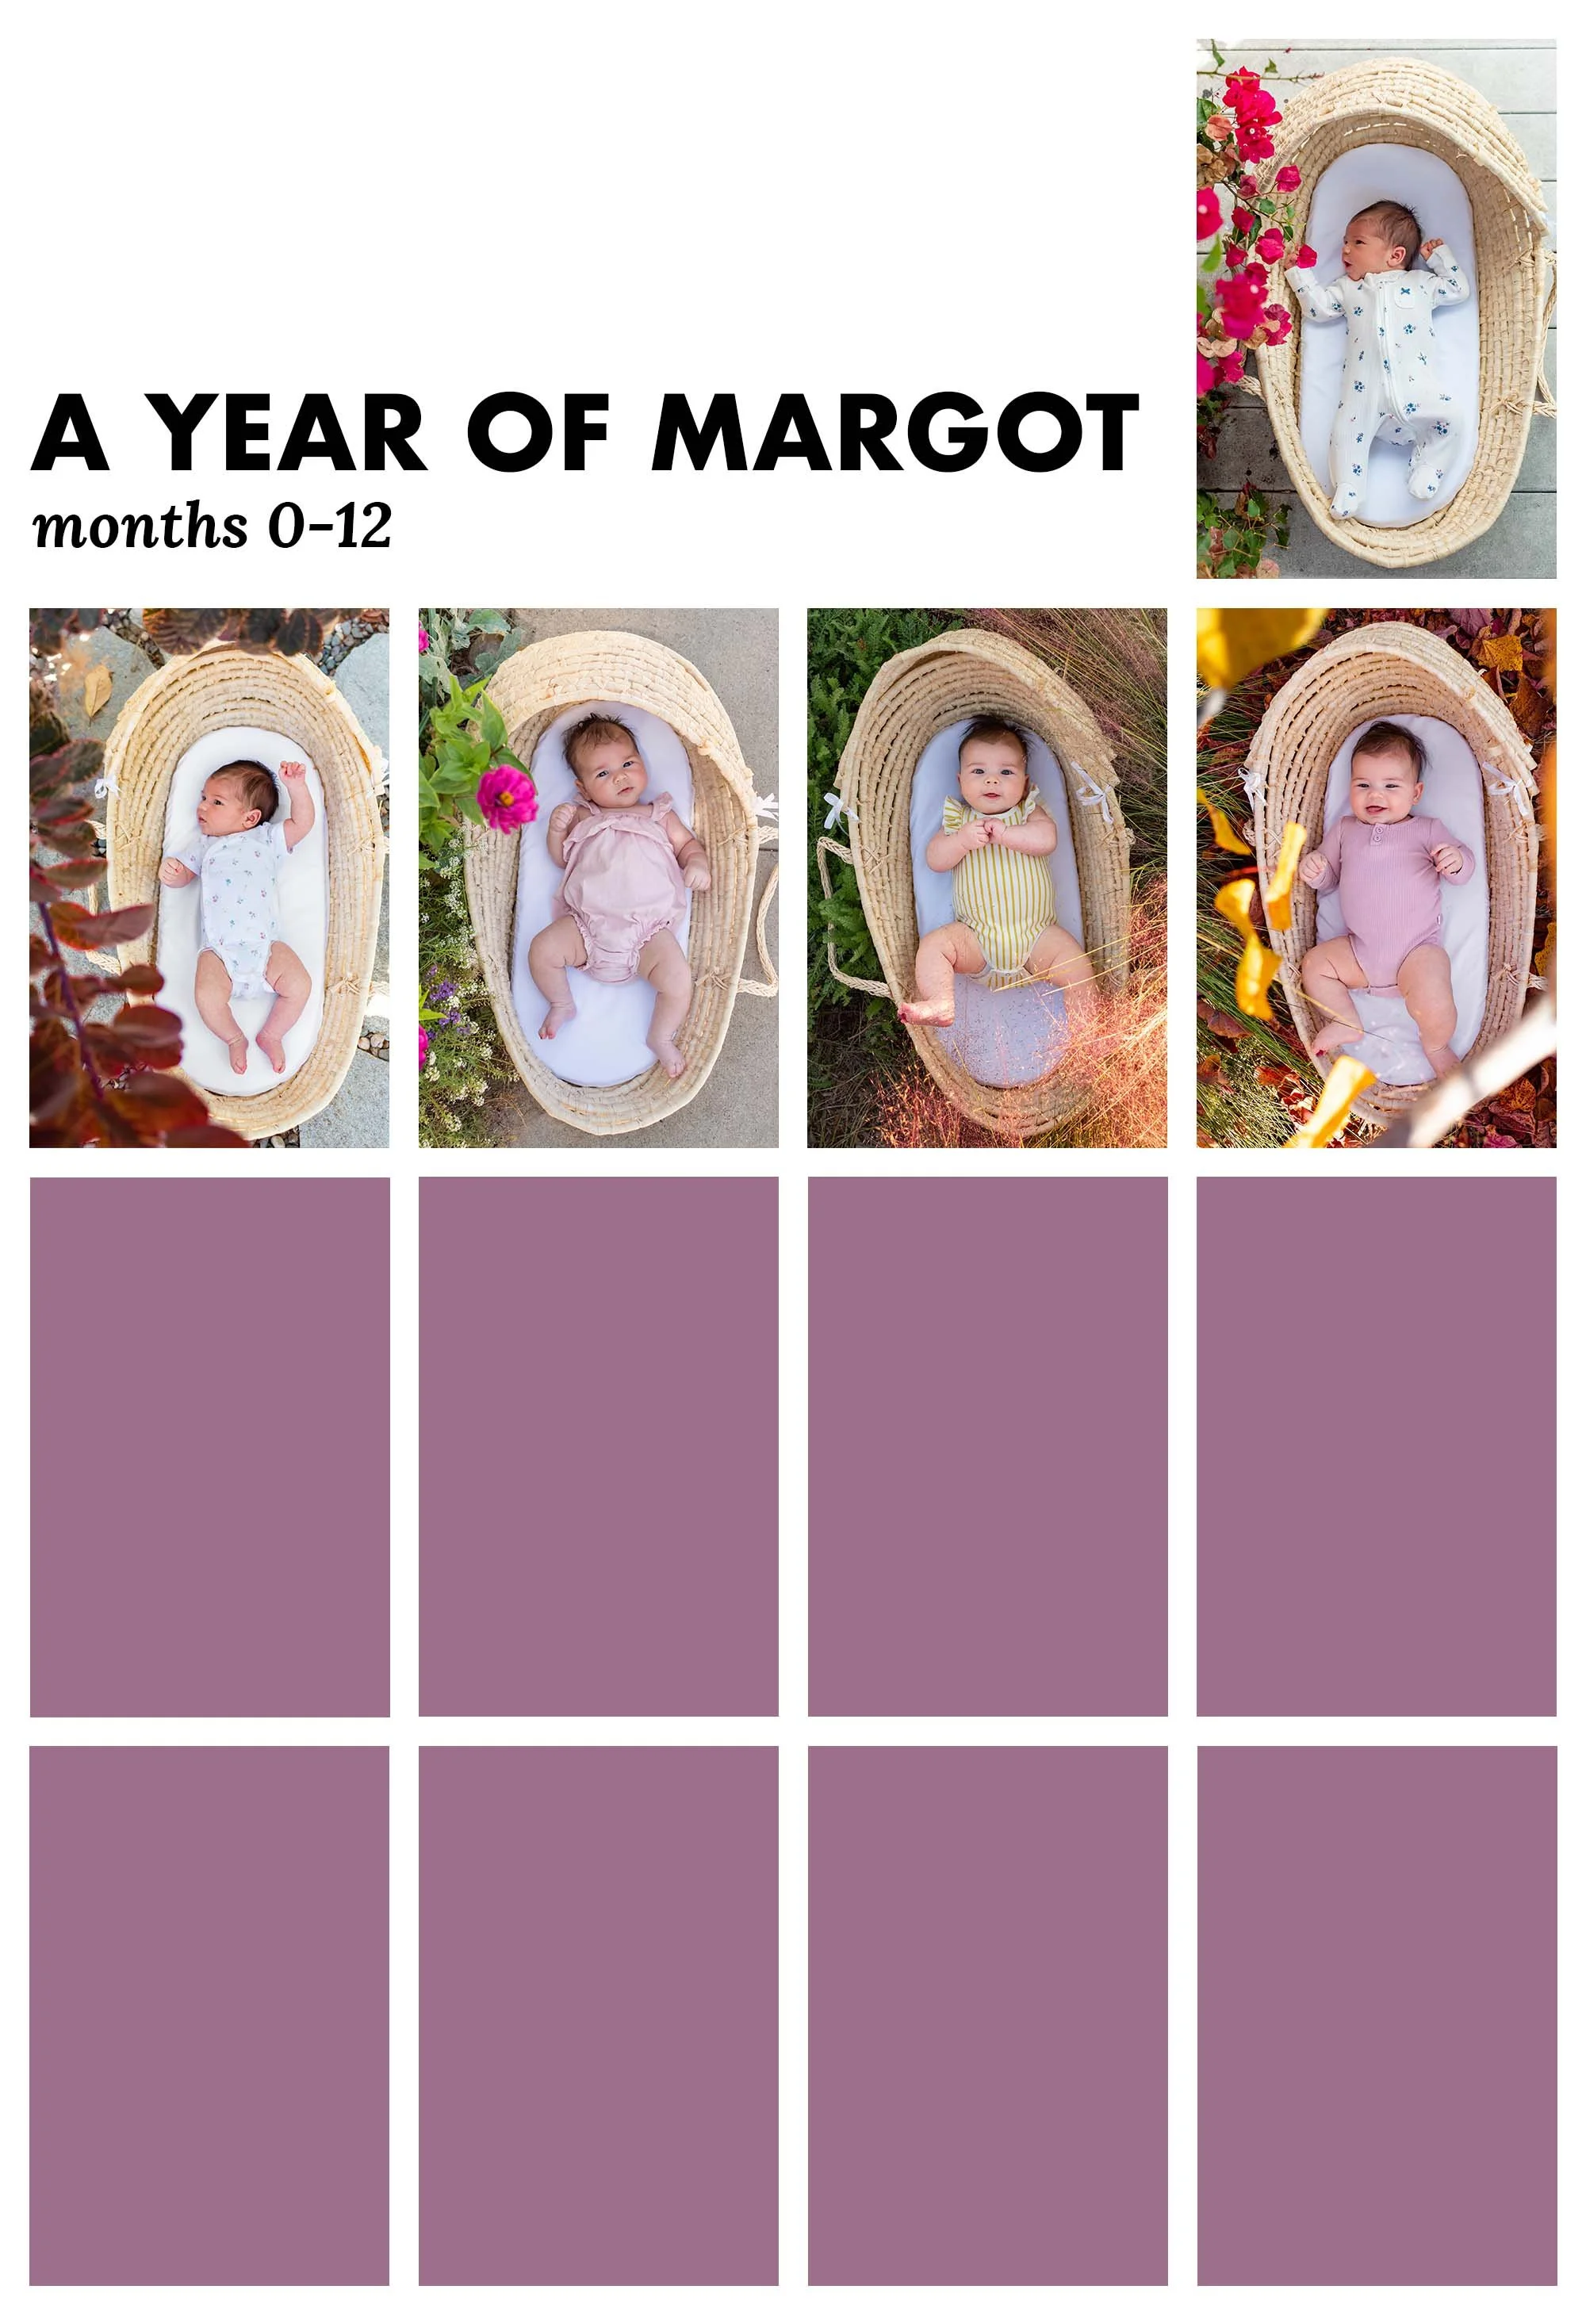
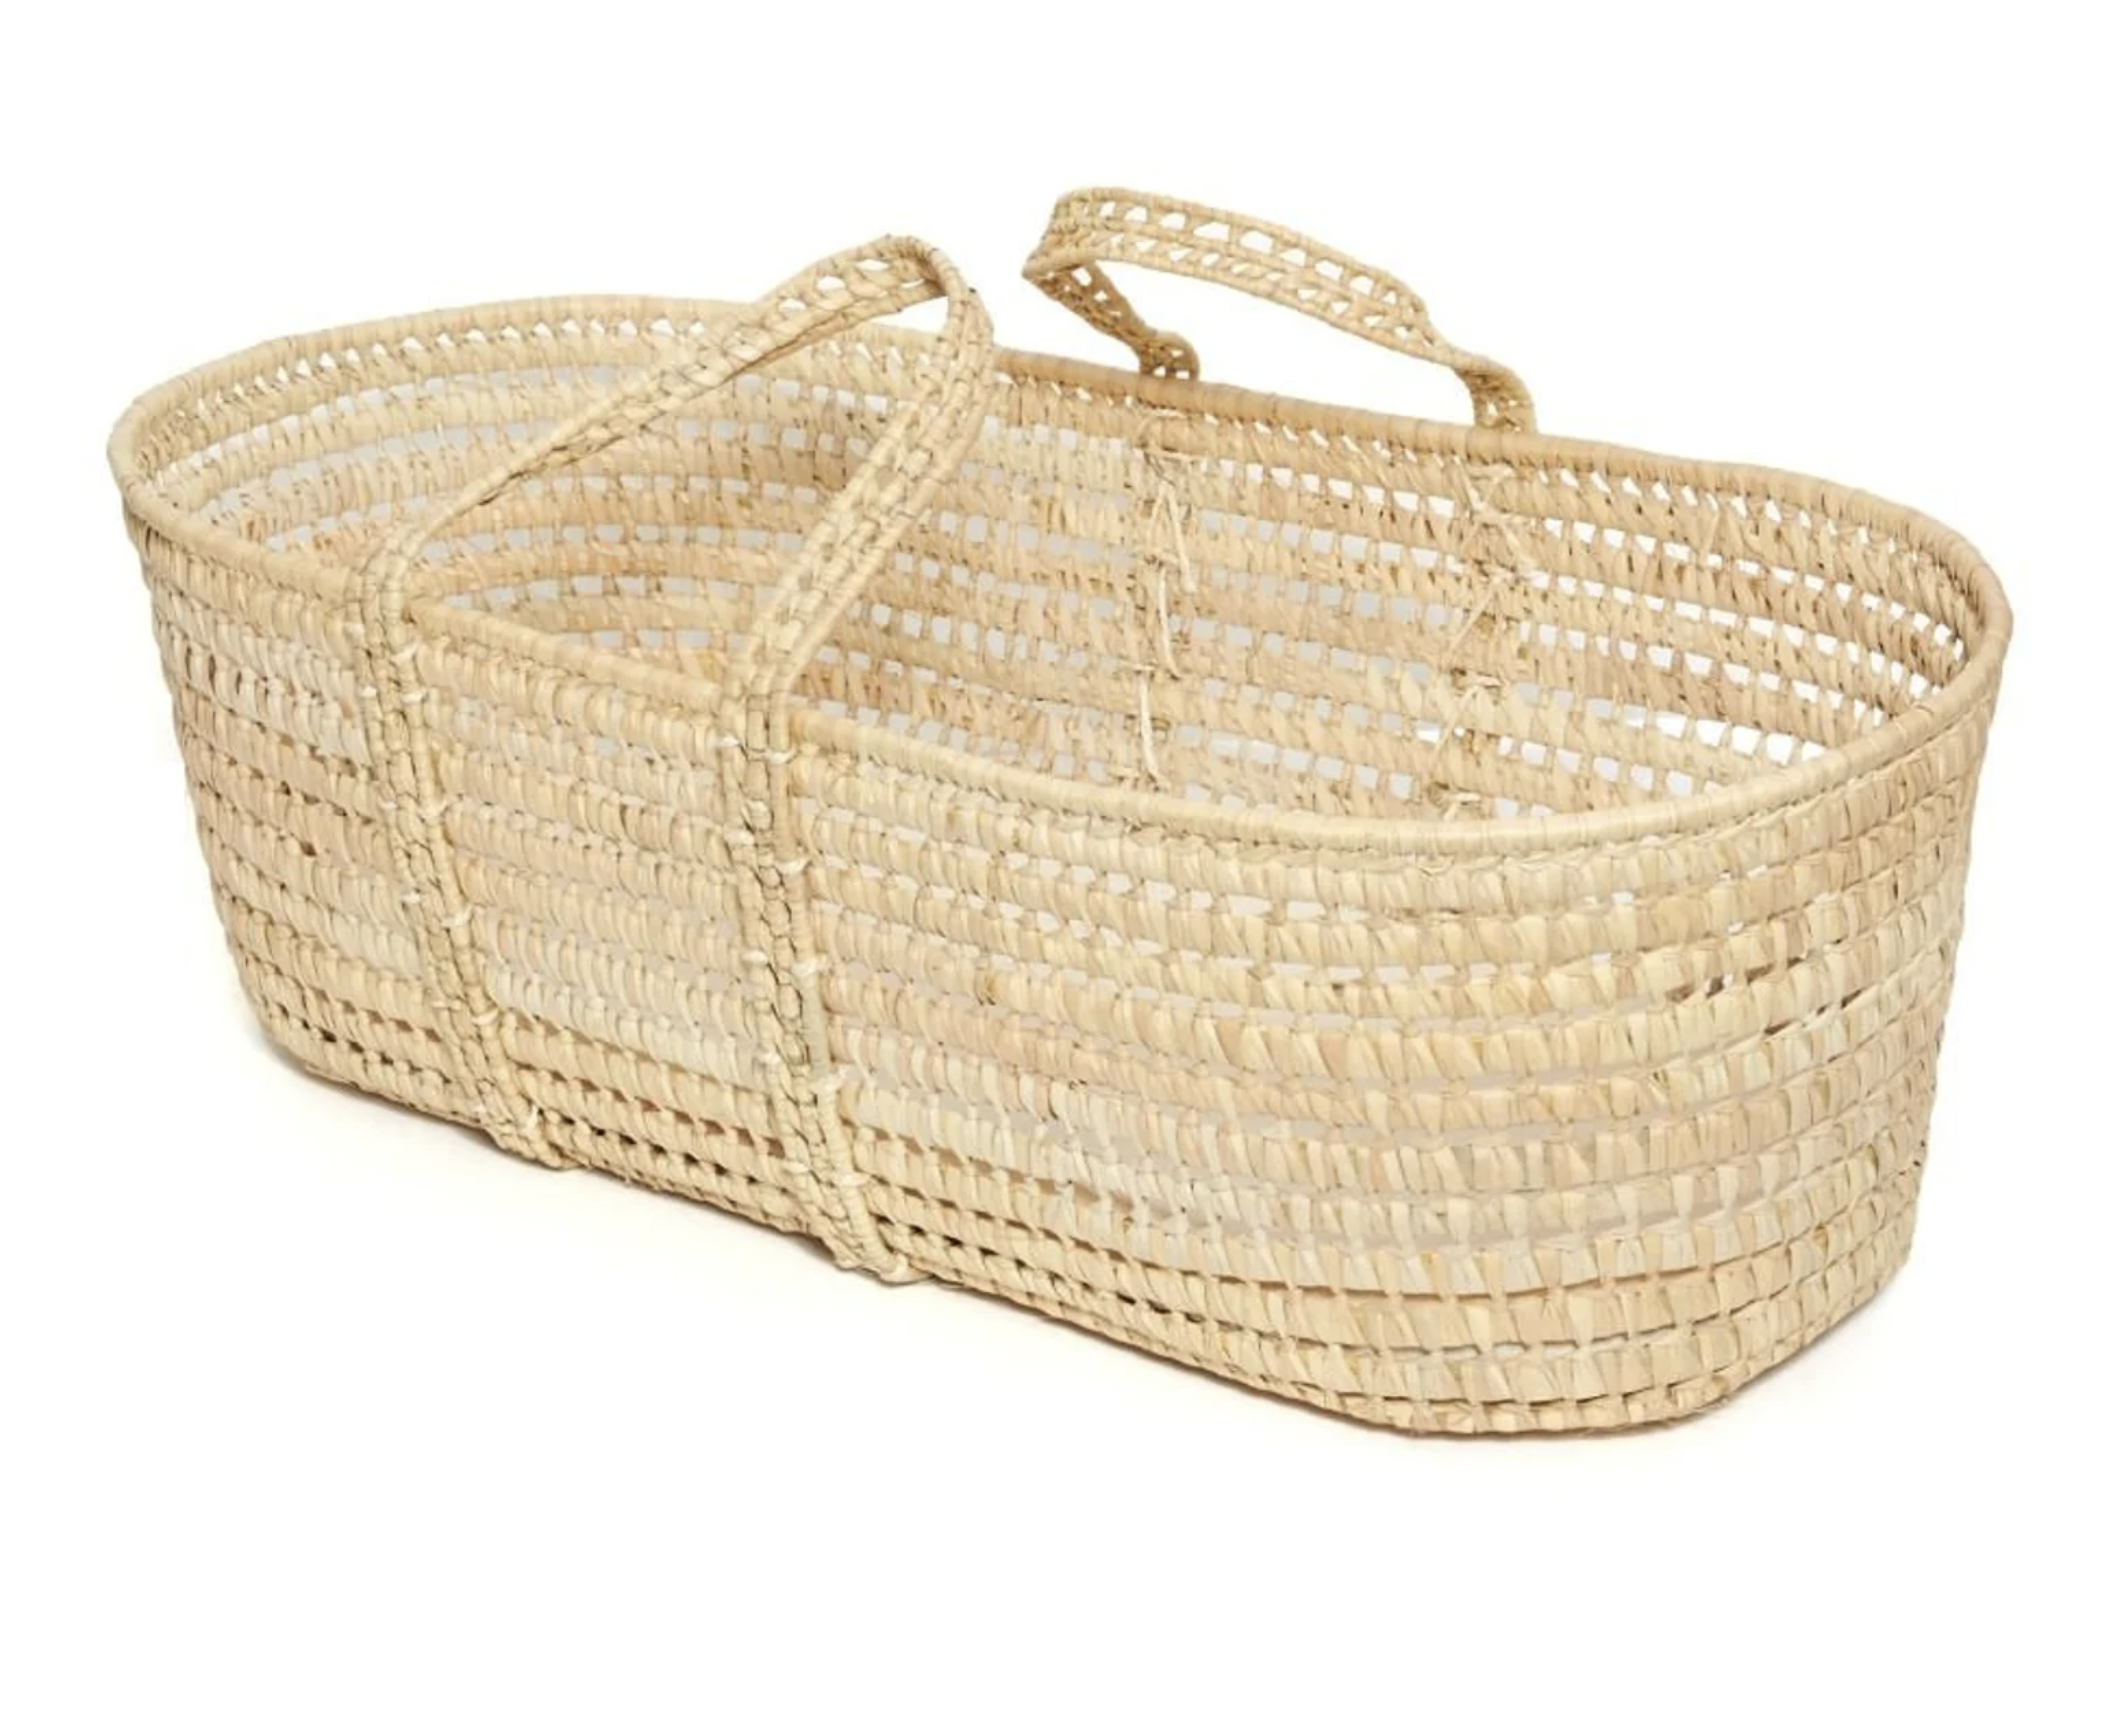
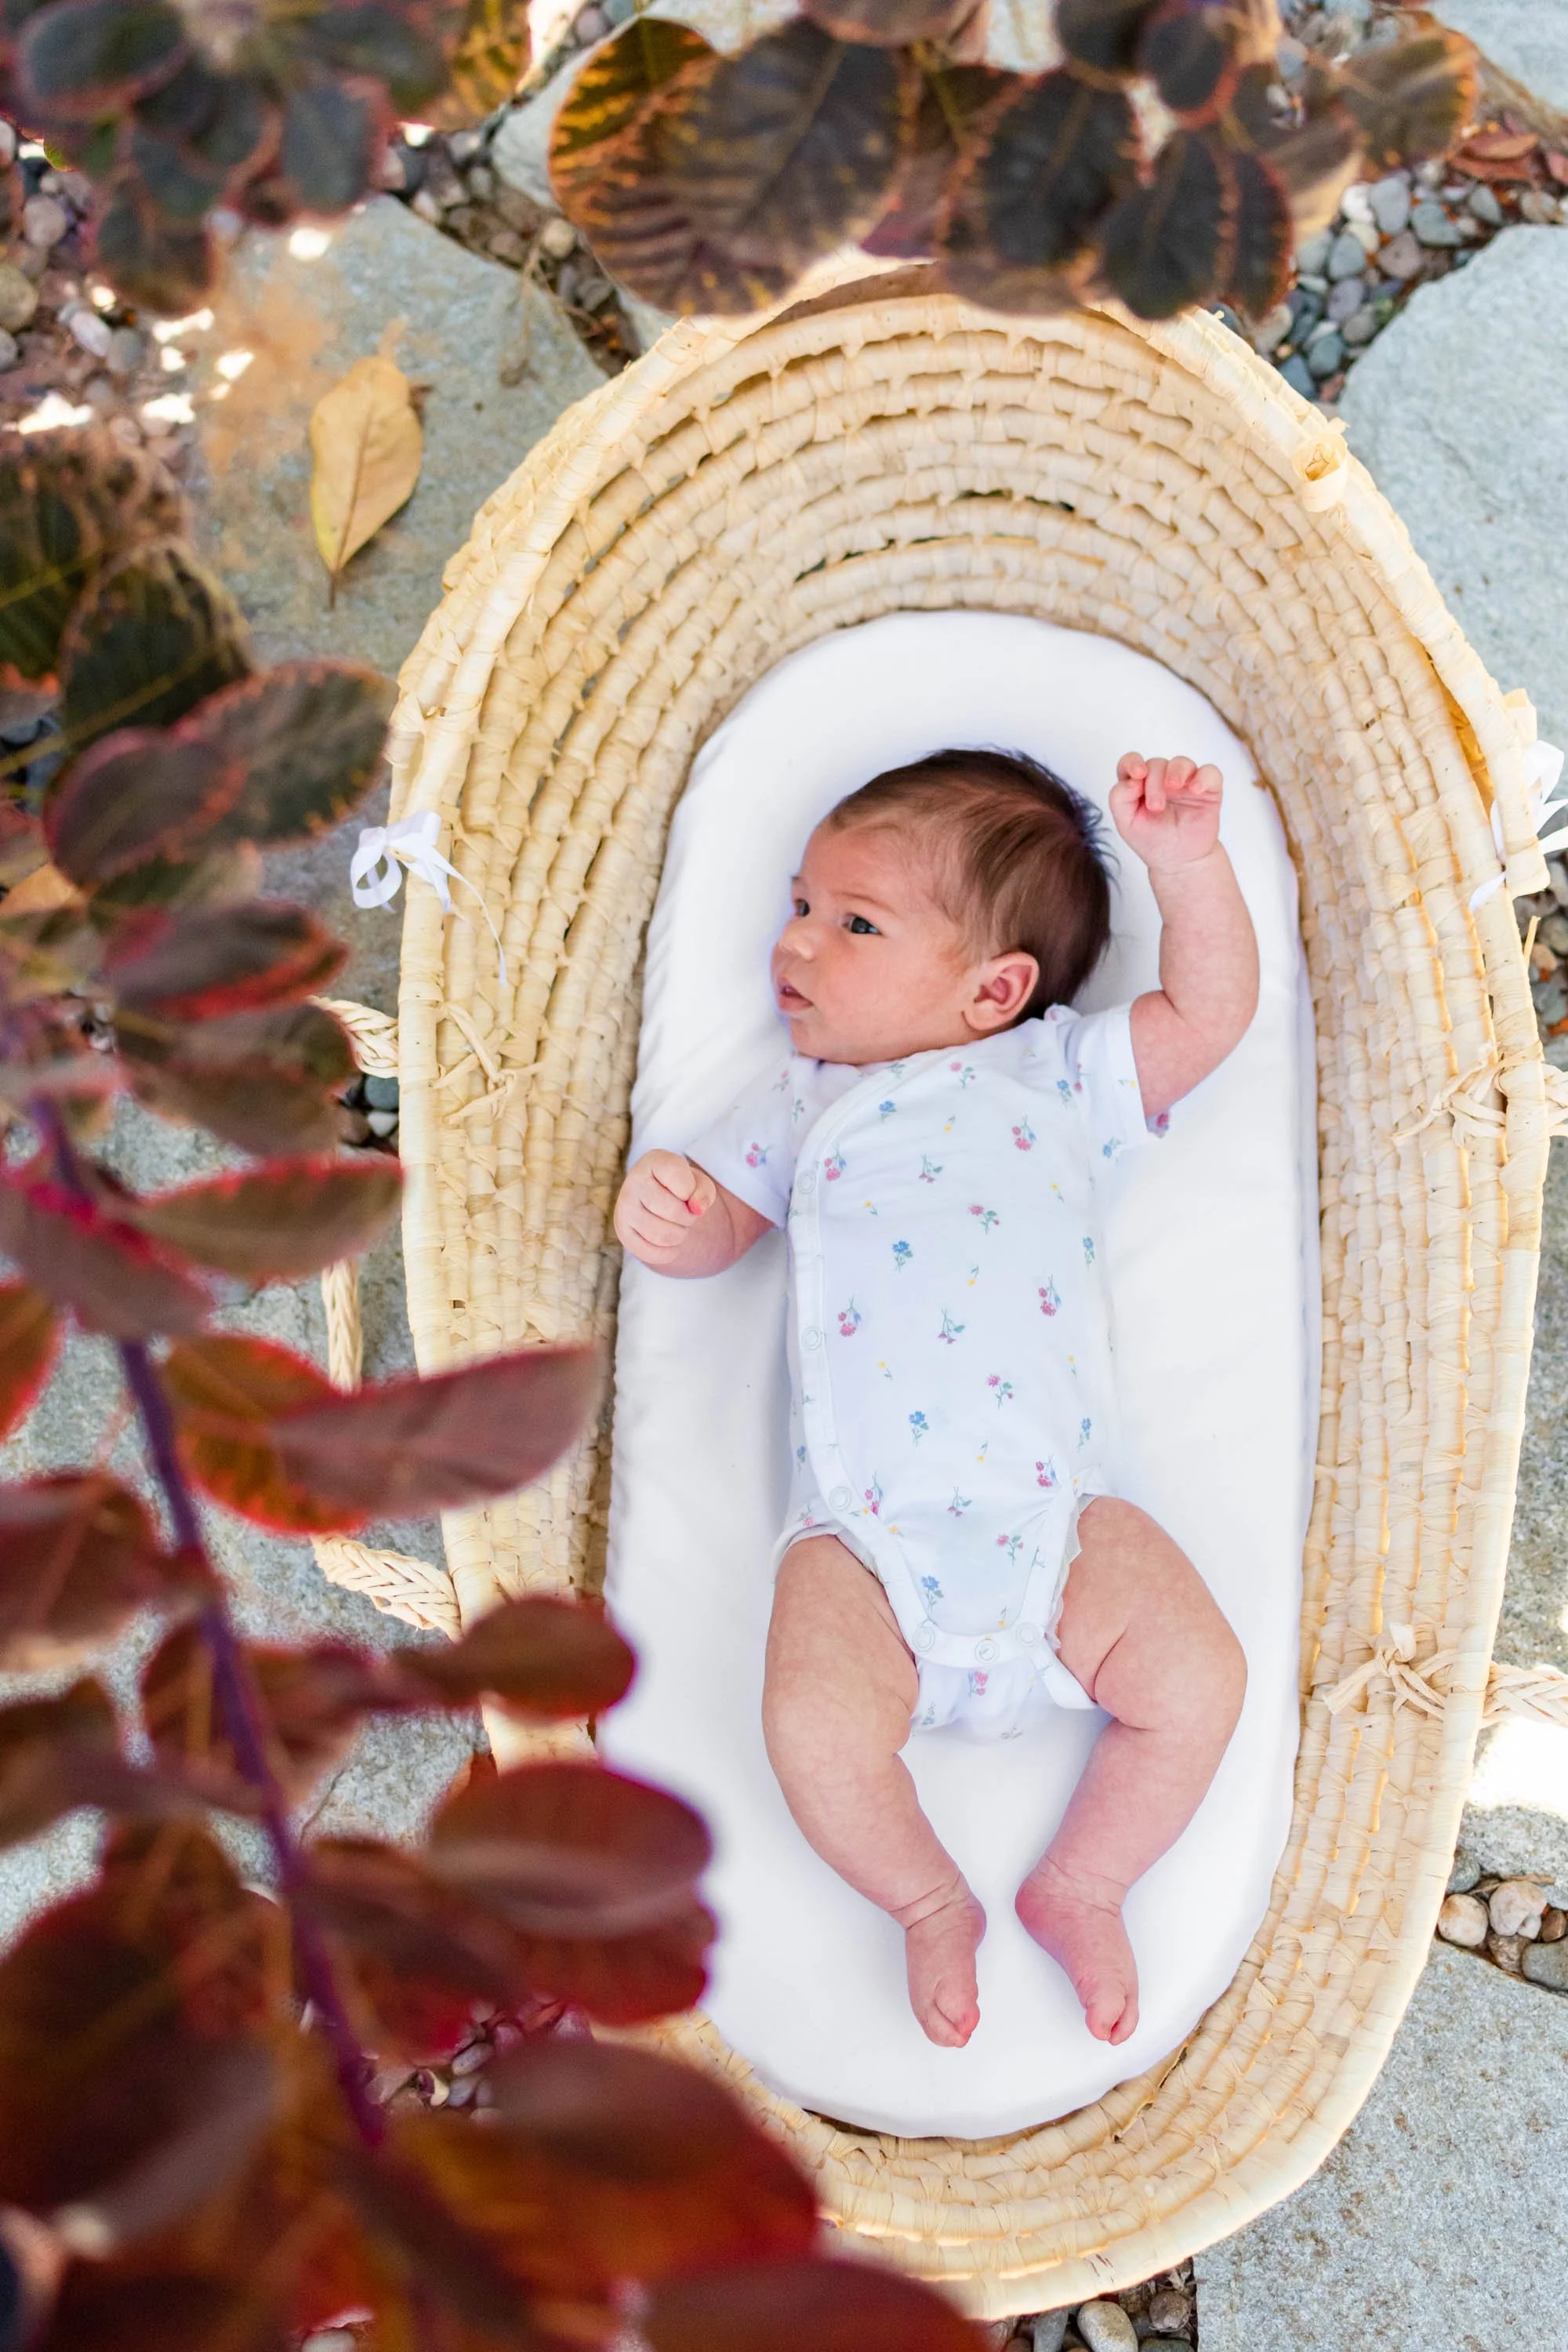
The day we brought her home from the hospital, we put her in a Moses basket on the back deck and snapped a photo of her with the pink bougainvillea flowers. I didn’t fully know how the photo series would evolve, but I’m so glad I snapped that photo at zero months old. It inspired the rest of the series to be a collection of images in the bassinet next to foliage of the season.
When she hit one month in August, I put the same bassinet in the front yard, and captured her next to the purple smoke tree. So tiny!
In September, we strolled to a neighbor’s house with a lush floral garden and got her photo next to the last of the summer blooms. I wish I put her in the garden and got less concrete, but that’s okay.
It feels like I took this photo just yesterday - how time flies!

In October, I simply had to plop her next to one of my favorite plants, pink muhly grass, which blooms bright pink tufts in the fall. Taking these photos had the neighbors outside laughing at me, but the shot is worth it.

So worth it!
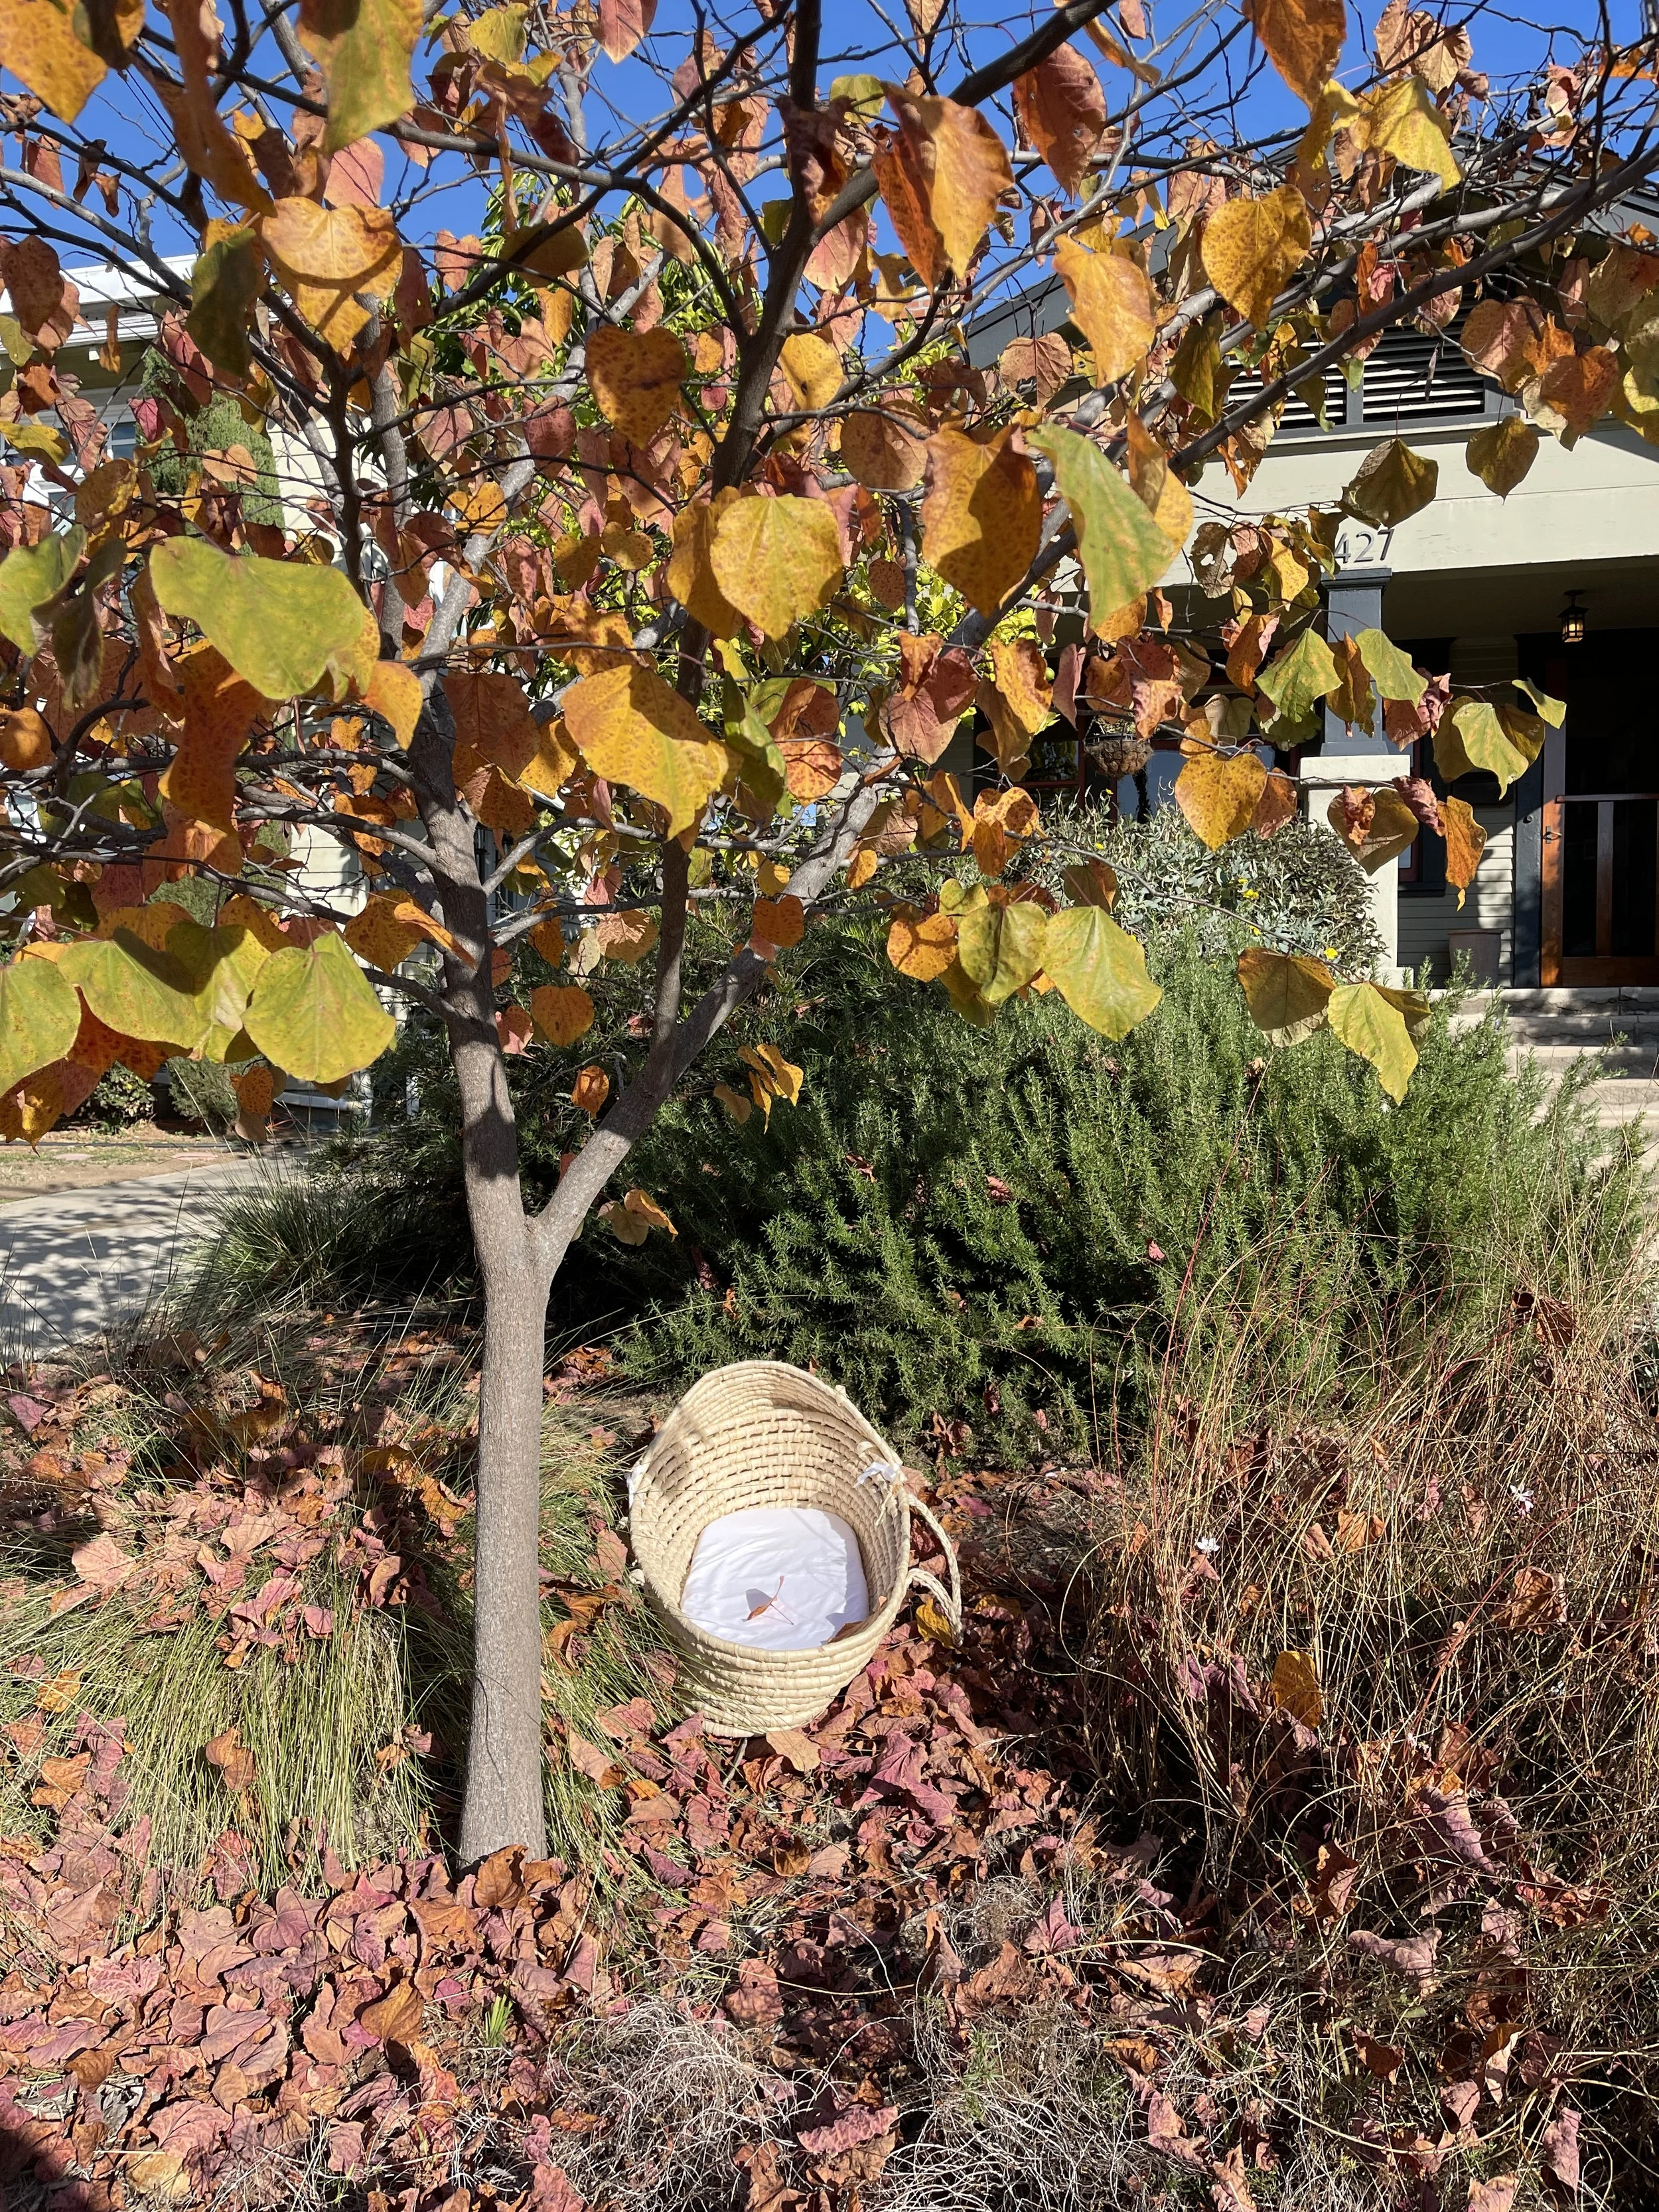
In November, we put the bassinet underneath our western redbud tree which she adores staring at. The girl loves looking at leaves! It was nice to get a photo with her favorite plant in the yard as well as the only tree on our property that turns colors in the autumn. Learn about our garden and each of the plants here.

I’m so excited about her future photoshoots alongside foliage as the seasons change! We’re lucky to have mild winters, so the tradition will continue all winter long, but we’ll certainly need to get creative about plants as we lose blooms in the chilly weather.
A Free Downloadable Template For You:
I’ve saved the Photoshop file as a template for you to download if you’d like to take similar photos of your baby, your dog, or whatever it may be you want to watch grow. Perhaps a chia pet?
First, my tips:
Stay consistent. Take the same orientation photo (portrait or landscape), use the same camera and the same lens, frame the subject in the same way (not cropping too much of the basket), etc.
Have one item remain unchanged. The background, the foliage, and the baby changes, but the basket remains the same. This helps the series look like a true series and gives a sense of scale to really see how baby (or pet) grows. A basket, a toy, or a letter board works well.
Embrace some variety. It seems contradictory to the last statement, but let the photos change a bit to be more dynamic. Margot’s gaze changes, her outfits are diverse, and the way the plants creep into the photo is different. It shows her changing personality and makes for a collection of beautiful images that are special even outside of the series.
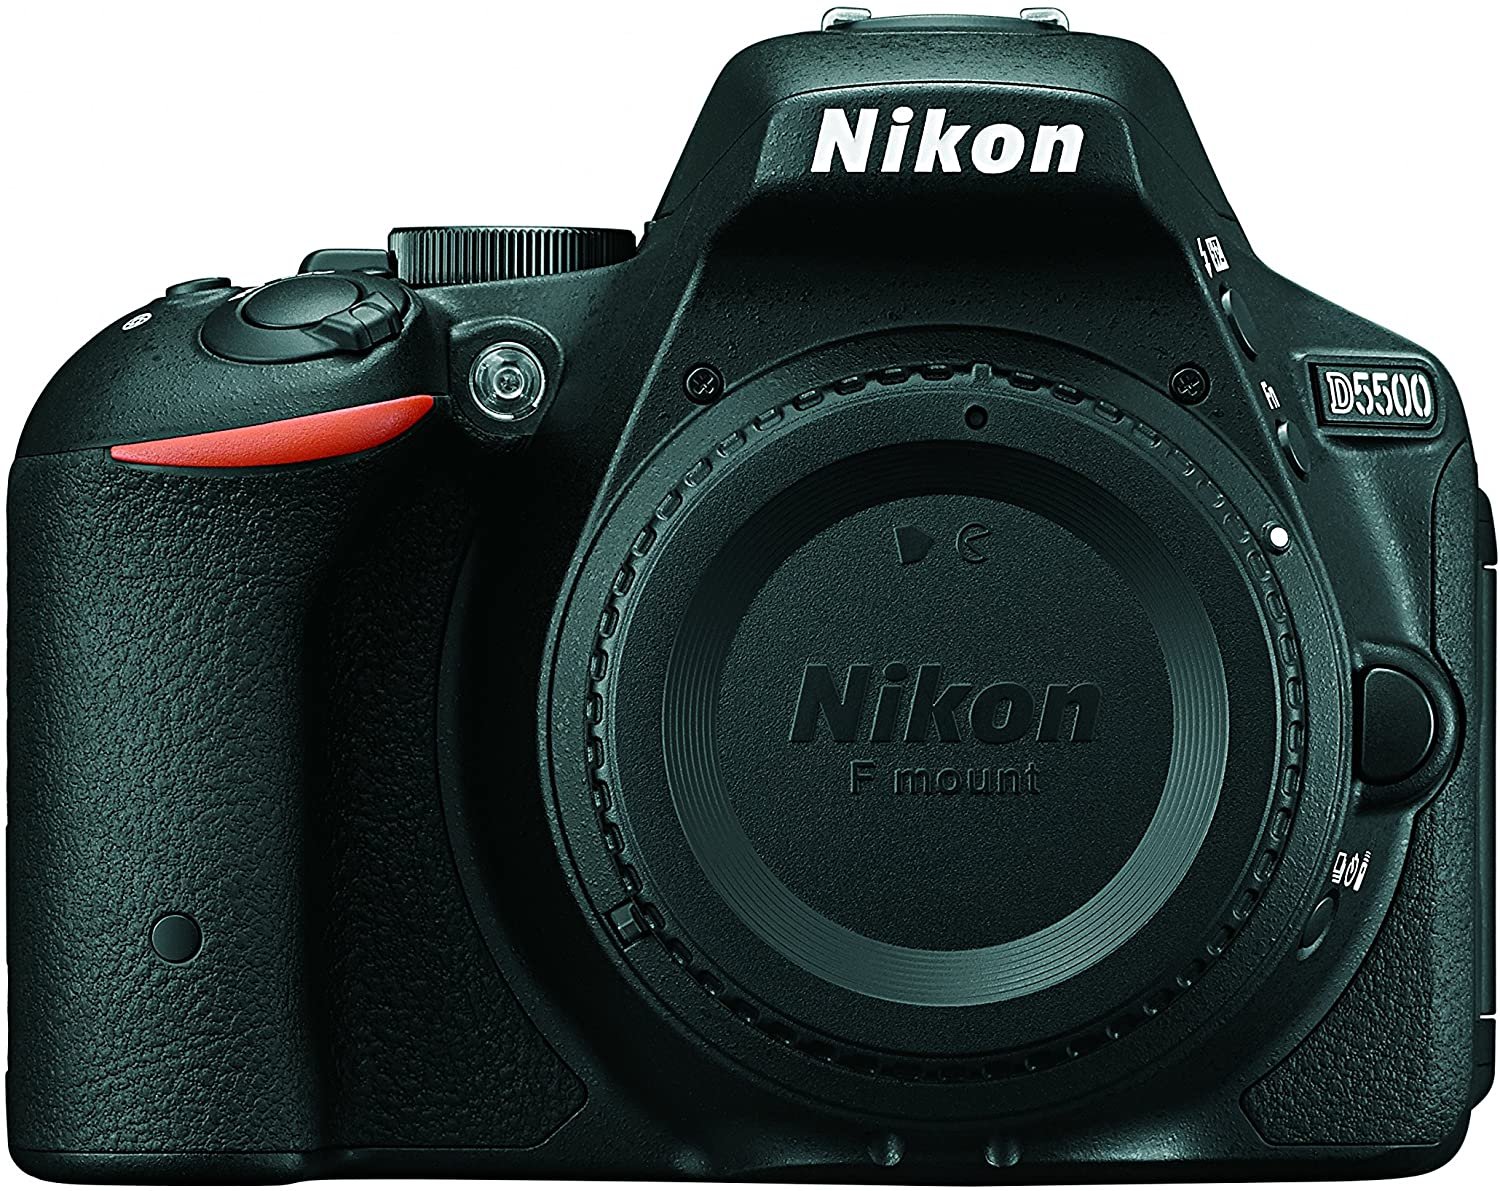
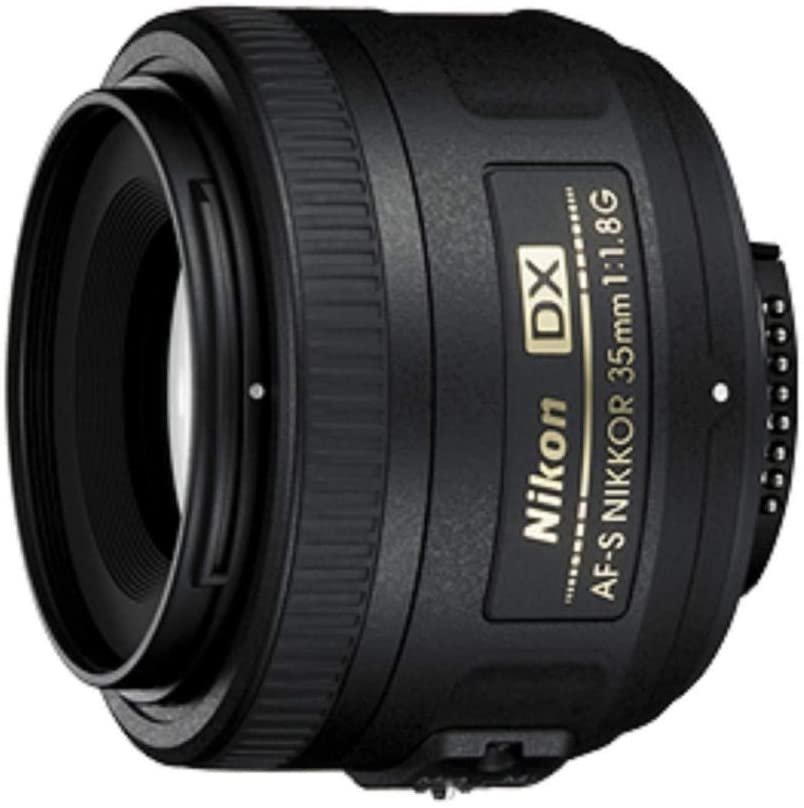
Aim for a solid-quality photo. Take photos when the lighting is ideal (not too harsh or dark), use a low ISO, and capture a large size and high-resolution image. I take my photos in Large, RAW, ISO 200 photos with a prime 35mm lens. She’s only going to be that age once, so I don’t want to regret having a poor-quality photo.
Save the original photo. As the series evolves, I find myself editing the previous month’s photo to match the lighting of subsequent months. I use Lightroom to store and edit the photos in their RAW and hi-res form. The Photoshop calendar file also stores the photos at their original high resolution so I can edit them within the calendar, too.

I created my own Photoshop calendar template because I wanted to maintain the hi-res image quality. So many collage-makers out there reduce the photo size and thus quality. My template is sized to receive 3000px wide portrait oriented photos and can then print the calendar really big!
Click the button above to download the file. To easily add the images, drag in your photo, and size it to be just slightly larger than the rectangle. Place it on top of the corresponding month’s tile. Then, in the layers panel, drag the photo layer to be right above the corresponding month. Then, hold down Option (on a Mac) or Alt (on a PC) and hover your mouse between the two layers. The mouse will make a new shape with an arrow, then click. Now, the image is masked by the rectangle and will be perfectly sized and lined up with the rest of the tiled images. I put in a stock image for you to see how it looks. I also put the completed months in a folder to keep them organized in the layers panel.
Get the Gear: