
How To Safely Work Around Lead-Based Paint When Re-Painting The Exterior of an Old House
/Our century-old house has been in need of a fresh paint job and the task of dealing with the layers of lead-based paint was admittedly intimidating. There are a few key steps to keep lead out of our waterways, soil, air, and homes when working outside. I’m here to share exactly what to do (and not do!) when prepping a house for a quality paint job while taking the greatest cautions with lead.
This post is sponsored by CertaPro Painters who were the first paint company to truly impress me during my initial consultation (I interviewed five others!) As always, all words and opinions are my own.
I’ll detail the process below, but I want to highlight the key safety measures right out of the gate.
How to safely work around lead-based paint outside:
Hire a lead-certified contractor that takes safety seriously.
Scrape to remove paint! Do not power wash! Do not sand! Do not use high-heat!
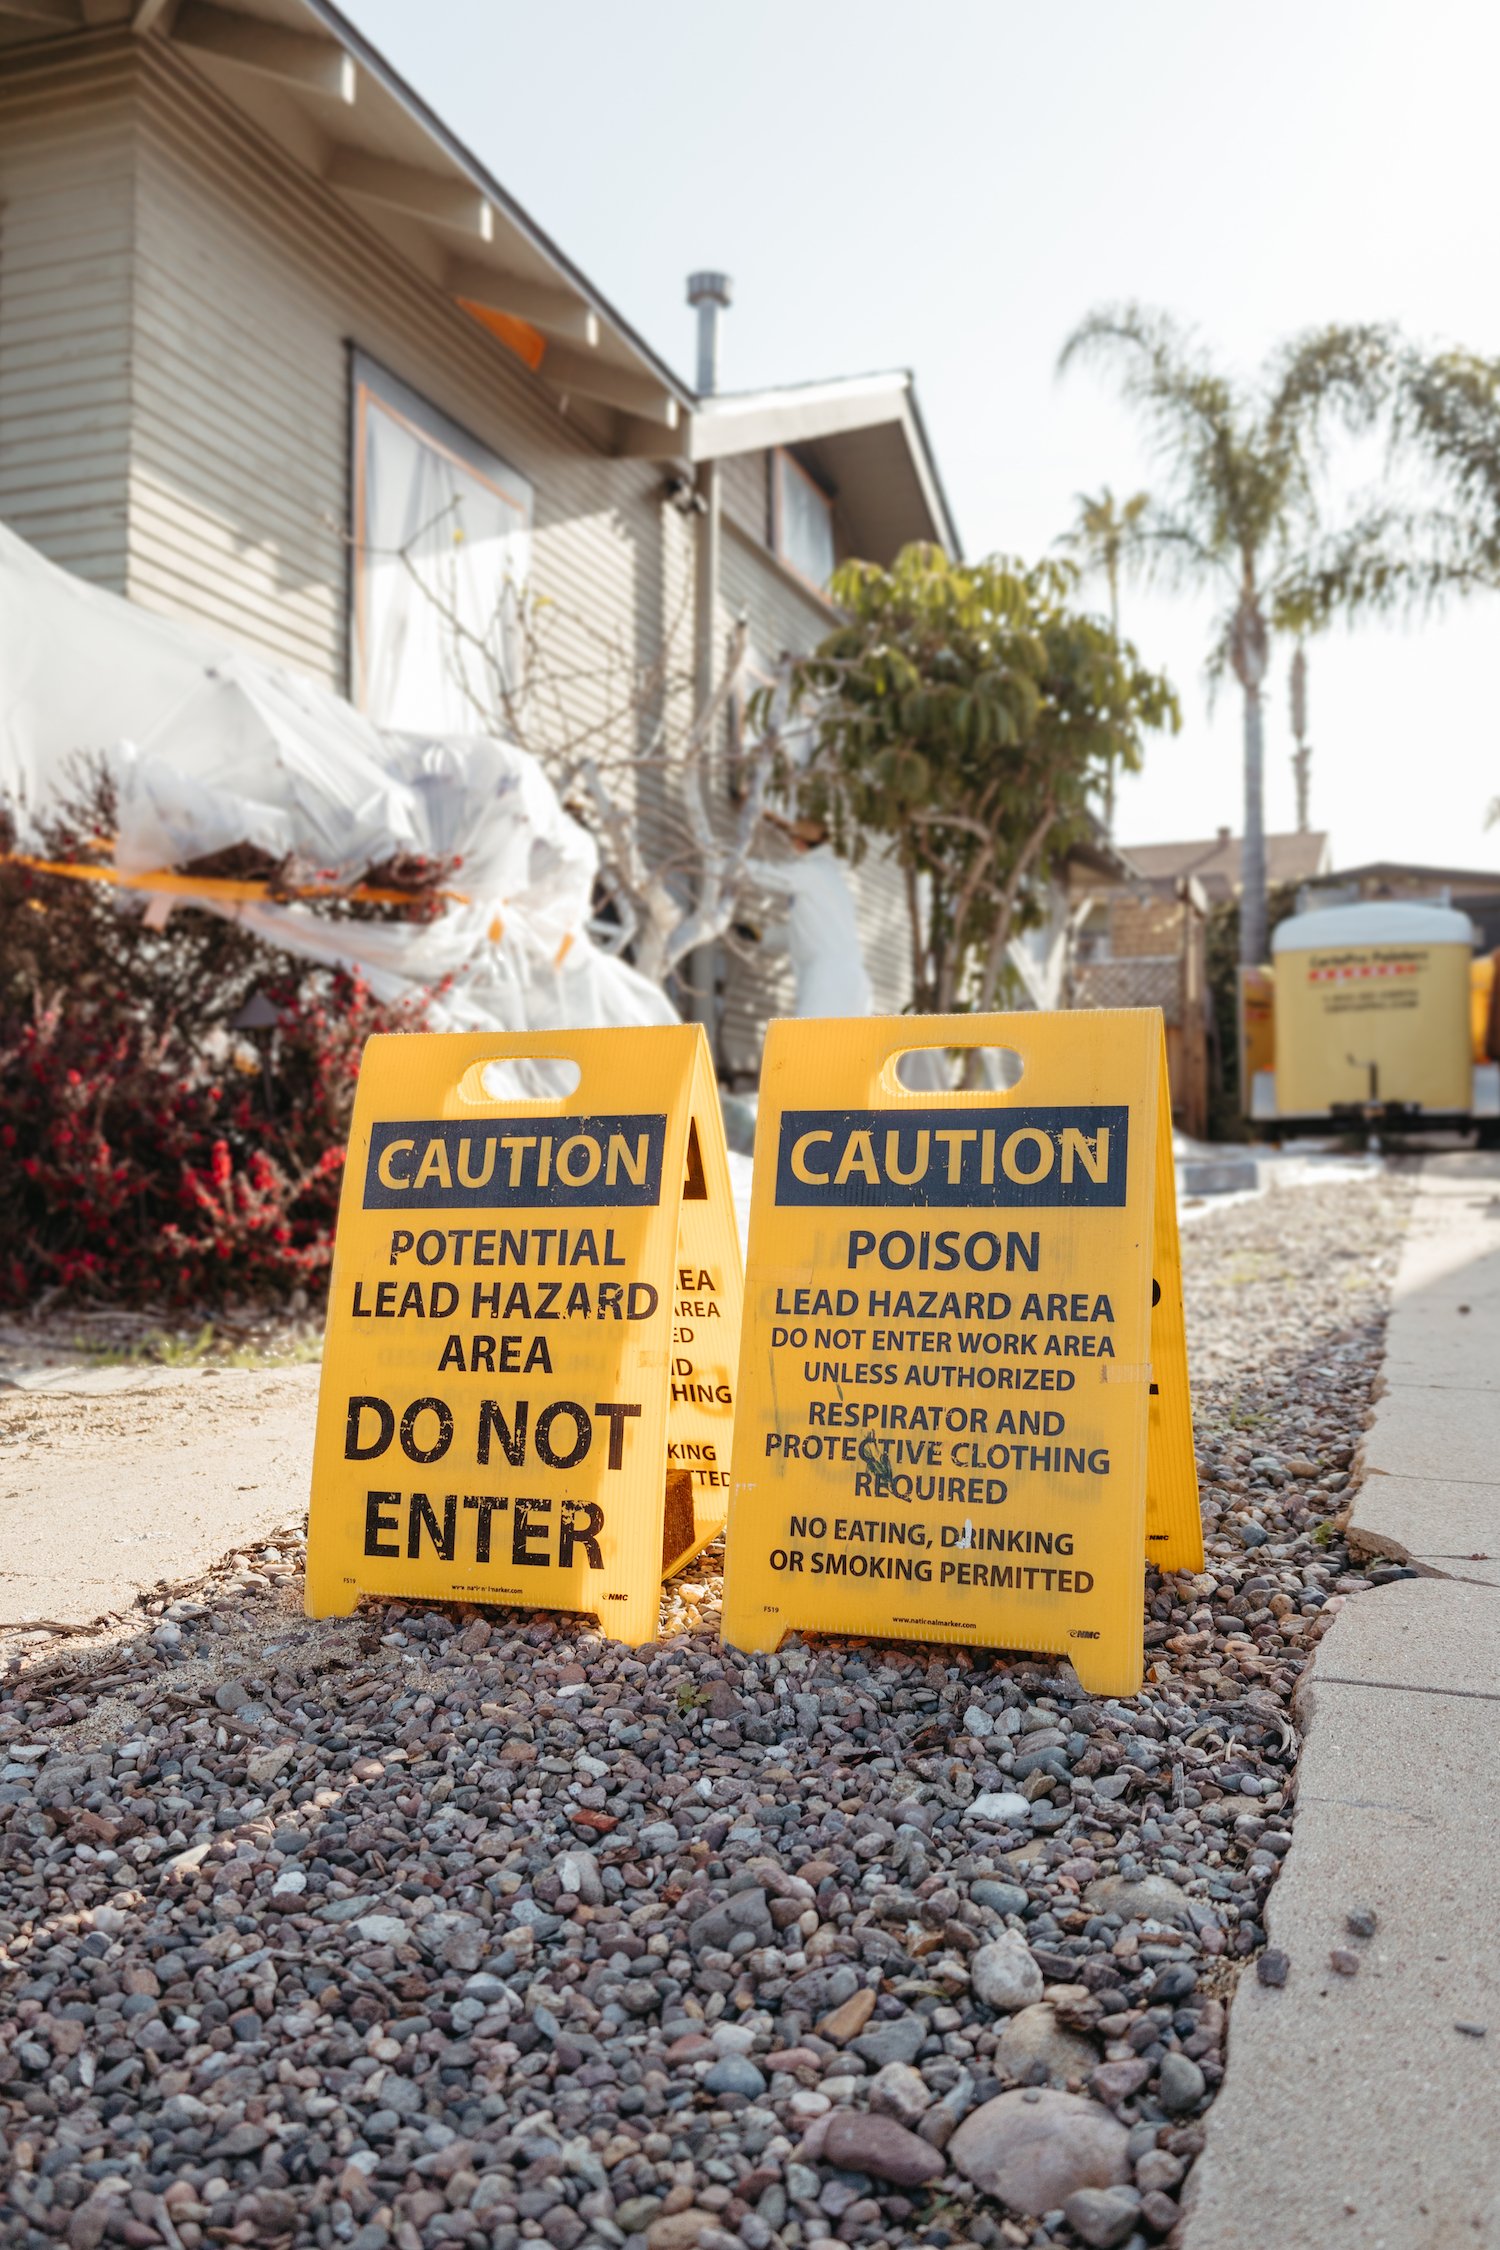
Lay down plastic in a 10’ perimeter to collect paint chips. Safely dispose at the end of each day.
Work only on days that aren’t windy. Work in small areas.
Cover vents, plants, HVAC and tape off windows (inside and out).
Wear respirators and full body suits while working.
Clean surfaces and/or use HEPA vacuum.
Prime, caulk, and seal with quality paint to encapsulate lead.
Repeat process if/when paint continues to peel after primer goes on.
Inspect at conclusion of project.

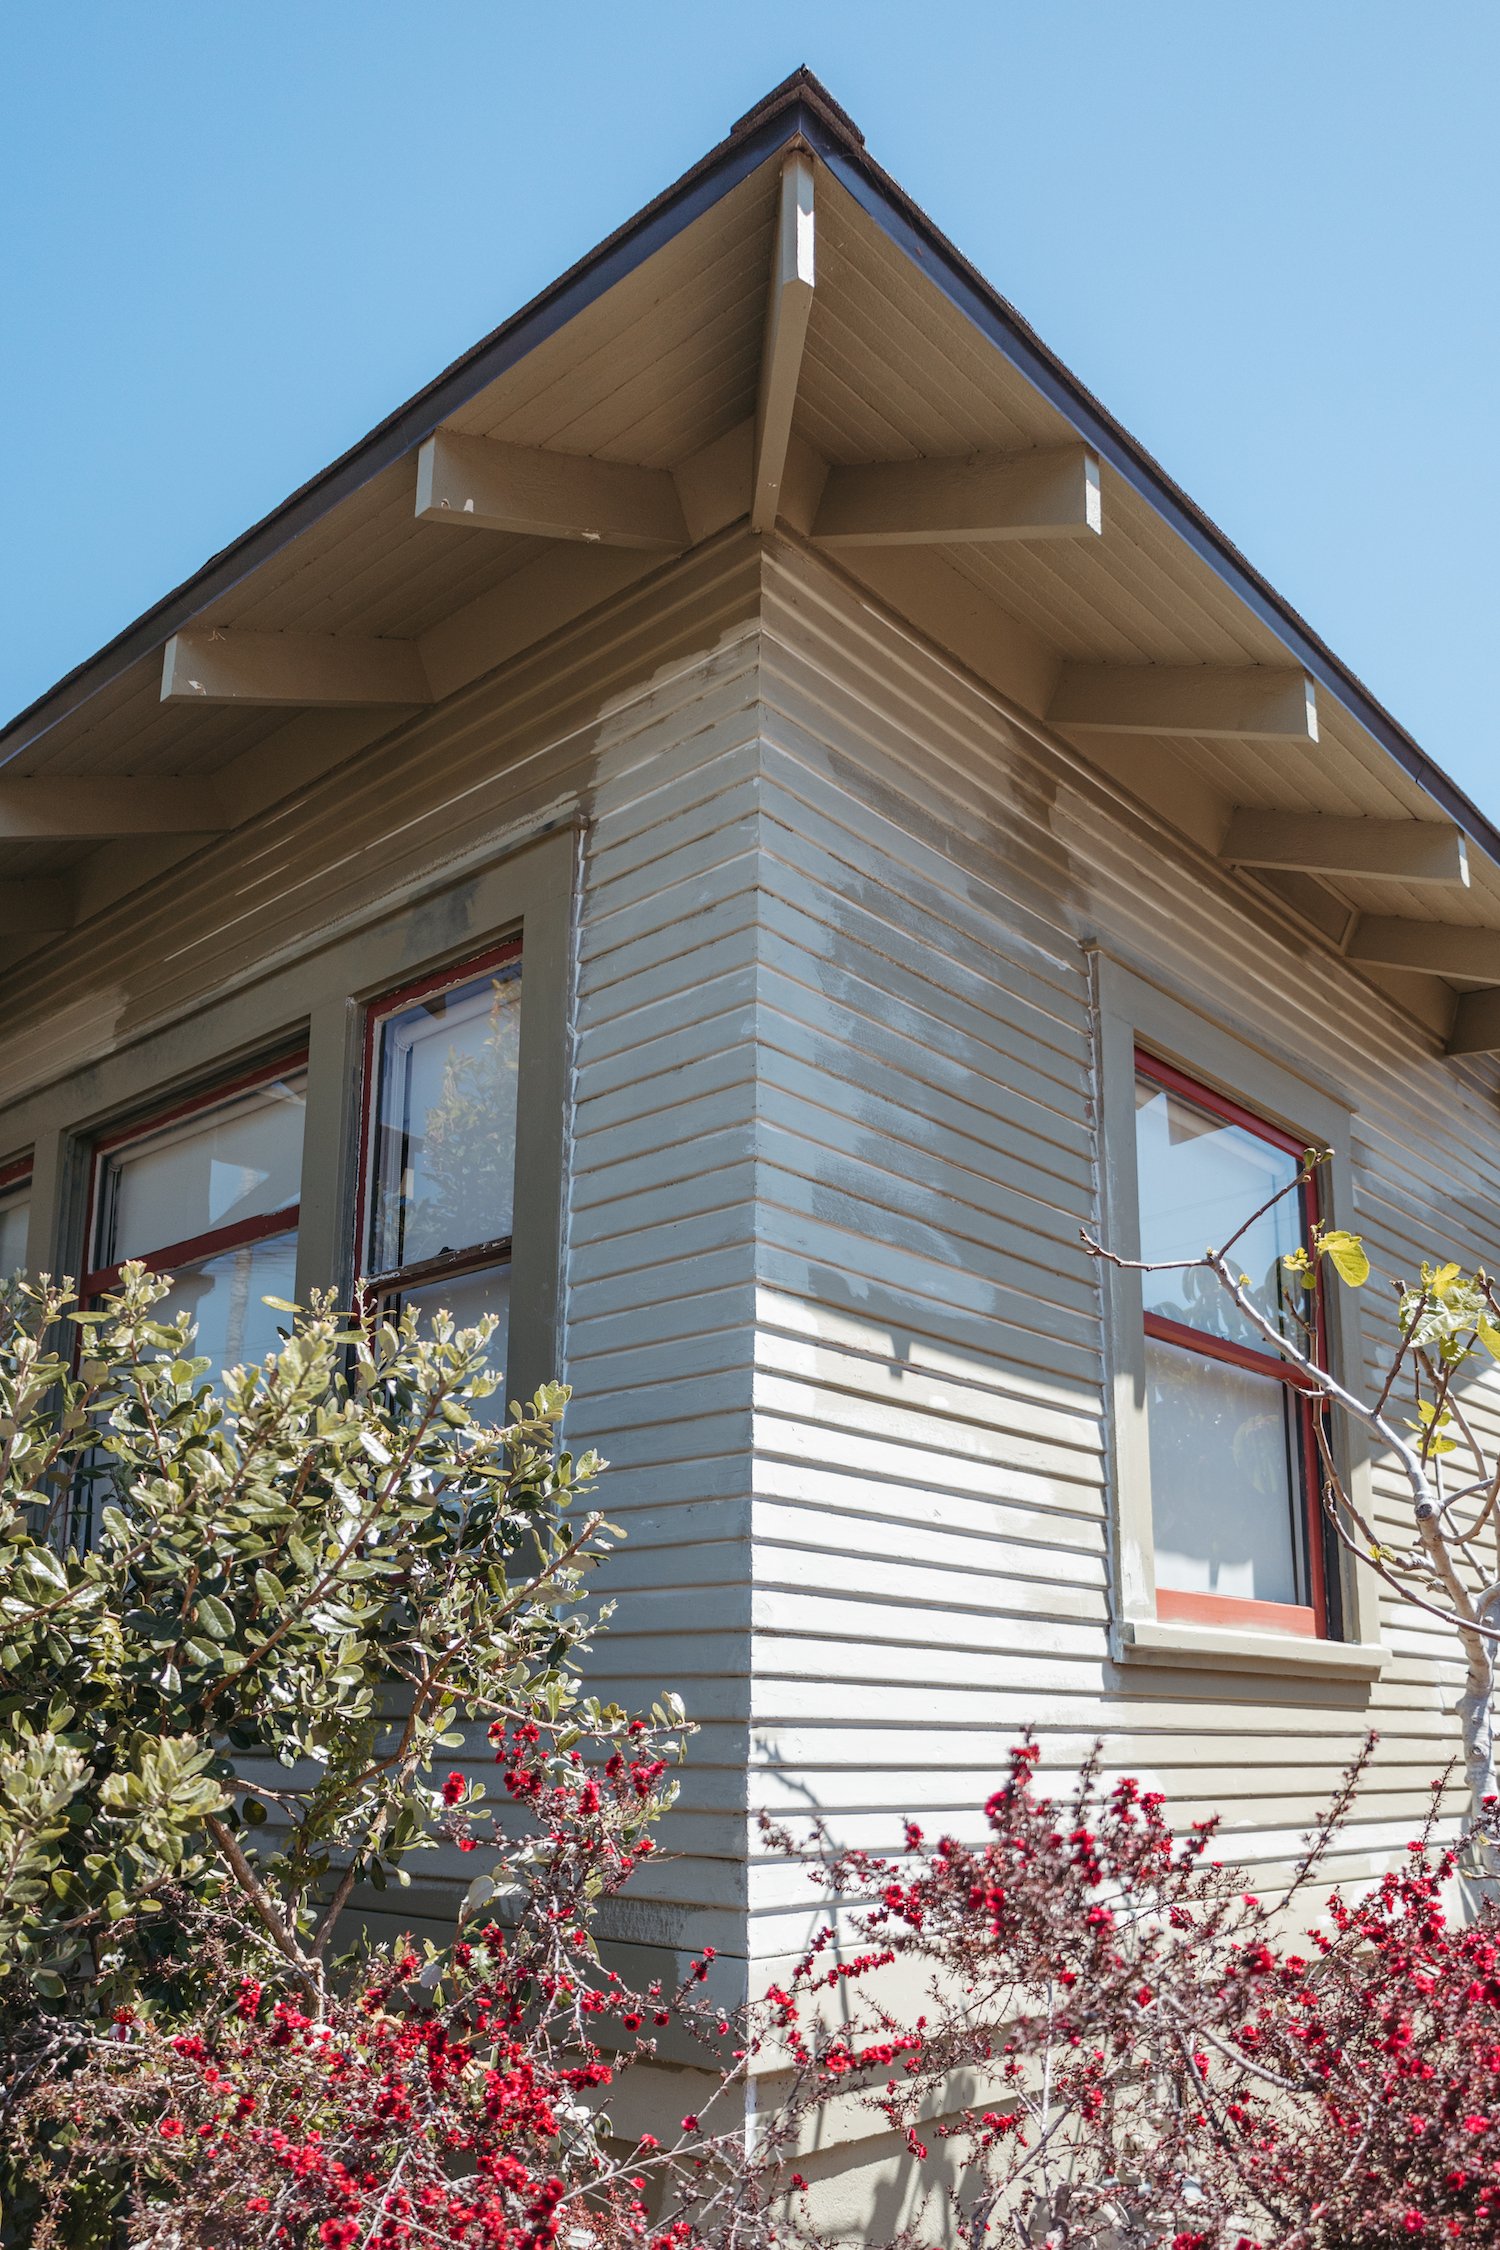
For starters, this is what the exterior of the house looked like. I’m ashamed that the peeling got so bad that the lead-based paint was exposed. Don’t do this!

With any paint job, a quality preparation is crucial - finish paint will never hold up when adhered to a loose or dirty surface. This means that any of the paint that’s peeling (or on the verge of peeling) has to go.
And this is where lead safety gets critically important. Ingestion of lead can lead to illness and long-term neurological effects, especially in young children. Lead has been prevalent in many household materials and was only removed from residential paint in 1978. Learn more about lead and home renovations from the EPA.

We don’t want any chance for lead-based paint to get into the air we breathe, the water we drink, or the soil that we grow our food in or play in. Lead safety is important for our own families, our neighbors, the painting crew, wildlife, and future generations. Once lead gets into the air, water, or soil, it’s there forever.
I knew that there was lead in the paint because I’ve tested it with these inexpensive and instant lead tests but they can only test for lead on contact. CertaPro wanted to get a good understanding of all the layers of unexposed paint, so they brought in a third-party lead inspector. He used a spiffy portable x-ray fluorescence (XRF) machine that could read through multiple layers of paint to determine the exact concentration of lead in all of the layers. No surprise here, our century-old home has lead.

How to safely work around lead-based paint outside:
Hire a lead-certified contractor that takes safety seriously.
Lead-certifed contractors have undergone training about local/state/federal rules for lead safety. However, not all of those that have gone through the training take lead safety seriously, so it’s smart to ask questions. The reason I chose to work with CertaPro Painters to give my home a free coat of paint is because they confidently follow all of the below steps as soon as they see that a house was built before 1978. I had previously interviewed other painters and was so disappointed to hear they cut corners.

Scrape to remove paint! Do not sand! Do not power wash! Do not use high-heat!
Sanding turns lead-based paint into a fine dust that can carry through the air. We don’t want this! I do have to sacrifice a super smooth finish on the house by insisting we don’t sand, but the safety is well worth it. And plus, the house is over a century old - I don’t need the surface to look brand new! If sanding is necessary, wet sanding with a HEPA-vacuum and creating a shroud of plastic can be done safely- but is very involved.
Power washing is indeed efficient at removing loose paint, but it’s a big no-no when the paint has lead in it. The mess of chips get soaked into the soil and/or run off into our waterways.
Stripping the paint is a fine option so long as a low-heat gun is used. The Cobra (and this budget option) uses infrared to safely remove the paint at low temperatures. Traditional heat guns get too hot and dangerously vaporize the lead. Another safe stripping option is using chemical strippers such as Peel Away 1 or Smart Strip. In most cases, removing all of the paint down to bare wood is overkill and time consuming.
The simplest yet safest method (if following the steps below) is to hand scrape loose paint, so this is what we did. The crew focused on one side of the house at a time and ran hand scraping tools over the entire facade to remove any bubbled, chipped, damaged paint. If the paint was solid, it stayed on to be encapsulated later.

Lay down thick plastic in a 10’ perimeter to collect paint chips. Safely dispose at the end of each day.
As the crew scraped off the loose paint, it dropped onto plastic that stretched 10 feet from the house. When they completed scraping a section, the crew rolled the paint inside the plastic, put it in a thick contractor bag, taped it, and took it to a lead disposal site.
Work only on days that aren’t windy and work in small areas.
The crew chose days that weren’t windy to ensure paint chips didn’t sail away. The 10’ perimeter of plastic is designed to catch flakes that get caught in a breeze, but gusty winds would extend beyond where the crew can tarp.
The team tackled one side of my house at a time and worked close to one another in order to keep the lead-exposed zone minimal. For my single story house they did one facade each day. At the end of each day, they cleaned everything up really well (no lead, drop cloths, or tools sat out overnight), then started fresh on the next side the following morning.

Cover vents, plants, and HVAC, and tape off windows (inside and out).
To ensure lead flakes didn’t get into the house, the crew put plastic over the AC unit and taped over vents into the attic. They also wrapped our fruit trees in plastic to be sure I could enjoy the produce later in the season without worry about lead exposure.
They covered all the doors and windows from the outside AND the inside with plastic. Sealing off windows with plastic and a generous amount of tape is a critical step, and the double layer of protection provided great peace of mind.

Wear respirators and full body suits while working.
The guys wore full body suits, gloves, and N95 masks to keep themselves safe during the messy work.

Clean surfaces and/or use HEPA vacuum.
After picking up the chip-filled plastic, the crew did a daily inspection to ensure no paint flakes were left behind. If they spotted one in the soil, they scooped up the chip along with the nearby dirt to dispose of it. They vacuumed with a HEPA vacuum to collect dust on windowsills and did a thorough vacuum of our porch where we spend lots of time.

Prime, caulk, and seal with quality paint to encapsulate lead.
Once the entire house was scraped of loose paint, they moved on to encapsulating the remaining paint with a high-quality primer. The team used PrepRite Pro Block Primer tinted to the final paint color and sprayed it on all surfaces.

To prep for priming, they did a quick and very gentle power wash to rinse away the dirt, cobwebs, and grime on the house. Note that there’s a big difference between rinsing the house gently and applying pressure to dislodge paint chips (don’t do the latter!). They also pulled back the mulch and soil to ensure fresh paint was sprayed below the soil line for maximum protection, and they did a top-notch job covering plants, masking off windows, and covering the items that weren’t going to be painted.
Once primed, they caulked the seams of the windows and along the outside corners of the house. They filled nail holes, and patched termite damaged wood with the best wood filler. I knew CertaPro was thorough when at our initial consultation they said they’d use Abatron instead of the unreliable wood fillers that many others use.

Repeat process if/when paint continues to peel after primer goes on.
After the primer went on, the crew noticed a few spots where the old paint started to peel up. This is common and expected, so it came as no surprise. It frequently occurs when the old paint absorbs the moisture of the new paint and the exposed edges start to curl.
So, the crew started the whole scraping process over from the beginning. They taped the inside and outside of the windows, and covered the trees, plants, and ground. They scraped all the loose paint, safely disposed of it, then hand primed the newly-exposed areas.

Inspect at conclusion of project.
The crew checked for lead chips and cleaned up at the end of every day, but at the completion of the project, a third-party inspector will come test the surfaces for lead dust, take soil samples, and do a visual inspection for lead chips. I might even have the inspector come back another time to test the inside of my house and even some antique furniture, glassware, and heirloom pottery.
The house is now primed and ready for the final coats of paint! I’ve been so impressed with the crew from CertaPro Painters - I feel taken care of knowing that my lead concerns have been respected. CertaPro Painters has locations all over North America - we’ve been working with the North San Diego franchise.
Pin the image below to save this post.


