Deciding on A Tank or Tankless Hot Water Heater

A couple of weeks ago, our hot water heater failed. We took a few cold showers, asked for recommendations, and debated tankless or tank options for days.

Hot Water Heater Debate

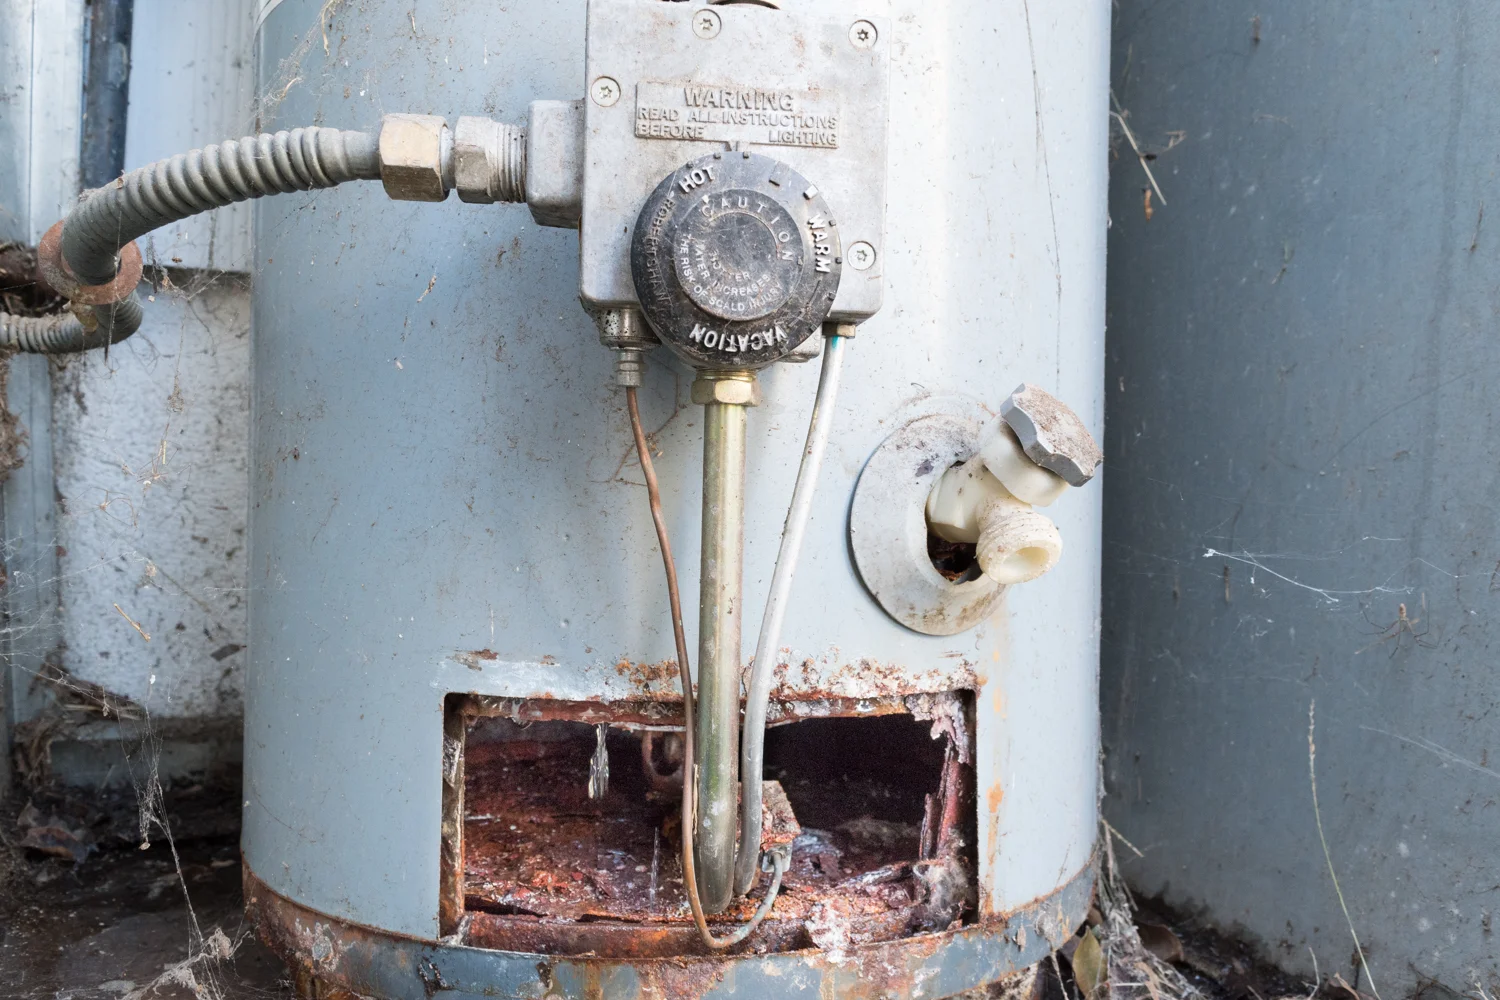
Our unit was a whopping 26 years old (!) which is triple the life expectancy of today's water heaters. It lived a good life, but just had enough, I suppose. I get it, 2017 has been a rough year. It acquired a leak (maybe tears?) that dripped onto the pilot light, extinguishing the flame. We could relight the light, but the leak had already rusted out pieces of the heater and it got worse day by day.

Tank or Tankless Hot Water Heater

Thus, we needed a new hot water heater. Before I get into shopping for a new one, a brief PSA. Is your heater easily accessible? Do you have experience relighting the pilot? Have you already identified which valve shuts off the gas and which shuts off the water? If not, I recommend you take a look at your unit and get comfortable with how to make adjustments in case of an emergency. Either a cold water emergency or worse - gas or water leak emergency.

And back to shopping for everyone's favorite product. The biggest, and really, the only decision we had to make was if we wanted to go with the tank or tankless option. In short, the tank is your old fashioned giant cylinder hiding in your garage, closet, or backyard. Using either gas or electricity, it keeps oodles of water constantly hot. A tankless option is a small rectangle that sits on the wall patiently waiting for you to ask for hot water. When you open the tap, it turns on and heats the water as it passes through the unit. To decide which we wanted, we broke down the differences and evaluated how they fit our needs.

Size

Tank: These big cylinders filled with 30-60 gallons of water don't do anything for aesthetics. They can eat up valuable real estate in a garage, closet, kitchen, bathroom, etc.
Tankless: They look like what someone in 1980 would imagine a 2020 backpack would look like. Or maybe more like a hand blow dryer in public bathrooms. They're little and mount on the wall instead of sitting on the ground. It's a perfect option for replacing a tank that sat in an ideal spot for anything other than a tank of water.
Our take: Our hot water heater sits outside of our house. It faces our neighbor's driveway and lives in its own hut attached to our exterior wall. It isn't bothering anyone at all, so we had no motivation to downsize.

Demand

Tank: Since the hot water is already heated, you get that hot water pretty much as soon as you turn on the tap. If you use up all of your hot water, you have to wait until the tank reheats itself which is not a fun thing to wait for while you're in the rinse and repeat stage of your shower.
Tankless: Since the water heats up when you ask for it, the unit needs a bit of time to heat up and get up to your preferred temperature. You'd have to keep the tap open and wait until the cold water becomes hot. But, you'll never run out of hot water once it's on so you can rinse and repeat all day long.
Our take: I lack patience and don't like wasting water waiting to get to the scolding hot temperature I need. Additionally, we've never run out of water, so the tank format is already working for our needs.

Efficiency

Tank: Imagine keeping a giant pot of water simmering on your stove at all times day and night. But imagine that pot is the size of a stout human. That's basically what the heater is doing. Not very efficient.
Tankless: It heats water only when you need it. Super efficient.
Our take: We love efficiency - this is the primary motivation to switch to tankless.

Power

Tank: Gas tanks need only gas. Electric need only electricity.
Tankless: Even if your water is heated with gas, you need to run electrical to it so it can power the brains of the system.
Our take: Even though the tankless unit would be more efficient in terms of its energy to heat the gas, it's just one more device drawing power off the grid. Plus, we didn't have power available to easily run to the unit.

Failures

Tank: If a tank fails, it could leave you with a disastrous flood.
Tankless: If it breaks, you'll be without water, but luckily water won't be all over your floors.
Our take: Our unit is outside. If it failed, the neighbor kids could make a slip-n-slide in their driveway, and my garden would be happy. We're super lucky - not everyone has this luxury. However, if our neighborhood's power goes out (which it does frequently in the hot summers) we would be without hot water - which I guess we wouldn't really even want in the hot summers anyway. But I've heard some folks report that turning the tankless unit back on is a real pain and not just a something that turns on when that surge of electricity comes back.

Natural Disasters

Tank: If we experience a natural disaster (like a California eathquake) I like knowing that we have 50 gallons of drinking water that can easily be accessed. If our power goes out, we’ll still have 50 gallons of hot water in the tank that would still provide us with a warm shower until it cools to the outside temperature, or until the power goes on.
Tankless: Water isn’t stored in the tankless system, so we don’t have any reserve in the event of an emergency.
Our take: I’m by no means “a prepper” but I like being prepared and find comfort in having the water available if needed.

Price

Tank: We were quoted $1,200 for a 40 gallon tank replacement.
Tankless: We were quoted $3,500 for a new unit.
Our take: Depending on how much you value each of the above items, the extra price of tankless may be moot. Or, depending on your area and capacity needs, the prices may be more similar. However, since we didn't need the smaller size or more demand, the extra price was really just to get a more efficient unit. Getting a return on the savings is debatable.

Are you still with me? Is a post all about my logic for buying a house utility at all interesting?

Conclusion

We bought a tank. A boring run-of-the-mill 40-gallon tank. You probably could have guessed it, but the benefits of tankless just don't apply to us. Maybe if we go solar we can get an electric thankless unit in a few years when the tank ultimately fails. (fingers crossed for solar!)

I drew all of my information from my online research and hearing from your experiences! But, if I missed anything, please use the comments section to weigh in and share your thoughts. I'd like to see this blog serve as a resource based on your experiences as well as mine!

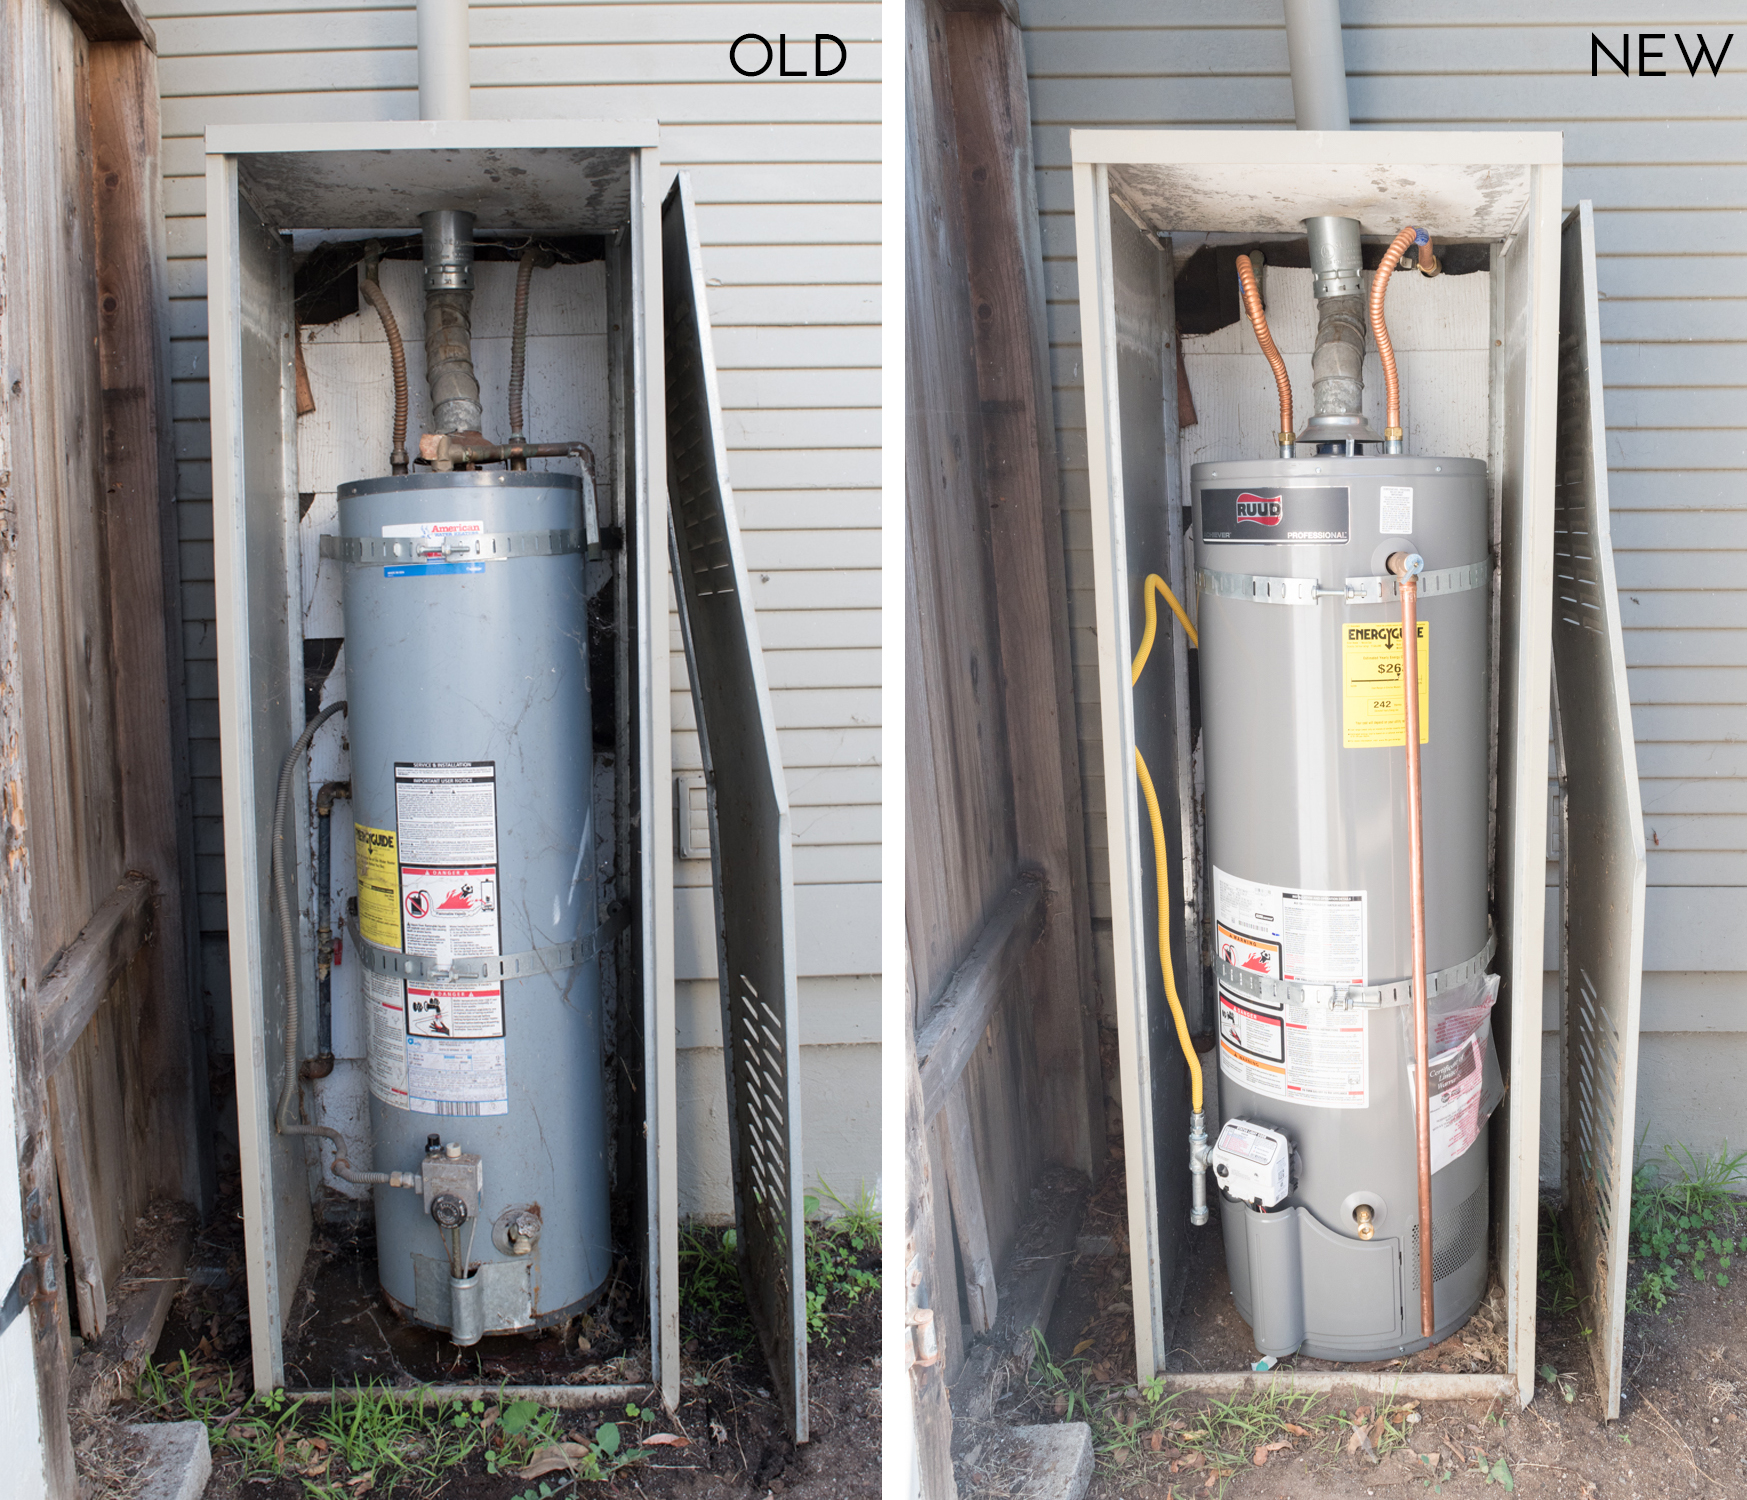
Isn't she pretty?

New Water Heater

My Number One Tip To Style A Bookshelf

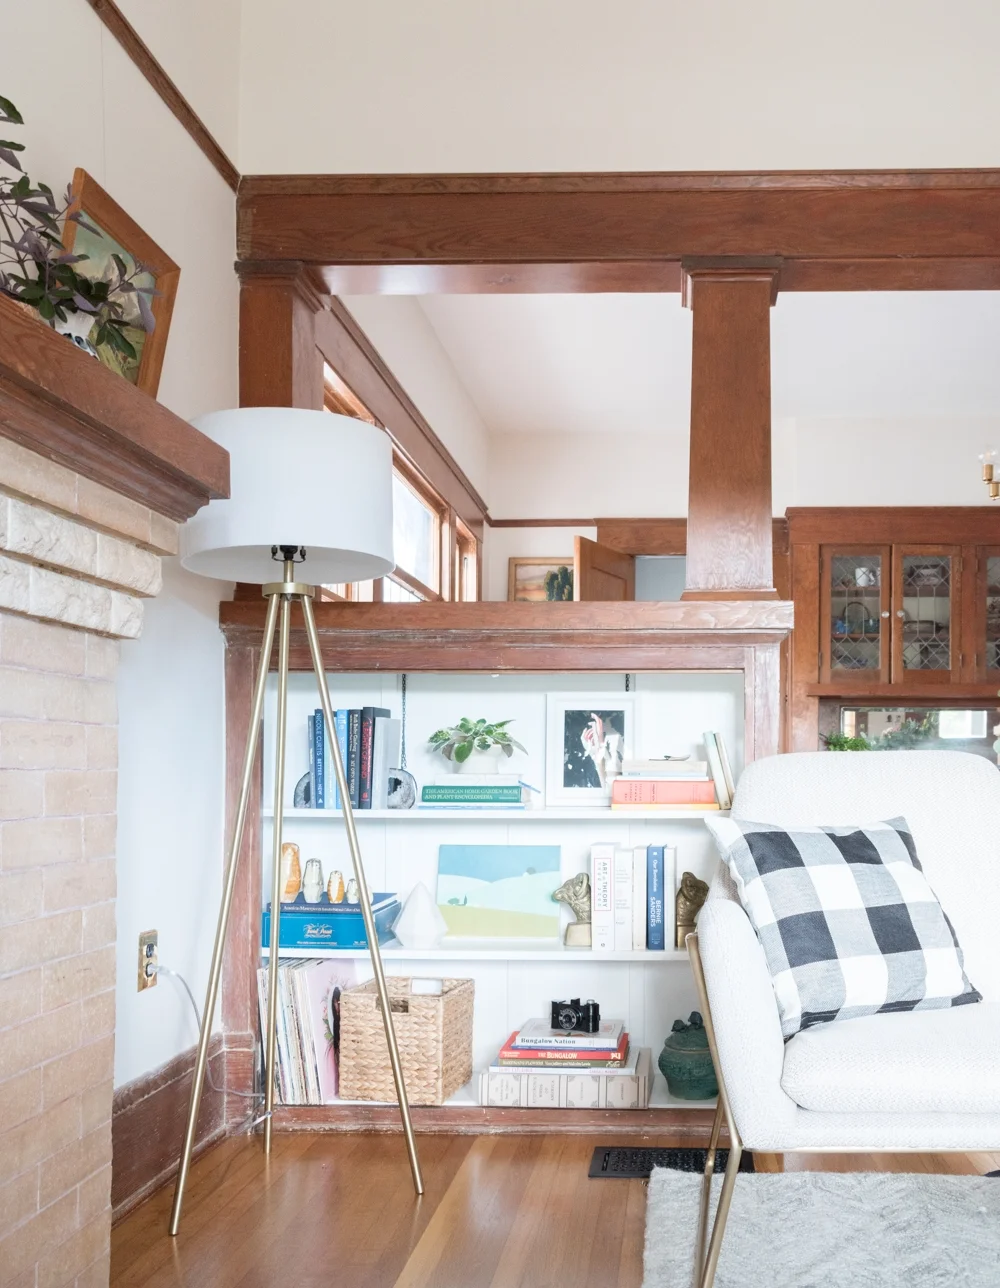
I don't believe that there are rules for styling shelves. It's such a unique and personal way of showing off your collection, that preaching my rules feels just plain wrong. I will, however, share my number one tip!

The Gold Hive Shelf Styling

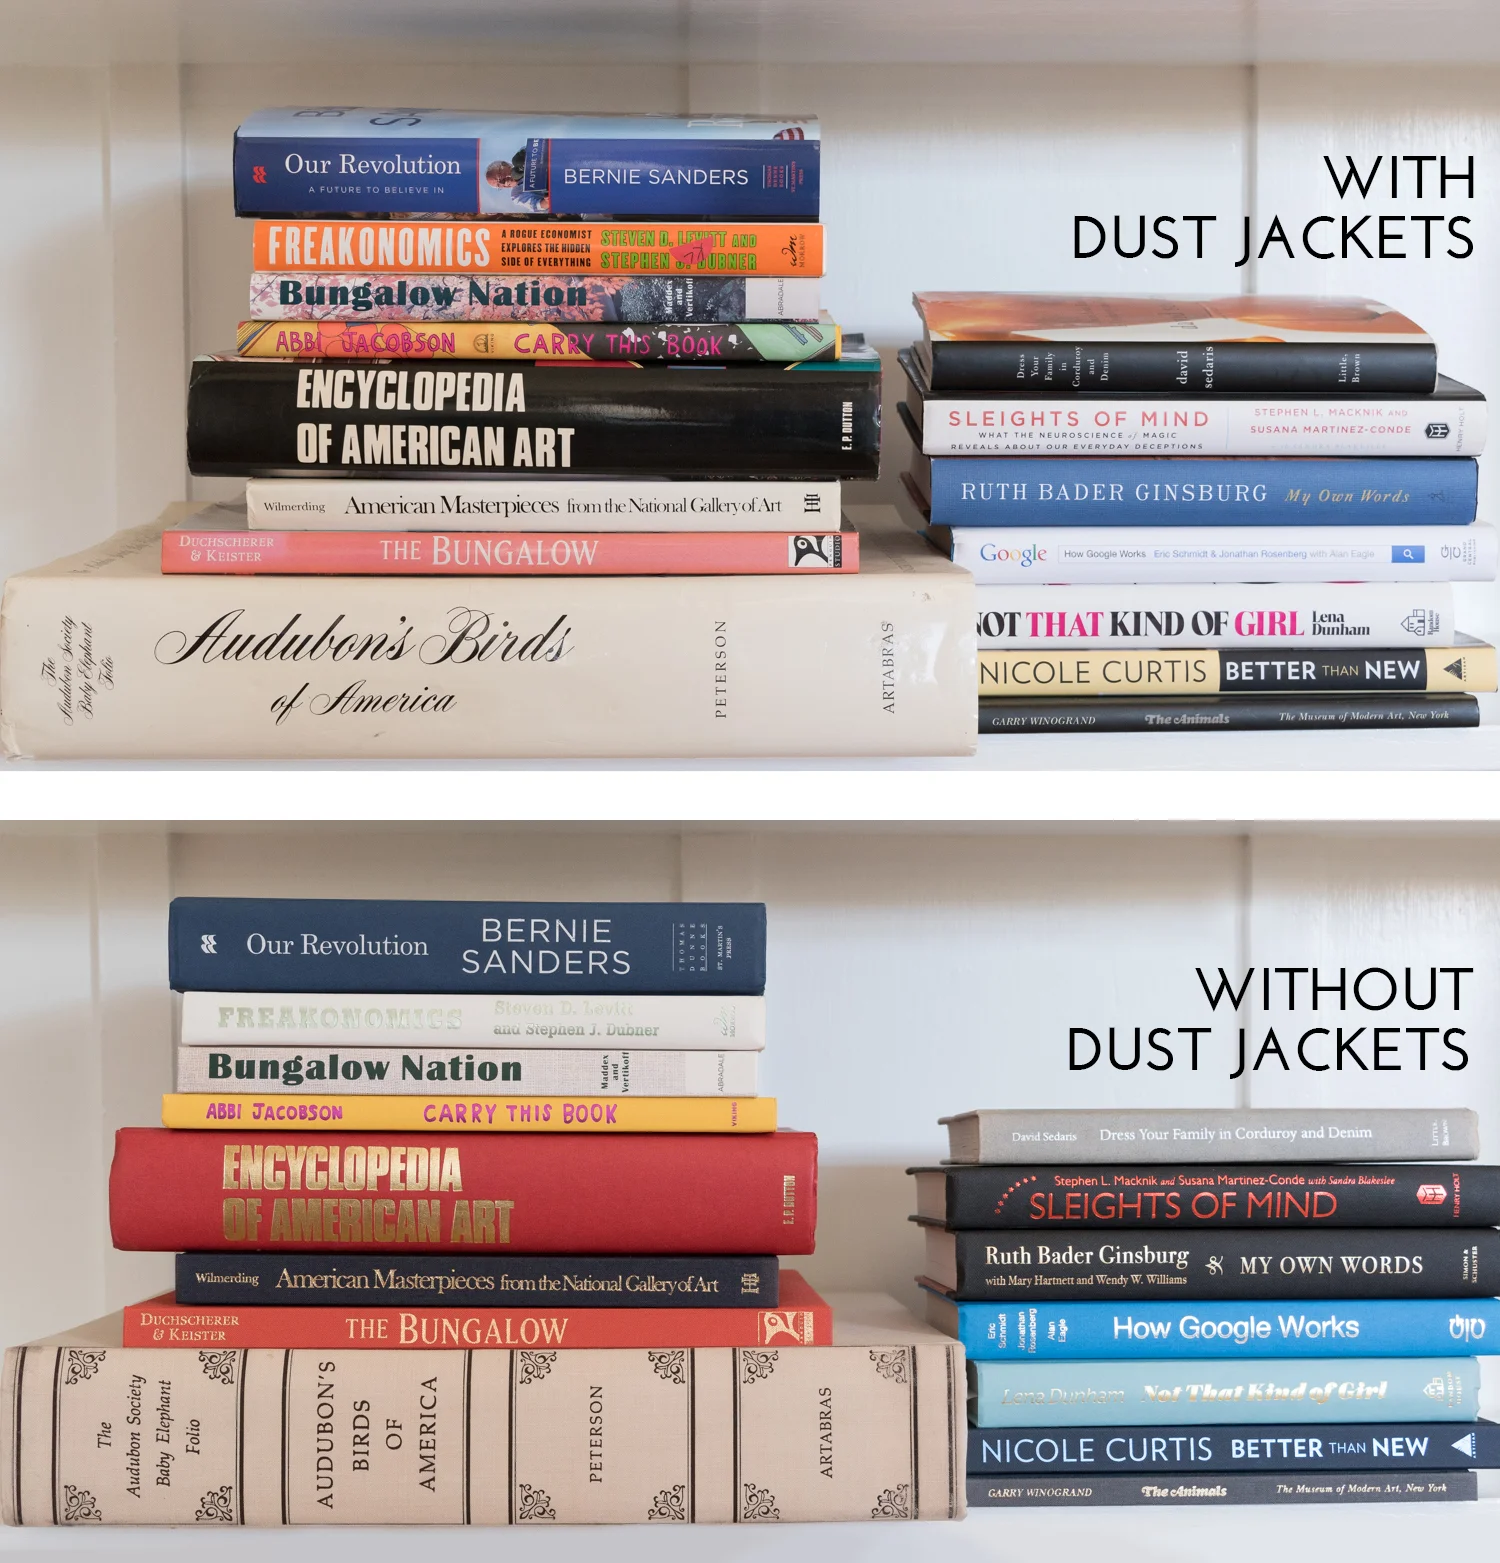
One of the best ways to dress up, or rather, dress down your books is to remove their dust jackets. The floppy papers wrapped around the covers have lots of color/style variety, so removing them can strip the book down to its simplest form. The book's actual spine is traditionally one color, with an understated typeface. It's so much more of a classic style that keeps your bookcase looking more intentional, and I actually find it easier to locate my favorite reads. 

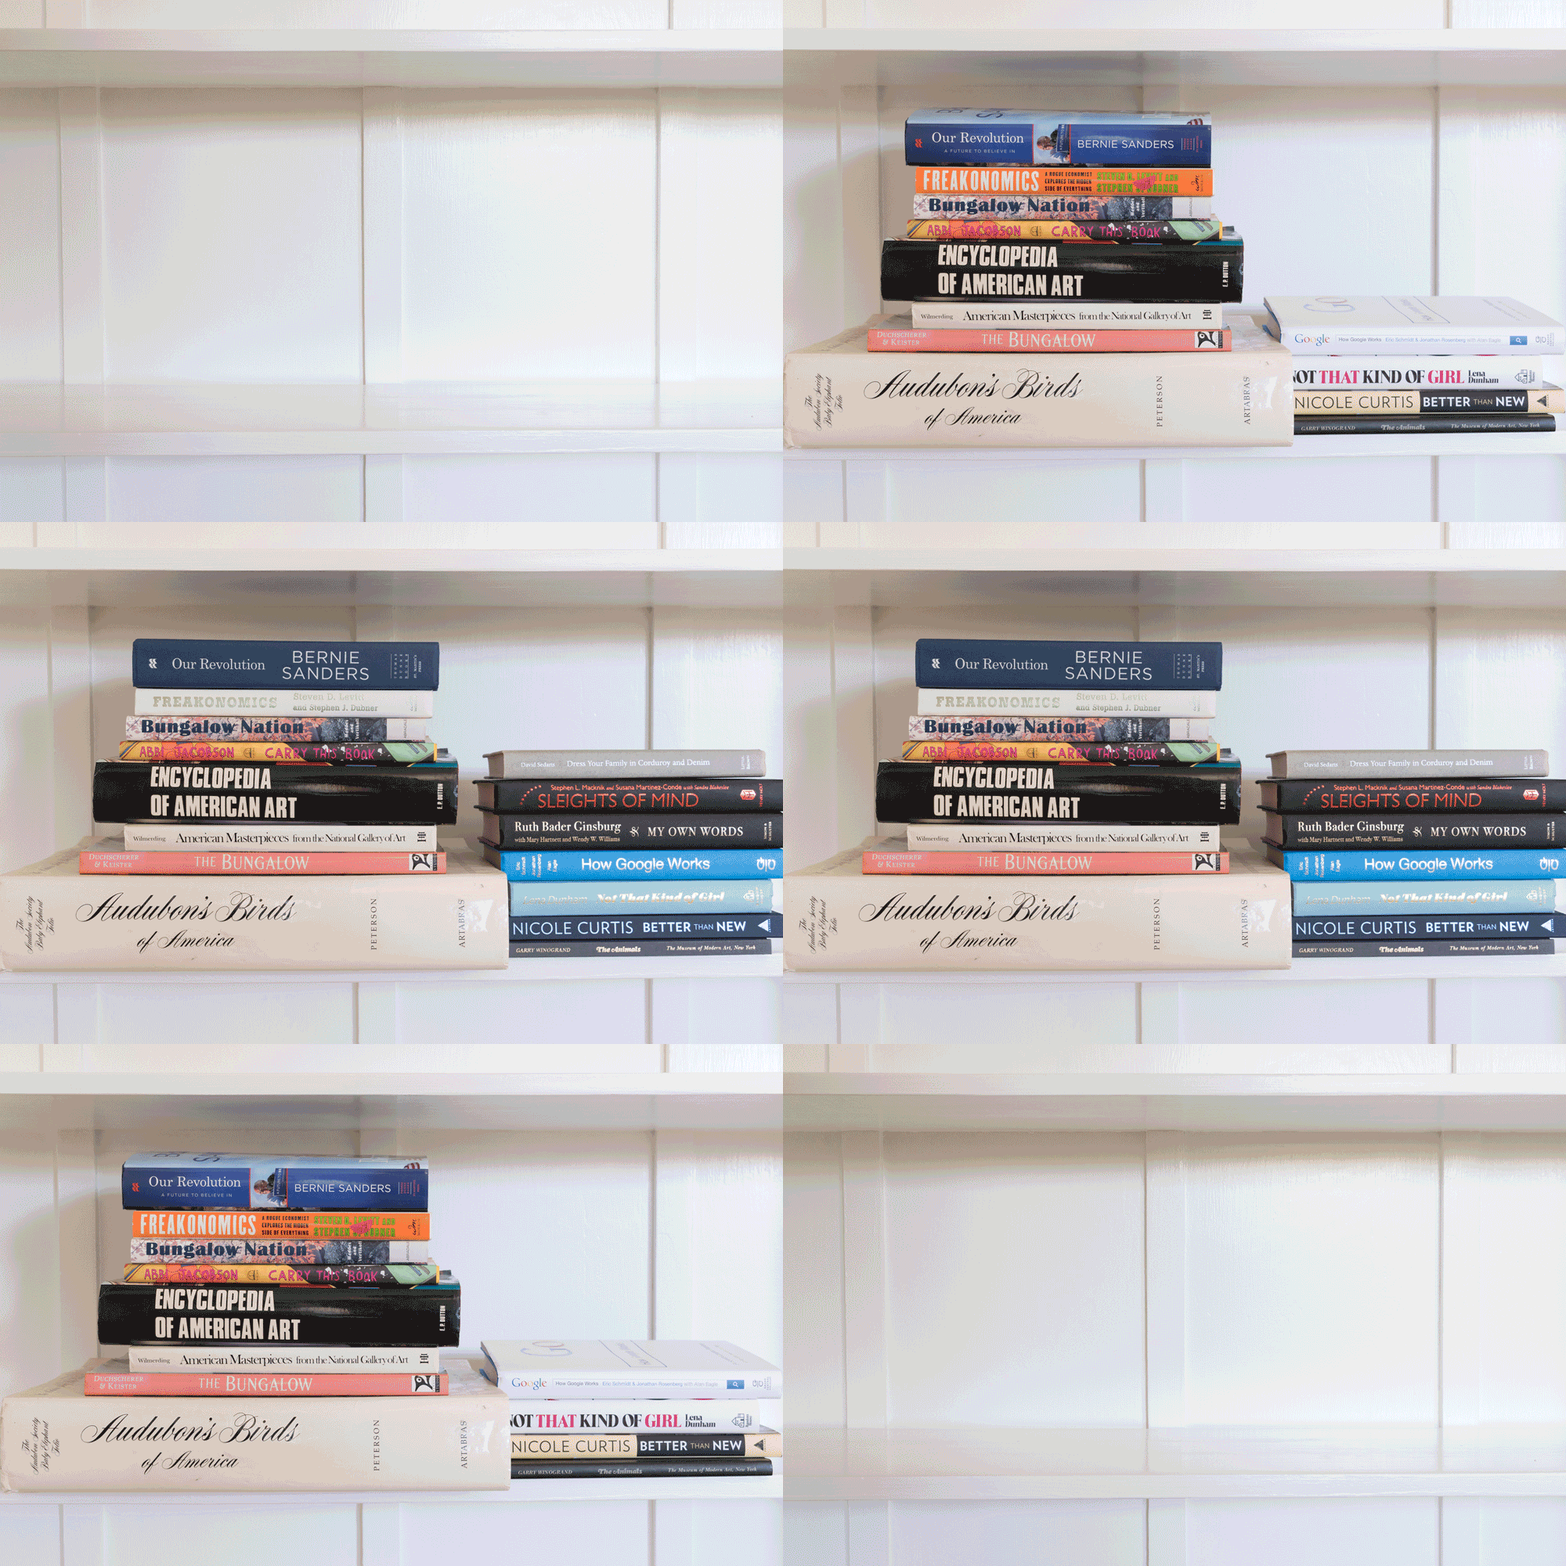
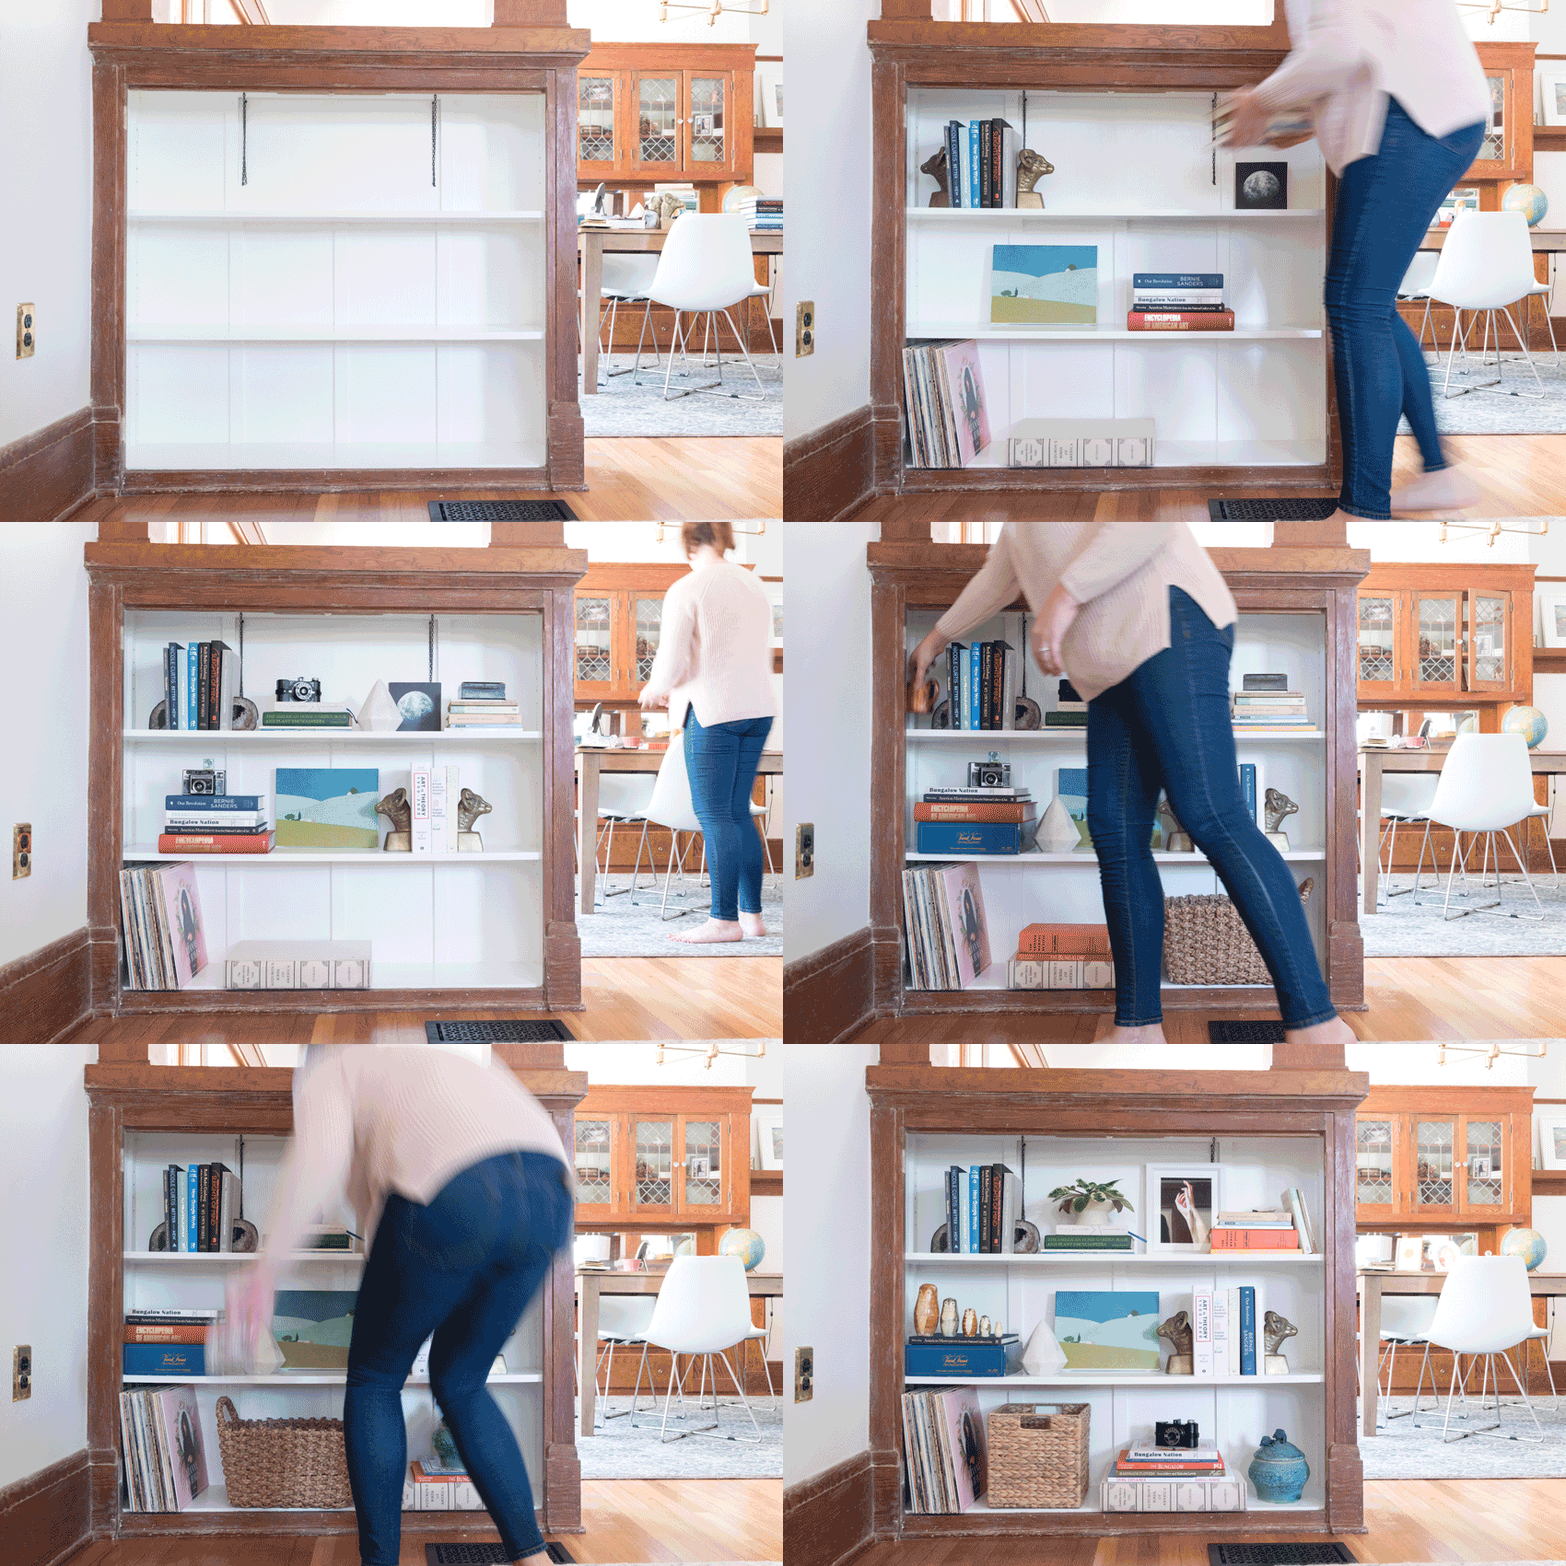
Everyone loves an animated gif, so I put one together to show off how much of a difference removing the dust jacket makes. (If you're reading this in an RSS reader, click through to the original post to see the animation.)

The Gold Hive Dust Jacket

If you're less of a gif animation person and more of a spot-the-different person, well, here you go:

The Gold Hive Tip to Style Shelves

Did you see the Audubon book without its jacket?? So. Pretty.

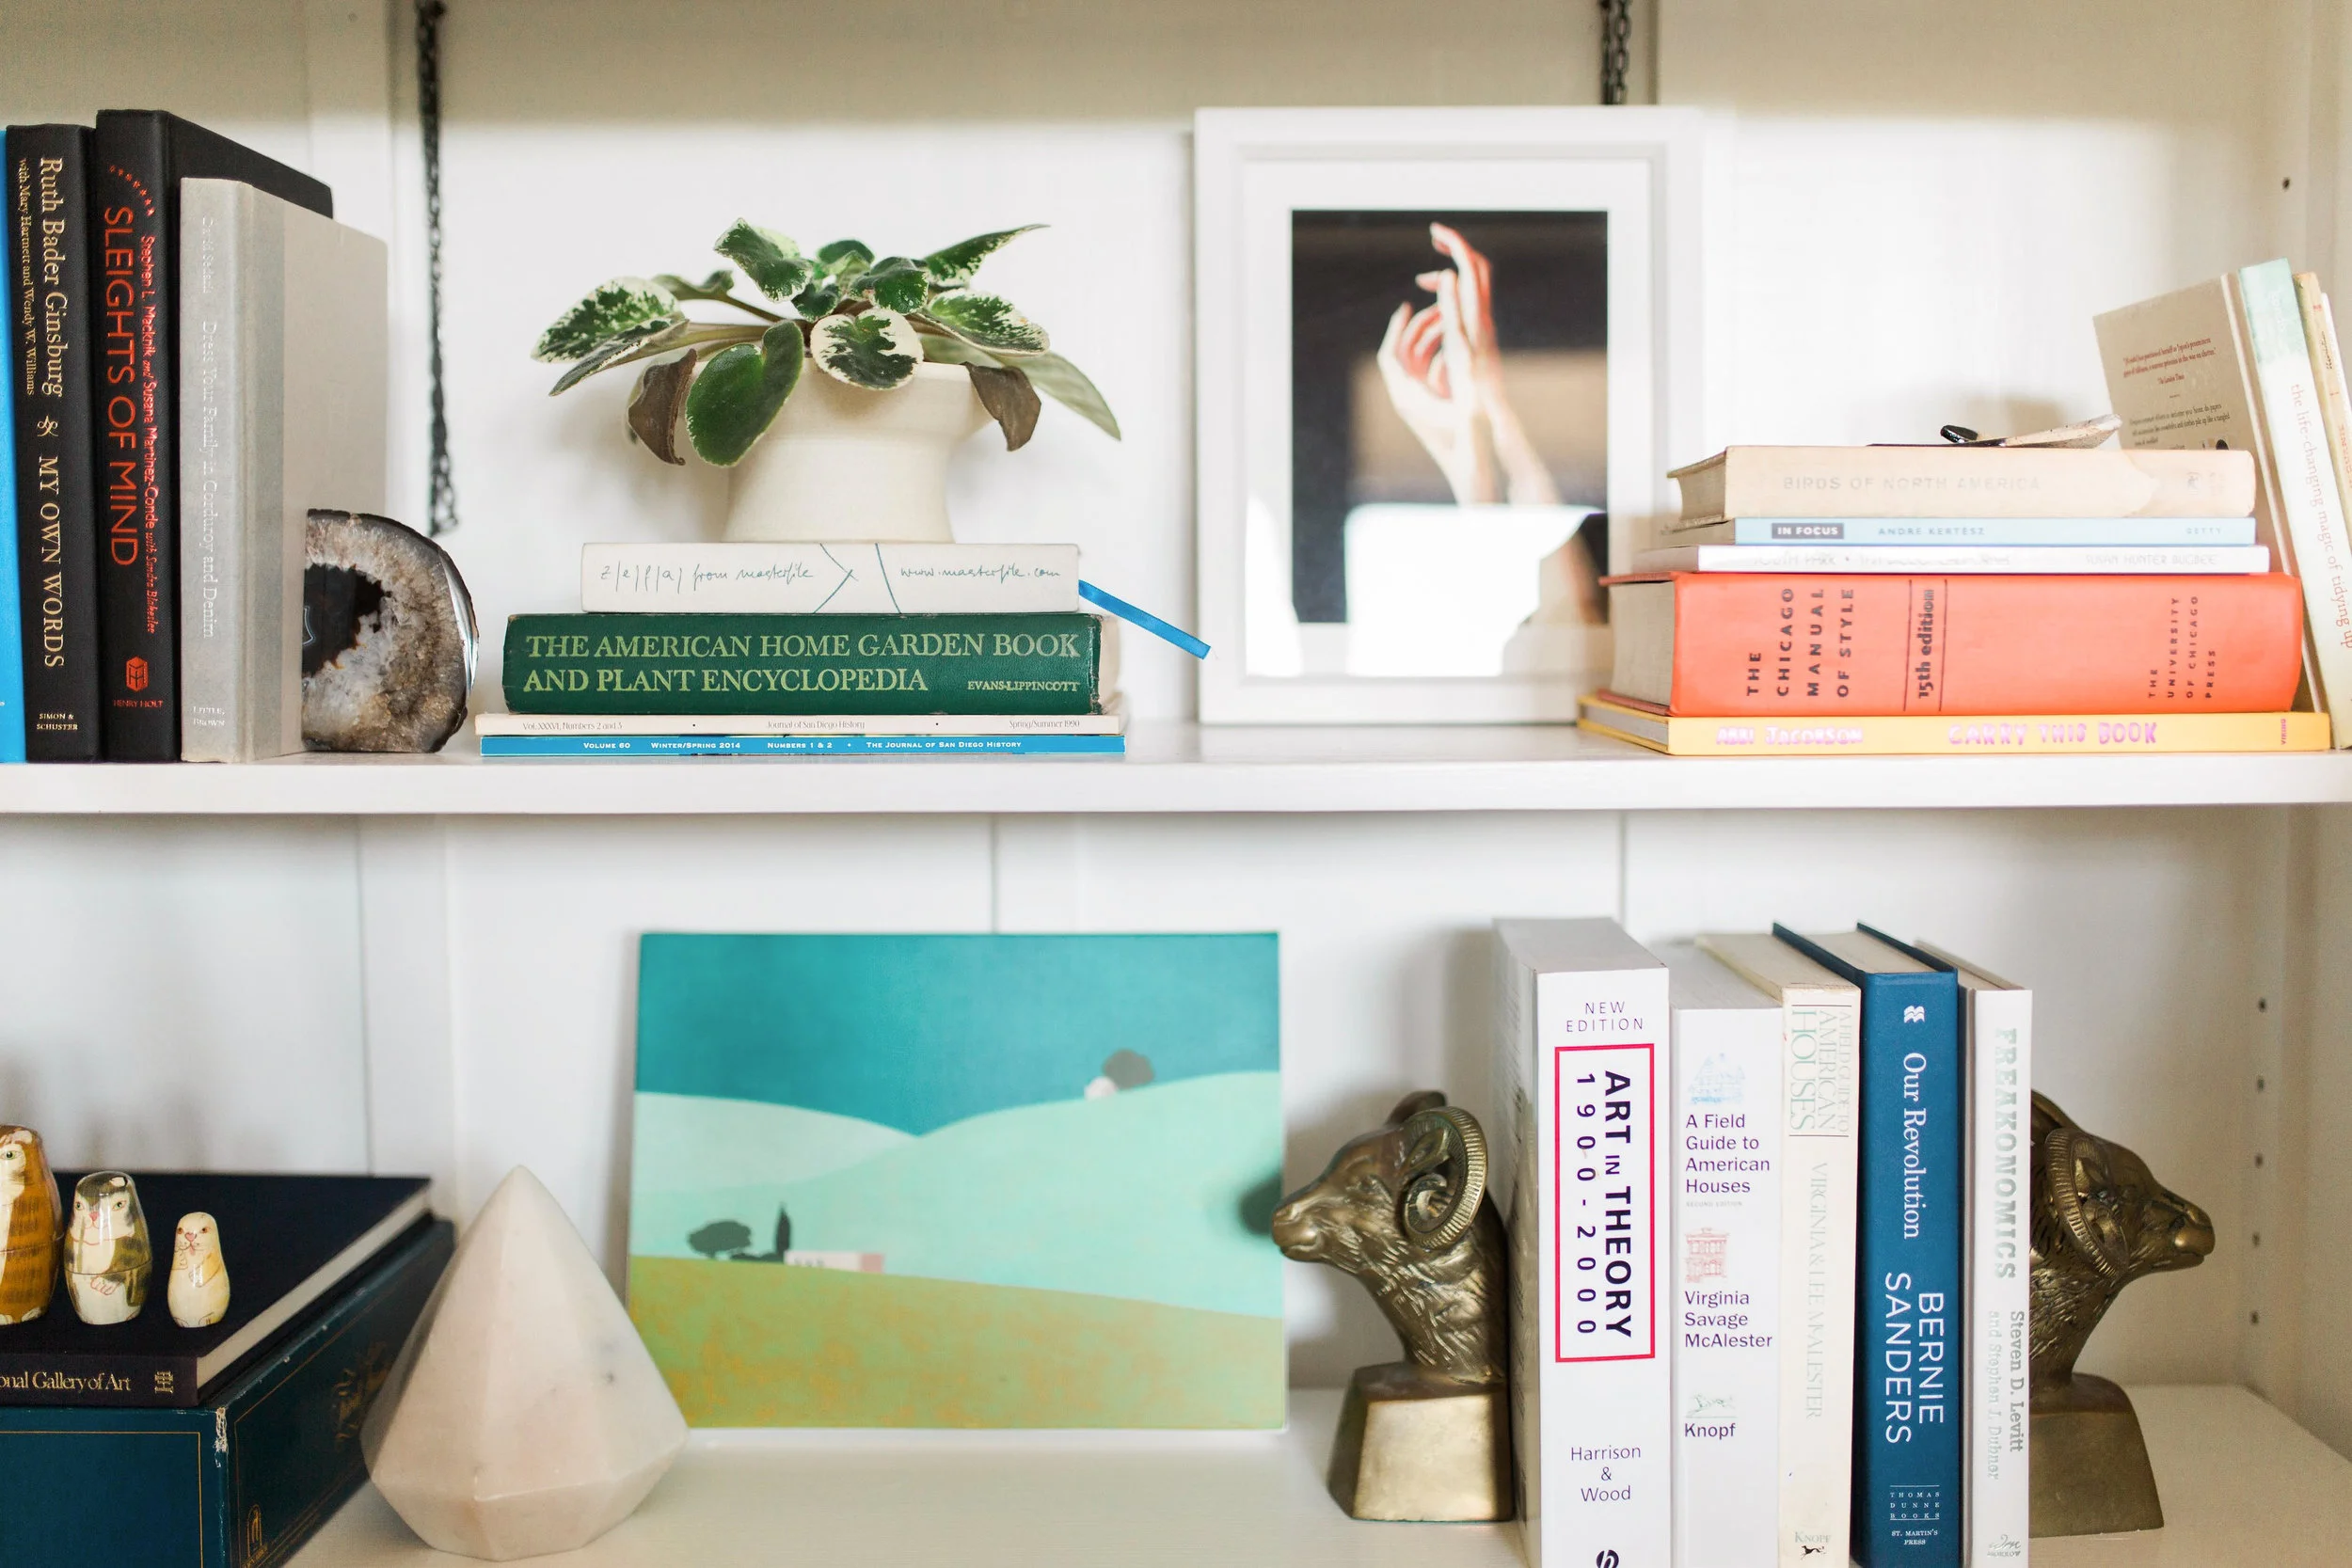
Once I stripped the books of their jackets, I collected things that I love from around my home and moved them around on the shelves until it felt right.

The Gold Hive Styling A Bookshelf

That timelapse (if you're in an RSS reader, you may have missed it and you should click here to see it) was my whole entire process. You can see I changed my mind several times, and kept tweaking over and over. My approach is more organic and less crafted than profesh designers might do.

As I made changes, I kept an eye on color, texture, height, and objects - aiming to vary them throughout the bookcase. It isn't perfect, and I'm still continuing to tweak things.

The Gold Hive Styling a Bookshelf

If you want to get serious about styling your shelves, you could keep everything to a uniform color palette, turn less-pretty spines to the back, or use more sculptural items to match a theme. However, I like books for being books. I'm generally not a fan of the shelves that organize the spines by color.

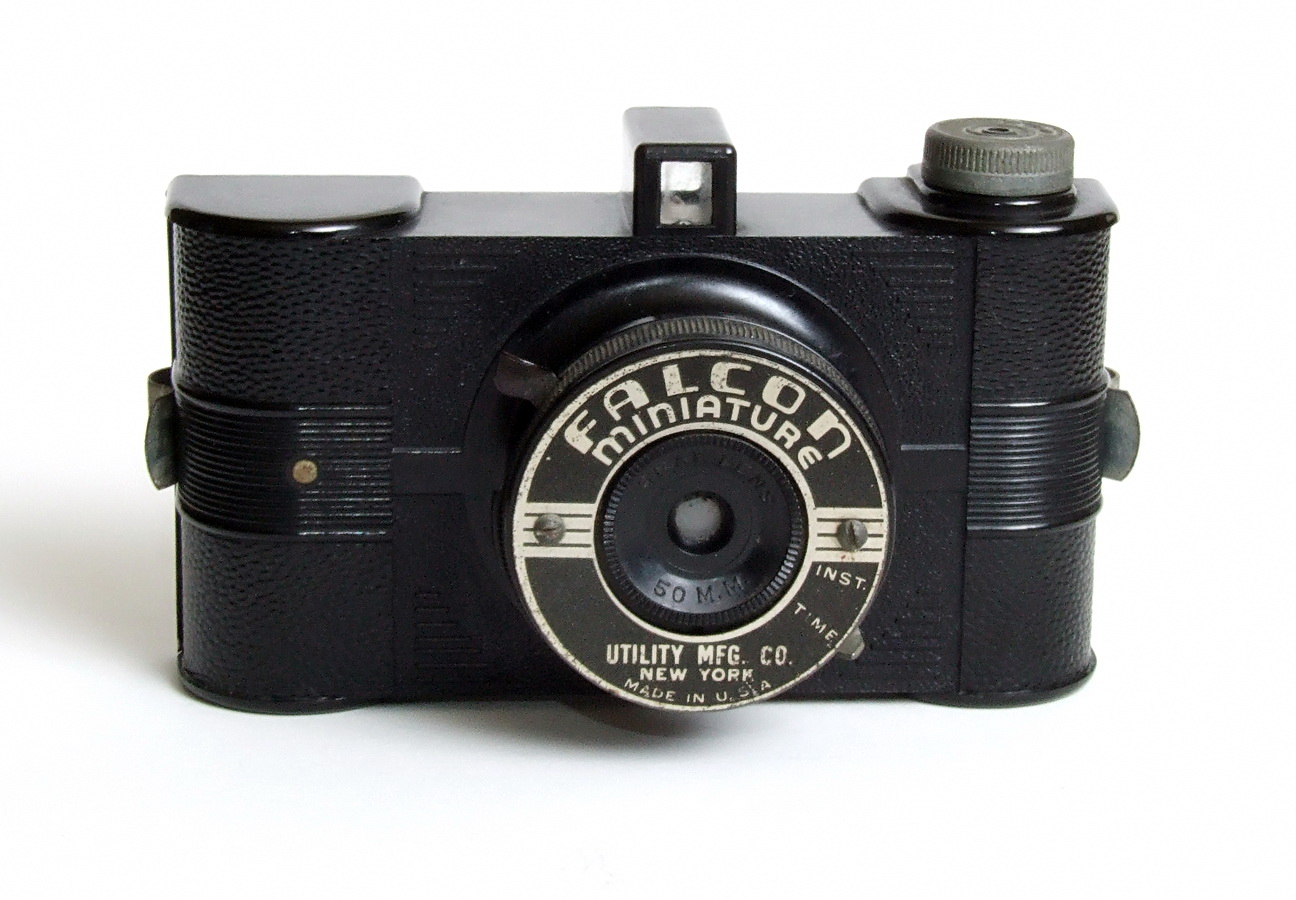
I also like to style my home with things that I find to be unique or heirloom-y. I'll supplement with knick knacks from Home Goods, but what I love about this shelf most is the vintage camera, the handmade pottery, the books we like to read, the record from a recent concert, the old-school Trivial Pursuit game, and the artwork that I'm drawn to.

But really, you do you. Go for the monochromatic scheme, the packed-to-the-gills library, the minimal look, or the filled-with-tchotchkes collection. I encourage you to make it feel like a representation of you and your home!

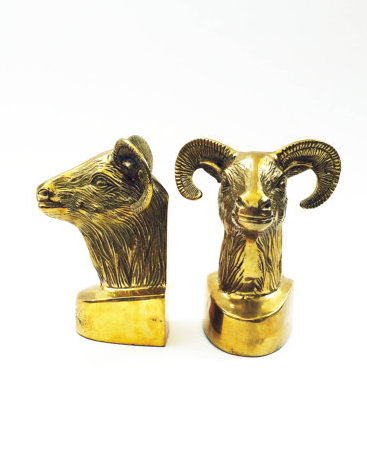
Looking to add more to your shelves? Below are a few of the items on our bookshelf. But we'd like to add more, what are your book recommendations??

Oh, and that very first photo was taken by my friend Dani for an exciting project coming up. (!!!)

Refreshing An Overly Painted Bookcase

The Gold Hive Bookcase Before and After

The bookcase room dividers were a big selling point when we (well, when I) first laid eyes on the house. But, somehow, I neglected them for two years. I got distracted with all of the other projects, so they sat empty for months. Then I started piling books on them. Then I loaded them with junk with no intention of styling them. Then they just sat there for months. I'm not perfect, okay??

The Gold Hive Bookcase Before

Luckily, all of my knick knacks covered up the horrid paint job underneath. Not only was it an unfortunate brown color, but it was peeling pretty badly. This, my friends, is why you don't want to paint water-based paint over oil-based paint without some serious prepping. Otherwise, you leave a mess of refinishing for people like me (or even yourself) years later.

Supplies:

6-in-1 tool
Razor blade scraper
Utility knife
Sander with coarse grit papers
Respirator/dust mask and goggles
Drop cloth and optionally an old sheet
Primer
Paint of choice
Angled paintbrush
Shelf support pins

The latex paint was peeling off in sheets, so I used a combination of tools to scrape and peel it all off. Some of it came off nice and easy, whereas other spots took some serious scraping. The goal was to scrape anything that wanted to come off. Really stuck-on paint could stay.

The Gold Hive Refinish a Bookcase

After what felt like 99 hours of scraping, the next step was to sand everything really smooth. Any edges where the layers of paint didn't come off entirely need to be sanded down until they are slick to the touch. You'll still see the different colors, but as long as you can't feel it to the touch, then you're golden. I used the 50 grit sanding pads on my orbital sander to smooth edges and rough up the existing finish to receive new paint.

Since power sanders blow a bunch of dust around, I wanted to protect the rest of the house from the mess. Thus, a made a cocoon for myself with an old sheet to encapsulate all of the dust. Of course, I wore face protection to keep dust out of my eyes and lungs.

The Gold Hive sanding a bookcase

I'll admit that the funny looking technique wasn't the most comfortable way to work. It got pretty hot and rather dusty. But I didn't need to clean up much dust at the end of the project, so I consider it a win!

Once everything was sanded smooth and paint scraps were cleaned up, I coated the surface with my go-to primer, Zinsser 1-2-3.

The Gold Hive bookcase primer

That's just primer, but look at the transformative power of paint!

Next, I did a couple of coats of paint left over from the One Room Challenge. Benjamin Moore's Simply White in the satin finish is such a pretty, soft white. So much better, right?

The Gold Hive Refinish a Bookcase

The bookcase has small holes on the sides to mount adjustable shelves on pins. Each of them was filled with so much paint (prior to my scraping), that the pins didn't fit. After painting my own three layers of paint, which subsequently mucked it up even further, I redrilled the holes. Using a bit the size of the holes (1/4" in my case) I re-drilled each of them being sure not to make them any bigger than their original size.

The Gold Hive Bookcase Refinish

The drill removed the gunk from inside of the holes, but it did pull up some of the new paint along the edges. No biggie, though.

The Gold Hive bookcase refinish

I followed up with a mallet and the end of a screwdriver to soften the edges by hammering any rough edges produced by the drilling into the hole. This is the same technique I recommend for patching a hole in the wall after removing a nail.

For a swift cleanup, I used compressed air to blow the dust out of each of the holes while vacuuming gunk that flew out with a shopvac. I followed up with a light dabbing of paint to touch up the spots that lost some of the finish.

The Gold Hive Refinish a Bookcase

Finally, I pushed the shelf mount pins in, then plopped the painted shelves on them. These pins work wondrously for creating adjustable shelving options. If you're building your own shelves, or want to add more storage to an existing unit, you could easily install a strip of wood in each of the corners with equally spaced holes. Then pop the pins in, mount a shelf, and you'd have adjustable storage!

pegs-0282.jpg

Next week, I'll share my steps for styling shelves. Maybe within the next two years I'll refinish the other matching bookcase, too!

The Gold Hive Bookshelf

A DIY Kitchen Transformation Using Vinyl Floor Tiles + A Video Tutorial!

A DIY Kitchen Transformation Using Vinyl Floor Tiles + A Video Tutorial!

The kitchen has seen a wild transformation! So far, I've shared the plans, the concrete counter DIY, and three tutorials for adding more work space - check out those posts here. But the floors! The new flooring made the kitchen into a wonderfully different space - a big improvement from the sad termite-filled fir. I couldn't have been more excited to get started on the quick/cheap/transformative project of giving my kitchen floors a fresh buffalo check pattern. This DIY kitchen transformation using vinyl floor tiles is among my favorites yet - and it costs about as much as it does to paint a room!

Read More

Picking a Kitchen Floor Pattern

The phase 1 kitchen earned several upgrades already, like new paint, hardware, concrete countertops, and even more countertops. However, the floors didn't get much love other than a coat of poly when we refinished the the rest of the floors. As much as I love the fir, the wood was pretty damaged. Nearly every plank had either huge gouges or was brittle from years of termites gnawing on the softwood. The previous owner made attempts at repairing the mangled boards by filling the cavities with wood putty, but it definitely didn't help the aesthetics.

The Gold Hive Kitchen Flooring Damage

These photos don't do justice to the damage. We lived with the flooring as-is for a couple of years letting those termite gaps fill up with a hefty amount of cat litter and crumbs. But, I lost my patience and had to remedy it. Knowing that the kitchen will eventually get a full gut renovation, I had the opportunity to do whatever I wanted without it impacting the future plans - even if it pushes my design boundaries. So, I jumped on to the graphic look and committed myself to installing a funky pattern that I like, but wouldn't be my first choice for a permanent kitchen floor. This transitional renovation fix lets me get the bold/graphic/retro vibe out of my system before having to make the forever-flooring decision. Win win.

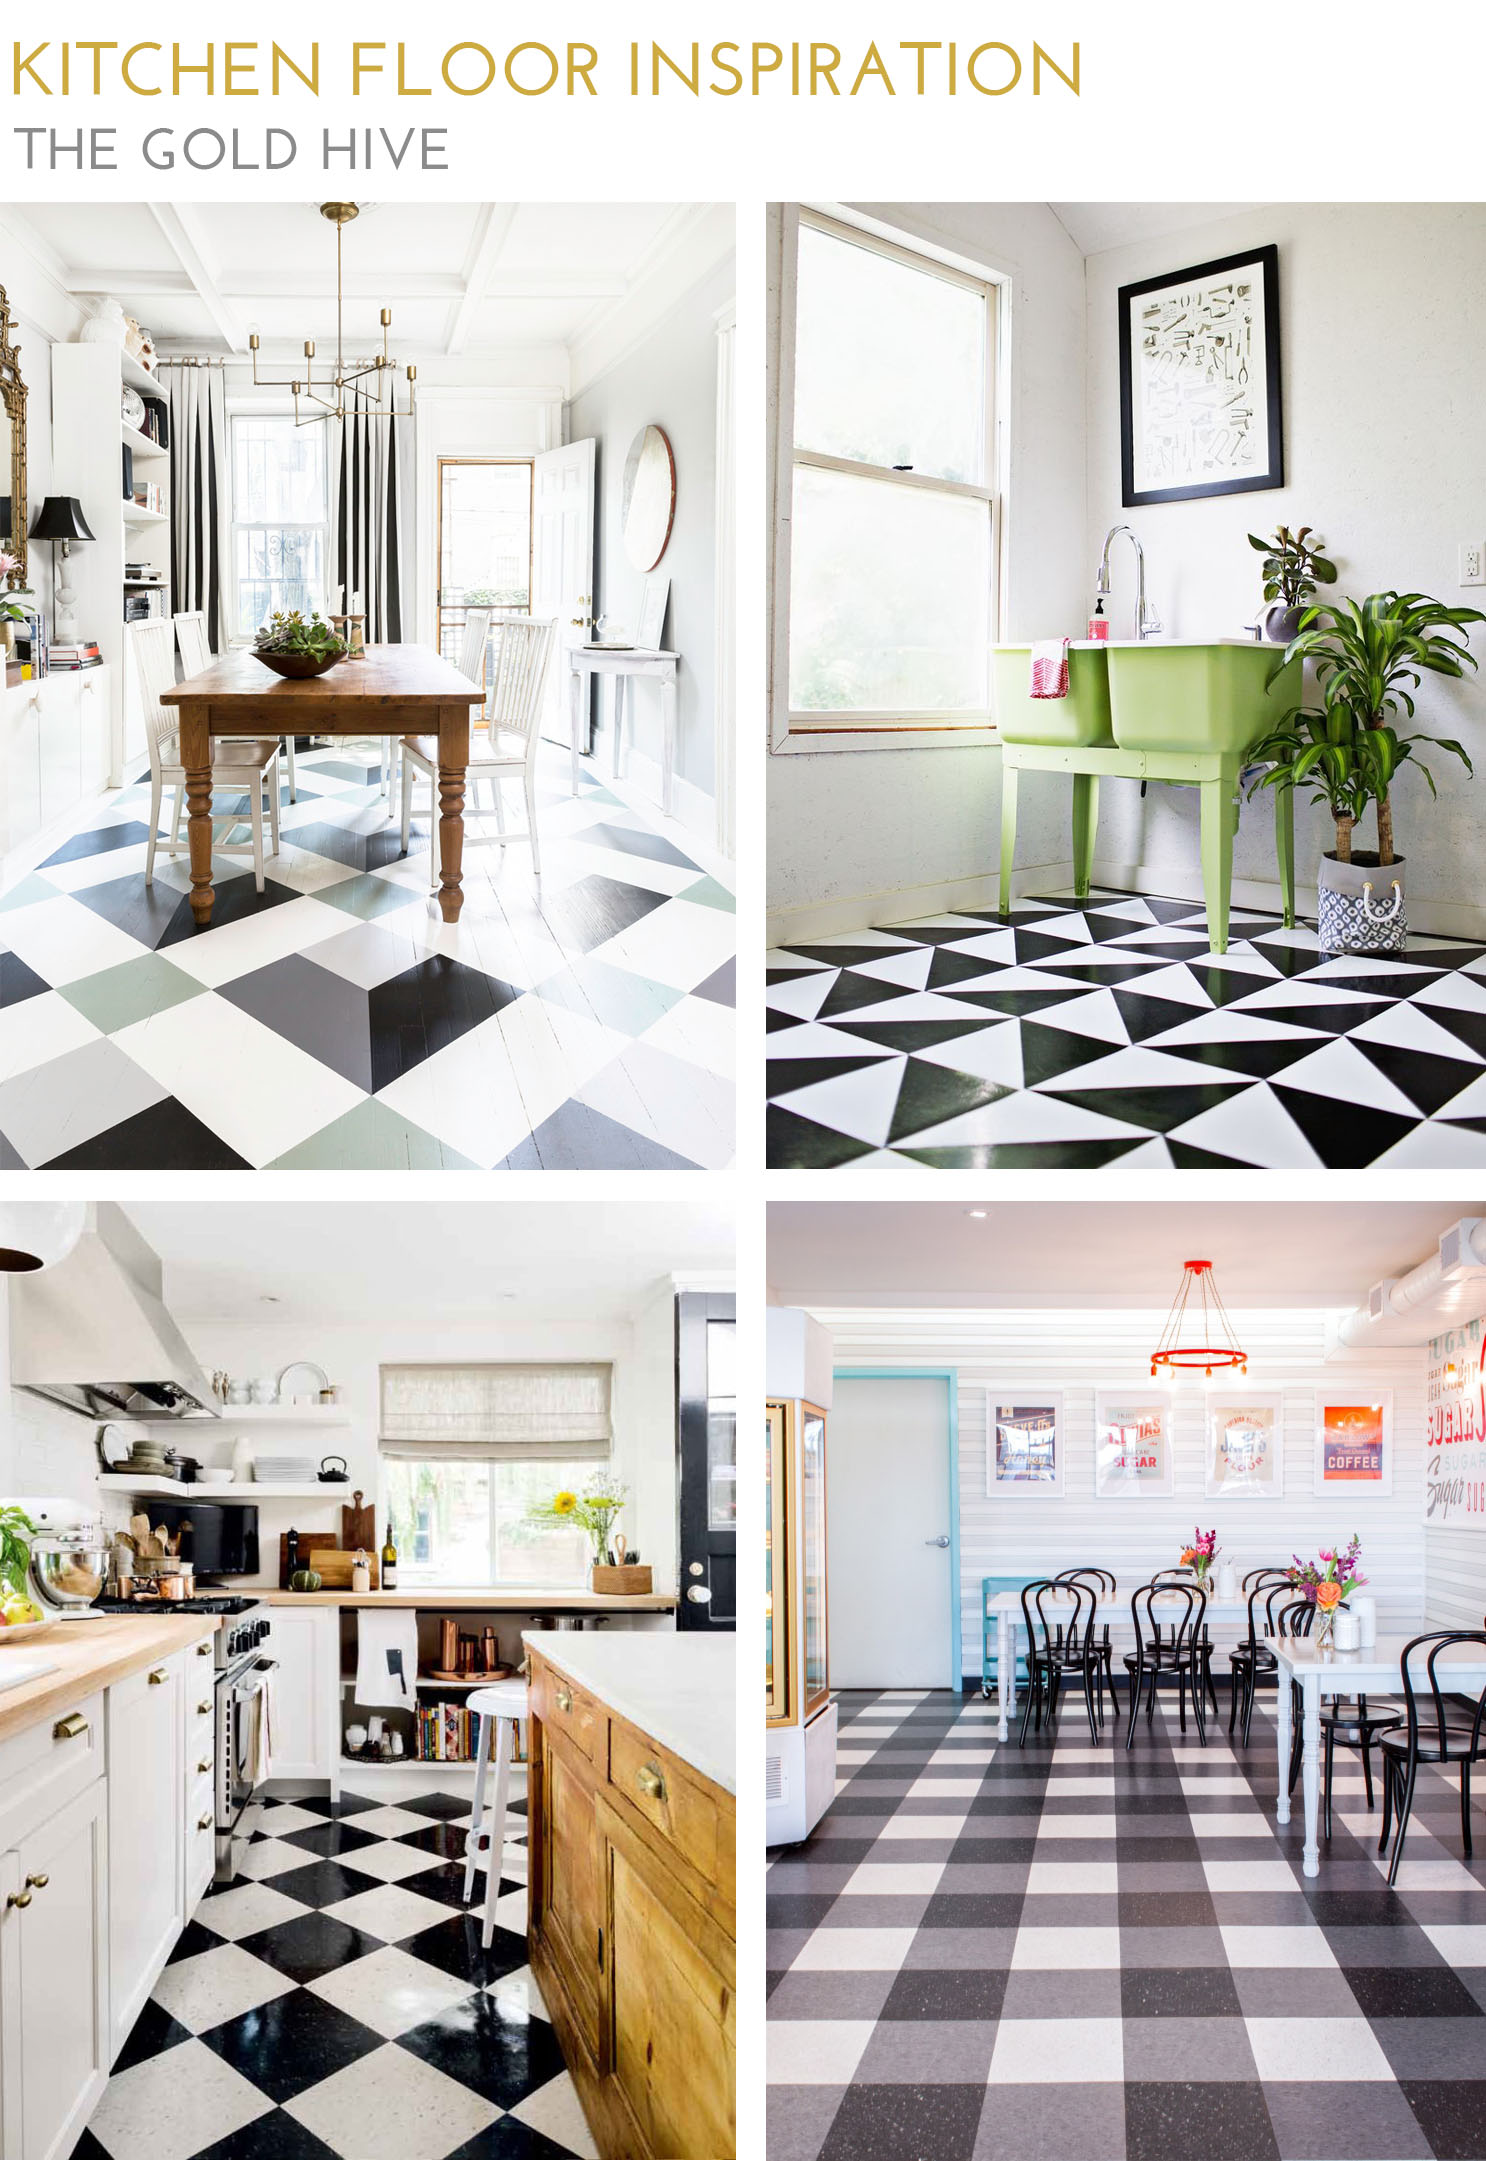
The Gold Hive Graphic Flooring Inspiration

Sources clockwise from top left: Megan Pflug Designs/A Beautiful Mess/Allison Burke Interior Design/The Art of Doing Stuff

At first, I was sure that I would install the checkerboard pattern to get that retro diner vibe. But after a few Photoshop mock-ups, I realized that with the large amount of uninterrupted floor space, the high contrast of black and white was too busy and could give us vertigo. The idea of modern geometric shapes was also appealing, but I worried I'd spend years cutting the tiny pieces. It didn't take much for me to fall for the buffalo check pattern. The grey neutralizes the high contrast black and white, while also adding texture with the illusion of the weaving pattern. It also has enough style that I can feel confident I didn't play it too safe.

Since this was merely a temporary solution that really only needed a bandaid, I found a flooring solution that was quick, cheap, effective, and super easy to install. The perfect improvement project for a newbie DIYer or renter.

I couldn't be happier with how it turned out. The installation went swimmingly and the result is sleek, clean, and full of personality. Come back next week to get the full tutorial and link to all of the sources! Subscribe, so you don't miss out.

Three Ways to Add Kitchen Countertop Space On A Budget

The biggest challenge with many kitchens is a lack of work surfaces. It's a pain to cook without sufficient countertop space, right? Yet, it's easy and inexpensive to DIY a spot to prep and cook. So, I bring you three super simple ways to add custom counters for cheap.

The Gold Hive How to Add Counter Space for Cheap

There are oodles of rolling bar cart options like this, this, or this, to give you more space to work, and they are great! Some have additional storage, some have spots for wine bottles, and some have fancy hooks and bars for all of your kitchen needs. But they don't always fit a space perfectly. Sometimes the height doesn't line up with the existing counters, or there's a gap next to the range, or it blocks an outlet. I tried out three different methods to add valuable work surface to a kitchen that has a couple of empty nooks.

1. The Cabinet & Counter

cabinet after-0331.jpg

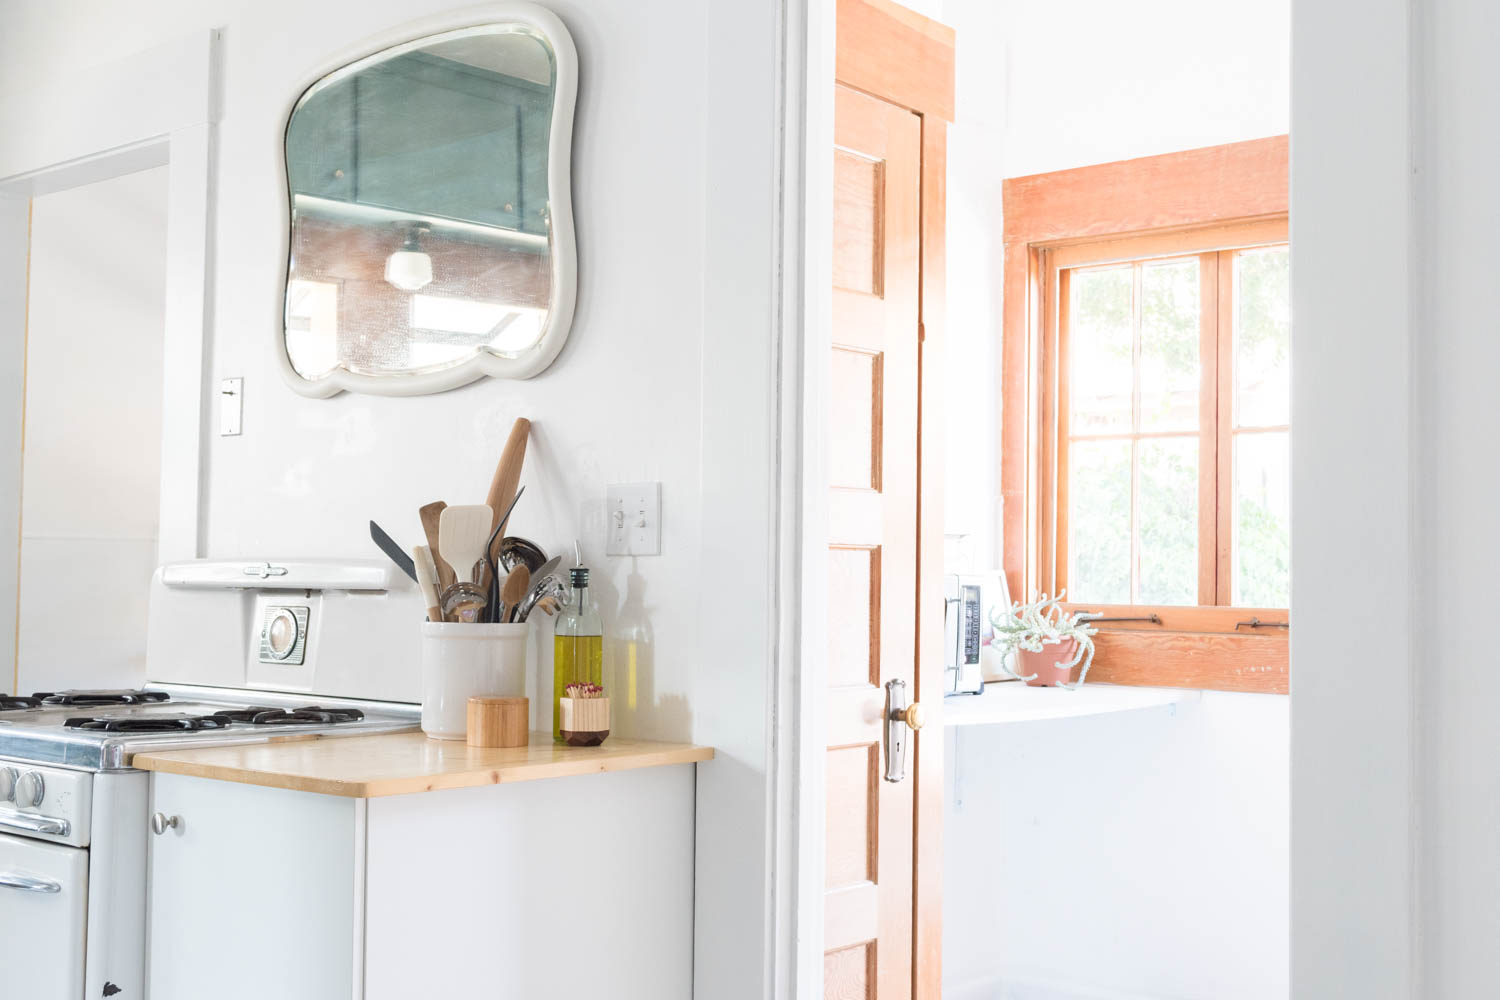
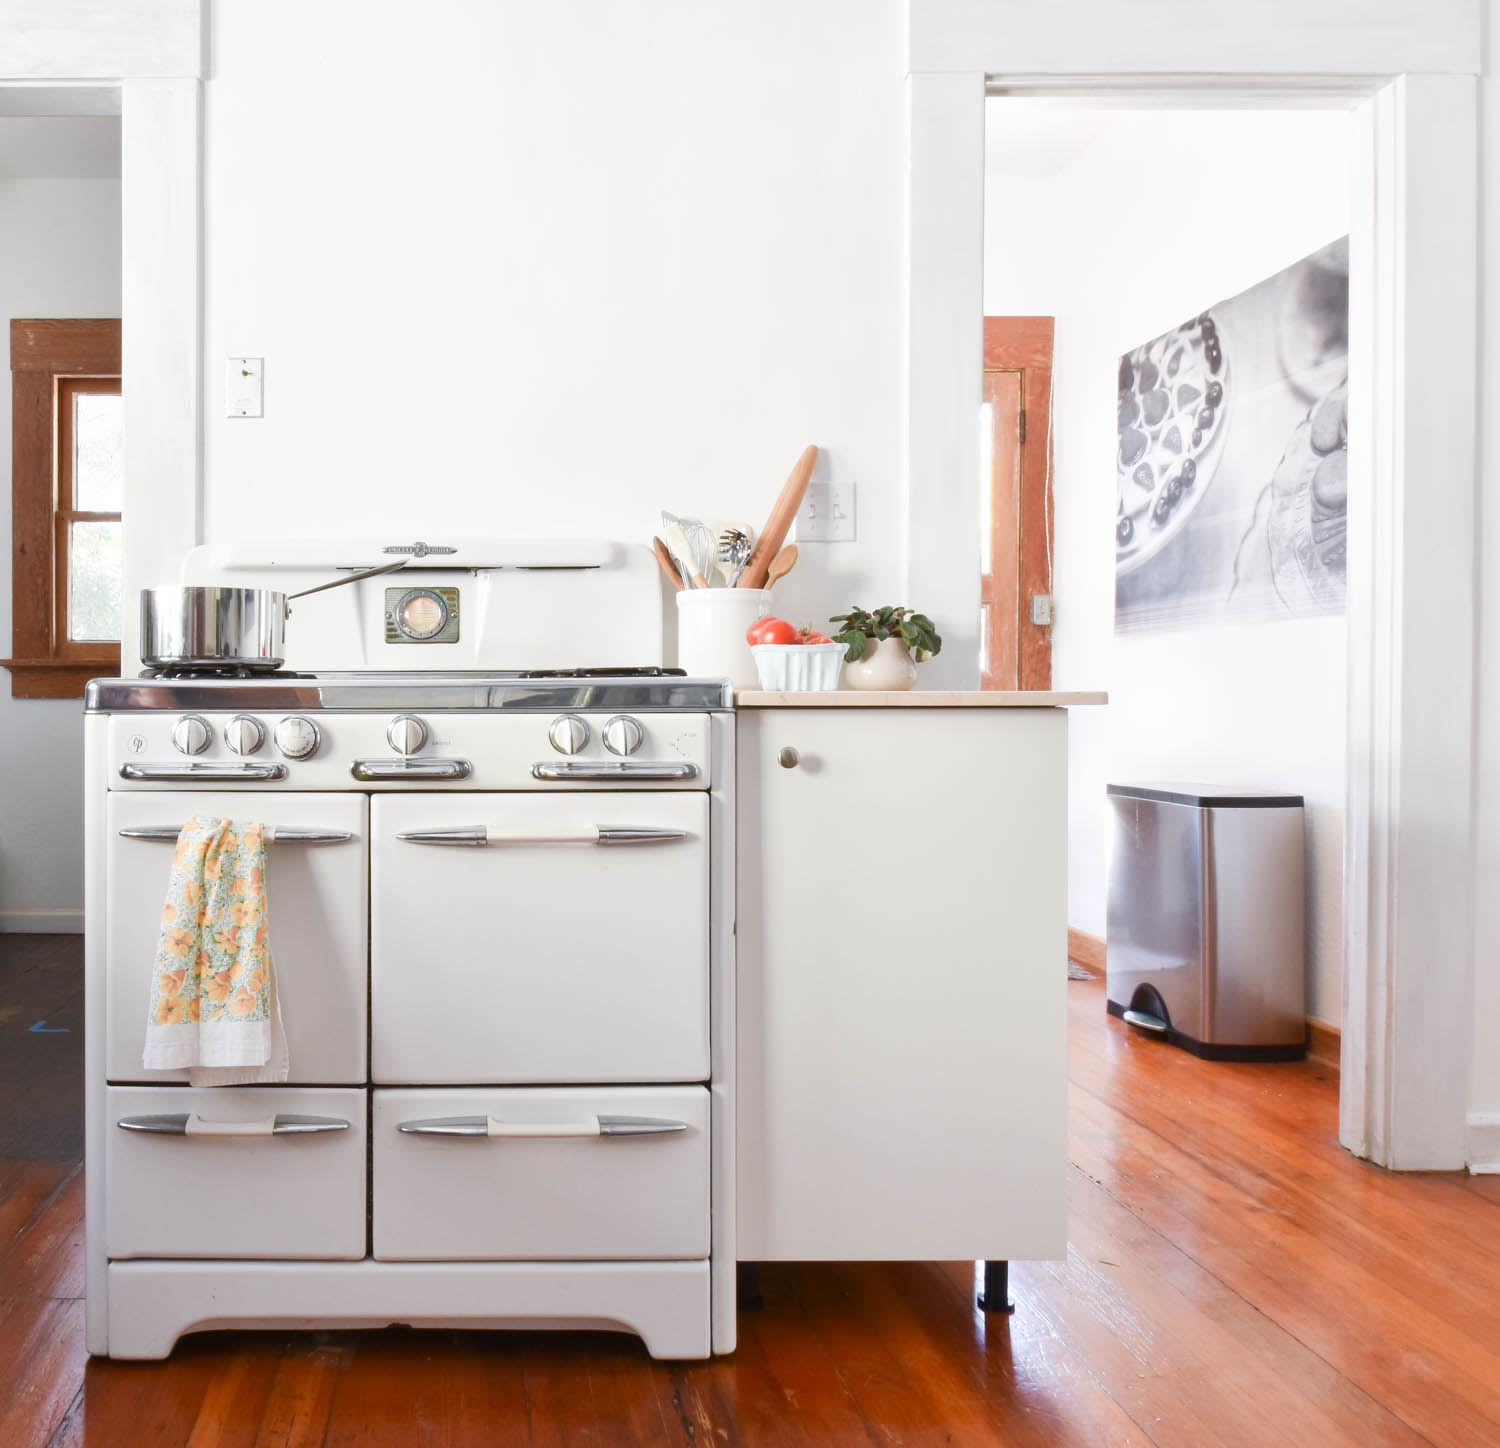
Our range was centered on a narrow wall so we never had a spot to rest our tools or prep. With a few inches on either side of the appliance, the area was the perfect candidate for a new work surface and even some concealed storage. The search for a base cabinet started at Habitat for Humanity ReStore, then Home Depot and Lowe's, but I ultimately found the best size and cheapest option at IKEA. After wiggling the stove over, I had the perfect amount of room to wedge in this 18x24x30" SEKTION base cabinet.

The Gold Hive How to Add Counter Space for Cheap

I assembled the base cabinet according to the instructions provided. Instead of using the track system for the full kitchen cabinet installation, I used the components that mount it directly to the wall and supported it with the adjustable cabinet legs.

The Gold Hive How to Add Counter Space for Cheap

These cabinets don't come with a countertop, so I made my own. Butcher block was my first choice since wood is easier to work with than stone. However, even the cheapest slabs were too pricy and more material than I needed, so I used this piece of 3/4" pine that works swimmingly. In an effort to get as much surface area as possible, I made the wood overhang by 2” and notched out a spot for the door trim using my trusty jigsaw. I also sanded the corners to match the round profile of the range.

The Gold Hive How to Add Counter Space for Cheap

To finish, I coated the pine with food-safe Acrylacq so it could better stand up to the moisture in the kitchen.

The Gold Hive How to Add Counter Space for Cheap

Cabinet: $60
Cabinet legs: $6
Countertop: $20
Acrylacq: left over from
the concrete countertop project

Total Cost for The Cabinet & Counter: $86

2. The Custom Cleat Counter

The Gold Hive How to Add Counter Space for Cheap

The corner of the kitchen had been the home for a small breakfast table, but we never used it. A better use of the space was a long shelf to extend the existing counter. Instead of store-bought brackets (see #3), I used a cleat system. This technique provides strong support and gives the illusion of a floating countertop.

The Gold Hive How to Add Counter Space for Cheap

The first step was to identify the wall studs so the cleats would have something strong to sink into. I used my favorite technique from when I installed picture rail molding.

The Gold Hive How to Add Counter Space for Cheap

After finding all of the studs, the next step was to screw in lumber along the walls just below the counter. To find the height to screw in the cleats, subtract the thickness of the counter material from the height you want it off the floor. Make your mark, then using a level, draw the guide along all of the walls. It’s important that you make the cleats level so your food doesn’t roll off the counter!

The Gold Hive How to Add Counter Space for Cheap

I was lucky to have some scrap lumber, but you could get a few feet of 2x4s and cut them to size. I purposefully left a gap between the cleats so I could feed a power cord through to the top of the counter. It conveniently gets hidden behind the coffee maker.

I cut the pine panel to just a hair bigger than needed, then sanded it down until it was a snug fit. After cleaning up the edges, it got a coat of Acrylacq just like the cabinet counter.

Countertop: $35
Lumber & fasteners: already on hand
Acrylacq: left over from the concrete countertop project

Total Cost for The Cleat Counter: $35

3. The Off-The-Shelf Shelf

The Gold Hive How to Add Counter Space for Cheap

I used these brackets with this white melamine board to create out-of-the-way kitchen storage. It's as easy as hanging the brackets in the studs, then screwing the top to them. Simple dimple. We use this counter space to get the microwave out of the main part of the kitchen, store some small appliances, and plop things that are going in and out of the house. It's such a helpful spot to dump stuff, but over time, the board started to sag. See it bowing in the photo? It also started to tilt forward, so we had to reinforce it with some L brackets. Not a big deal, but it certainly doesn't have the floating cleat counter look.

The Gold Hive How to Add Counter Space for Cheap

Shelf brackets: $26
Melamine board: $13
L brackets: $6

Total Cost for The Off-The-Shelf Shelf: $45

For a grand total of $166, we gained 10.5 feet of additional counter space (and a few shelves)! While we were lucky to have lots of room to expand, I’m certain that even adding a 6” shelf between the range and the counter in a small space would do wonders. Each of these projects can be done in a weekend and are great for a rental. How would you upgrade the work surface in your kitchen?

To see how I skim coated tiled countertops with concrete and to see more kitchen progress, click here. To follow along with how the rest of the home renovation goes, subscribe!

Concrete Countertops in the Kitchen - A How To and A Report on Two Years of Use

While the kitchen didn't get a full gut and remodel like the bathroom, it received its fair share of updates to make it usable. Among the most impactful were the concrete countertops.

The Gold Hive How To Concrete Counters

The existing counters were granite tiles. Now, some of you may swoon when you hear "granite counters" but these were NOT swoon-worthy (but also, not many granite counters are swoon-worthy in my personal opinion - though, I digress).

You may be familiar with concrete countertops that are a solid piece of concrete that's poured in place, but skim coating is an easy option that doesn't require any demo. If you're a DIY-loving renter that has the "go ahead and make changes but I'm not going to pay for it" landlord, then this project is for you.

I'm not going to pretend that I came up with this DIY. I followed the instructions from John and Sherry of Young House Love to a T. For a comprehensive step-by-step, take a look at their whole process here and here, but you can follow along with my brief play-by-play below. Then, I'll get into how they are holding up 2 years later.

What you'll need:

  • Ardex Feather Finish - this is the star of the show. Amazon sells it in packs of 4 which is good if you need a lot. My kitchen needed less than 2 bags for a 12' run of counters and no backsplash. I got this option which comes with 2 bags and a trowel.

  • Measuring and mixing buckets - I used an old gardening pail and a cup. The ratios are what matter more than the actual measurements.

  • Scraping tool - I used a metal putty knife, but a 6-in-1 tool works great. I recommend something with a 2-4" blade.

  • Trowel - You can get creative with lots of different sized and shaped trowels but I used the one in the combo pack of concrete and a trowel. If you're new to this type of work, I'd recommend a short trowel to give you more control. A "pool" trowel has smooth edges which also helps newbies not make track marks as they spread. If that's what you're after, here's one.

  • Sandpaper - I used a heavy grit paper on my sander, then finer grits on the sanding block.

  • Mask and eye protection - During the sanding stages, it gets really, really, really dusty. You'll want eye protection and a mask or respirator.

  • Sealer - to protect the concrete that you so laboriously applied.

  • SafeCoat Acrylacq - to finish the counters and make them food safe.

  • Foam brushes - If you have a lot to cover, you can get a foam roller, but I used a wide foam brush.

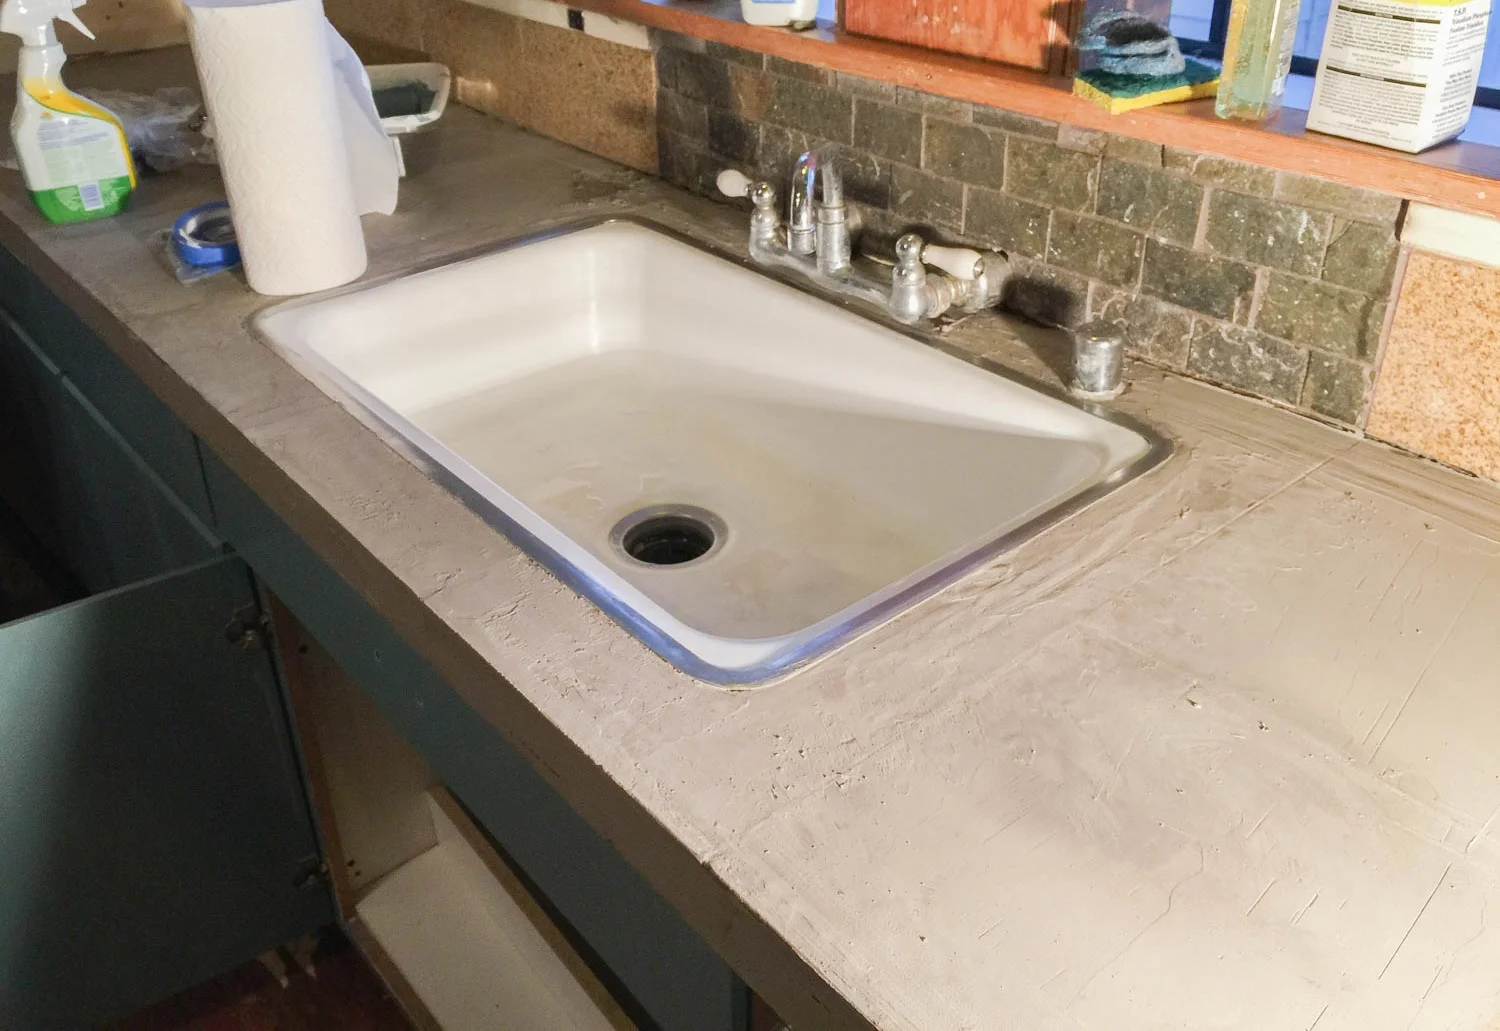
As a reminder, here's what the kitchen looked like before.

The Gold Hive How To Concrete Countertops

The first step is to quarantine the room you'll be working in. I was lucky to be doing this project in the midst of renovations, so dust was aplenty. But, if you're living in the house while doing this project, you'll want to thoroughly seal off the space to contain the mess. Note that this is a multi-day project, so plan accordingly.

I used a coarse grit sandpaper on my sander to rough up the counters. It seems silly to sand granite which is a pretty darn strong material, but I did it anyway to really clean up the surface and sand down remnants of anything that I didn't want between the counters and the concrete. If you have a softer countertop material, this step is helpful for scratching the surface and giving the concrete something to grip to.

After wiping up the dust, I mixed the concrete according to the ratio on the bag (2 parts powder to 1 part water) to get a toothpaste consistency. If you're doing a lot of vertical work you'll want more of a peanut butter consistency, but if you're just working on the flat counter, it can be runnier. Find what works for you! I mixed small amounts at first to see how far it went.  If you mix too much, it will harden and all you'll have is a concrete mold of your bucket.

Coating the counter was like icing a cake - over and over again. The first coat is similar to the crumb coat of a cake - not pretty but an important base for the next step. I dumped out the mixture onto the counters and used the trowel to spread it to an even thickness. You don't want to go too thick or you'll prolong the already-lengthy process. Coat everything and don't worry too much about the edges.

After the concrete dried for a few hours, I followed up with a scraper to knock down the bumps and imperfections. You can try to make it perfectly smooth right after you apply it, but it's often too wet and you end up messing up, then reapplying, then fudging a little, then reapplying. Hot tip: set a lamp low on the counter and point it parallel to the surface; this will emphasize the imperfections so you can scrape them off easily.

The Gold Hive How To Concrete Countertops

After the first coat dried completely, I followed up with the sander to make it smooth for the next coating. I used a power sander which made everything go by quickly, but it did get suuuuper dusty.

The Gold Hive How To Concrete Countertops

Once the base coat was sanded and smooth, I applied another coat the same way as before, and then again. Three coats is the minimum I'd recommend, and it does indeed take three days! I applied the concrete late at night, went home, went to sleep, went to work, came back, sanded, sanded, sanded, wiped up dust, applied another coat, went home, went to sleep, and repeated.

The Gold Hive How To Concrete Countertops

The sanding block was helpful for refining the edges that the power sander couldn't do. I started with a coarse grit block, then graduated to a finer grit for the last layer. 

The Gold Hive How To Concrete Countertops

I purposefully left trowel swooshes and visual texture in the concrete. If I didn't, then any imperfection would show dramatically. Concrete isn't known for being particularly beautiful, so I embraced the nature of the material and aimed for a handmade look - plus, imperfection is so much easier!

The Gold Hive How To Concrete Countertops

Once the countertops were shaped and smoothed to my liking, they had to be sealed. There are lots of opinions on sealers, but John and Sherry did lots of research, so I followed their lead. This final process included wiping on a few coats of sealer, then coating everything with a few layers of Acrylacq which is basically a polyurethane - but a non-toxic food-safe version. I don't have photos of this process, but it's easy as pouring the sealer on and spreading it out, then waiting for it to dry between coats.

The Gold Hive How To Concrete Counters

How they're holding up two years later

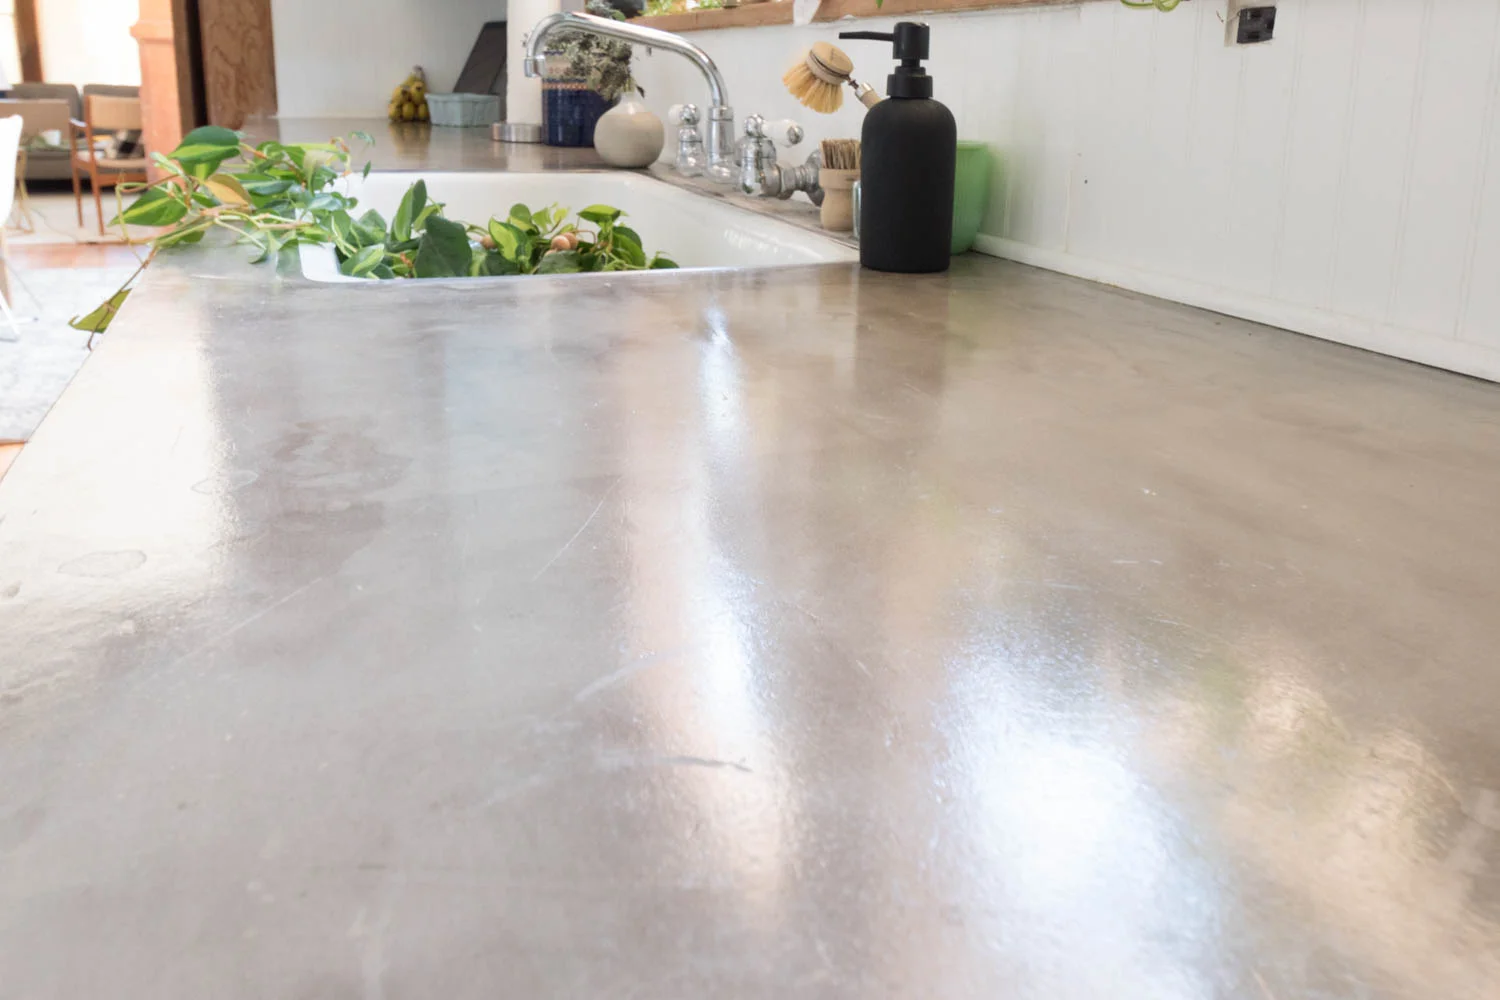
They are doing pretty well after two years of use! They still have a nice shine to them and still have the natural concrete look. I haven't babied them, so they're definitely seeing signs of wear.

The Gold Hive How To Concrete Counters

Water: I store our dish scrubber on the countertop, so a puddle of water will pool on top of the counters for hours/days. I worried it would break down the finish and cause big issues like mold, but the only problem is it darkens the tone. Since I don't mind the darker shade, water on the surface doesn't bug me at all.

Heat: I somehow forgot that I had (essentially) a coating of plastic on my counters when I sat a hot cookie sheet on top of them. It didn't sit there long before I remembered the many days of labor I put into the countertop project, but the cookie sheet definitely left a burn mark. There are a few small spots where the finish completely melted away.

Chemical: I sat down some laundry spray on the counters only to come back the next day to find an oval-shaped haze on the counter from where the product leaked out of the bottle. I haven't managed to get rid of these, but the haze has dissipated over time and blended into the other markings.

Rust: The bottom of my coffee maker started rusting and left a nice orange spot on the surface of the counter. I used some Bar Keepers Friend to buff off the rust, though I scrubbed through a layer of coating because it's a bit more dull there. It isn't attracting any issues, so I don't mind!

My review? Overall, I love the concrete counters and how much this project transformed the kitchen. I would do it again in a heartbeat.

The Gold Hive How To Concrete Counters

When You Can't Live With It But Can't Live Without It

There are two types of approaches I take to DIY.

  1. Permanent projects designed to last forever using solid materials

  2. Quick fixes using cheap, semi-permanent materials designed to be band-aids (with the caveat that it doesn't get in the way of future permanent projects nor damage the integrity of the home)

The kitchen project? I'm taking the latter approach. In the next year (hopefully!), we're going to tear out everything and replace it with our dream kitchen. Yet, we aren't ready for the permanent kitchen for a bunch of reasons like $$$ and my lack of decision-making skills and the fear of taking the plunge without being sure it's as perfect as can be. However, I'm totally embracing the slow evolution of the future kitchen plan. Each recipe gives us insight into functionality, each party better highlights ideal flow, and each trip to the store enlightens us on the best kind of storage. I'm taking my sweet time, but I'm learning oodles that I can apply to the big remodel.

Now, there is no way that I could ever cook a meal or host a get together in the kitchen in the state it was in when we bought it. No. Way.

Shall we revisit what she used to look like?

The Gold Hive Kitchen Before

How do you like those twig and rooster cabinet pulls?

The Gold Hive Kitchen Before

It really doesn't look that bad, but the smell, folks, the smell.

Since we couldn't wait it out for our permanent kitchen in this space, the clean it up and cover it up method was the route we took. Since we were going to do something with minimal investment that wouldn't last forever, I used the phase 1 kitchen update as an opportunity to play with styles that I wouldn't install in our dream kitchen.

So, I bring you the inspiration. These are among the MANY photos that I pinned for the kitchen two years ago when this project got started. They are a bit more vintage country than our future kitchen will be and they have a touch more color than I would gravitate towards today. But when you're going to do multiple phases of renovation, why not explore all sorts of design styles!

The Gold Hive Kitchen Inspiration

Sources from upper left: 1/2/3/4/5/6/7/8/9/10

See some trends? Muted colored cabinets, vintage drawer pulls, natural material countertops, semi-open cabinets, lots of white and light, patterned flooring/rugs, wood accents, beadboard, and nods to yesteryear.

Come back to get all the sources, the tutorial on installing linoleum floors, a how-to cover existing counters in concrete, tips on making a space feel new even when it isn't, the installation of the backsplash, a step-by-step on adding more counterspace, and a check-in to see how it's holding up two years later. If you're itching to see what she's become, click here. To follow along on the progress, subscribe!

A Console Sink Collection

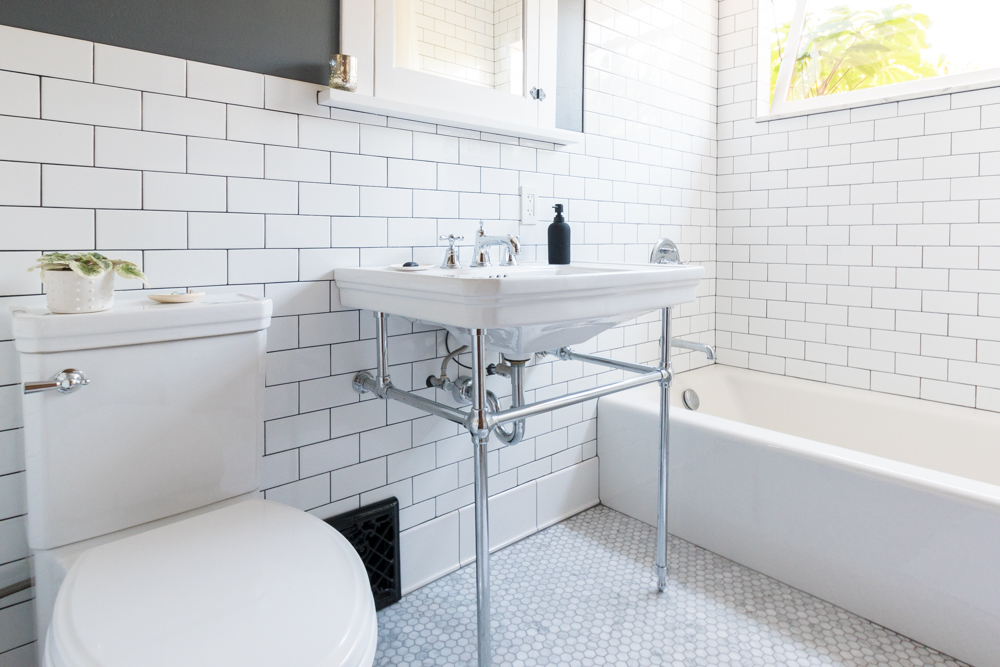
We lucked out with extra space in the bathroom to carve out lots of storage so we were able to nix the vanity and opt for a console sink. With all of our toiletries in the cabinet, the sink could be just a sink - no need for a bulky vanity taking up visual space in a small bathroom.

The Gold Hive Console Sink

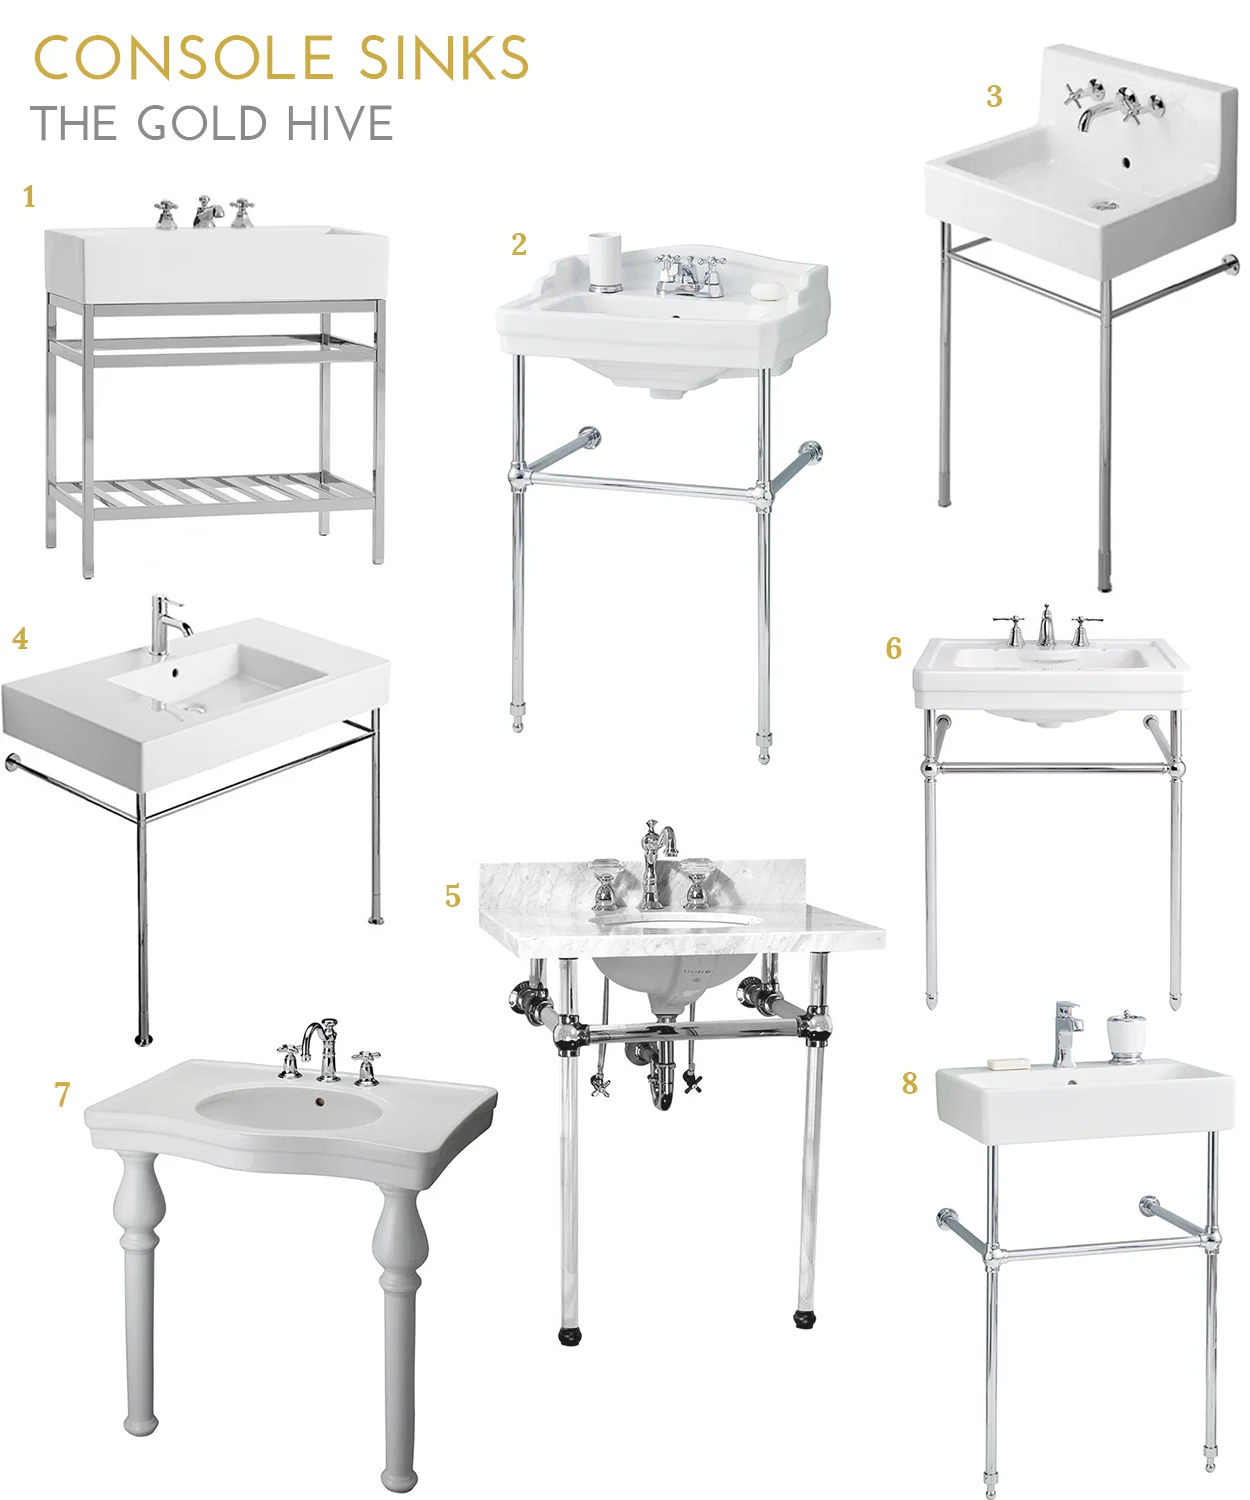
During our sink hunt, the priority to was to get as much work surface area as we could for the space we had (so we opted for this one). But if that isn't your number one goal, how about acrylic legs? wall-mounted faucets? turned legs? shelves? or marble? I've collected my favorite console sinks from a few different online retailers - each with some different features.

The Gold Hive Console Sinks

1. Mason Apothecary $999 / 2. Essex $714/ 3. Vero Wall Mount plus legs $731 / 4. Vero $582 / 5. Templeton $823 / 6. Mason $699 / 7. Milano $706 / 8. Nuo $739

Those are all great brand new sinks, but there’s nothing like an authentically antique sink. Shop available vintage sinks with the button below.

We have #6, the Mason console from Signature Hardware. We've been using it as our primary bathroom sink for two years and it's holding up beautifully - even fared well after I left a hot curling iron on it for 8 hours by accident. Doh!

For more of the bathroom renovation progress check out the inspiration, the plans, the demo, the recessed shelves and storage cabinet, and the window. There's still more to come, so I'd recommend you subscribe.

But, Where Do You Keep All of Your Things?

Bathroom storage is a biggie. In all of the infomercials of people in dramatic black and white reenactments spilling their toiletries all over the bathroom floor or in House Hunters when a couple is tripping over each other trying to both get ready in the morning, they all exasperatedly exclaim how they need more storage in their bathroom. We've all been there, amiright?

I try my hardest to live minimally and own as few makeup products as possible, but we all have stuff to store. Without a vanity to hide all of our things in, we carved out a nice spot in the corner of the room to store all of our goodies.

The Gold Hive Bathroom Storage

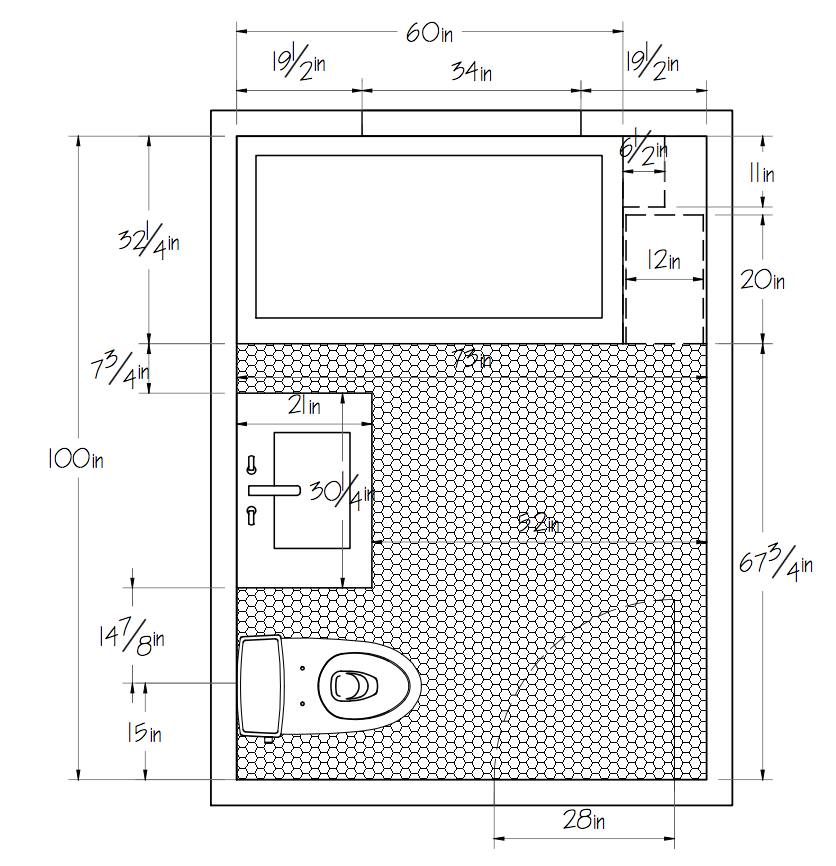
To revisit, here's the layout we played with during the design stage (the finished dimensions changed a bit).

Bathroom plan view

See that chunk of space at the end of the tub in the upper right corner? That pocket is the answer to all of our storage woes. The 6.5" deep space became what I call "wet storage" and is accessed from the shower/tub. The 12" wide section is our "dry storage" that opens into the main part of the bathroom. The goal was to create as much hidden storage as possible so things didn't sit on the sink or the edge of the tub. Also, I'm one of those people that decants my shampoo into an unbranded bottle aiming to see as few product labels as possible - sorry toiletry brand graphic designers.

With these terrible photos, you can see how the whole thing came together.

The Gold Hive Bathroom Storage Progress

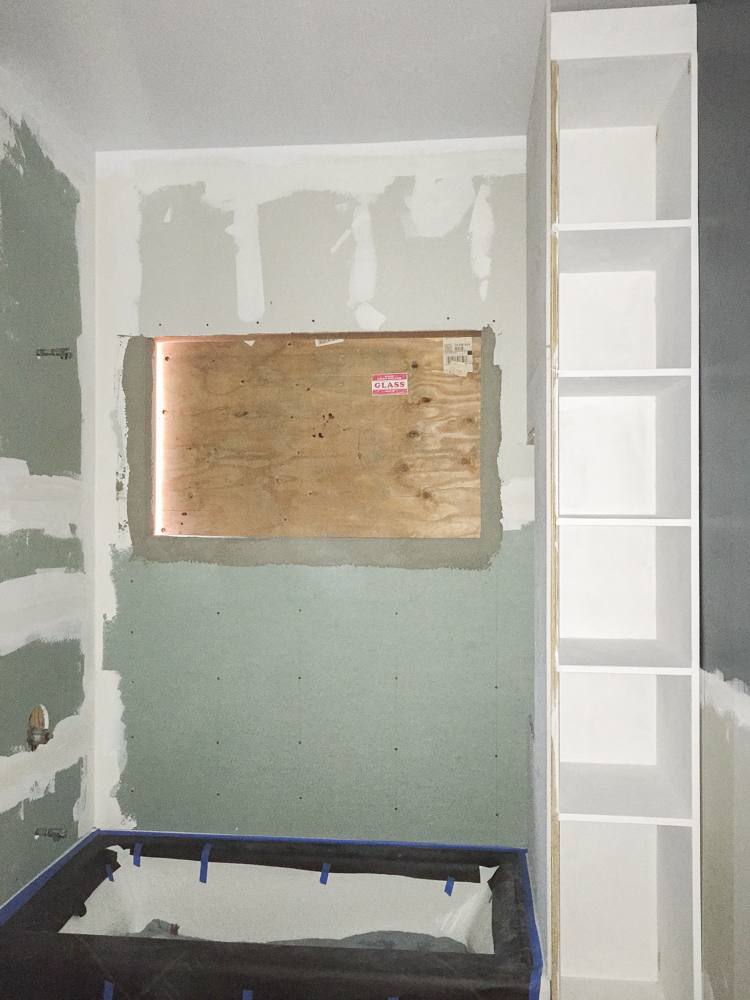
Before the storage unit construction began, the window was sized, the subfloor was rebuilt and prepped for tile, electrical was put in, rough plumbing was installed, walls got cement board, and the floor was tiled.

The Gold Hive Bathroom Storage Progress

When we were interviewing contractors for this project, 85% of them said that adding this storage unit was a bad idea. They said that the weight of the tile would pull on the cabinet and the only way to prevent it was to make the unit super strong by building a wall between the tub and the shelves, which would only leave 5” of usable storage space. I refused to accept that, and the contractor we ultimately hired agreed that my cabinet dreams could indeed come true.

Well, the bathroom remodel wrapped up two years ago and the storage unit is in perfect condition! 

Kim and Scott of Yellow Brick Home did a similar cabinet at the foot of their tub awhile after we installed ours. They used the wall and pre-made cabinet method - but did so much better a job than any of those doubtful contractors could have done. Either route works!

The Gold Hive Bathroom Storage Progress

A big part of what made this cabinet strong is we opted to permanently install the shelves, rather than adjustable boards that we can move up and down along pegs. The permanently affixed shelves hold the whole piece together from top to bottom. I don't have the luxury of resizing the cubbies, but that's perfectly fine for our needs.

The Gold Hive Bathroom Storage Progress

We also took the cabinet all the way to the ceiling. Which is storage heaven, and gives it extra rigidity being tied into the floor, ceiling, and wall.

The Gold Hive Bathroom Storage Progress

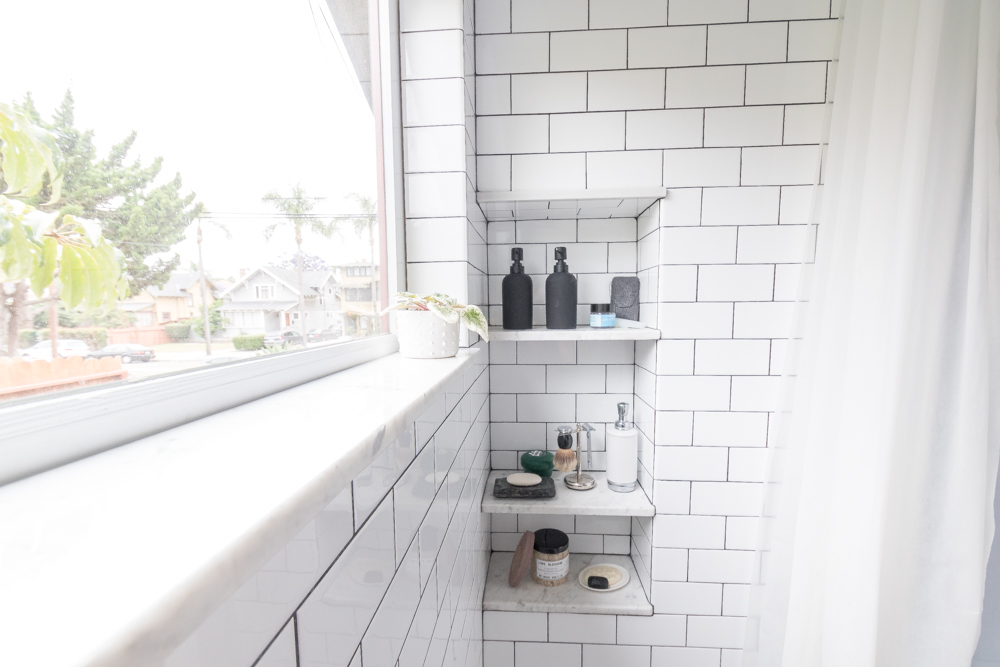
The wet storage earned marble shelves to create three cubbies to rest shampoo bottles. The marble sits on top of the row of tile and gets wedged in on all three sides by the second row atop the slab.

Here she is - two years later and still going strong.

The Gold Hive Bathroom Storage

The original plan was for the shower niches to be 6.5" deep, but I found a remnant slab at a local stone yard that was 8" deep, so why not! Each shelf varies in height from 8" to 14" tall to allow for different sized bottles. The whole recessed niche is 19" above the edge of the tub so its low enough that the bottom shelf can be reached while soaking in the tub, yet not so low that we're bending down to grab things while showering.

The Gold Hive Bathroom Storage

I talked about the tile in this post, but I just have to point out this detail at the bottom of the cabinet with the base tile wrapping underneath the door. Love.

The Gold Hive Bathroom Storage

The bottom shelf is 23" tall to allow for the toilet brush, plunger, and cleaning supplies. The rest of the shelves are 13" tall. It's the perfect size for these baskets and this modular acrylic storage. With 17" of depth, I can fit 24 rolls of toilet paper easily within reach. Any deeper and it would be hard to reach anything in the back of the shelves.

The Gold Hive Bathroom Storage

The concealed storage and the tucked away shower niches give all of our toiletries some privacy. Yet, whenever guests ask "Where are all of your things?!" I proudly open up the cabinet and pull back the shower curtain to reveal the shampoo bottles. Which kinda defeats the purpose of designing a hidden niche and a concealed cabinet. oops!

The Gold Hive Bathroom Storage

You can read about all the rest of the bathroom elements by clicking the button below. Then, subscribe so you can follow along when we add another bathroom to the house in 2019!

Installing a Custom Wood Window in the Shower

Installing a Custom Wood Window in the Shower

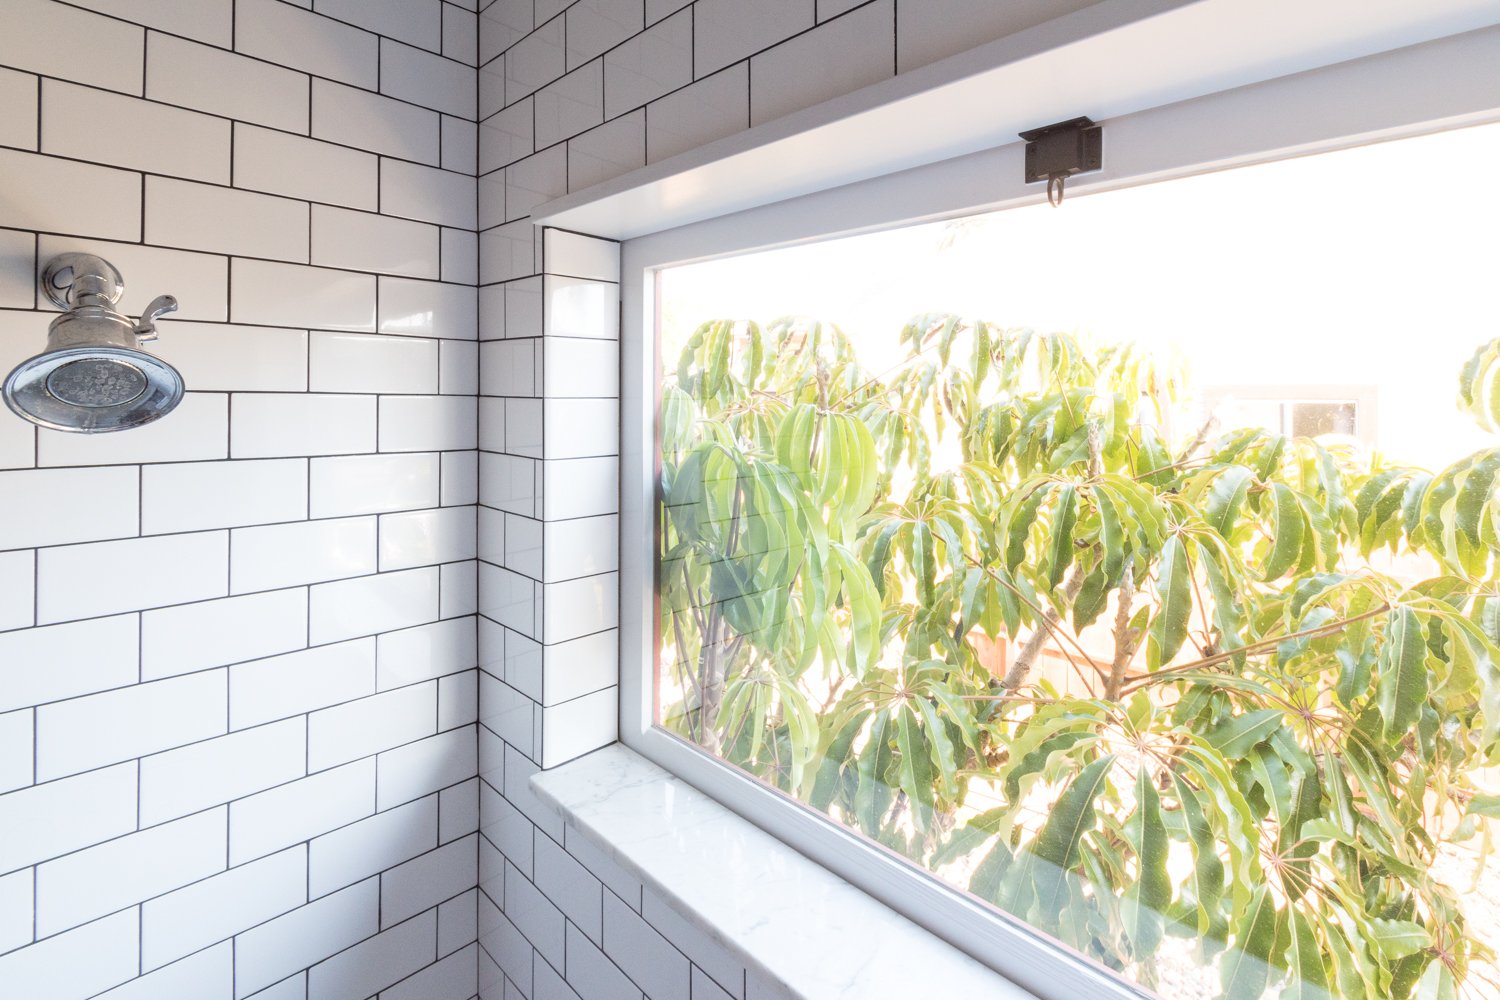
The window in our bathroom is perhaps the star of the show. Not until I got to bathe right next to the great outdoors did I come to fully appreciate how great a window in the shower is. And boy is it great! We had a custom wood window installed and while some people would disagree with this approach, I wouldn’t change a thing!

Read More

One Room Challenge Week 6 - The Moody Room Reveal!

The Gold Hive One Room Challenge Week 6 Reveal-0008.jpg

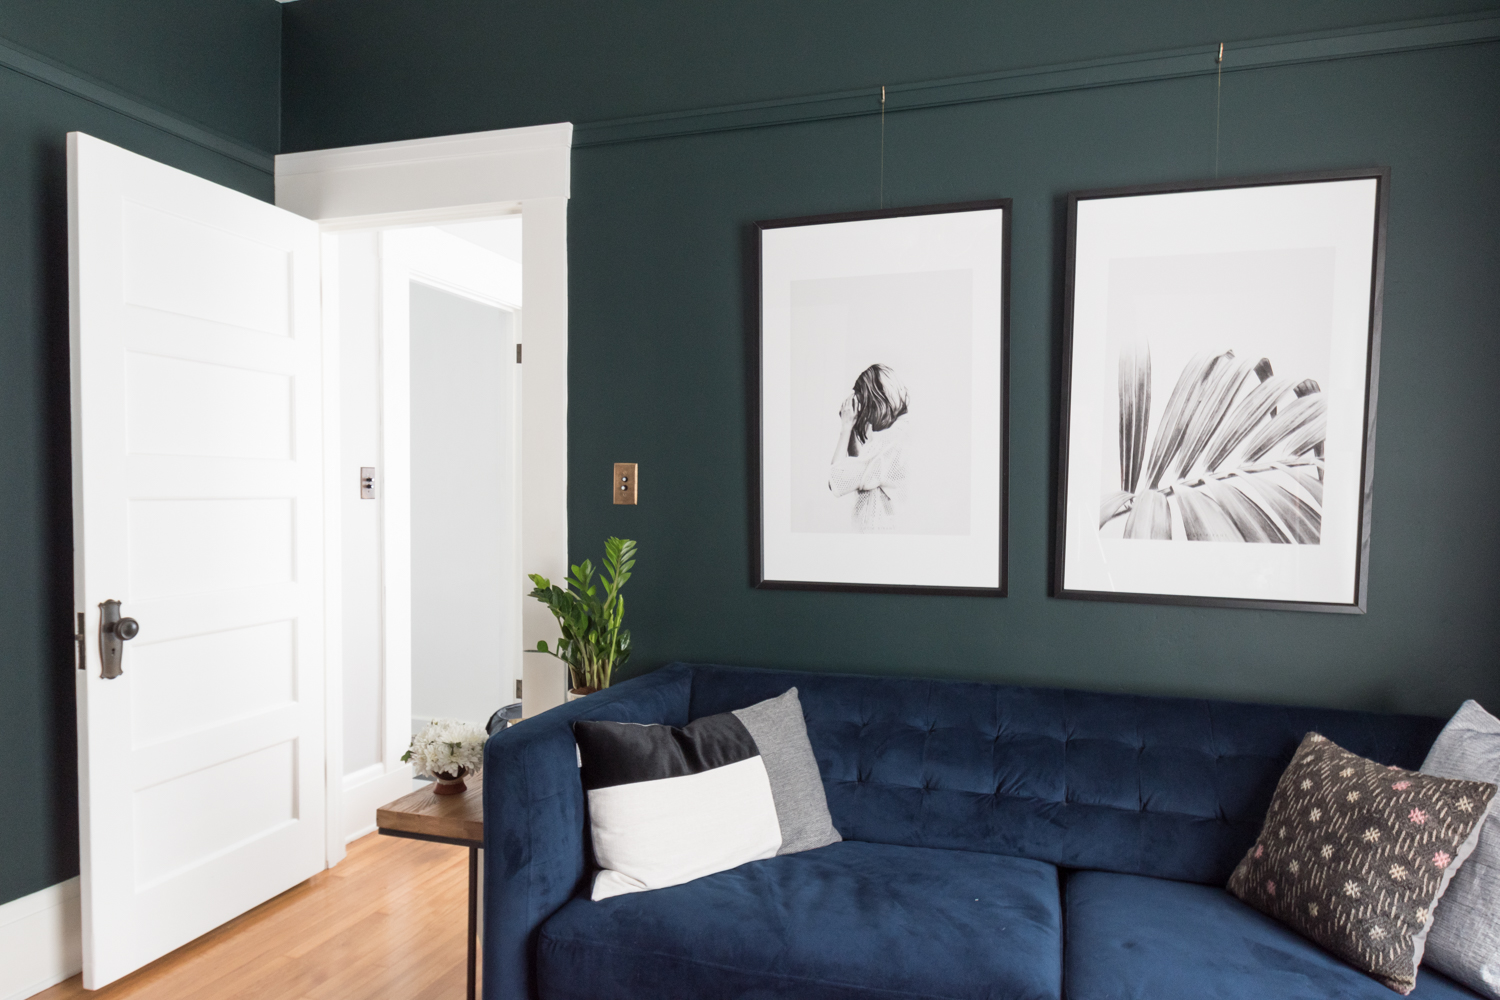
Can you believe it's been six weeks since the One Room Challenge began? Six weeks. To recap, here's the before, the inspiration, and the plan, the moody paint, the installation of picture rail molding, the artwork, and the refresh of a chair. And now here we are, at week six! 

The Gold Hive One Room Challenge Week 6 Reveal-0061.jpg

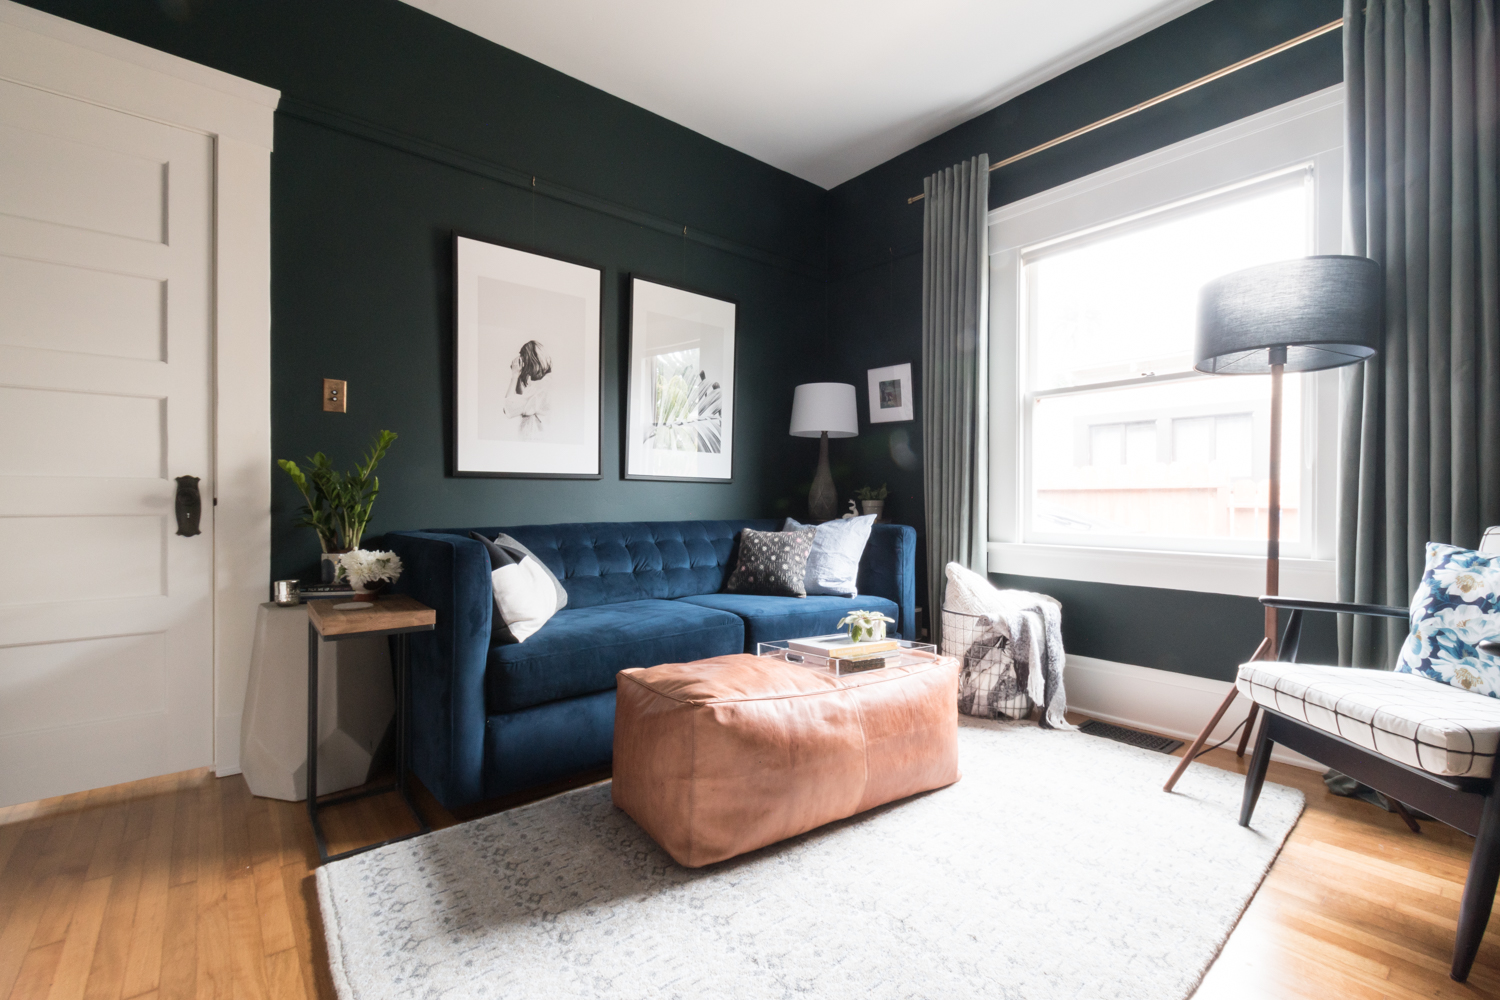
Can you believe that paint color? I still can't get over it. It is the perfectly dark tone with the richness of an emerald green. My heart! This shade is Salamander by Benjamin Moore. It's more like a chameleon because it shifts throughout the day and ranges from nearly black to emerald and blue green to forest green. It's perfection.

The Gold Hive One Room Challenge Week 6 Reveal-0028.jpg

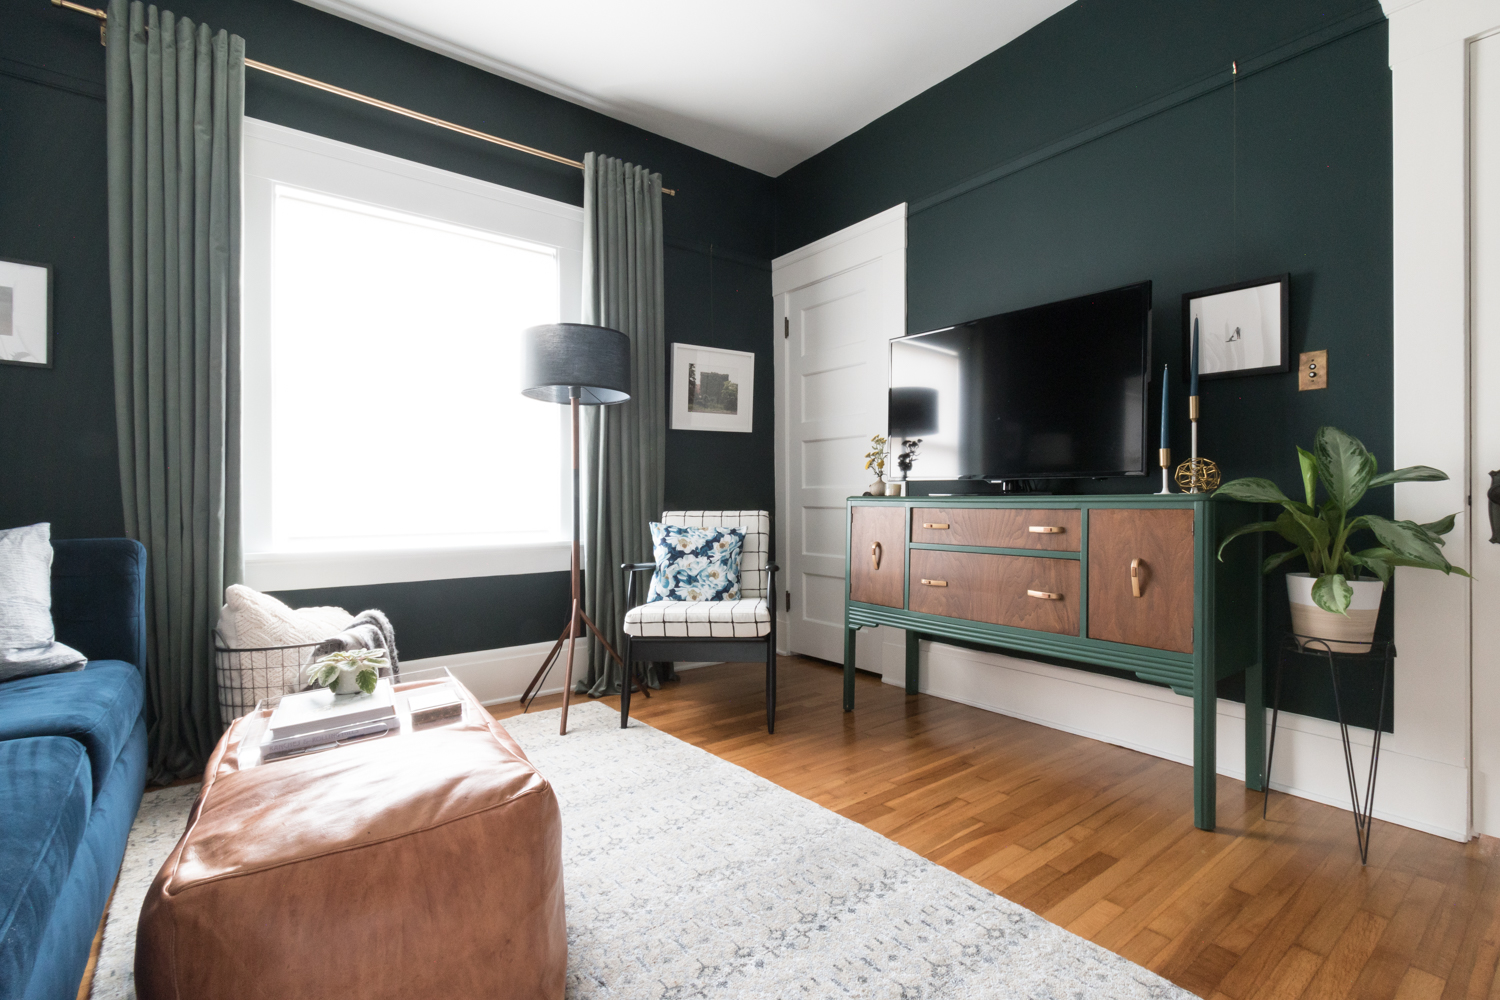
The goal was for a tone on tone color scheme with blues, blacks, and greens, plus a heavy dose of contrast with some bright whites. The room was starting to feel stark, so this ottoman makes the space feel like a casual place to kick up our feet for some Netflix viewing - which is what happens in here 90% of the time.

The Gold Hive One Room Challenge Week 6 Reveal-0041.jpg
The Gold Hive One Room Challenge Reveal

The sofa used to be in the living room, but it is so much happier in here. In its previous configuration, it sat against a wall of windows so it was always backlit and you could never enjoy the texture of the tufting and the velvety finish. The couch is a sleeper, so the room can very easily transform into a guest bedroom. Win Win.

The Gold Hive One Room Challenge Week 6 Reveal-0026.jpg

The TV and the stand stayed from the previous iteration of the room. That credenza is just too perfect in size and deco style to get rid of it

The Gold Hive One Room Challenge Week 6 Reveal-0089.jpg

There's that print that I love so so much. Shall we admire the artwork, now?

The Gold Hive One Room Challenge Week 6 Reveal-0056.jpg
The Gold Hive One Room Challenge Week 6 Reveal-0093.jpg
The Gold Hive One Room Challenge Reveal

I wanted to make sure that the dark walls didn't get too covered up by large frames, so I exercised some restraint when I was eyeing all of the great possibilities for artwork. I ultimately settled on these prints that are showstoppers on their own, but also let the moody paint shine.

All of the artwork is hanging off the newly installed picture rail molding. Since it's so easy to swap the frames out, you can bet that I will move pieces around the house from time to time.

The Gold Hive One Room Challenge Week 6 Reveal-0068.jpg

This light from West Elm was the last addition to the space, and I totally have a crush on it. I didn't want the room to get carried away with being too casual, or too dramatic, or too old fashioned, or too modern. I think this light balances all of those and gives me the best of each world.

The Gold Hive One Room Challenge Week 6 Reveal-0044.jpg

Did any of you vote on my curtain choices on last week's Instagram story? I picked up about a dozen different curtain options from IKEA to test, then return. I nearly didn't pick up these green ones, but I did on a whim, and they instantly became standouts.

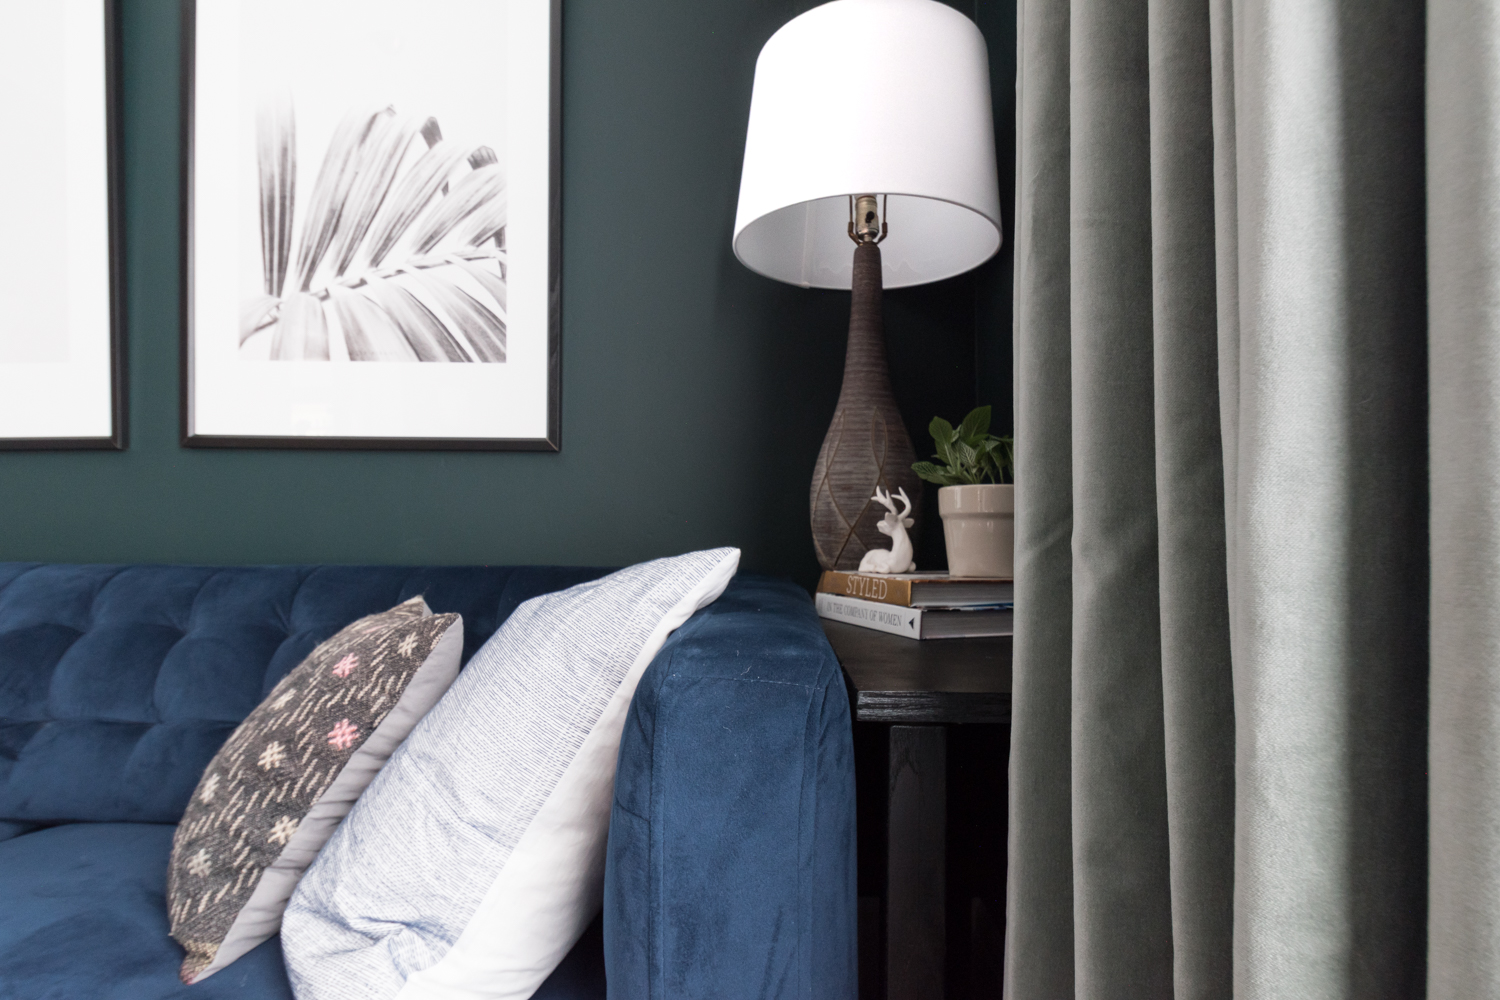
So many of you chimed in with votes and they were nearly all split. A lot of you really liked the plain white, but I went with my gut. I doubled up these sage velvety drapes so each side of the window has two panels, to give them some oomph.

The Gold Hive One Room Challenge Reveal

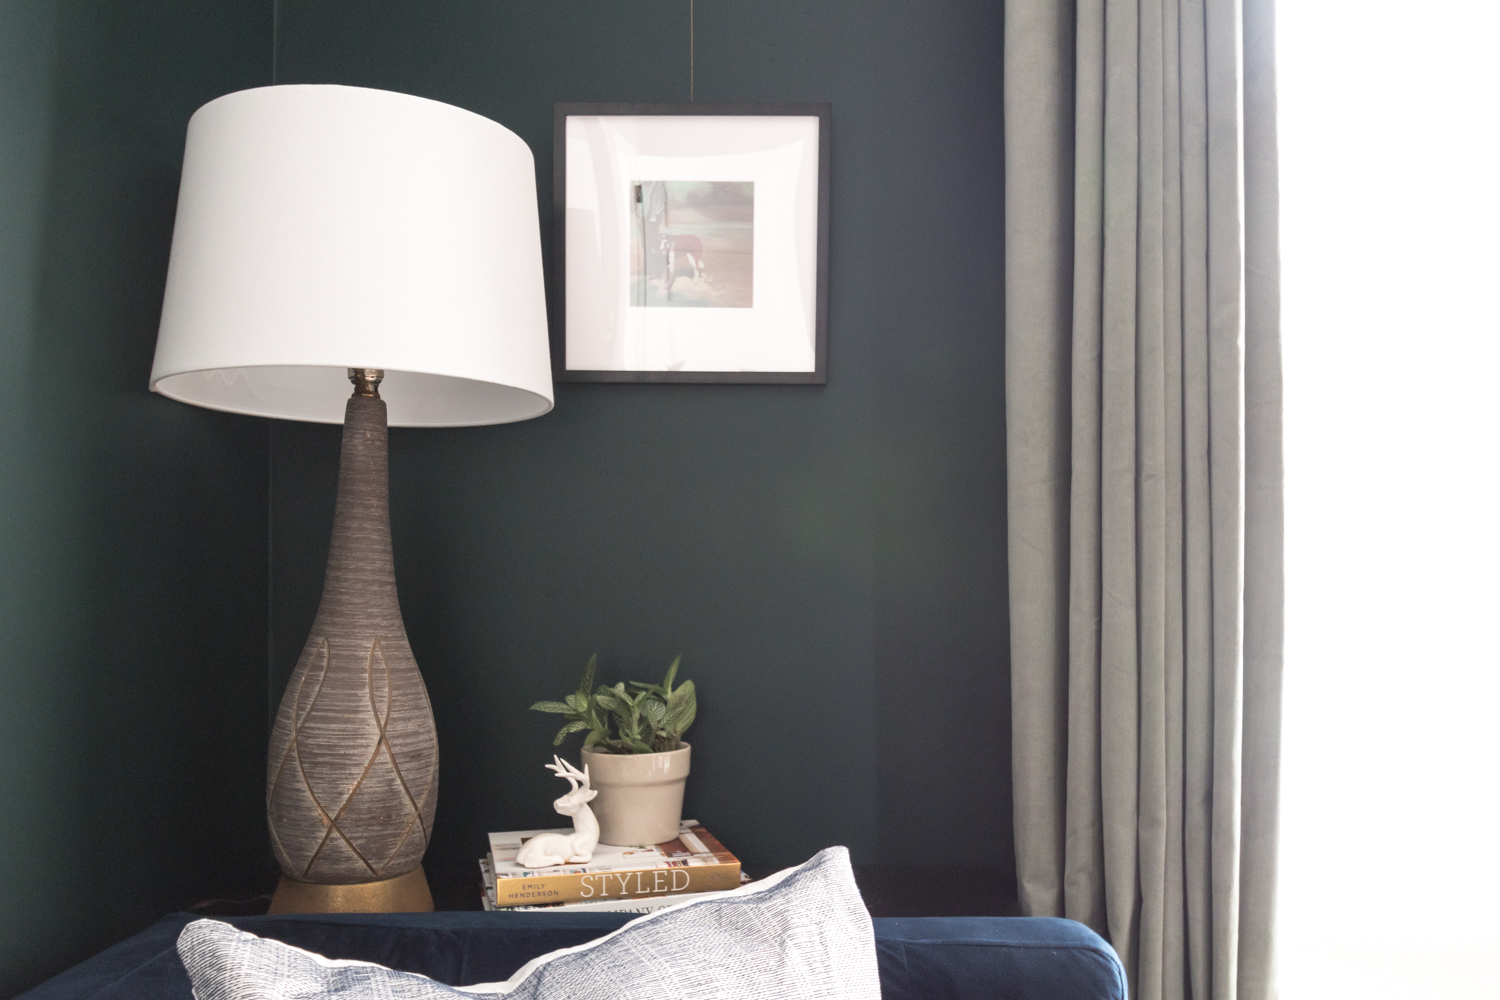
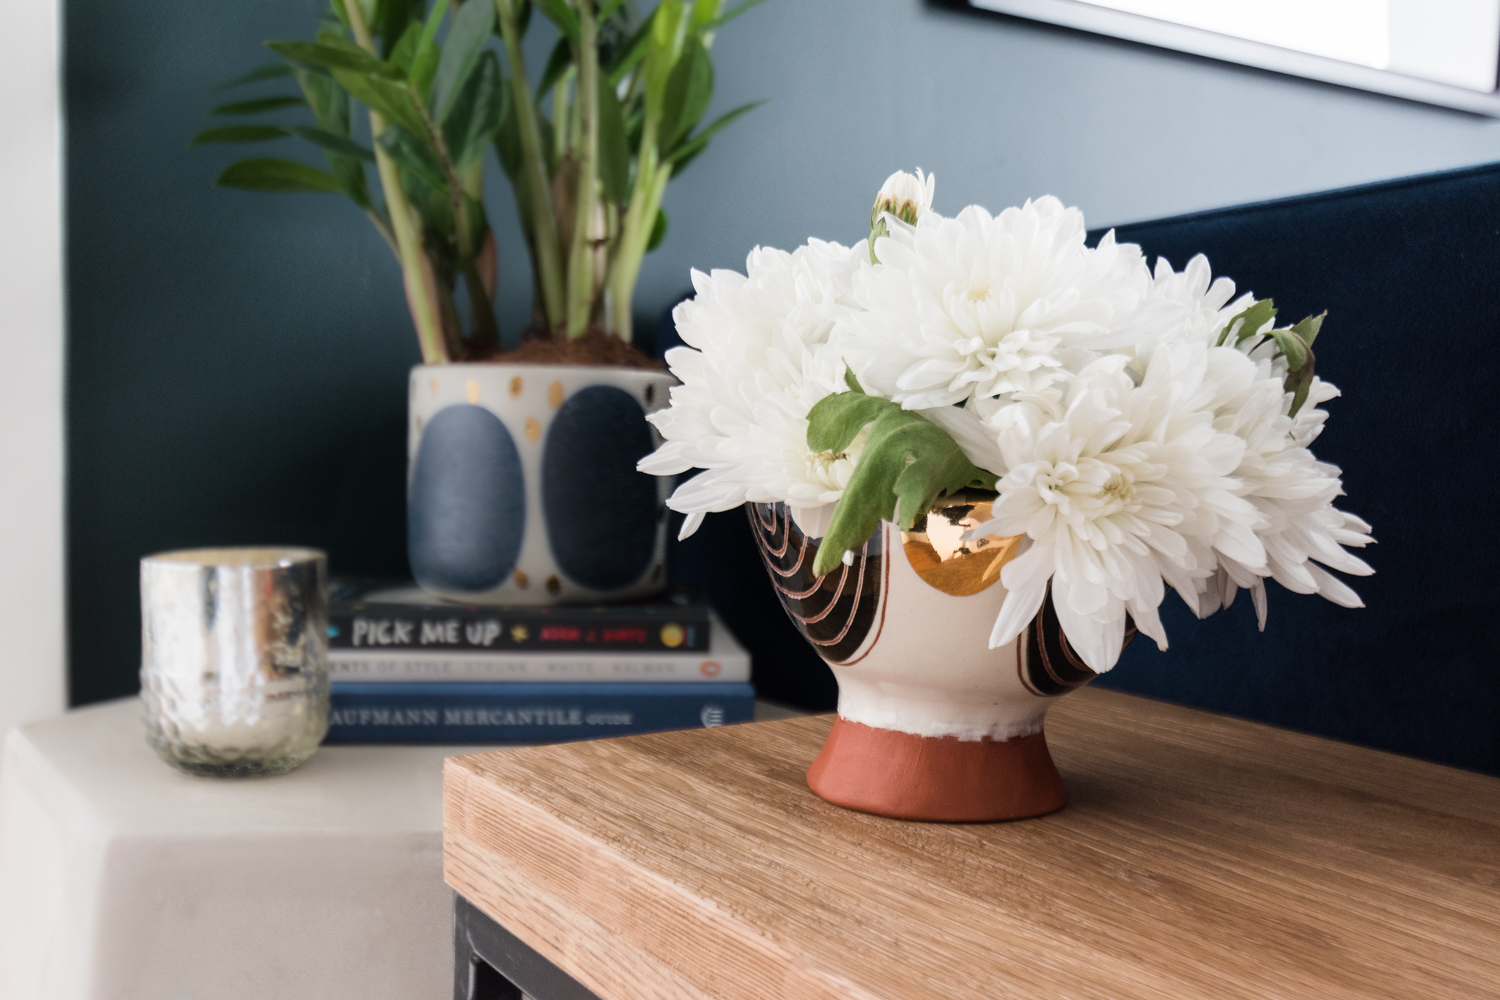
I doubled up the side tables, too. The lightweight metal framed table gets moved around to the front of the couch periodically so I have easier access to my snacks and goodies that I park on it. Since it moves, I wanted a second table that would be stationary and could keep books and plants that don't need to migrate around the room.

The Gold Hive One Room Challenge Week 6 Reveal-0111.jpg
The Gold Hive One Room Challenge Week 6 Reveal-0102.jpg

The other side of the couch needed its own table, too. But in a tight space with high arms on the couch, the necessary dimensions were impossible to find in a store-bought table, so I made my own. Using some plywood, parson legs, and plates, I cut the pieces to the exact dimensions needed, put it together, and spray painted it black.

For added storage, a small box sits on the floor under the table to house the laptop charger and hide the cables from nearby lamps.

The Gold Hive One Room Challenge Reveal
The Gold Hive One Room Challenge Week 6 Reveal-0073.jpg

We previously didn't have any seating other than the couch. It didn't let the room be much more than a place to park ourselves in front of the TV. The addition of the newly refreshed chair and lamp gives the room much more versatility.

The Gold Hive One Room Challenge Week 6 Reveal-0115.jpg

Sources

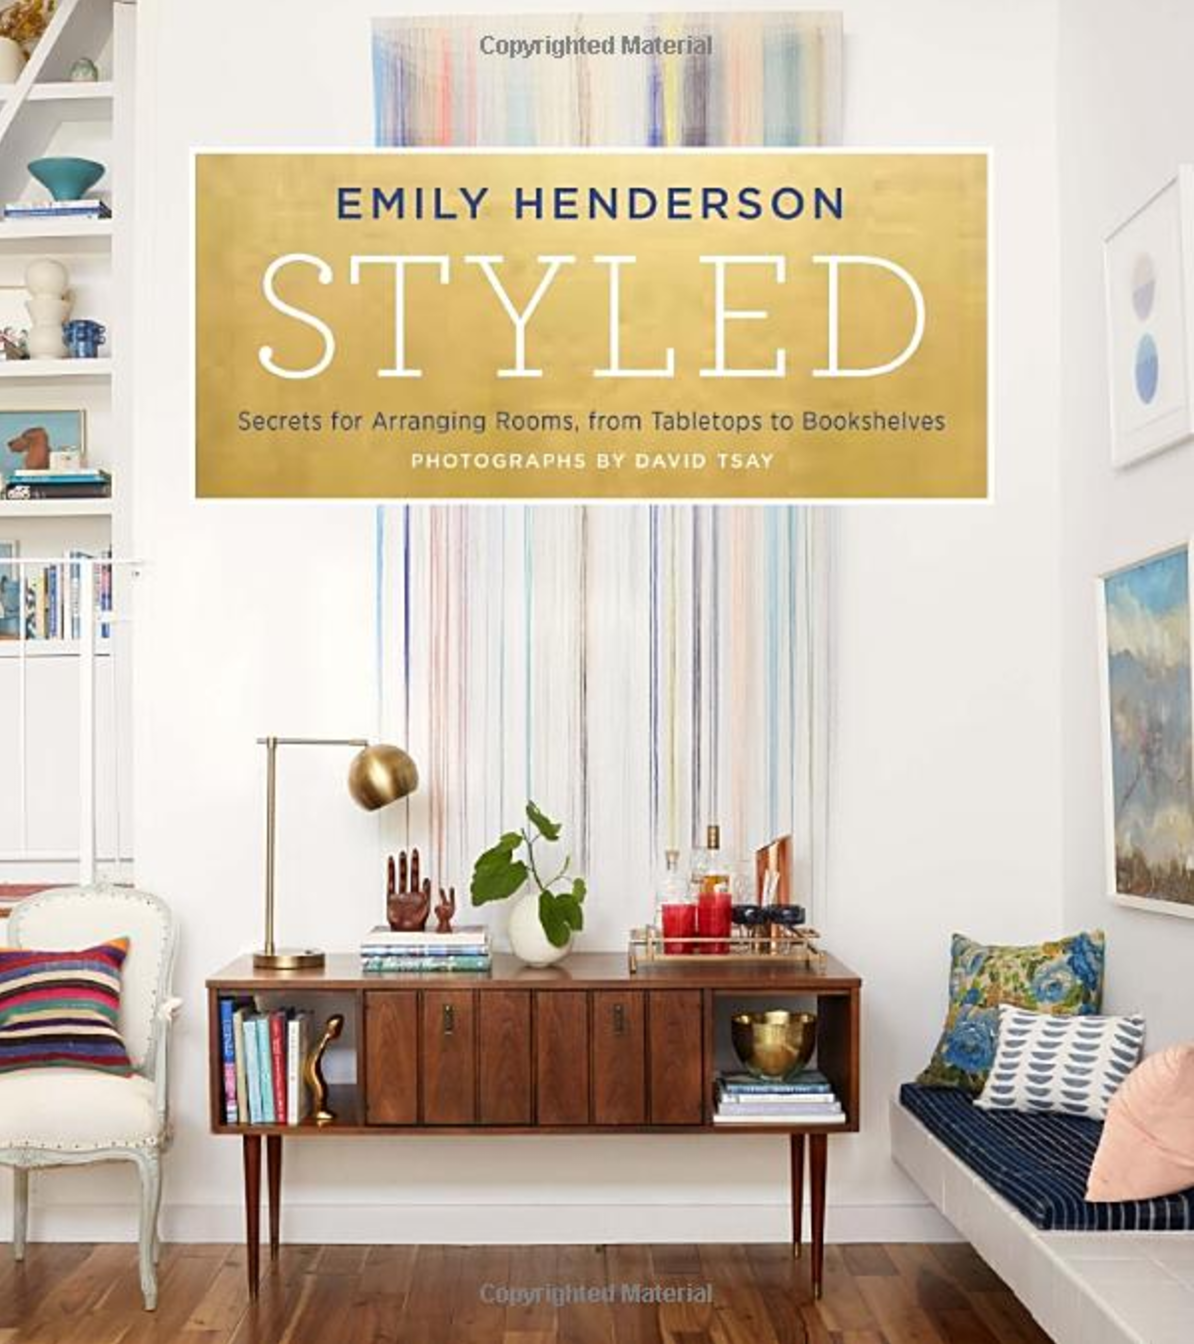
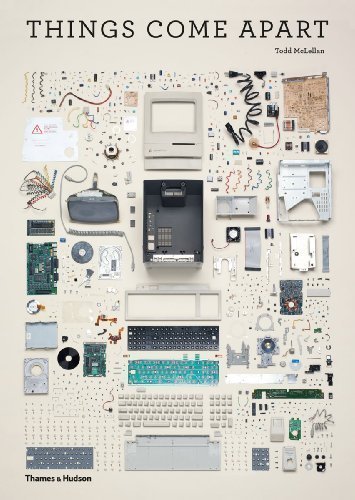
Couch - Rochester from West Elm / Ottoman - Long Pouf by Minda Living / Rug - One of a Kind from eCarpet Gallery / Pillows - VELU from Article,  Mount Cook Lily (night) from Society6 / Tray - Format ClearSquare Tray from CB2 / Black Lamp - STILT from Article / Books - Old Home Love, Styled, In The Company of Women, Pick Me Up, Illustrated Elements of Style, The Kaufman Mercantile Guide / Deer sculpture - Artist Jeff Irwin / Artwork -  Minimal and Palm by Lucie Birant, St. Bernard by Mary Sinner, Feral House #7 by James Griffieon / Chandelier - Pelle Asymmetrical from West Elm / Candle Stick Holders - Taper Candleholder from World Market / Side Table - TAIGA from Article / Potted planter - Glowing Arbor Pot from Anthropologie / Shallow Flower Vase - Moonbird Pottery / Curtains - SANELA from IKEA / Curtain Rod - Umbra Cappa / Shade - Solar Shade from Select Blinds / Side table materials - plywood, parsons leg, top plate / Picture rail molding and hooks - House of Antique Hardware / anything not listed is vintage or Home Goods.

If you're here because of the One Room Challenge, I hope you'll subscribe to the blog to get future blog posts in your email! Be sure to follow along on Instagram, too!

One Room Challenge progress:
Week 1 - the before, the inspiration, and the plan
Week 2 - paint, paint, paint
Week 3 - how to install picture rail molding
Week 4 - sourcing the artwork
Week 5 - refreshing a chair
Week 6 - the reveal!

So many other rooms have been transformed over the past six weeks, you best check' em out! There are 20 featured and 250 guest bloggers! Block out some time, put on a pot of coffee, and browse through all of those freshly designed rooms!