I Built A Custom Range Hood Vent Surround!
/I’ve successfully turned a perfectly good kitchen into an entirely useless box with walls and floors. But now I’m adding things back to it and making it an actual kitchen again! Finally! Now that it’s a livable space, I’m anxious to get cooking again, so I’m kicking things off with building a custom range hood.
Here’s a video version of the process including a fun timelapse, and then a more in-depth text explanation after the vid!
Watch The Video
If that video isn’t loading properly, click here.
I bought this range hood which has a wood-cased surround. You can see in that link that it’s a chimney style with a narrow and rectangular vertical piece coming out of the wide base. It has a lot of acute angles, and that’s just not my jam. I like a softer tapered shape, or as Corky St. Clair would say, he likes a “sweeping sort of hat.”
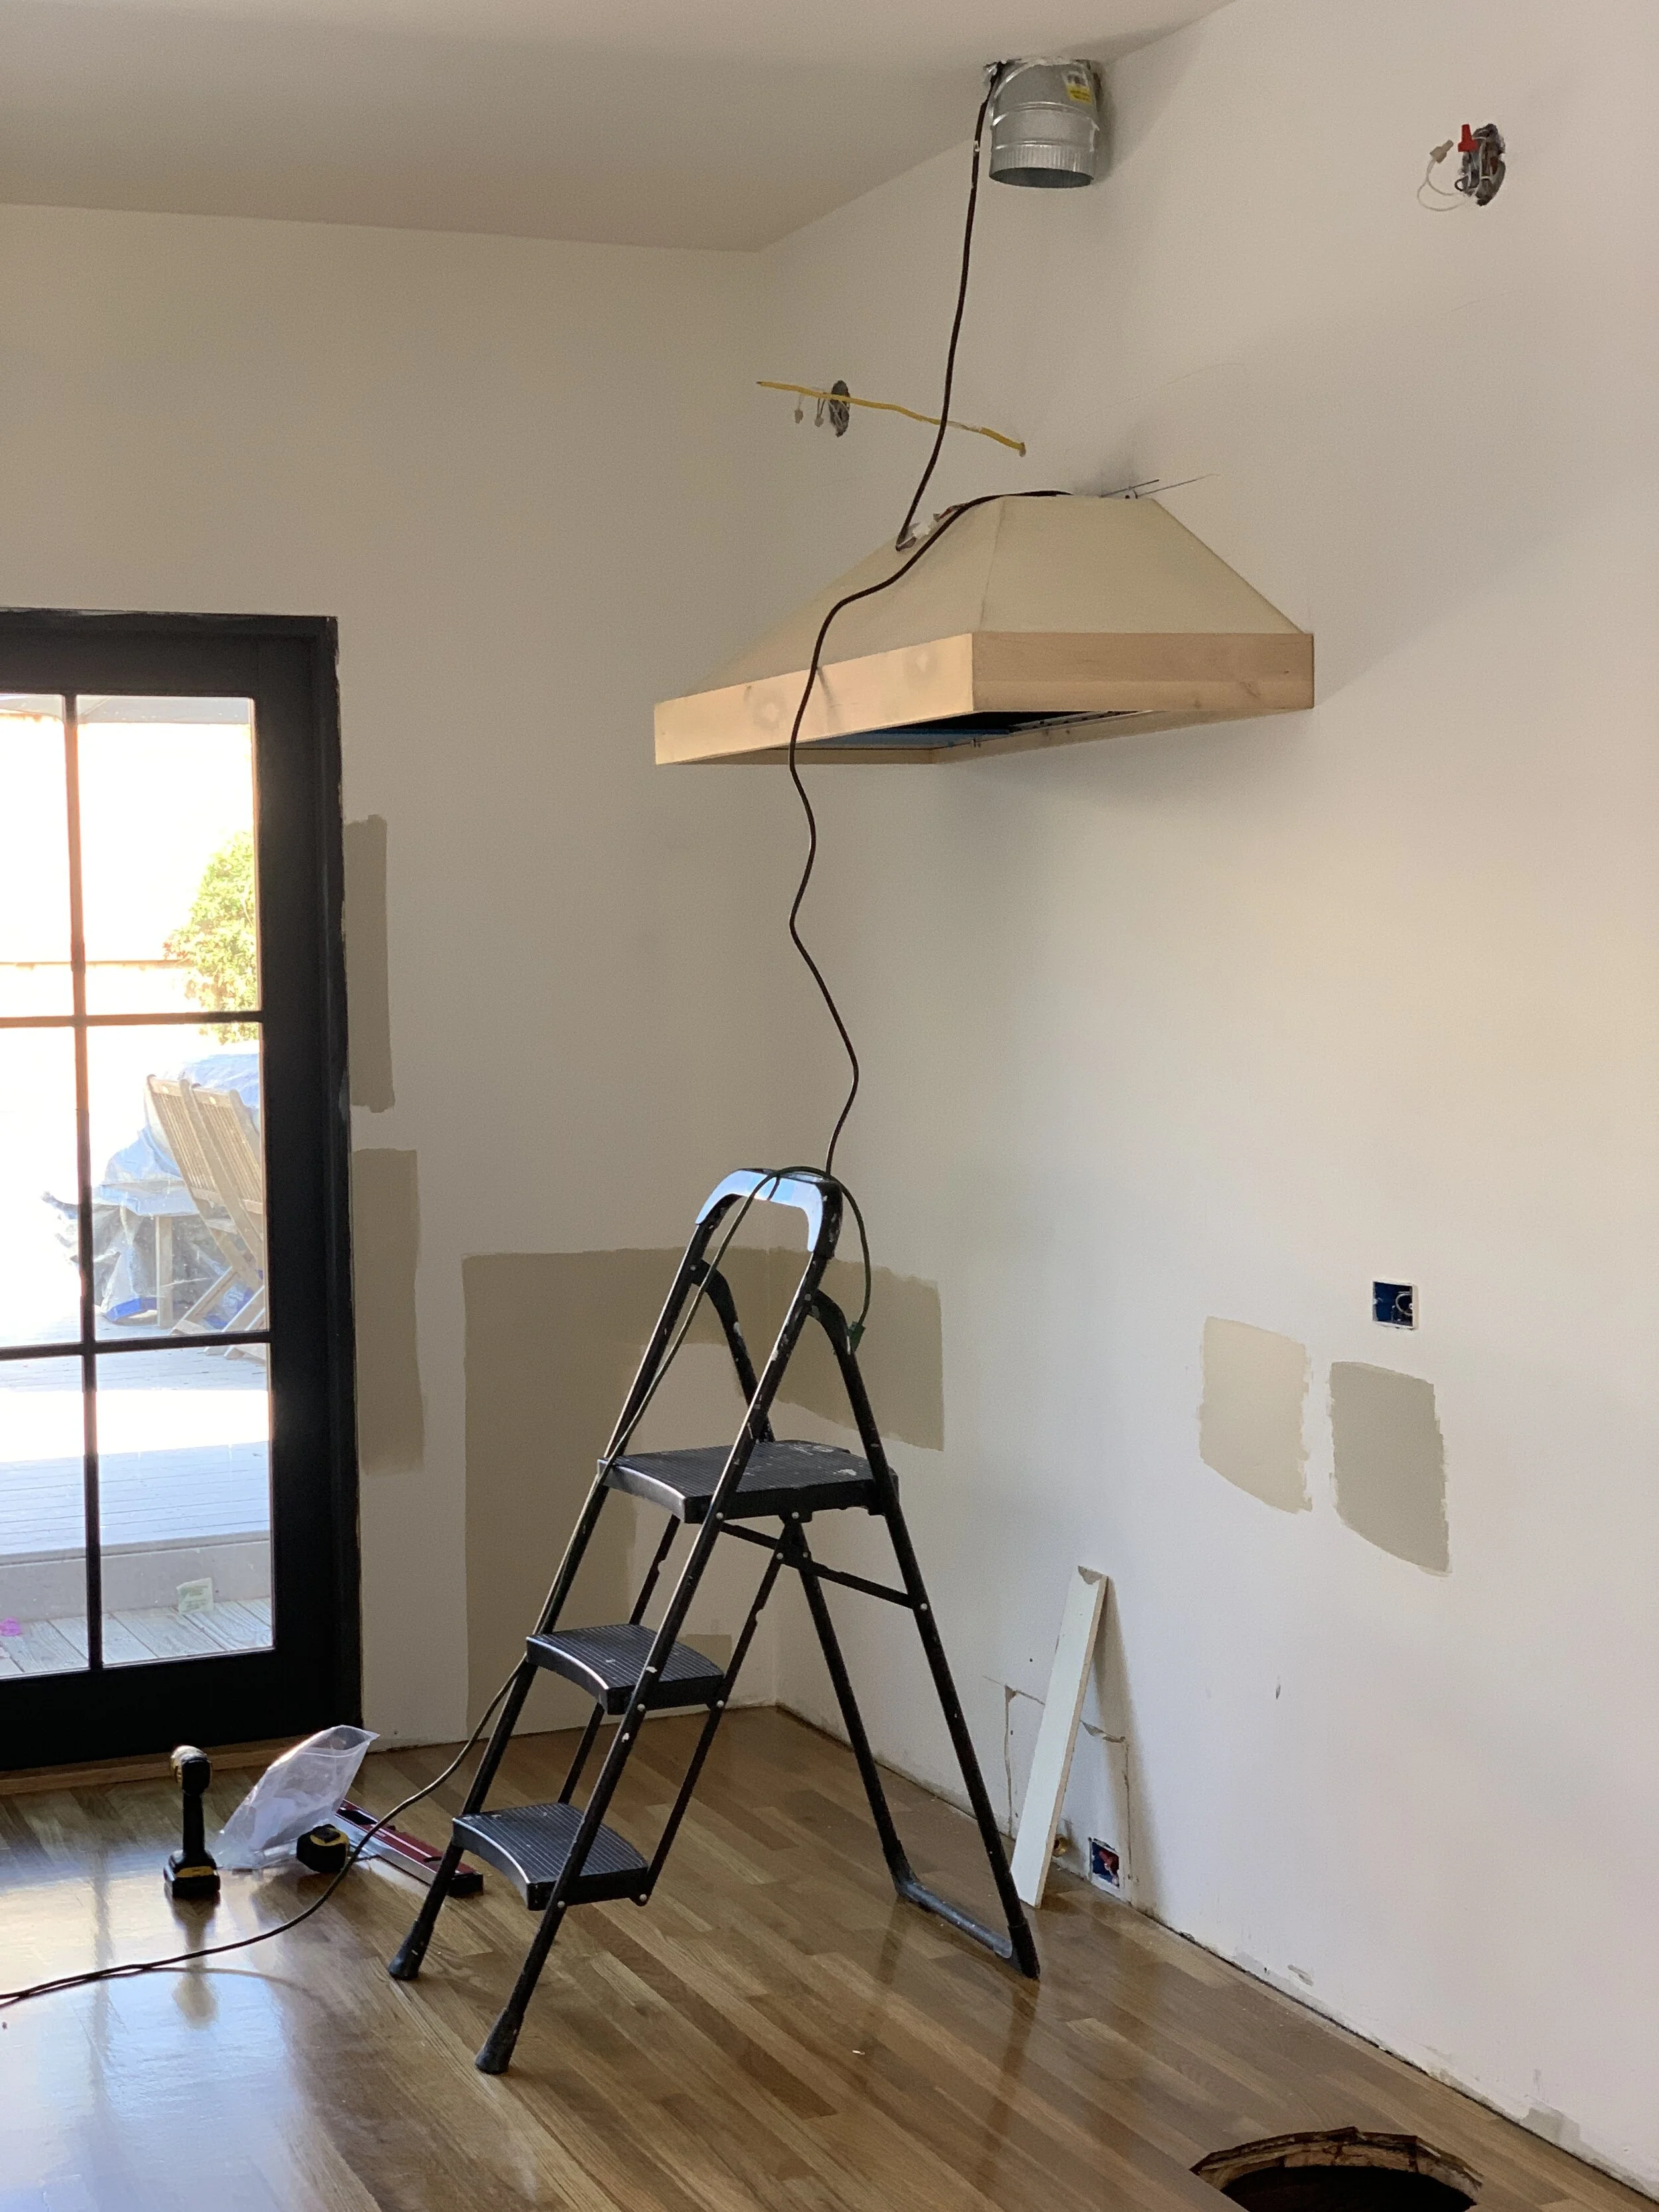
I didn’t like the shape, so I didn’t bother installing it. I just mounted the bottom part (seen above) and chose to make an entirely custom surround. Mostly because I’m picky and partly because I like making things more difficult for myself.
A few things of note:
1. This is a 48” range hood because I bought a 48” range. If you have a 36” range, get a 36” range hood. But, if you have a 30” range, you can go for a 30” OR even a 36” range hood to ground the appliance more.
2. I bought my range hood on eBay*. This particular model retails for $1,500 but I bought mine for $650. What a deal! It was brand new but came in an open box from a reseller. It’s perfectly good but way less expensive! I bought all of my appliances on eBay and saved thouuuuuusands of dollars, do yourself a favor and shop there or at scratch and dent warehouses.
3. This particular range hood is a bit unique. The blower is external, meaning it mounts in the attic rather than inside of the hood itself. See this photo for a better visual explanation. I opted for this because we were venting through the attic and out of the roof anyway, so I wanted to reduce noise by hiding it a bit further from our ears. I mean, who wants a fan blowing by their face when they’re trying to cook a meal and listen to NPR? This design also gives me a little more freedom to play with the shape because I’m not having to worry about additional components or venting for the components either.
*the link I’m providing is updated for a newer 2024 model, please do due diligence to confirm the link takes you to the model with the external blower - if that’s what you’re into.
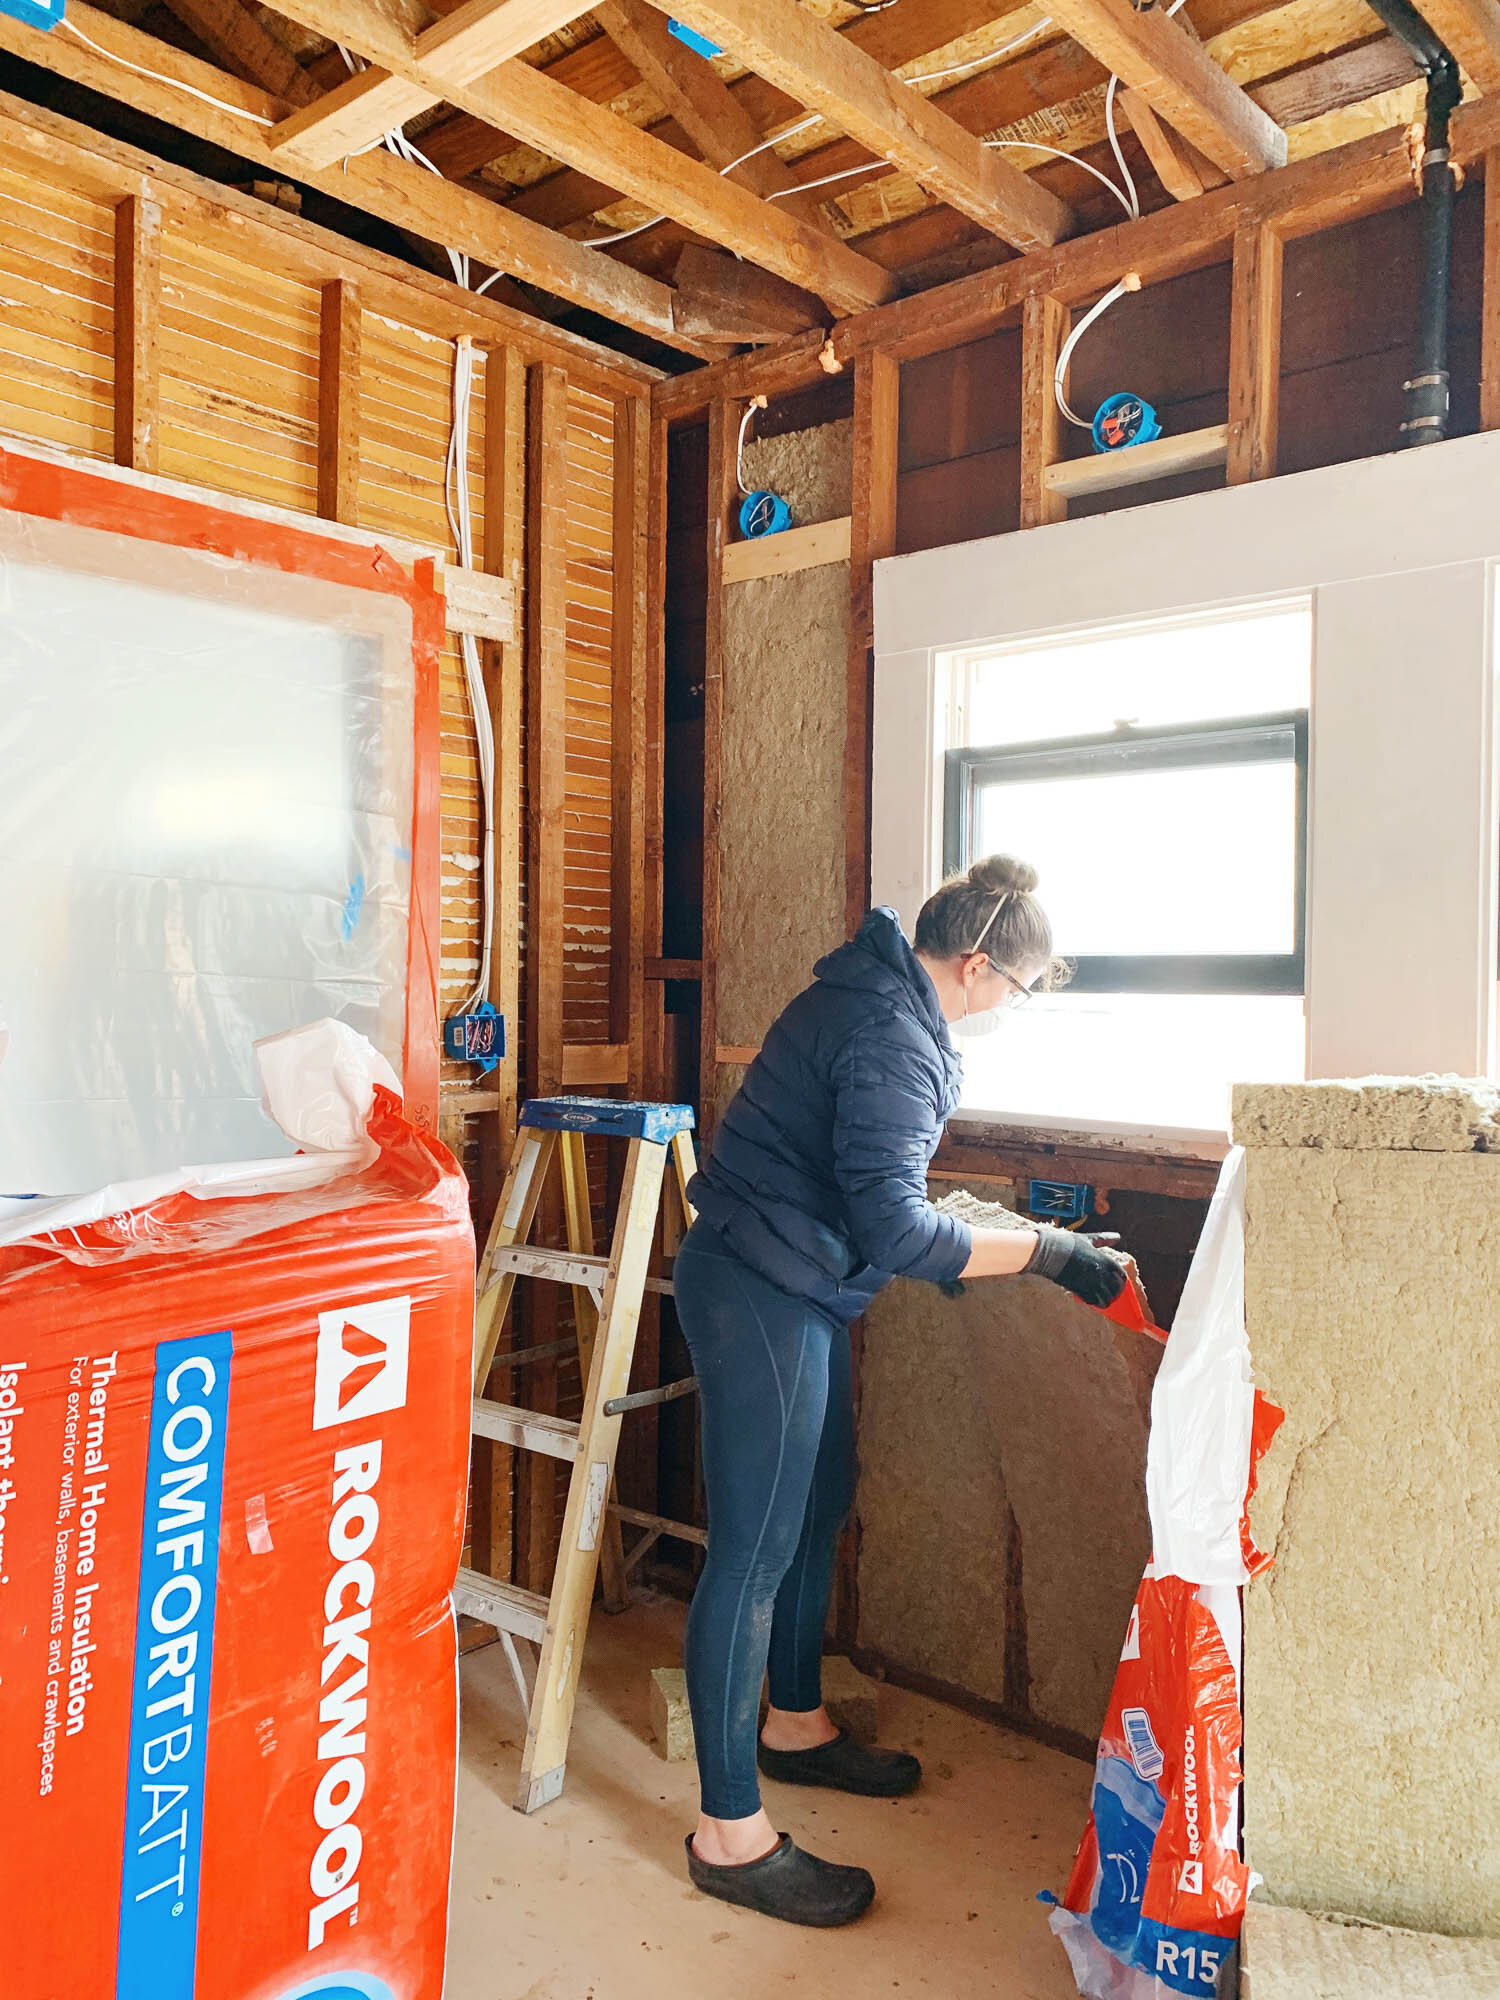
4. It’s important to mount heavy things that hang over your head properly. I had to cut open the wall to add supports directly tied into the studs because I failed to do so during the framing stage. If you plan ahead you can save yourself the cutting step, but oops! Some folks will recommend using toggle anchors rather than bracing in the studs. I’m sure they’d work! But since I had the opportunity to cut into the other side of the wall, I took it. Mounting supports directly into lumber connected to studs is always the best bet. The hood itself is now super supported, and the framing I added is all in the studs, too. Make sure your things are sturdy!
5. I talked a little more about venting in this blog post.
6. I hung my range hood a little higher than basic internet websites advise. I just didn’t want the hood directly in my face while I’m cooking! Is that so much to ask? The bottom of my hood is 69.5” off the ground. It’s just enough that it’s out of my sightline but not so high that I’m staring at the underside of it all the time.
So, I bought a fancy range hood at a discount in order to only use a portion of it, and then customize it for myself. This is kind of my motto, actually.

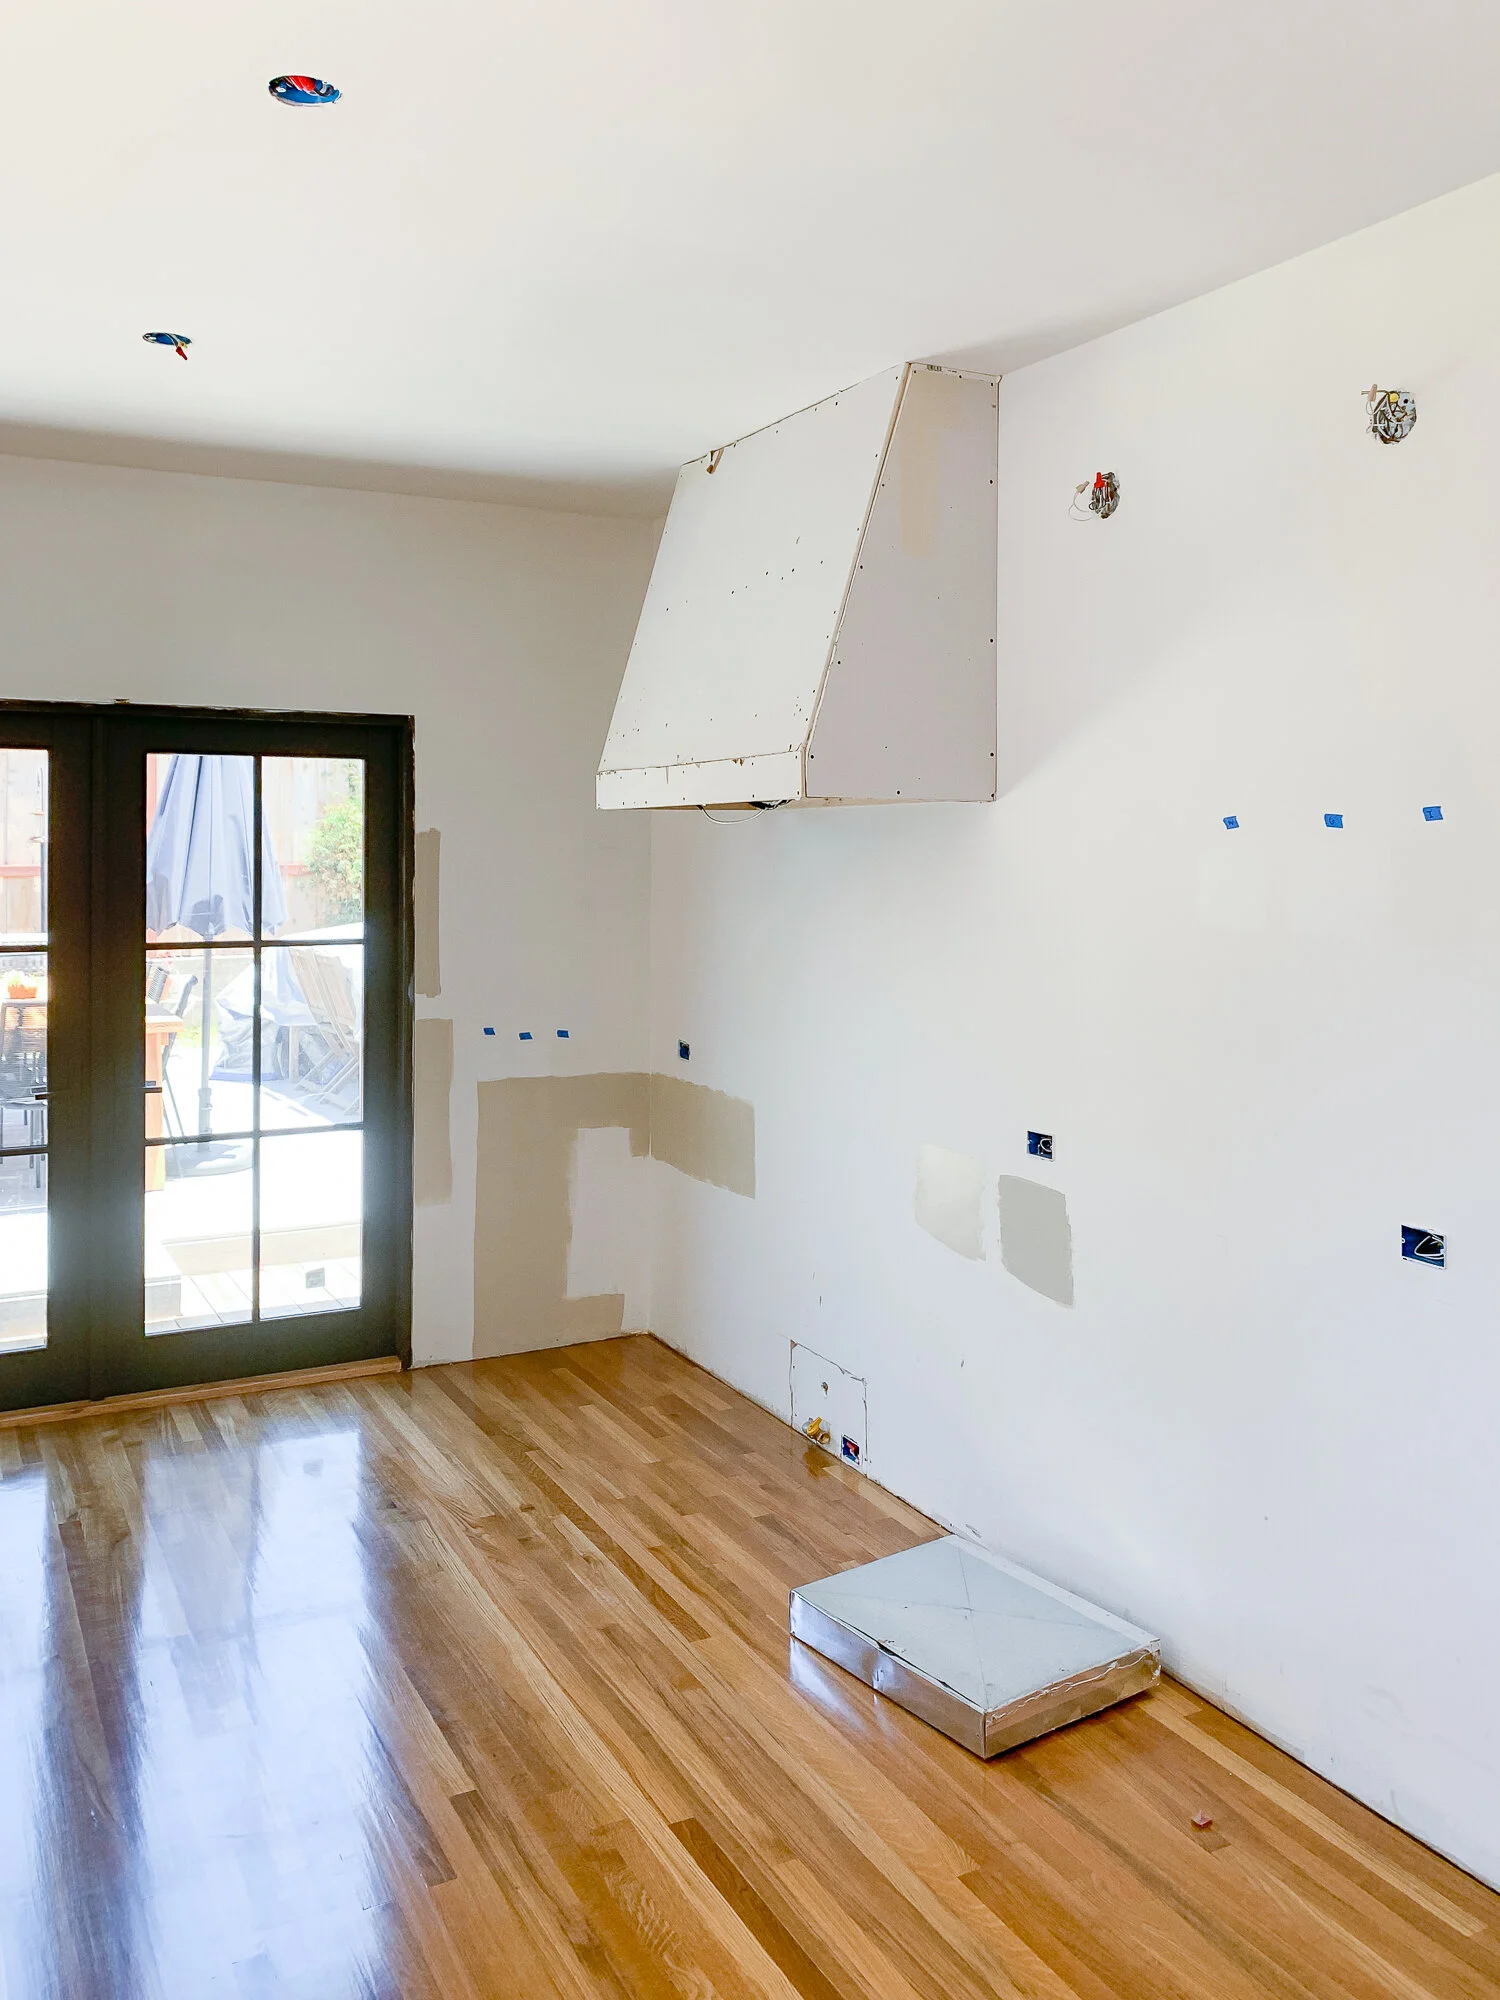
The first order of business was to modify some electrical. The unit came with a plug, so the initial plan was to put an outlet in the wall, plug in the unit, and then encase the entire hood in drywall. However, our local code says that the power supply needs to be accessible. So, an outlet and a plug behind a drywalled hood cover wouldn’t cut it.
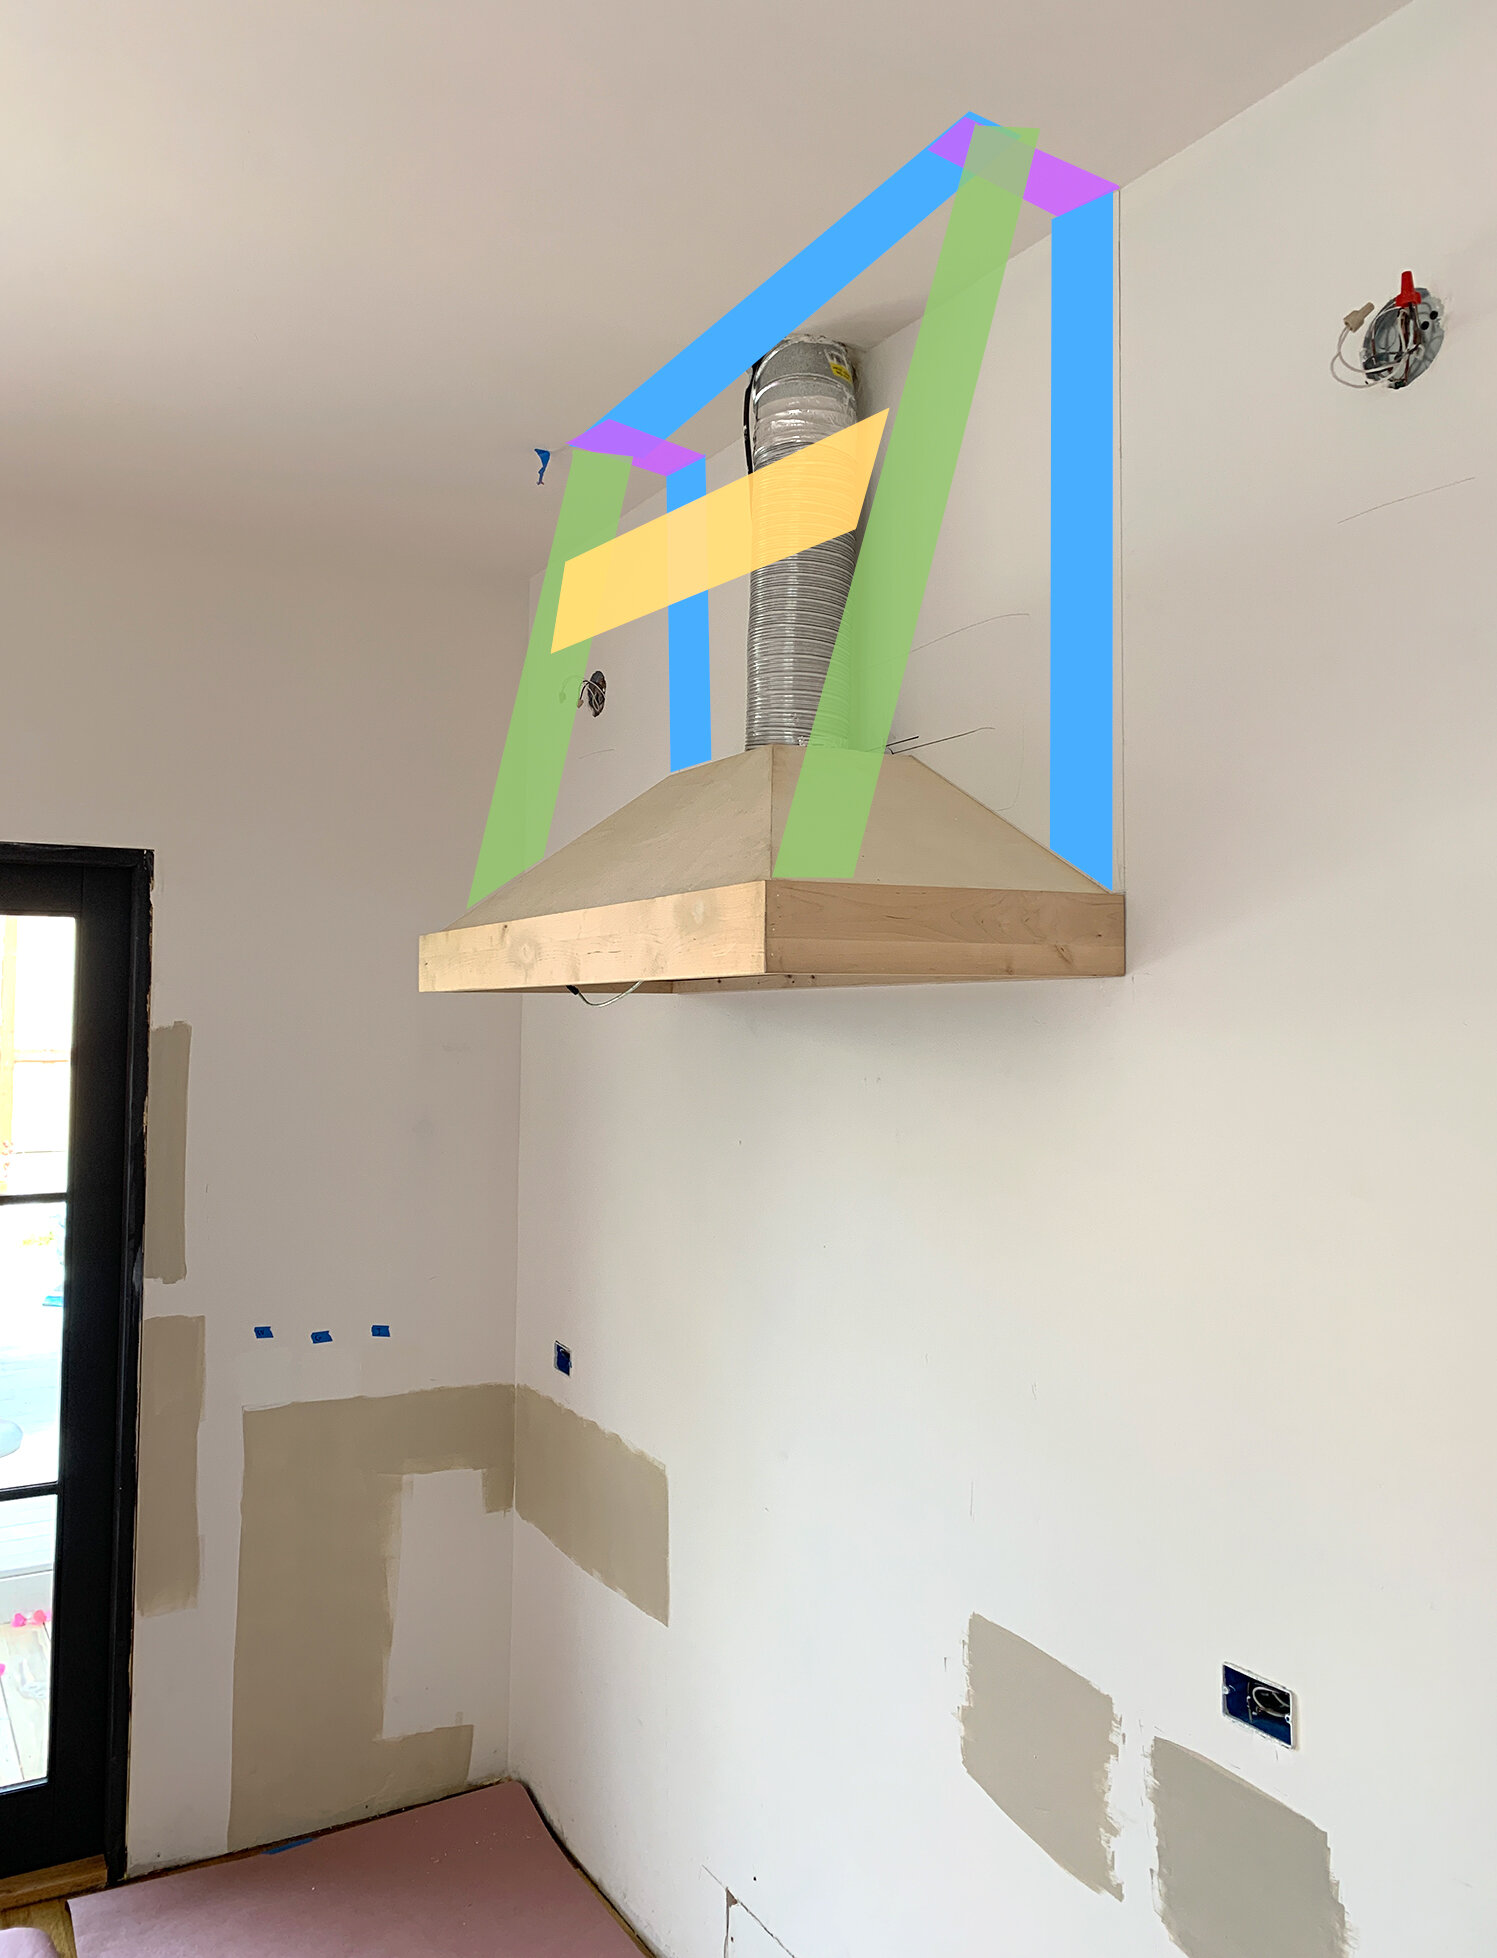
We chopped off the plug (which is okay by code if the manufacture says this is an installation option), drilled through the top of the hood, routed in the power cords, mounted a metal box, then hardwired everything together. (See the photo above for the electrical connection that we made inside of the hood). This connection is inside of the triangular hood part and we can access it by taking down one of the removable baffles. Of course, we covered it with a metal cover after snapping the photo of the wires.
Make sense? In summary, all of the electrical is accessible from sanding at the range by removing a simple baffle. But isn’t at all visible on the day-to-day. That’s what code said to do, so that’s what we did.
Then I had to decide on a design. And this is hard for such an indecisive person! I wanted a hood that had a bit of a statement but wasn’t overly dramatic. I pinned oodles of inspirational hood designs to the Pinterest board above. (You can scroll through it there, or click here.) There are some really beautiful designs with cool curves and linear angles, chunky brackets and delicate transitions, dramatic statements and barely noticeable designs. I like them all!
I was heavily inspired by historic homes and the hood vents in old houses. I even tried hunting for a salvaged antique but didn’t find any of the right size. You can see more of these in my Pinterest board here. I also talked about efficient century-old kitchens here.
I started the design by first looking at existing architectural shapes in my house. Whenever I’m in doubt, I turn to existing angles, shapes, and profiles already in our home’s original design. I looked throughout the house and then modified a recurring theme - tapered, chunky, and understated moldings. My house doesn’t have many flourishes nor curvy shapes. It’s pretty geometric with soft angles and tapered lines like the porch columns or the colonnades in the dining/living room.
There was still a lot of different directions to go from this design, but ultimately chose a wide and tapered but not too pointy design.
How do you like my psychedelic rendering?
This was the result of playing in Photoshop trying to figure out my lumber for the design I chose. I watched Cathy and Garret’s video of building a custom hood vent about 20 times, then designed my shape using their techniques. The blue lines are the support to ground the structure into studs. The purple is to extend the support to the green pieces that would define the shape. The yellow would provide additional support for the whole structure and give the front panel something to screw into.
It makes sense, I guess? But it isn’t the most detailed explanation of plans for construction.
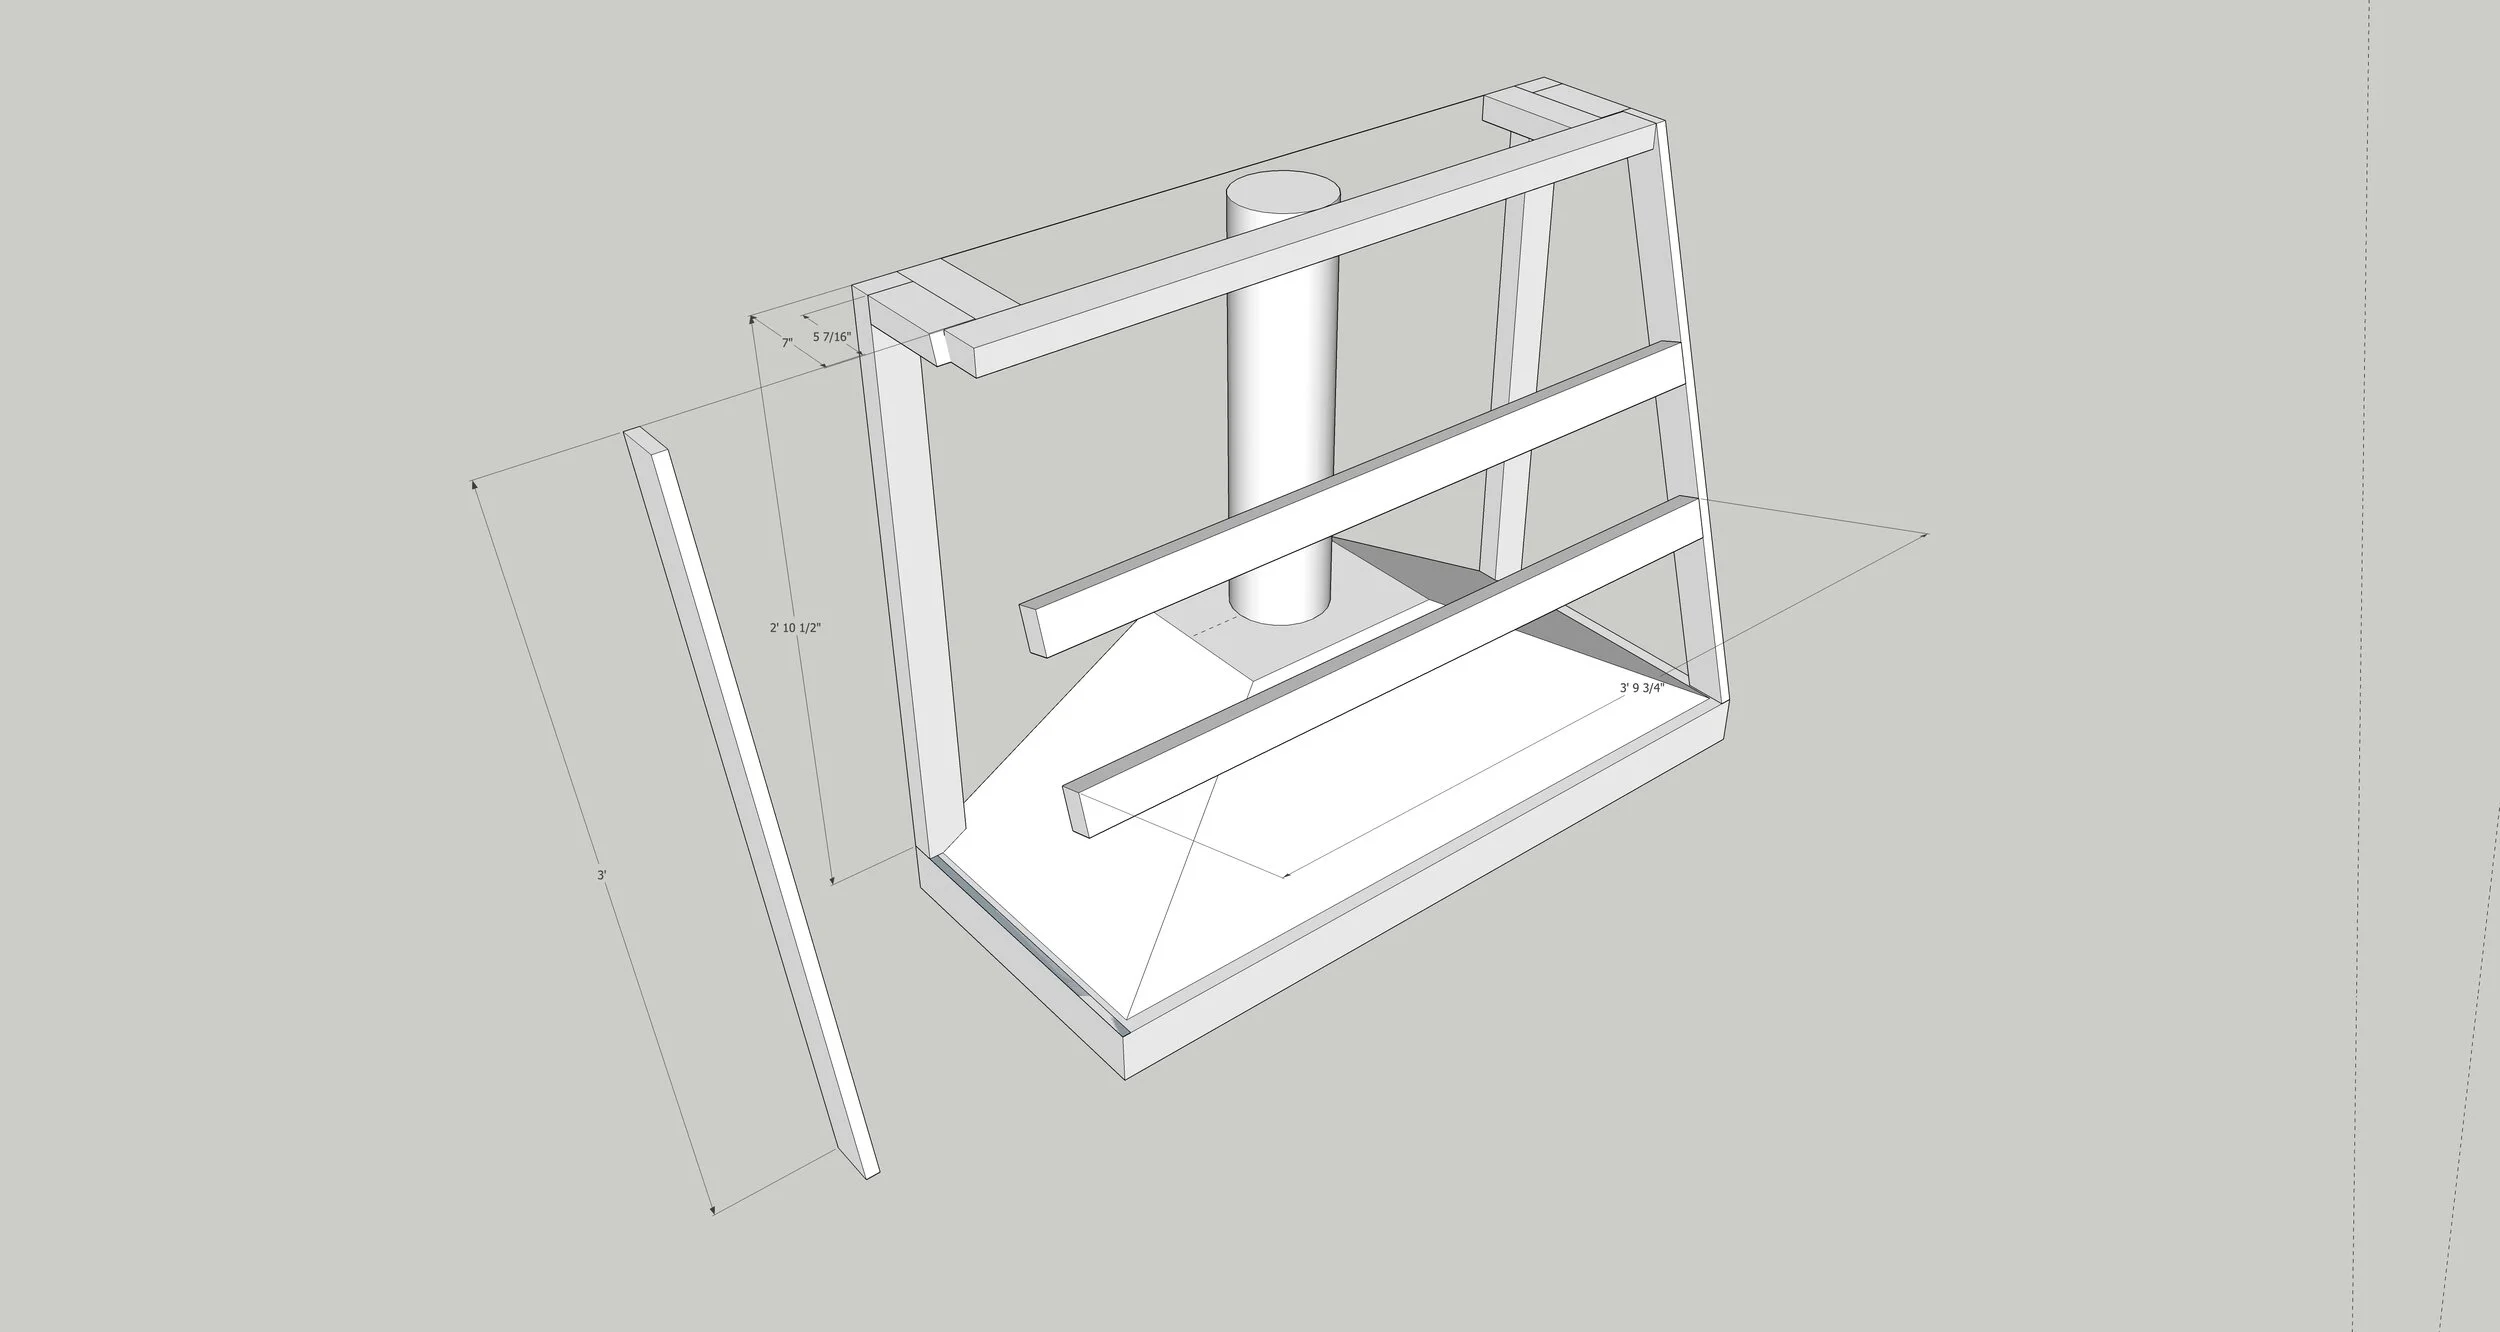
So, I turned to my pal Alison (blogger at Deuce Cities Henhouse) who is a GD wizard in SketchUp! We spent about 30 minutes on the phone as I dictated measurements and angles - as well as random life thoughts that you share with friends when they help you with things. While I rambled, she built the existing range hood unit in 3D, then she used my weirdly colored Photoshop mockup to add the lumber to the design.
The beauty of working like this is she was able to detail the exact cuts I needed to make. She was able to determine the angle I needed to chop on my miter saw without me figuring it out as I was building. I had a perfectly customized plan with all the measurements I’d need.
I can’t tell you how helpful this was. Please find yourself a friend that loves making things in SketchUp, you won’t regret it.

Aaaaand then I built it. Easy as pie. I mean, I had a few issues, as I always do. And it was a sweltering day so I was uncomfortably sweaty, as I always am in the summer. But I did it!
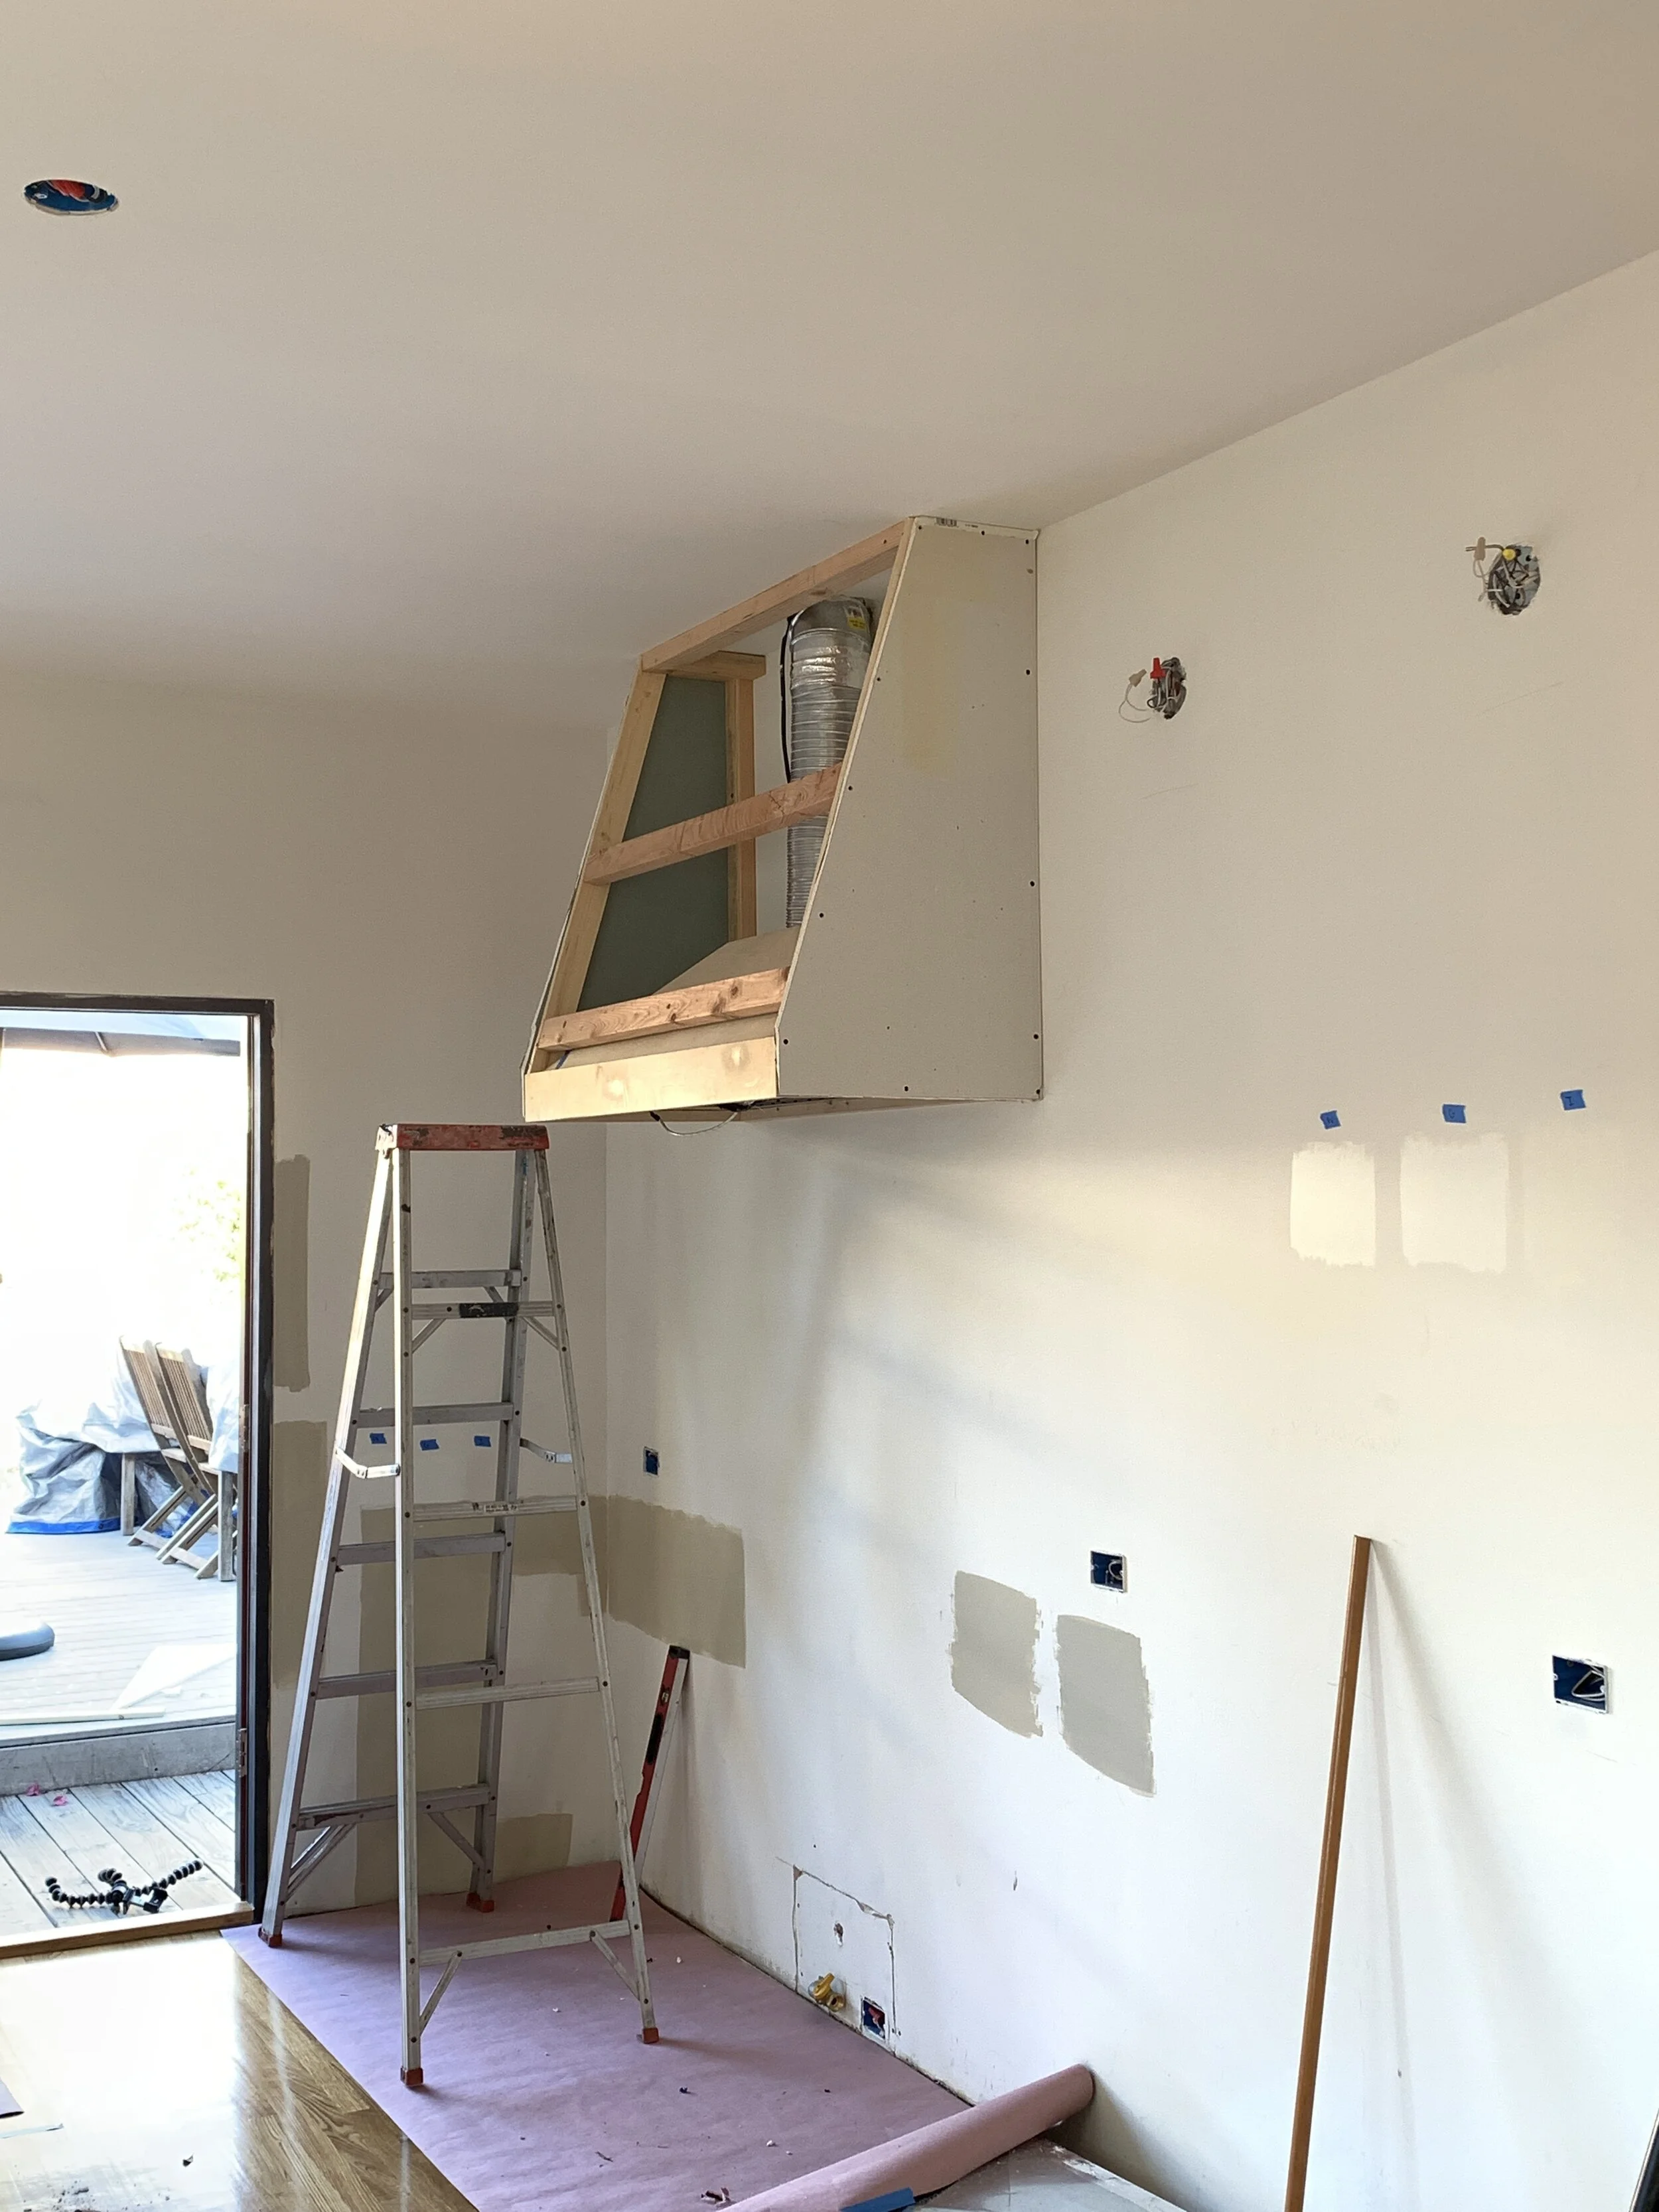
Once I had the framing all done, I plopped some drywall on there. Remember when I saved all the excess drywall? Well, I did and it paid off! I didn’t have to spend any money on more materials, I didn’t have to send the useful sheetrock to the dump, and I didn’t have to go to the store when I was a sweaty mess at 7pm. Win win win.

Drywall cuts so easily by scoring and snapping. It’s amazing, actually, how easy it is to work with such a strong and transformative materials.
I cut the four shapes needed to encase the hood, then used drywall screws to attach it to my oh-so-thoughtfully-planned lumber.

And here she is! It isn’t completely done because I need to tape and mud the seams, but I’m saving that for another day. I might even add wood trim onto the bottom to create a shelf like Natasha’s hood. But, I’ll noodle on and and maybe add it on another day. Or maybe I’ll embrace the drywalled/plastered look. Who knows!
I’m glad I was able to get this construction done before moving in the range in. I highly recommend working top down on projects because you can move the ladder and supplies around really easily. And now that the hood is (nearly) done, I’m anxious to get our the range in place and get back to cooking. It’s been way too long!