Kitchen Renovation Week 3: Framing Continued + A Video!
/This kitchen renovation and bathroom addition are still cruising. Kinda slow, often uneventful, sometimes thrilling. This past week the guys have been wrapping up framing and that included cutting a hole into a perfectly good wall, removing a door, adding two doors, and adding two walls!

If you’re new here, be sure to catch up on the week 1 demolition and week 2 demo and framing beginnings. I’ve been sharing the play-by-play each week as well as videos of the progress, so check those out before jumping into this week 3 update. If you’re really new and have no idea what’s going on, check out this post which gives you a summary of what to expect and why we’re making some odd framing decisions.
Enough of that, let’s get into what’s actually been going on, because progress has been made this week!
Watch The Week 3 Video of More Framing!:
I’ve been sharing videos of the progress on Instagram Stories, but not all of you follow me there, so I put the Instagram clips into a 15-minute YouTube video so you can see the whole evolution and get a good sense of the layout, too.
The video is formatted vertically, so it’s best watched on your phone - but it works on your computer, too!
If that video isn’t loading properly, click here.
Here’s what’s been happening in week three, in text format:
Day 11: Started framing the bathroom window
I talked last week about the french doors, but we also are adding a new window in the bathroom! We’re getting a pretty all-wood casement style window from my friends at Sierra Pacific Windows to fit the exact size that we can squeeze in there. With the limitation from the city on the dummy door, we are losing some of the potential for a big window, but we’re going to fit in a 26”x26” casement that will open up for a nice breeze. I’ll talk more about the window later when it arrives, but at this point, it’s just getting framed in so we can see the outline of where it will be one day soon.

I consulted this great book about architectural details and designs when planning the door design that I talked about last week, and I consulted it again when determining the size of the window. I highly recommend that book! And on that note, here are all of my favorite home design books.

Also on day 11 the framer worked on adding fire blocking into the walls. Fire blocking is basically adding horizontal chunks of wood that go into each of the stud bays to reduce fire damage. Their design is to slow the spread of a potential fire by reducing oxygen to the flames and physically blocking the flames from making their way all the way up the wall and into the attic.
Day 12 & 13: Framed a temporary door
Because the wall dividing the bathroom from the kitchen is going to run into the dummy door, we needed to close off that dummy door to finish the wall. And if we close off the dummy door, we lose access to the construction site because the new french doors won’t be ready for another couple of weeks. So, the crew made a temporary door with our existing one, and then put the new (old) dummy door in its permanent home.

How many times can I say “door” during this post??
In the above photo, the white door is the dummy in its permanent home. The open wood door is the temporary one. For now, pretend that door is one-half of the french doors and the second door will go where all those pieces of plywood are. Below is a view from the interior.

And then they built the wall! See how it runs smack into the white dummy door? That’s why we couldn’t keep that opening as an operable door. That wall is dividing the kitchen from the bathroom so now we can finally get a sense of the future kitchen’s size and footprint. Mmm, it’s going to be good!
The goal of the dummy door from the exterior is to make it look like a normal door. So, we put original hinges on it and I’ll add an authentic doorknob. To do so, I need to patch the existing hole (seen above - that round little guy) so we can put false hardware in its place. I’ve got my trusty wood filler to patch it up! This wood filler is top-notch and won’t shrink when beaten on by the sun like so many other wood fillers do. It comes at a higher cost, but it’s worth it. If you’re interested in all of my favorite tools, materials, and home improvement products, check out my personalized Amazon Storefront with all of my favorite things.
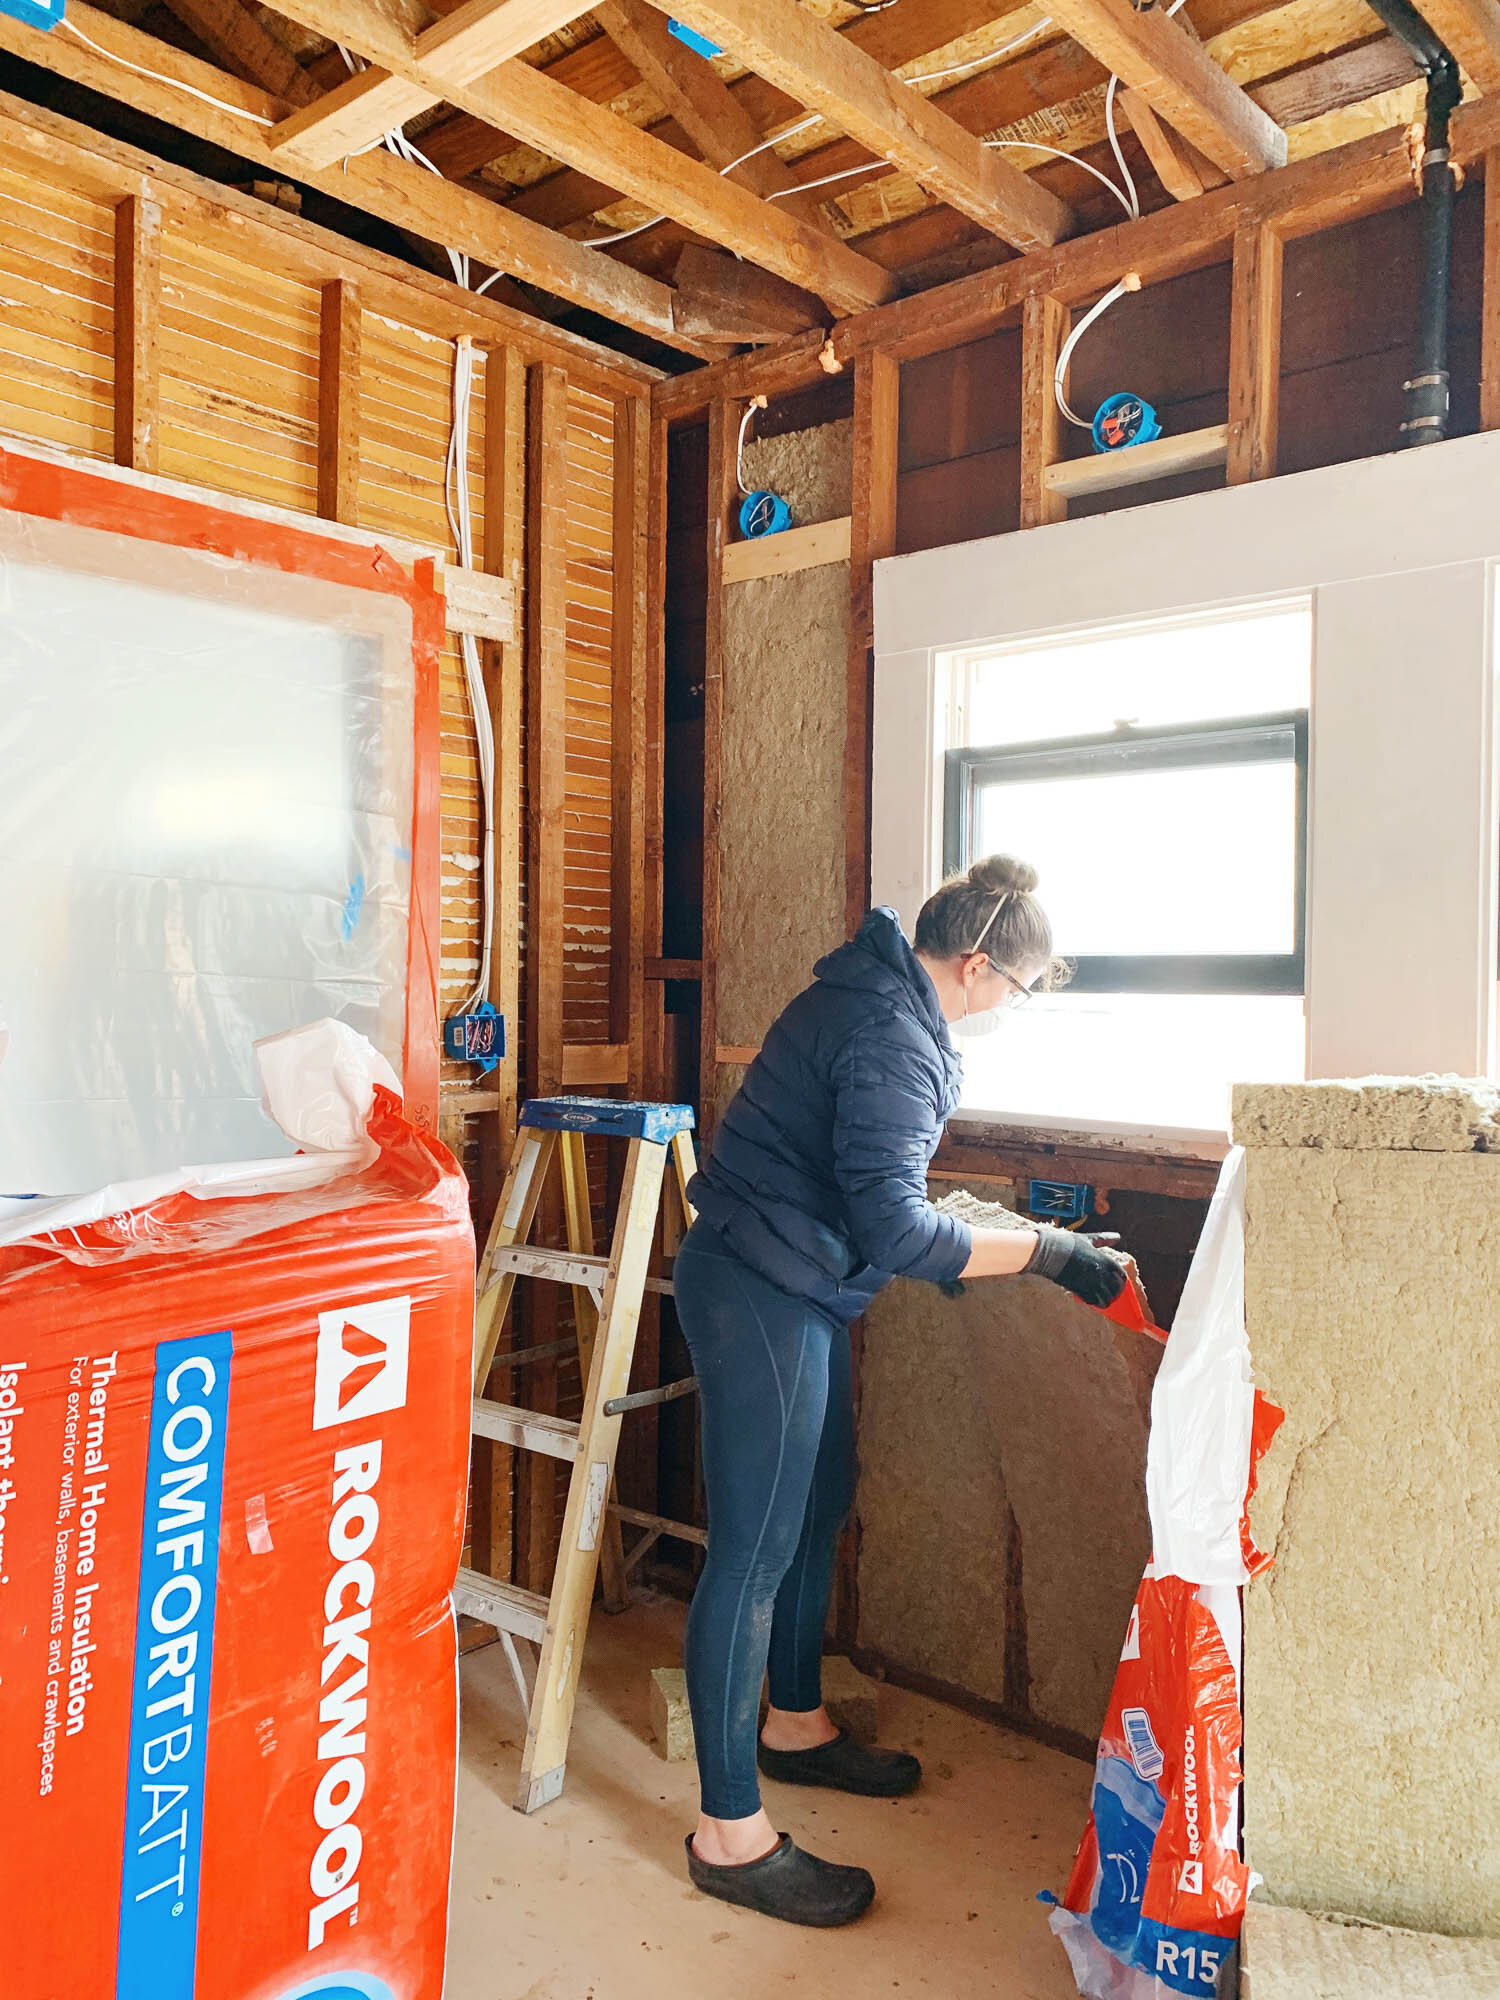
Day 14: Added ceiling support, adjusted window, and framed opening
By day 14, they did a few housekeeping things that aren’t super showy. They added some 2x4s in the ceiling for additional support, started removing the old gas lines that were used for old wall-heaters, and framed the opening from the closet into the den.
They also moved the window over slightly to make the trim match juuuust perfectly on the exterior. It’s hard to explain without visuals, so just watch the video where I can show it more clearly with lots of pointing. The window trim talk starts at the 6:40 mark.
Day 15: Prepped bathroom flooring
Are you getting bored of these updates yet? I kind of am. Let’s pick up the pace.
On day 15, I had them make some changes to the bathroom floor. It was oddly two different heights with weird joist heights so that needed to be fixed. But also I insisted on lowering the flooring by about ¼” because I want the bathroom floors to be exactly flush with the existing hardwoods so there’d be no transition from the master into the master bath. It’s the details, people!
While they were at it, they started building out the shower pan and ledge. That beauty is going to be a spacious yet not palatial 36” wide shower. Dreamy!
Day 16? Day 17? Day 100?: Added new bathroom subfloor
They wrapped up leveling the floors and put the new subfloor in.
OMG I’m getting bored just typing this. Are you really still reading?
Day 17: Cut a hole in the wall of the den
Now it’s really getting exciting!

The framing guy cut a hole into the den for our new vestibule passthrough area. What a thrill! It was like watching a dinosaur crack out of its shell. I wasn’t prepared at all so I scrambled to empty out the room before it got too dusty. Watch the saga of the opening coming to be in the video starting at 10:50.

Once the hole was cut, we got a really cool view into the kitchen and I can really see the vision for the cyclical flow of our house come together.
He started to add the bones of the vestibule wall in the den. We’re borrowing juuuuuuust a biiiiiit of space from that room to make this odd but helpful layout work. Some of you may not like this unconventional layout. But that’s okay with me because I love it!
I got to then have fun with the cleaning post wall demolition. All that dust made for very satisfying vacuuming and moping content. Check out that satisfying clean up in the video at 13:32.
Day 18:
The next day, he came back and spent a couple of hours framing out the header and now the vestibule has really taken shape.

Note that the black door into the master is going to move into the opening that’s been newly framed out. Only one door will be hanging in this triangle of three openings. The other two will be non-fussy pass-throughs.

And the beauty of doing this is we get to enjoy a view from the view straight through these rooms to the backyard.

And then when I back up all the way to the front of the house, I get to admire this view from the office, down the hall, past the bathroom, past the laundry, through the den, through the master, and into the backyard. I absolutely love this view!
What to expect this coming week:
Up next is plumbing. There are some minor changes to make in the kitchen, but the bathroom is an entirely new space so it requires brand new plumbing and drainage and all that good stuff. It will take about a week to do that. After that, it’s electrical, and then inspection, and then subfloor, and then drywall and then new french doors, and new window, and then and then and then and then and then we’ll have a new kitchen and bathroom!
What’s on my agenda for this week:
Order the greywater 3-way valve and actuator to prep our shower for a greywater system one day
Salvage an antique vanity
Decide on the placement of plumbing fixtures
Come back next week or follow along on Instagram Stories for daily updates! These blog posts are always a few days delayed as I take time to compile all the info. Follow me on Instagram for live updates. And don’t forget to watch my video about the week here.