Getting You Up To Speed on the Kitchen and Bathroom Remodel Plans
/I’ve been talking about my kitchen and bathroom remodel for ages. And we’re finally going to get started on the remodel next week! I want to use this blog post to recap the process of getting to today and then loop you in to some of the latest updates and final decisions. Demo has kinda sorta started (as seen below), so now is the time to get well versed in what’s happenin’!
The Overall Layout:
The plan for the remodel is to update the kitchen and add a bathroom to our 3 bed, 1 bath house. The design has been really tricky as it affects the flow of our home and we want to maintain as much original charm as possible. It’s been YEARS of hemming and hawing but we’ve finally found a plan that works well for us.
In summary, we’re demolishing our kitchen and two mudrooms to give us a big empty box to work with. Then, we’ll add a wall down the middle to make a long yet wide kitchen. On the other side of that wall, we’ll add a master bathroom ensuite and a walk-through master closet. Accessing the master bedroom was a really big challenge to figure out but we ultimately decided the best flow was get to it either through the guest room or the kitchen without adding additional hallways.
To get a better idea of the future plans compared to the current layout, watch this quick walk-through video where I point out where the new things will be and show how the floor plan will change in real-time. I’ve received lots of feedback that this was super duper helpful for understanding, so please give it a watch if you’re going “huh?”
If you want to dig deeper on how we came to this layout, click through these links:
Listing our goals and necessities for the layout change and pitching a concept
Sharing all of the reader-submitted ideas for the remodel and my thoughts on each idea
The layout we decided on and updates from the City and Historic
A video tour of the future layout in the space and with live floorplan view
The Historic Designation (and a dummy door):
Our home was designated Historic which is really cool but does have a challenge. In an essence, the City doesn’t want us to modify our windows and doors very much. They are luckily letting us add french doors to the back yard and a new window in the bathroom, but they are making an odd request.
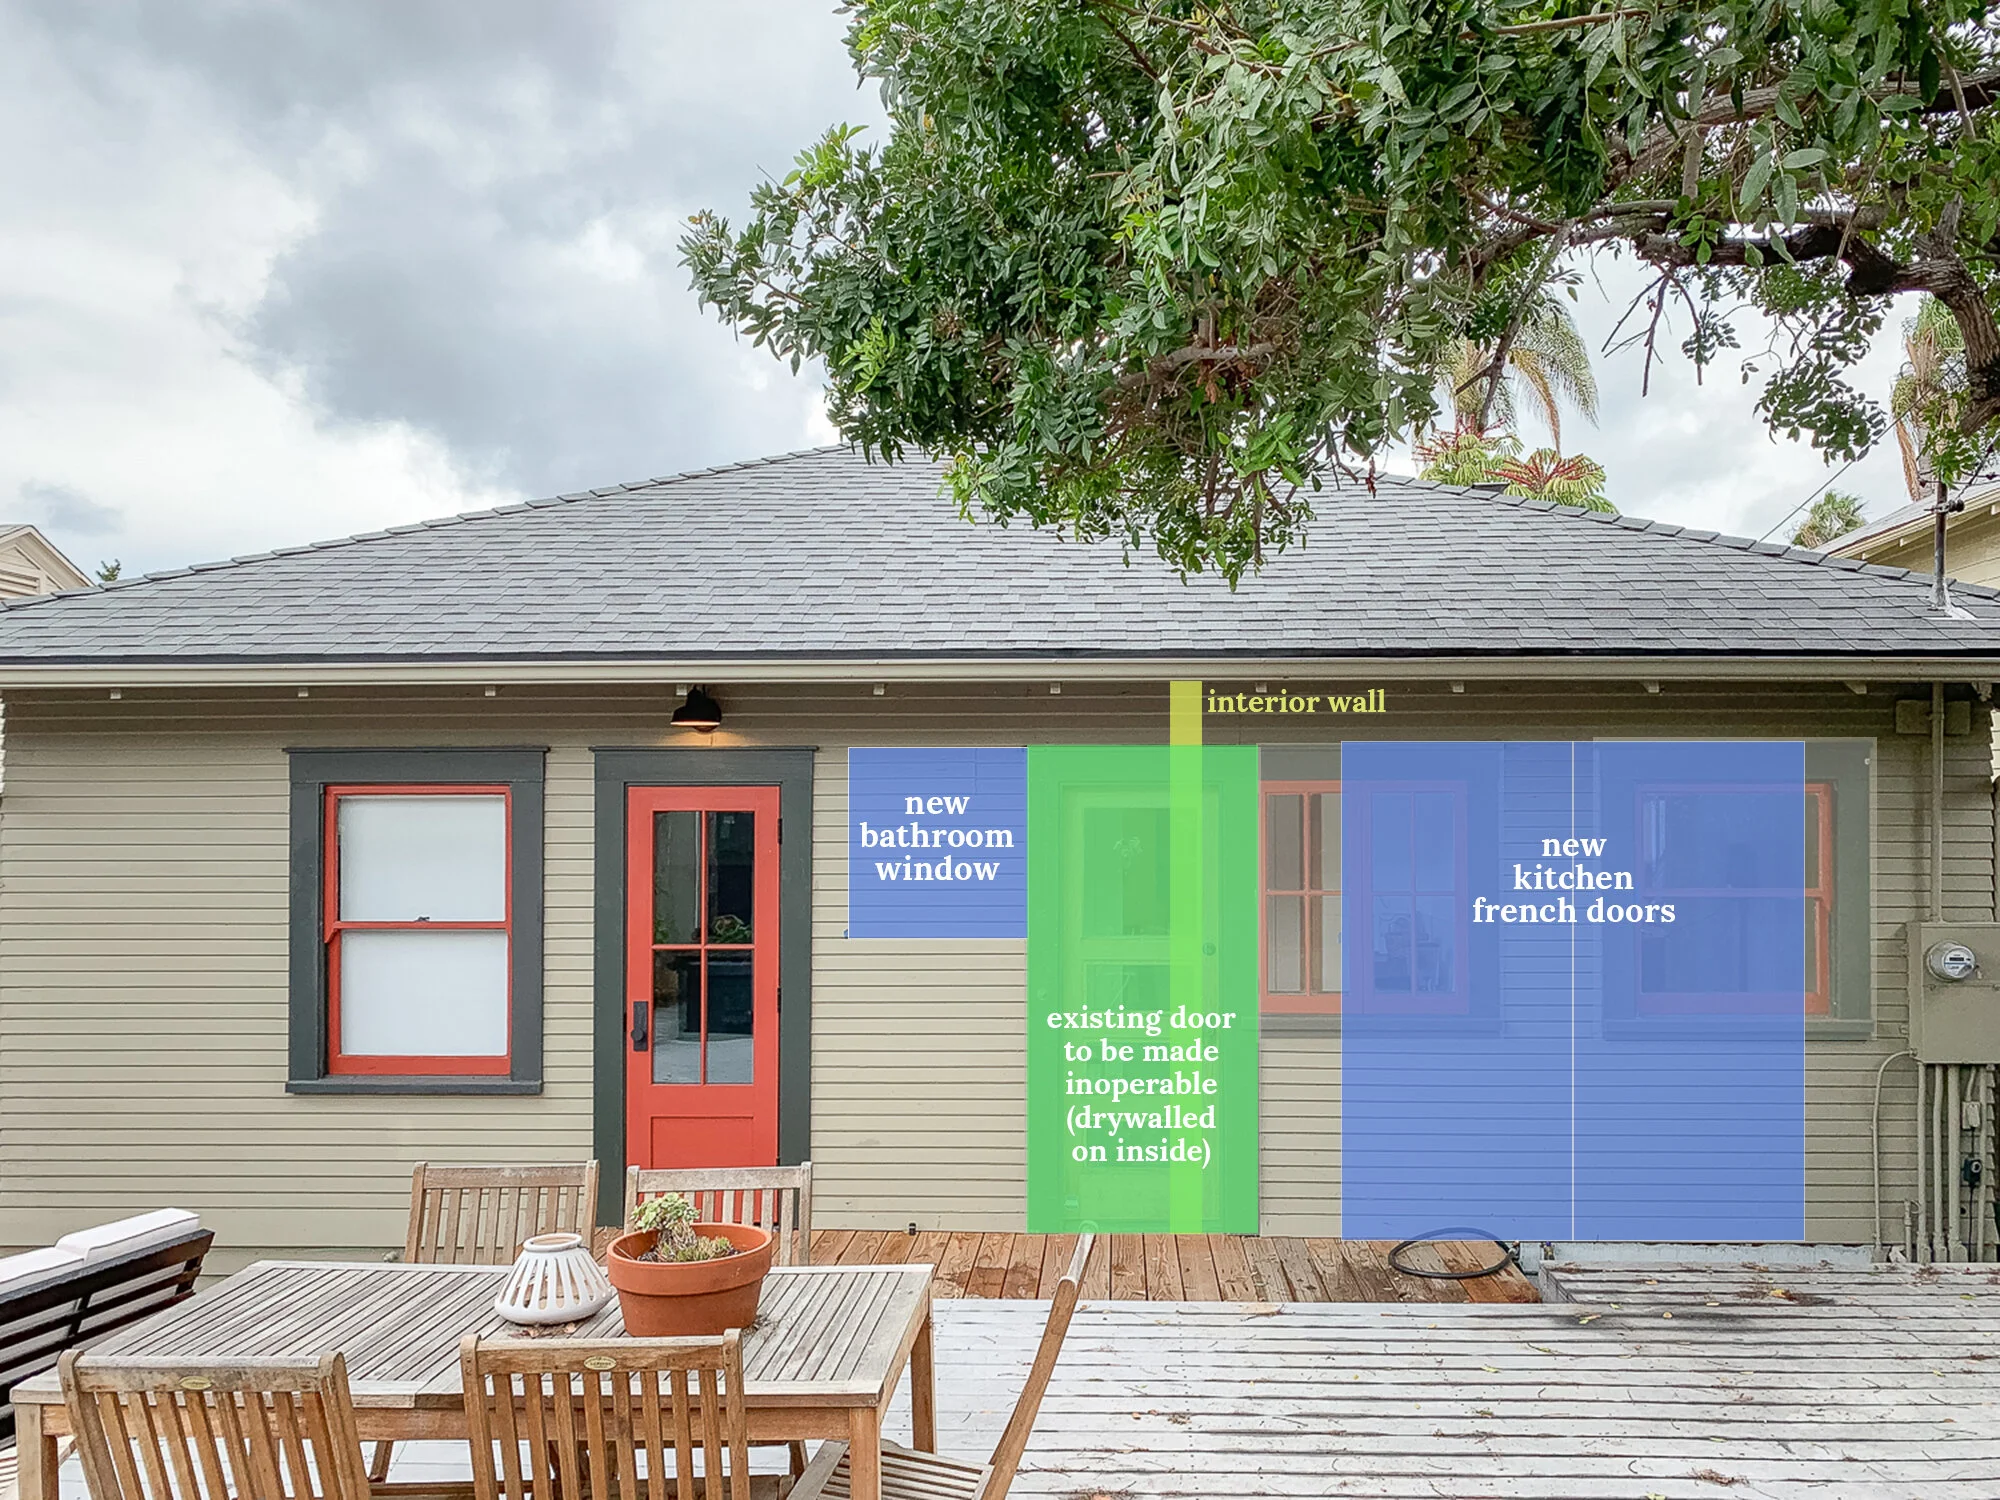
The City doesn’t want us to remove the existing back door (highlighted in green) even though we won’t be able to use it because we’re adding an interior wall right in the middle of it. I initially proposed that we’d cover it with siding to make it disappear, but instead, the City says we need to keep it there and then drywall over the interior. You’ll be able to see the door from the outside, but you’ll have no idea it’s there from the inside. Their reasoning is that they want evidence of the original door opening preserved. Weird. I know. But it’s a compromise I’m willing to make.
It’s especially odd, because nobody from the City came to the house to inspect the door. How do they know its even original?? Since starting demo, I’ve been finding evidence that the windows next to that door were likely added 10 years after the house was built. The door opening may not be original at all! The request to keep the door is peculiar, but it’s a compromise I’m willing to make because their other requests were ones that I simply couldn’t accept.
Here’s more on that process:
The process of getting historically designated and what it means for our house and finances
Negotiating with the City and figuring out how to make compromises
How to get a construction permit and my experience with historic designation
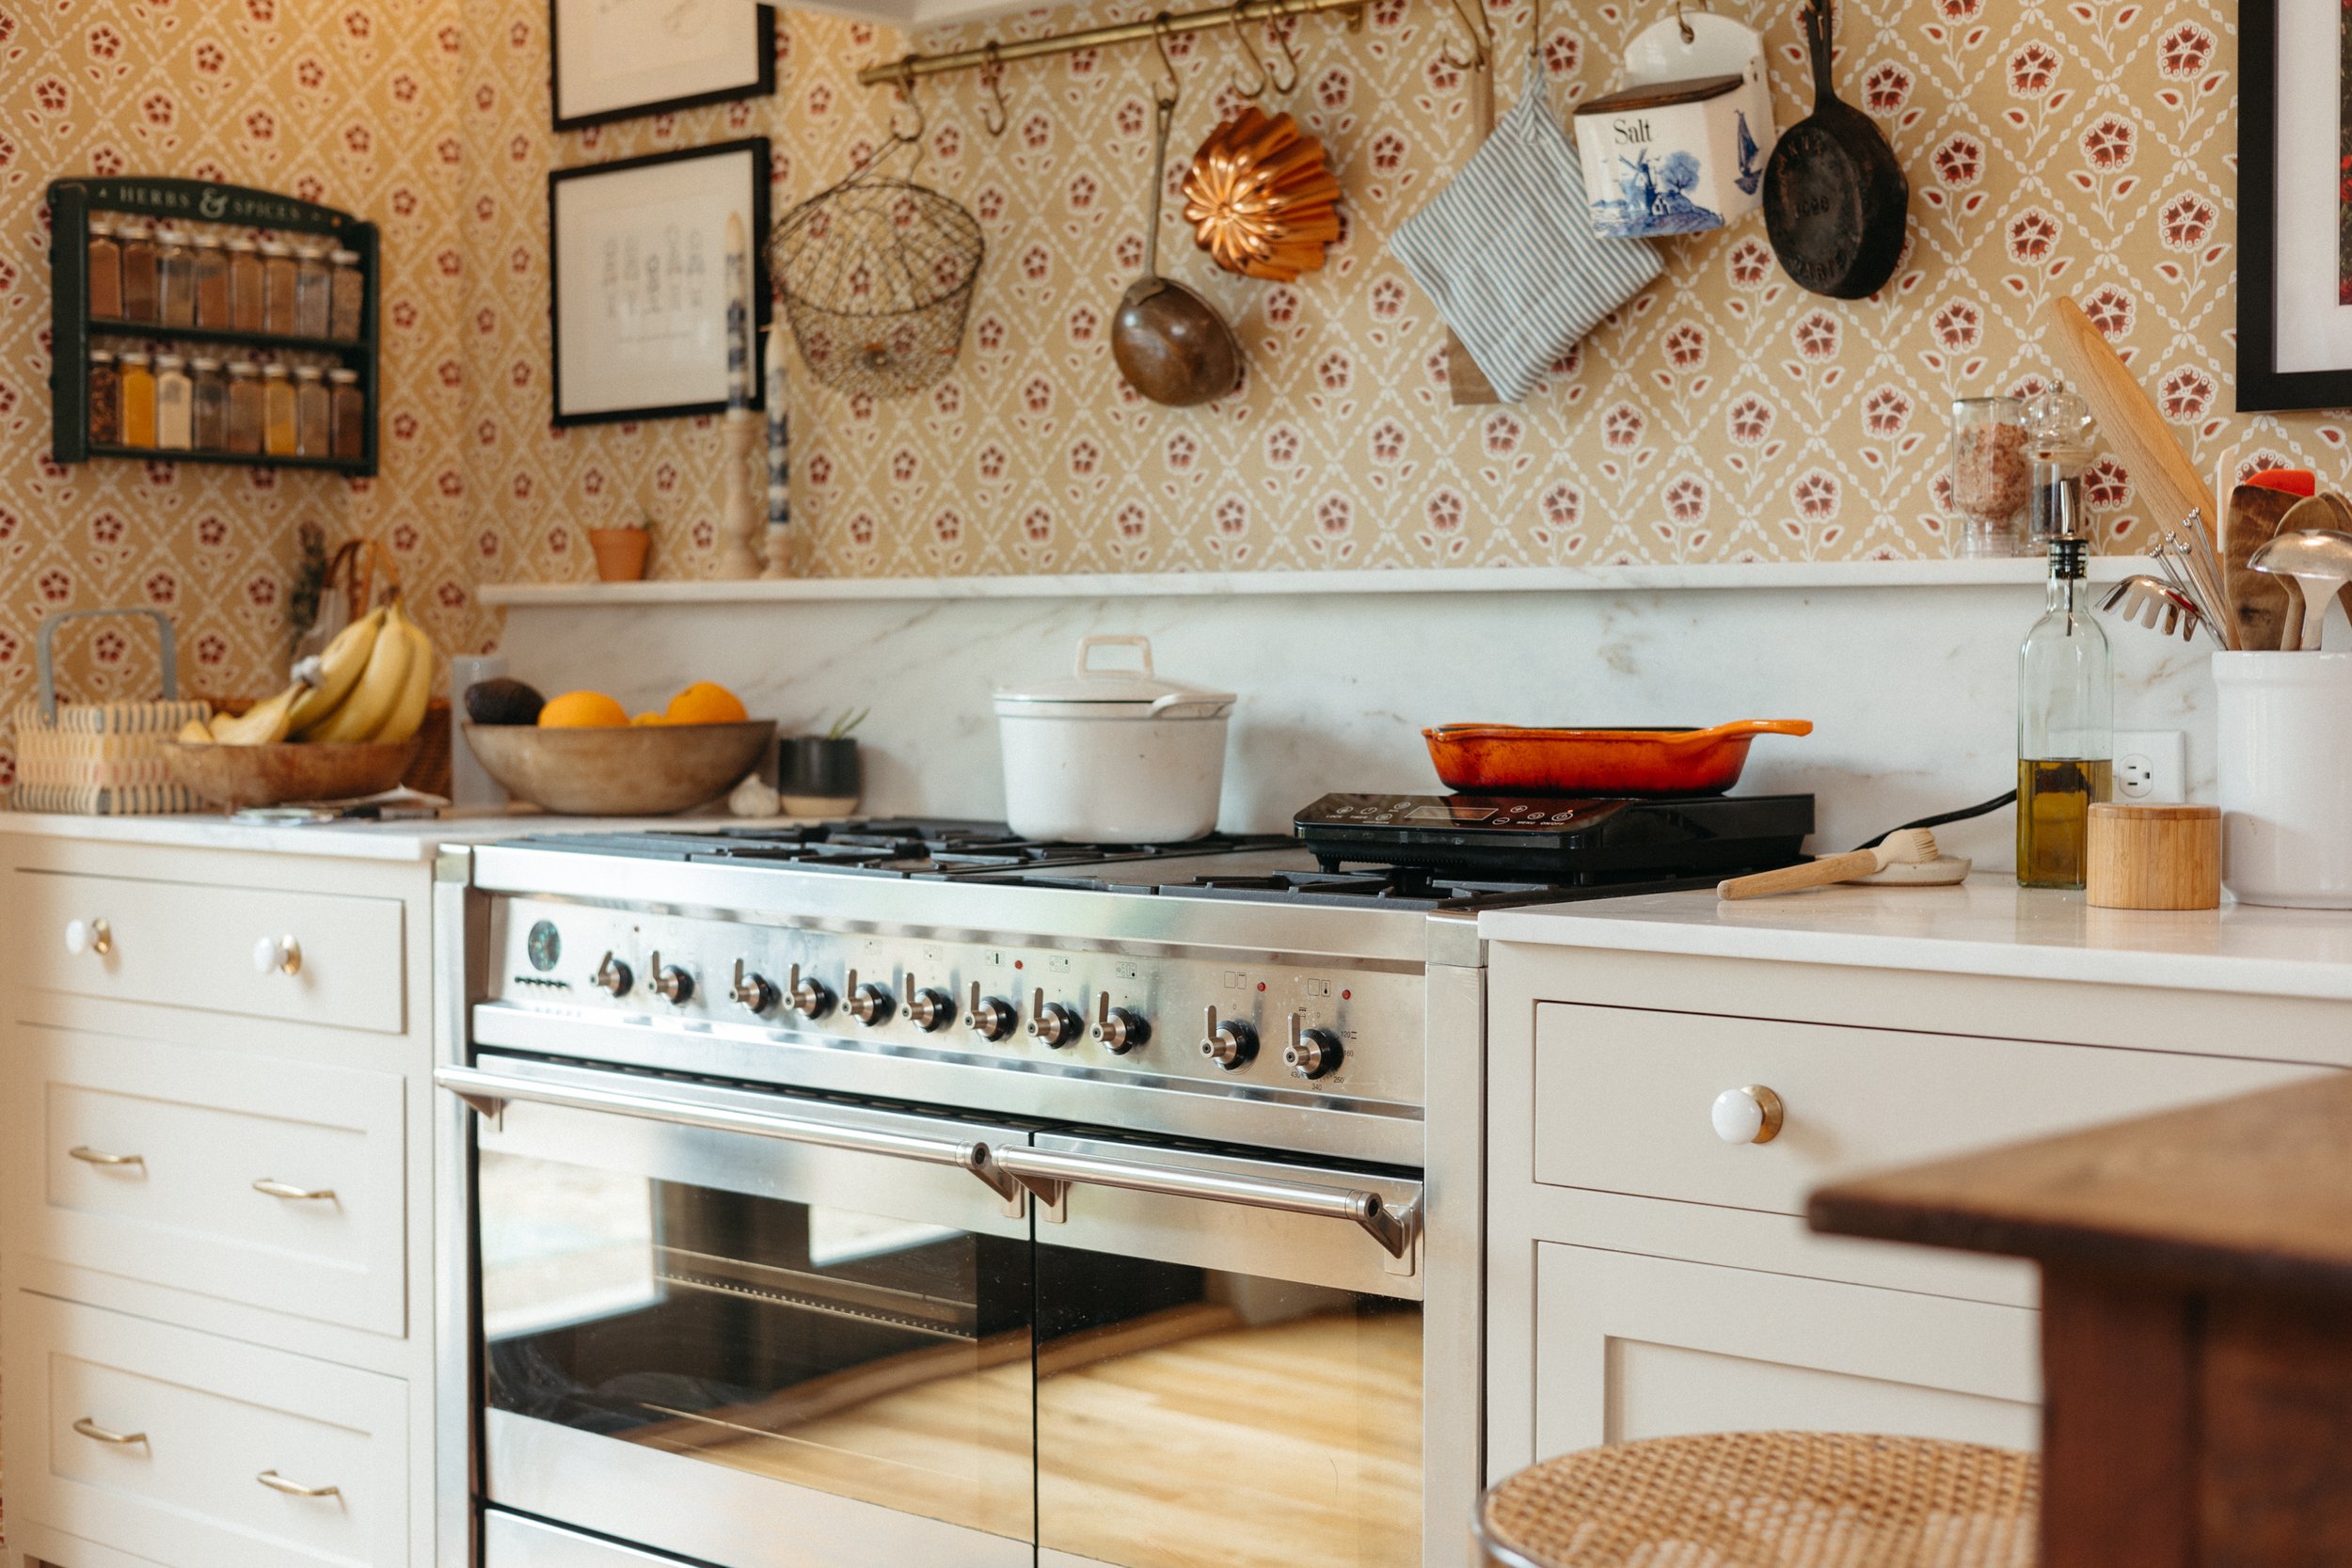
The Kitchen Plan:
Eek! I really really can’t wait for this new space that I think is going to be so so much more efficient and more fitting for our home.

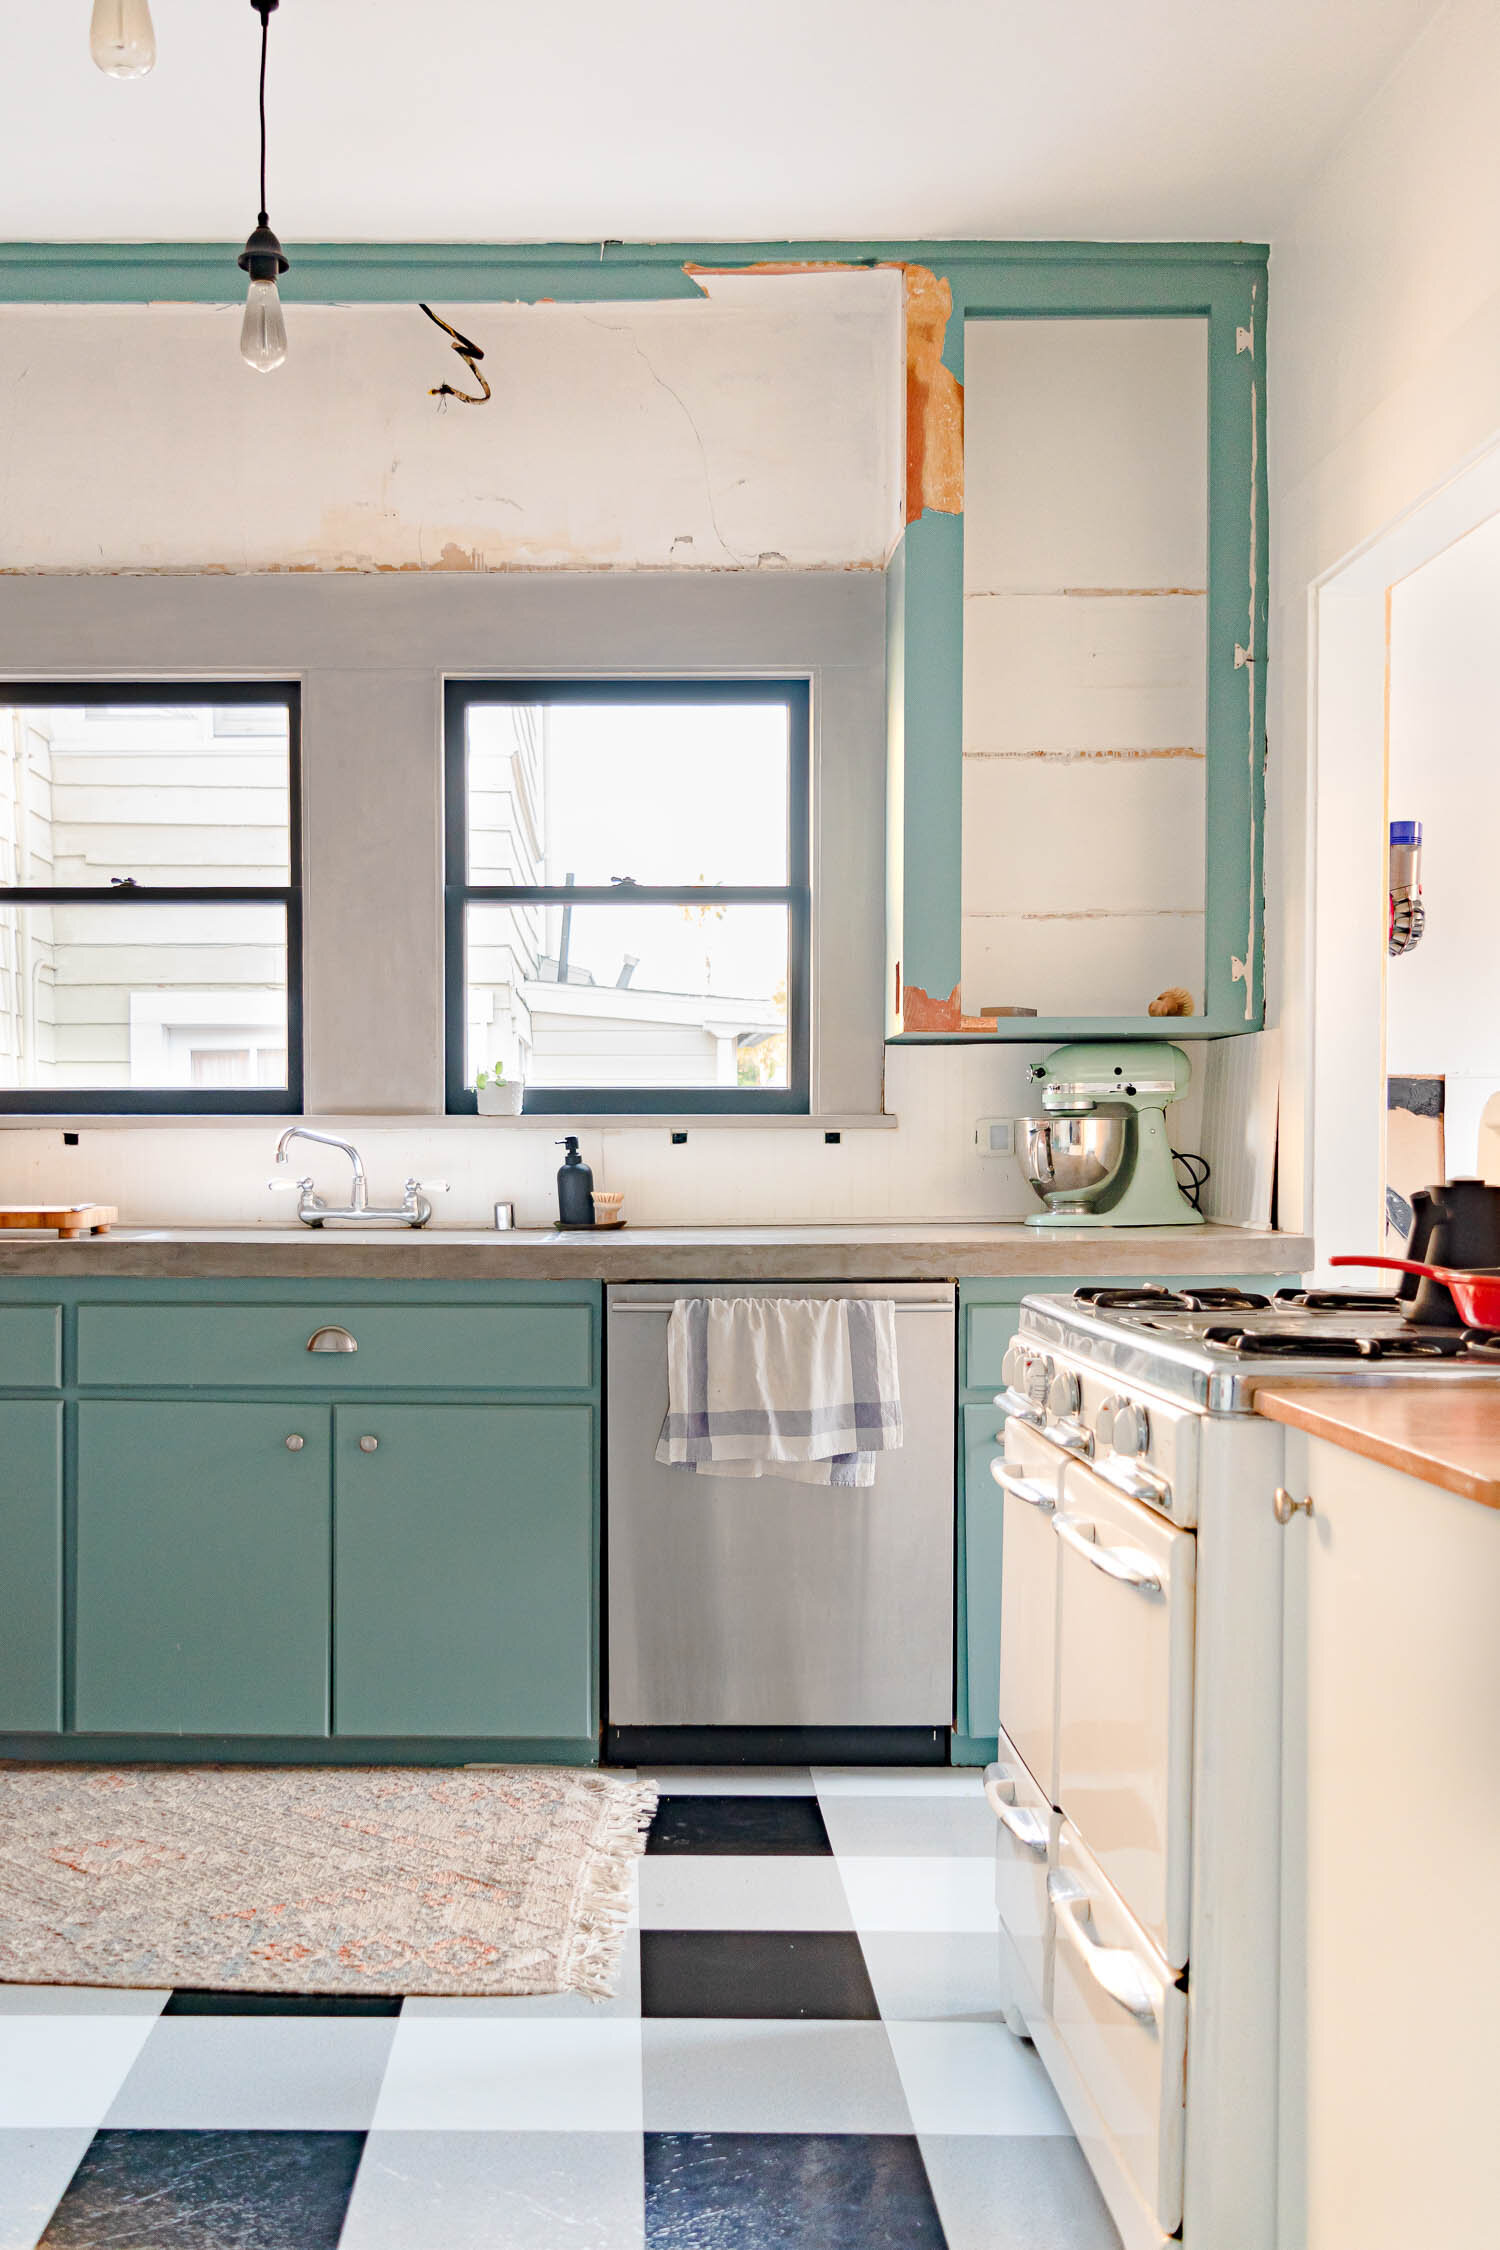
The kitchen previously had a bunch of unusable spaces with the two mini rooms, a wide area with cabinets on one side, and a floating range. It wasn’t horrible, but the functionality wasn’t great. I made a bunch of cosmetic updates but it needs more than a bandaid to get it to a design that will last decades.
The overall design is a wide galley kitchen with the sink and the fridge on one side, then the range and a seating area on the other side.

At the end of the kitchen will be french doors out to the backyard to let lots of light in, and on the other end we’ll have a floor to ceiling pantry for storing food, small appliances, and cleaning supplies.
Stay tuned for more as I break down each of the elements as they come together. And note that the finishes aren’t accurate in these renderings, so don’t worry that I spoiled the reveal!
The Bathroom:
I’m always referring to the remodel of both the kitchen and bathroom as “the kitchen remodel” because it’s the thing I’m most eagerly anticipating and what I’m most focused on, but we’re adding a brand new bathroom where one never existed!

Our house has only one bathroom which hasn’t bothered us. Neither of us get ready at the same time due to Ross’ inconsistent work schedule, and when he’s gone half of the year I have the space to myself. Plus, I spend a total of 3 minutes putting my makeup on and I never do my hair, so I don’t even do much in the bathroom. However, we are looking forward to having a second bathroom when we have guests/kids, during those rare occasions when we both need to pee at the same time, and for resale of our home one day.
The bathroom isn’t going to be a glamorous ensuite but the 5’x10’ space will have everything we need. We’re opting for just a shower since we already have a tub, and I’m currently leaning towards just one sink so we have more counter space. Honestly, what do people need two sinks for? We’ll have a window to the backyard, a vanity with space for the things we need, an antique mirror, and a vintage light fixture. The door to the bathroom is our existing closet door, so we don’t need to modify the footprint of the master bedroom, which is great!
The Closet:
Currently the master is accessible only through the den which is fine now but when the den serves as a guest/kids room, the master bedroom is entirely inaccessible. We thought about cutting off three feet of the den to turn it into a hallway but that seemed like such a waste of space. So, we are going to borrow a small corner of the den to create what I’ll refer to as “the vestibule” which is on the plan below as that little 3’x3’ space to the left of the couch.

The little vestibule will create access from the kitchen, through the closet, and into the master (or into the den). We’ll have a door separating the master from the den and a pocket door from the kitchen (by the table) into the closet portion of the master.

What I like about the plan is we basically added a hallway, but it’s entirely functional. From the kitchen, the hallway is pantry storage and a space for chairs behind the table, then it becomes our master closet, and then it becomes a private vestibule. The jog in the wall means we can’t see the kitchen nor master from one another so the spaces don’t feel like they’re on top of one another.

The closet plan isn’t for everyone, I get it. But it works for us, it doesn’t impact our home too much, and it’s the most efficient layout possible. Plus, who doesn’t want quick access from the bedroom to the coffee or ice cream?
We’re going to have two closets on either side of each other with a hallway down the middle. We’ll keep everything tidy by having doors on the closets and smart storage systems to keep everything organized. Neither of us own many clothes and we’re perfectly happy without a grand walk-in closet.
The Construction Strategy:
I’ve been struggling with how much to hire out versus how much to DIY. I love being involved in projects and I like to push myself to learn and do new things. But I do need to be realistic with myself and remember that I’m only one person. Ross travels a lot so he isn’t around to be my helper and I don’t like forcing my friends to help me heave construction materials. I also don’t want to get burned out then lose steam and not be able to finish the project in a timely fashion.
So, we’re going to hire some of the work out. Not all of it - but some of it. You’ll still get to see me install flooring and install cabinets and hang shelving and all that fun stuff. But I will take a step back when it comes to major work that requires more than two human hands or work that requires trained professionals.

I have great respect for the people that can completely DIY an entire renovation, but I also respect the trades that have been doing this work for years. There’s no shame in hiring things out even if it feels like all of your favorite home accounts are working on projects by themselves.
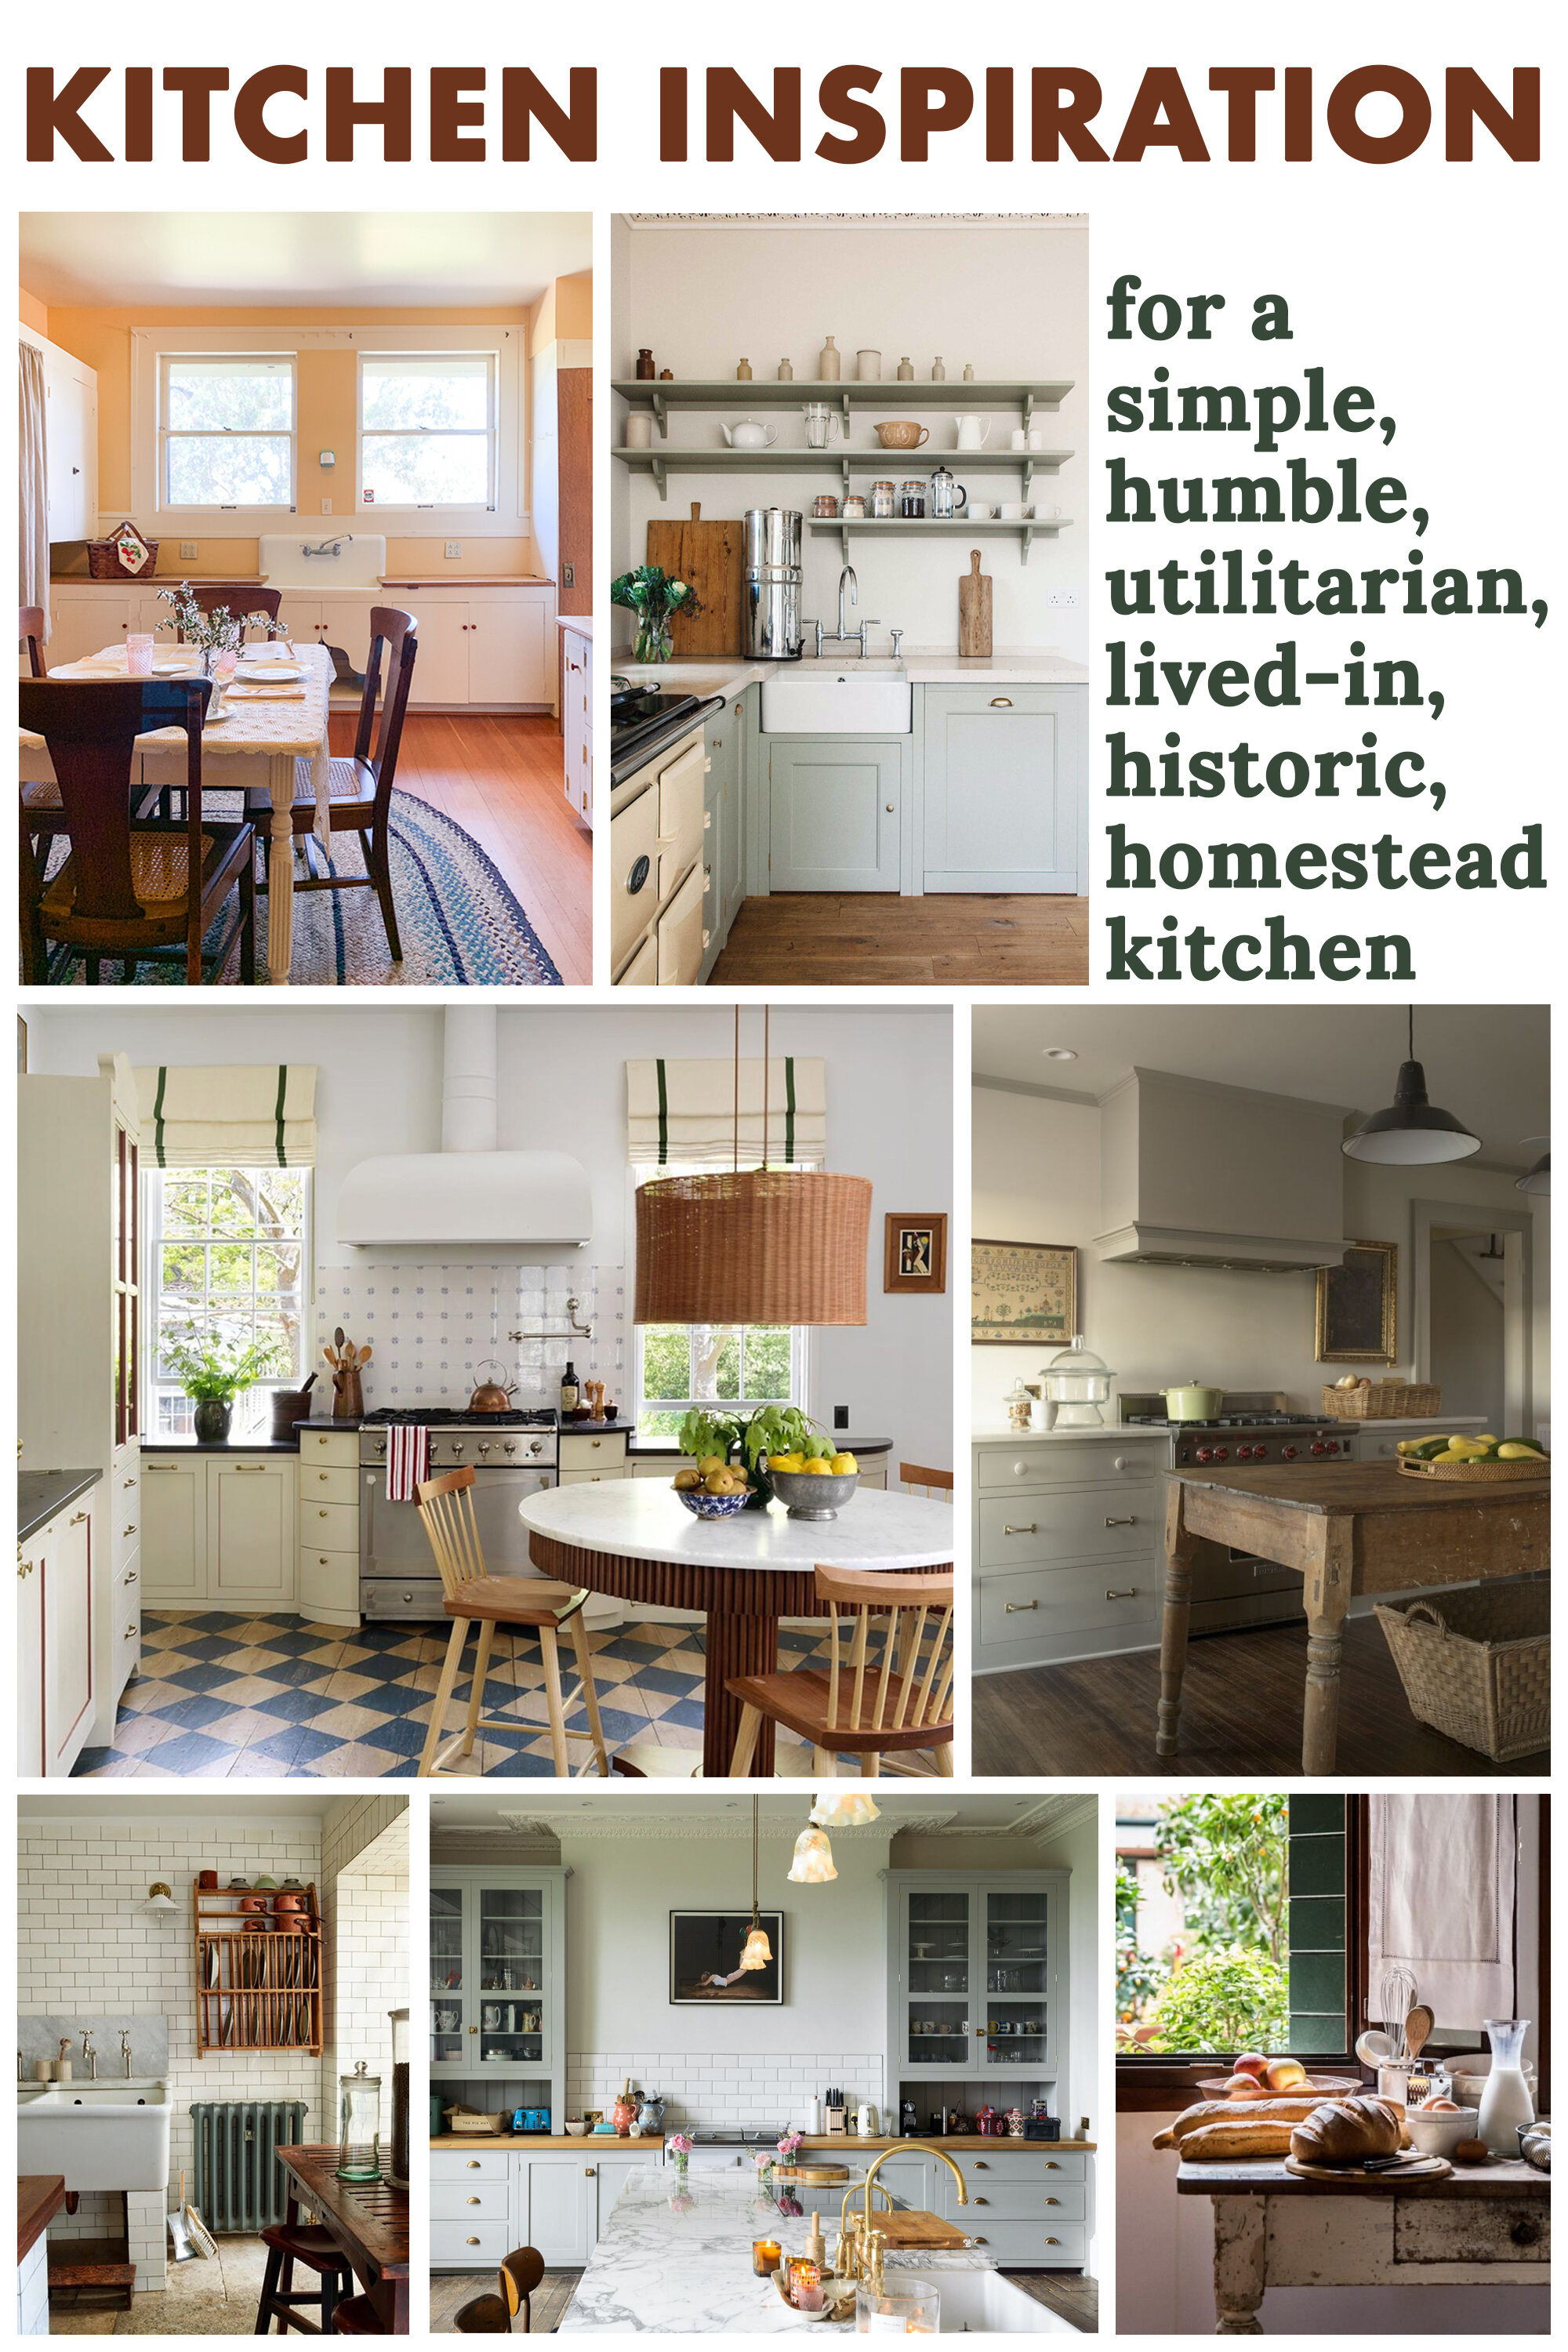
My Philosophy:
I don’t really have an actual philosophy - let’s not get pretentious here - but I do have a few viewpoints that you’ll hear me repeat over and over throughout the renovation, so here we go.
Our house is historic and we like it like that it’s old. My goal is to make our home function for the 21st century, but not at the expense of the charm of our home. I’m no purist but you better believe I’m going to match my moldings to the existing ones in the house and try to make the new construction feel cohesive with the rest of the home. There will be some modern updates because I don’t want it to look like a museum and I do enjoy features of living in 2020, but I want to do my historic house proud.
We aren’t into gimmicks and prefer simple living. You may already be noticing that we aren’t trying to make our home into a grand estate. We don’t need a freestanding tub in the bathroom, we don’t need two sinks, we don’t need a huge walk-in closet, we don’t need a pot-filler for our coffee machine, we don’t need two refrigerators, we don’t need fancy light switches, we don’t need smart gadgets, we don’t need a wine fridge. These are all fine things to have and I’m not knocking anyone that has them, but we just don’t feel the need to have those things in our home. It’s not that big of a house and those things just don’t fit our needs. We do like the finer things so we may spend more on the faucet or a light fixture, and you might think some of the other things we do add are luxuries, but we’re not trying to go overboard.
We live low waste and are mindful of our impact on the planet. You’ll see during the renovations that I’m going to try to salvage as much as possible, I’ll try to repurpose what I can, and I’ll try to incorporate used and antique items. We’ll aim to do some energy efficient upgrades, but not at the expense of wasting energy, carbon, labor, and materials producing “environmentally friendly” things. Learn more about this here where I critique “green” buildings. I’m not going to do 100% salvaged - I will buy new - but there will be a mix.
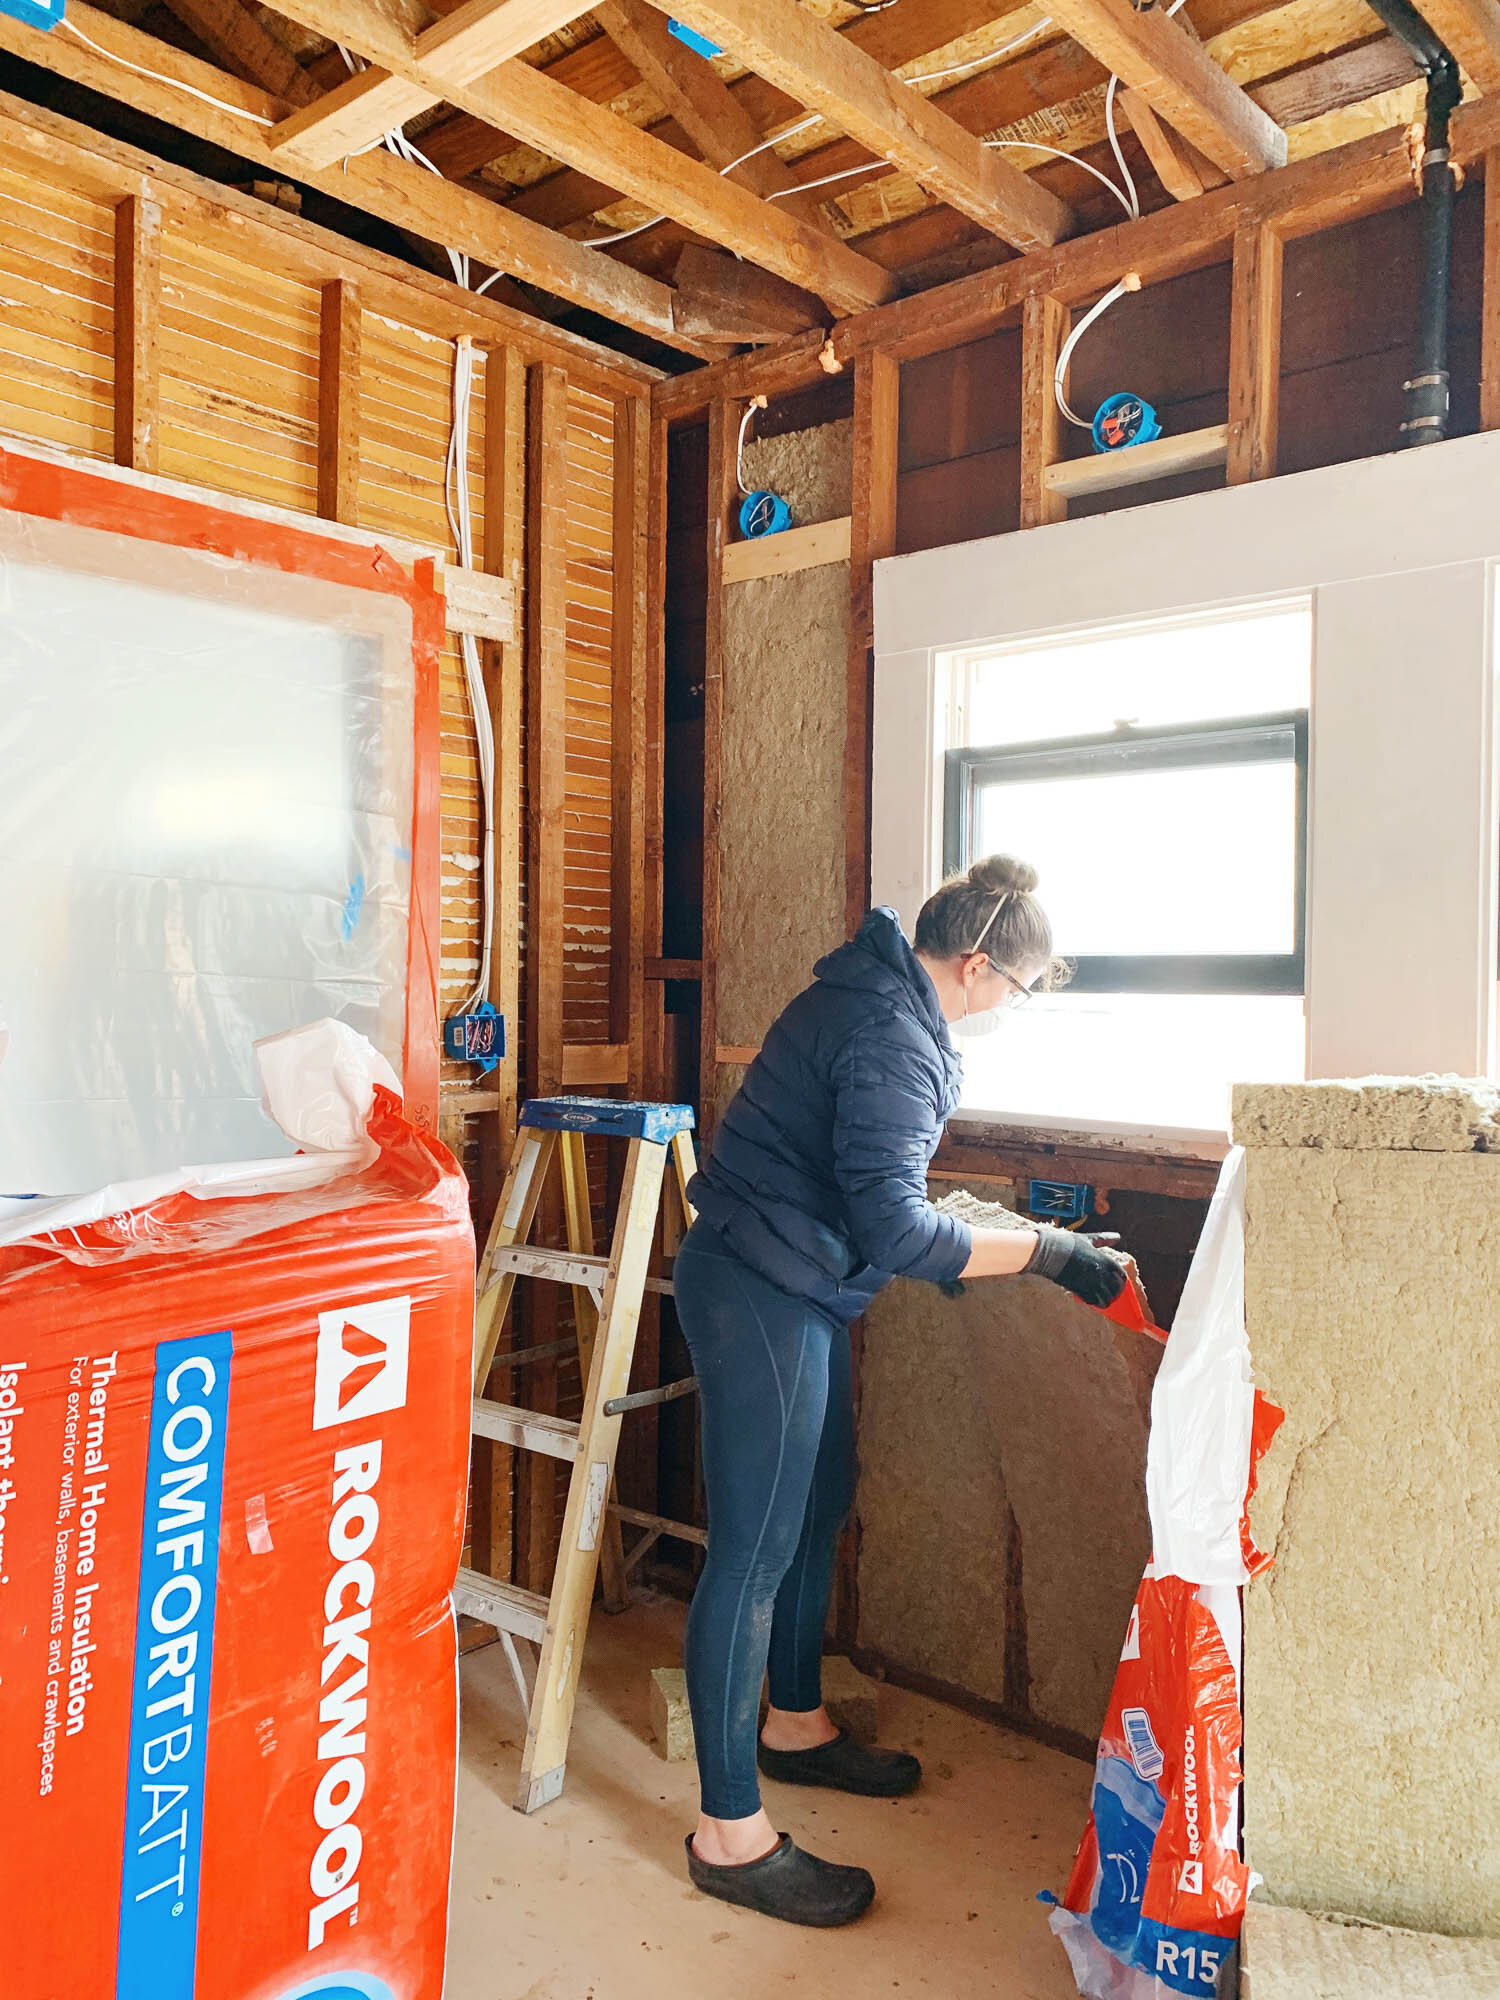
The Timeline:
Did I mention that official demo starts on Tuesday?! You can see from the photo at the top of this post that I did start doing some demo weeks ago. I pulled the cabinet doors off, removed some cabinets, restored the windows that we’re keeping, and cut holes in the walls. But next Tuesday I have a team coming in to do the actual work of pulling down the wall and getting started on reconfiguring the space.
I think that in a month we’ll have a blank box with updated plumbing and electrical in all the new walls we’re adding. After that, it will be my turn to get going on the flooring, cabinets, and finish materials. Since I’m one human, this will take me a couple of months, but we’ll see how things go. Maybe it will be 8 months maybe it will be 2. Maybe I’ll hire more out or maybe Ross will be home more to lend a hand. I hope to have a fully finished kitchen by the summertime!
Since we already have a bathroom, I’m not prioritizing the work in the new master bath. I want the energy to go to the kitchen so we can get settled in there and get back into the routine. Once we’re rested after the kitchen, we’ll pick back up on the bathroom and do the finishing work that remains. We will do rough-in plumbing and electrical when the crew does that in the kitchen, but after that, the bathroom will probably just sit as a rough shell until the kitchen is looking pretty.
The Finances:
I’m going to share the budget once it’s all finished, so stay tuned. I can tell you though that this isn’t going to be a $5,000 remodel. We’ve already spent over $5,000 on permitting expenses alone! Rough construction materials will be another $5k. Plumbing and electrical will be another $5k. And that’s not getting to the actual guts of the kitchen or bathroom. We’re making a lot of changes here, so it’s going to add up.
We won’t go overboard, but this remodel is an investment, not a stop-gap upgrade. We live in an expensive city, an expensive part of town, and also live in a historic house so we want the materials to reflect the quality of the home. I also want this kitchen to last many decades, so I won’t be putting in flimsy cabinetry that will need to get demolished and sent to the landfill in 10 years. I have been working on sourcing salvaged materials that are cheaper, discounted appliances, and secondhand furnishings, so there are lots of expenses I’m excited to share with you so you too can buy a refrigerator for a third of the retail price, too!
All this to say, this remodel is going to be quality with some splurges but also simple with some frugality.
And there you have it. I wanted this to be a rough recap, but it naturally became a novel. I hope this gives you a good idea of where we’re taking off from but do let me know if you have any questions. I’m going to break down each and every thing as we get going!