Renovation Diary: Week 1 Demolition + A Video!
/Demolition started last week! The kitchen renovation and bathroom addition have been such a long time coming that it doesn’t even feel real that this new space is actually taking shape. Well, at this stage it isn’t taking shape so much as it’s losing its shape and becoming a big empty box. But that’s progress!
There was a time when I thought I would do all of the demolition myself. I really thought that I could do it! But boy am I glad I didn’t try to do it on my own. We ultimately hired a crew to demolish the space and we’re so glad to have a skilled, strong, and dedicated team to do the work.
It’s worth noting that the demolition in our kitchen has been much more involved than what we may often see on HGTV. You may have seen TV clips of a contractor kicking their foot through the wall, or a couple taking a swing at a cabinet and taking the whole thing down in a second. That’s not the case here. Our kitchen is made up of the original plaster and lath construction. It’s hard, heavy, solid plaster - much like concrete, and then thousands of strips of wood nailed to the studs. This isn’t something you can just kick your foot through and pry off with your hands in a couple of minutes. The team of 3-5 guys has spent days pulling all of the walls down. Imagine if I did that all by myself - it would have taken me months. Oof. In addition, we’re replacing all of the plumbing with new stuff so they’re tearing out the big, heavy, cast iron, and they’re ripping out the old electrical. This isn’t just a quick remodel!
Watch a video of the week’s Demo!:
I’ve been sharing videos of the progress on Instagram Stories, but not all of you follow me there, so I put the Instagram clips into a 15-minute YouTube video so you can see the whole evolution and get a good sense of the layout, too.
The video is formatted vertically, so it’s best watched on your phone - but it works on your computer, too!
Here’s what’s been happening with demo, in text format:
Day 0: We cleared out our things

I’ve been prepping for demo for months, but the day before the official demo day, Ross and I cleared absolutely everything out. We took off the cabinet fronts and drawers to give away, listed the stove for sale, packed away our things, then labeled the windows and architectural details we wanted the crew to save.
Day 1: Crew started removing the walls

The guys kicked off demo by pulling down the two walls that were dividing our kitchen into three rooms, and it really opened up the area. They left the framing but removed the lath and plaster to give us an idea of how big the room feels without the division. The team also salvaged some of the woodwork that I didn’t have time to pull off - thanks, guys, I’ll be sure to put it to good use again! In addition to taking down the walls, they started to strip the plaster and lath off of the perimeter walls.
The crew has been bagging all of the plaster to keep lead contained. It’s safe to assume any house that had any work done to it before 1980 has lead in it, so we always practice safe lead practices. I got asked about asbestos abatement but our walls didn’t have asbestos. That’s a material that is more often added in the 1940s so you don’t see it in 100-year-old houses unless there was a latter renovation or wall re-coating. Our house wasn’t one of those, so we had the privilege of not having to worry about that.
As I saw them removing the wood lath (the thin strips of wood that make up the walls), I got the idea to save it so I can build something out of it. I’ve always been in love with this lath house at a 1905 house in San Diego (where we also happened to get married) and want to build something similar. Maybe a lath house in the garden? Maybe a surround for my A/C unit? Maybe a little house for cats? Who knows! Until I decide, I’ll just have a pile of wood in the backyard.
Day 2: Cleaned up the perimeter walls

The guys kept making their way around the room and started removing the cabinetry, too. It takes a while to remove all of the plaster and lath. As the pull everything down, they take time to sort the plaster into the dump pile and drive the trash away, they make a pile of lath of me to salvage, and they keep the job site quite clean. I really appreciate a crew that maintains a tidy workspace - for themselves and for us living in the house.
Our set up is convenient in that there are only two doors connecting the construction site to the house, and we have them thoroughly taped off. There was a tape leak and it got dusty in the master, but I went back in with my tape and plastic to seal it off, and I’m pretty free of the mess. The banging and sawing noise carries throughout, so I hide in the office on the opposite corner of the house and close the doors. It’s not that bad, but I’m definitely glad to not be fostering scared little animals during all of this. So far, the biggest construction nuisance was the day one of the crew guys blasted the radio from his van 20 yards away from where he was working.
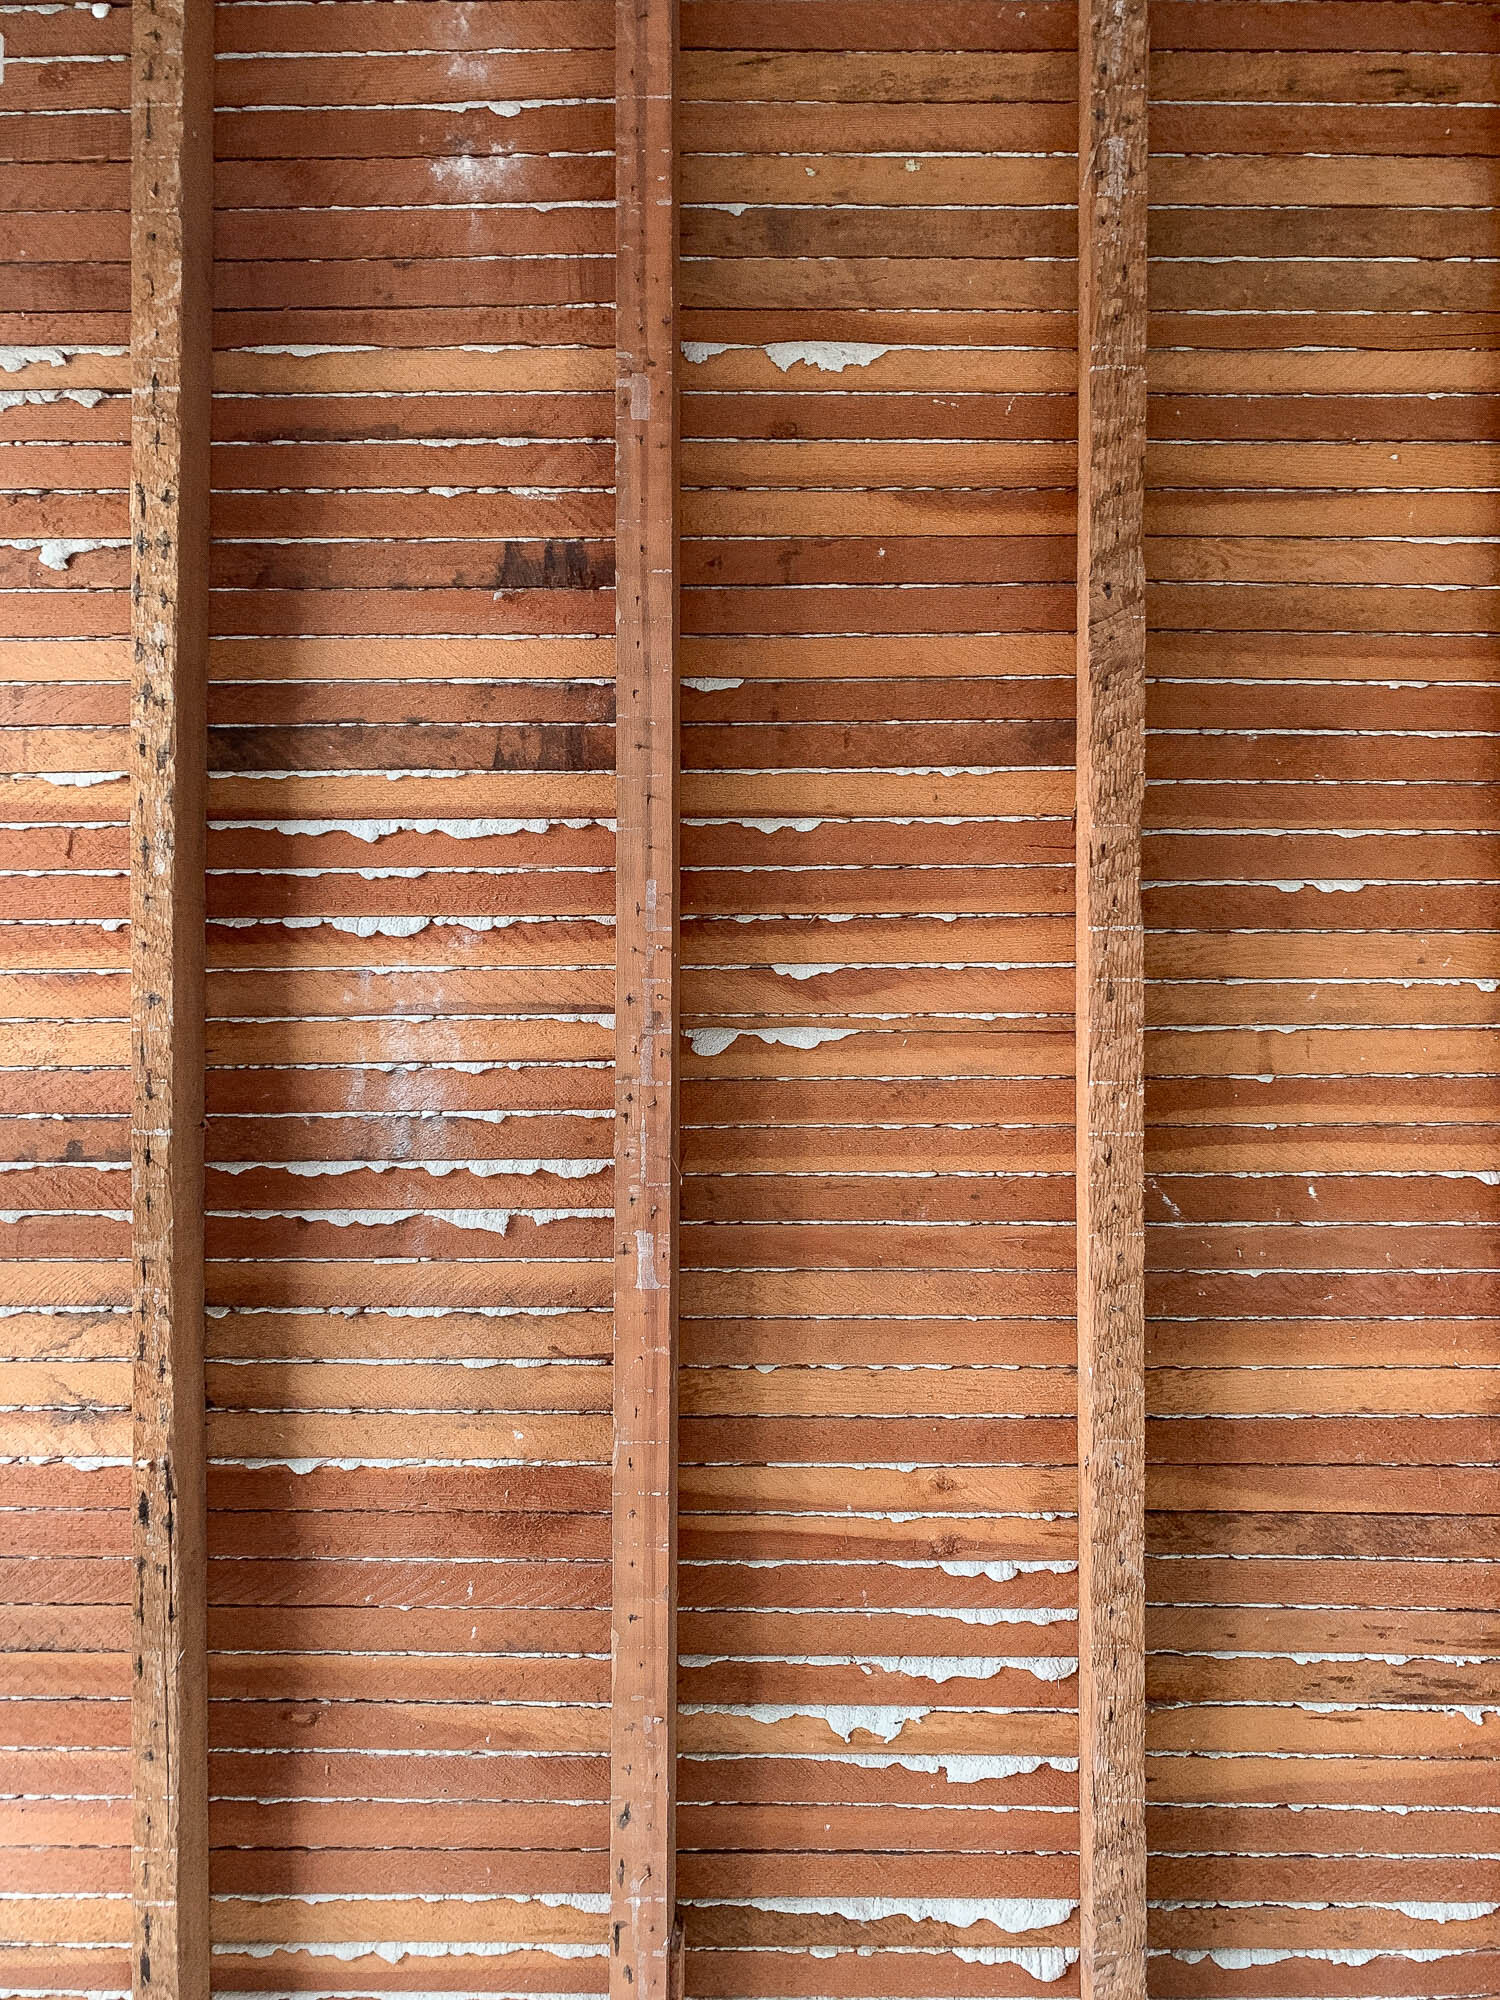
Another time-intensive task is removing the nails from the studs. After the plaster and lath comes off the walls, there are often thousands of little nails still stuck in the studs. Since the studs around the perimeter of the room are staying (unlike the ones in the dividing walls that got torn down) they need to be smooth and free of nails so we can later install drywall. They spent hours yanking those buggers out of the walls.
Day 3: Removed the floor and ceiling
The room was starting to feel sufficiently gutted, but then the team took it to another level by demolishing the flooring and the ceiling. The floors are something that I really wish we could have salvaged. It was old-growth fir that could have been shined up really nice like Cathy and Garrett did and Kim and Scot did. Unfortunately, nearly every board had termite damage in it- and lots of it. That’s why I covered it up with vinyl tiles a few years ago for that termite-free buffalo check look. It really is a shame we couldn’t salvage it. The crew pulled up the termite-damaged floors to find that those darn bugs had eaten through the subfloor, too. UGH.


Those termites had such a great feast that I could easily stick my finger straight through the hardwoods and then through the subfloor (watch the video to see how easy I could poke through). Finding all this termite damage is a bummer but it was entirely expected. It makes me glad that we aren’t just doing a bandaid renovation - we’re really opening everything up and getting the opportunity to take a close look at the structure, the foundation, the framing, the plumbing, and the electrical. We’ll be able to sleep easy knowing everything is in tip-top shape by the time the renovation is done. It is going to cost us more in replacement lumber and the time for the crew to patch everything, but it has to be done.

In addition to the flooring, the guys also removed the ceiling. I had a hard time letting them pull it down. I wanted to keep that plaster ceiling! Plaster is such a good insulator, so it does a superior job to drywall keeping our home cool in the summer and warm in the winter. Plus, by keeping it, we’d save a load of junk from going to the landfill! I figured we could just put drywall sheets over the plaster to smooth it all out and retain the material. Ultimately, my contractor convinced me to remove it because of the multiple different heights, the way the walls were constructed, and the overall condition of the plaster.
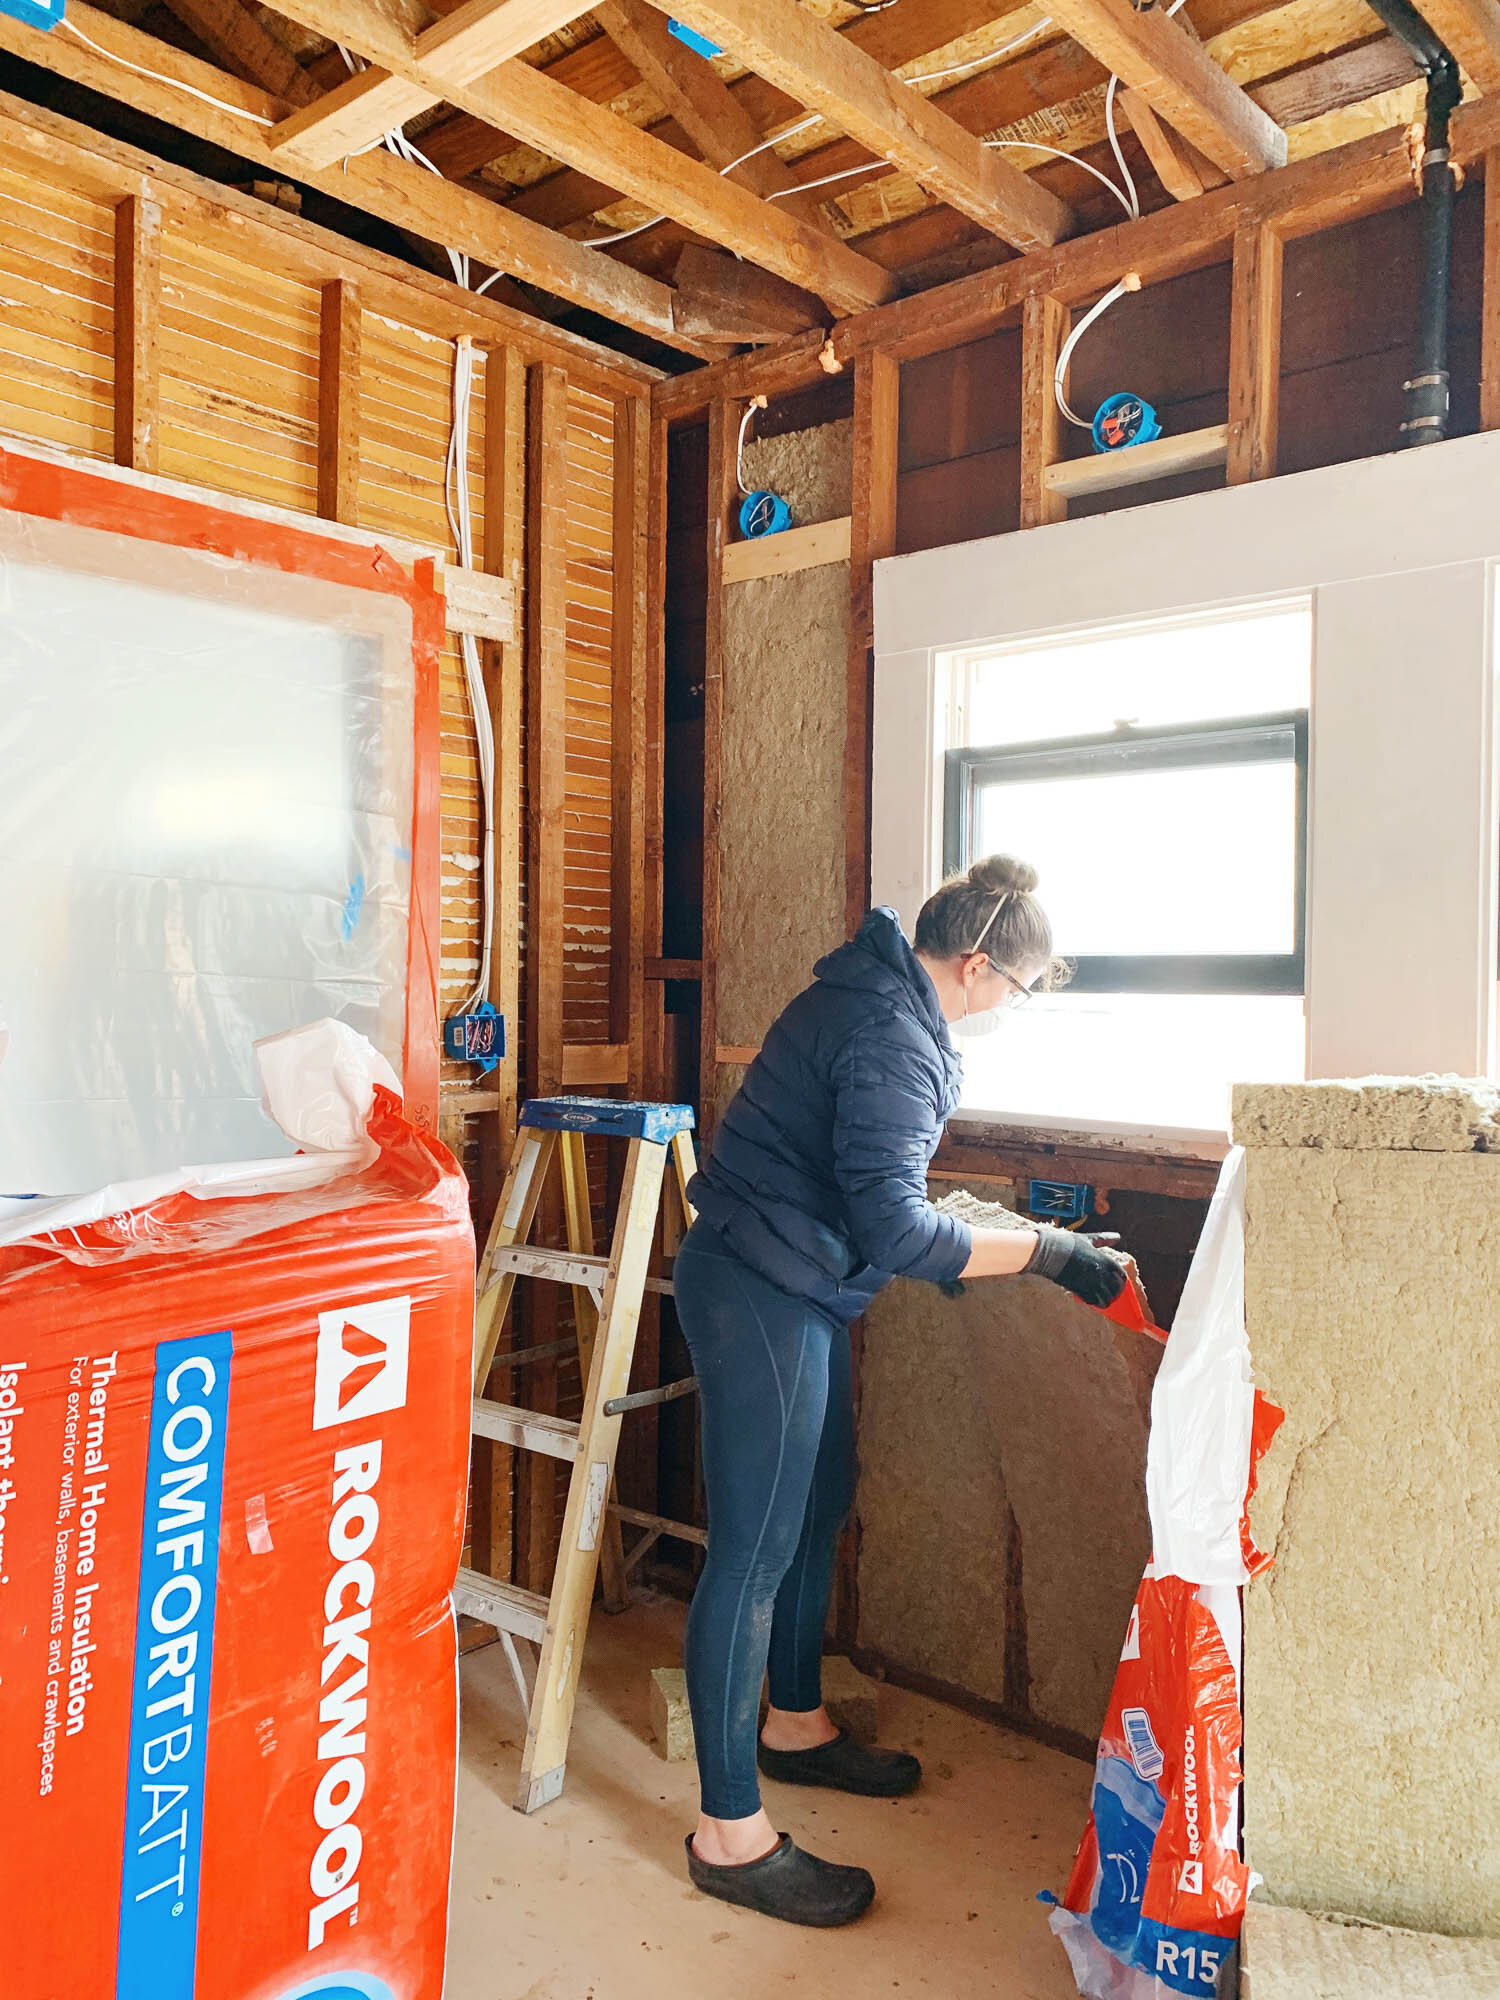
So, down the came along with the filthy, dusty, messy, gross blown-in insulation. That grey powdery stuff is the only insulation in the house, but once we put the ceiling back in, we’ll add more insulation to the attic and we’ll put insulation in the walls before drywalling over them.

Looking up into the pitched attic from the kitchen definitely gives me the idea of lofting the ceiling but we’re definitely not going to. It’s an extra cost, it isn’t fitting with our house, the ceilings are plenty tall at 9’, lofted rooms are less energy-efficient and they’re noisier. So basically, I have no issue keeping our flat 9’ ceilings. Also, I just might need that attic space to store my secret presents, money, or dead bodies.
Day 4: Removed appliances, closet, and termite damage

By day 4 it was really feeling like we were in the tick of demo, but there’s still more to go. The guys waited until they made the biggest mess before removing the master closet. You may remember that we moved out of the master closet and into the guest room closet a few weeks ago. Because taking down the closet would expose our closet door, they wanted to avoid getting any construction dust into the master bedroom - and I appreciate that! They taped off the closet door and the dining-room door, but dust always has a way of getting into the rest of the house. For context, the photo above is of the flooring in the closet and the closet door that goes into the master.
Without the closet walls, we realized that the floors are of different levels, so we’re going to have to plan accordingly and make sure all of the transitions line up perfectly. I’ve added this to my to-do list!
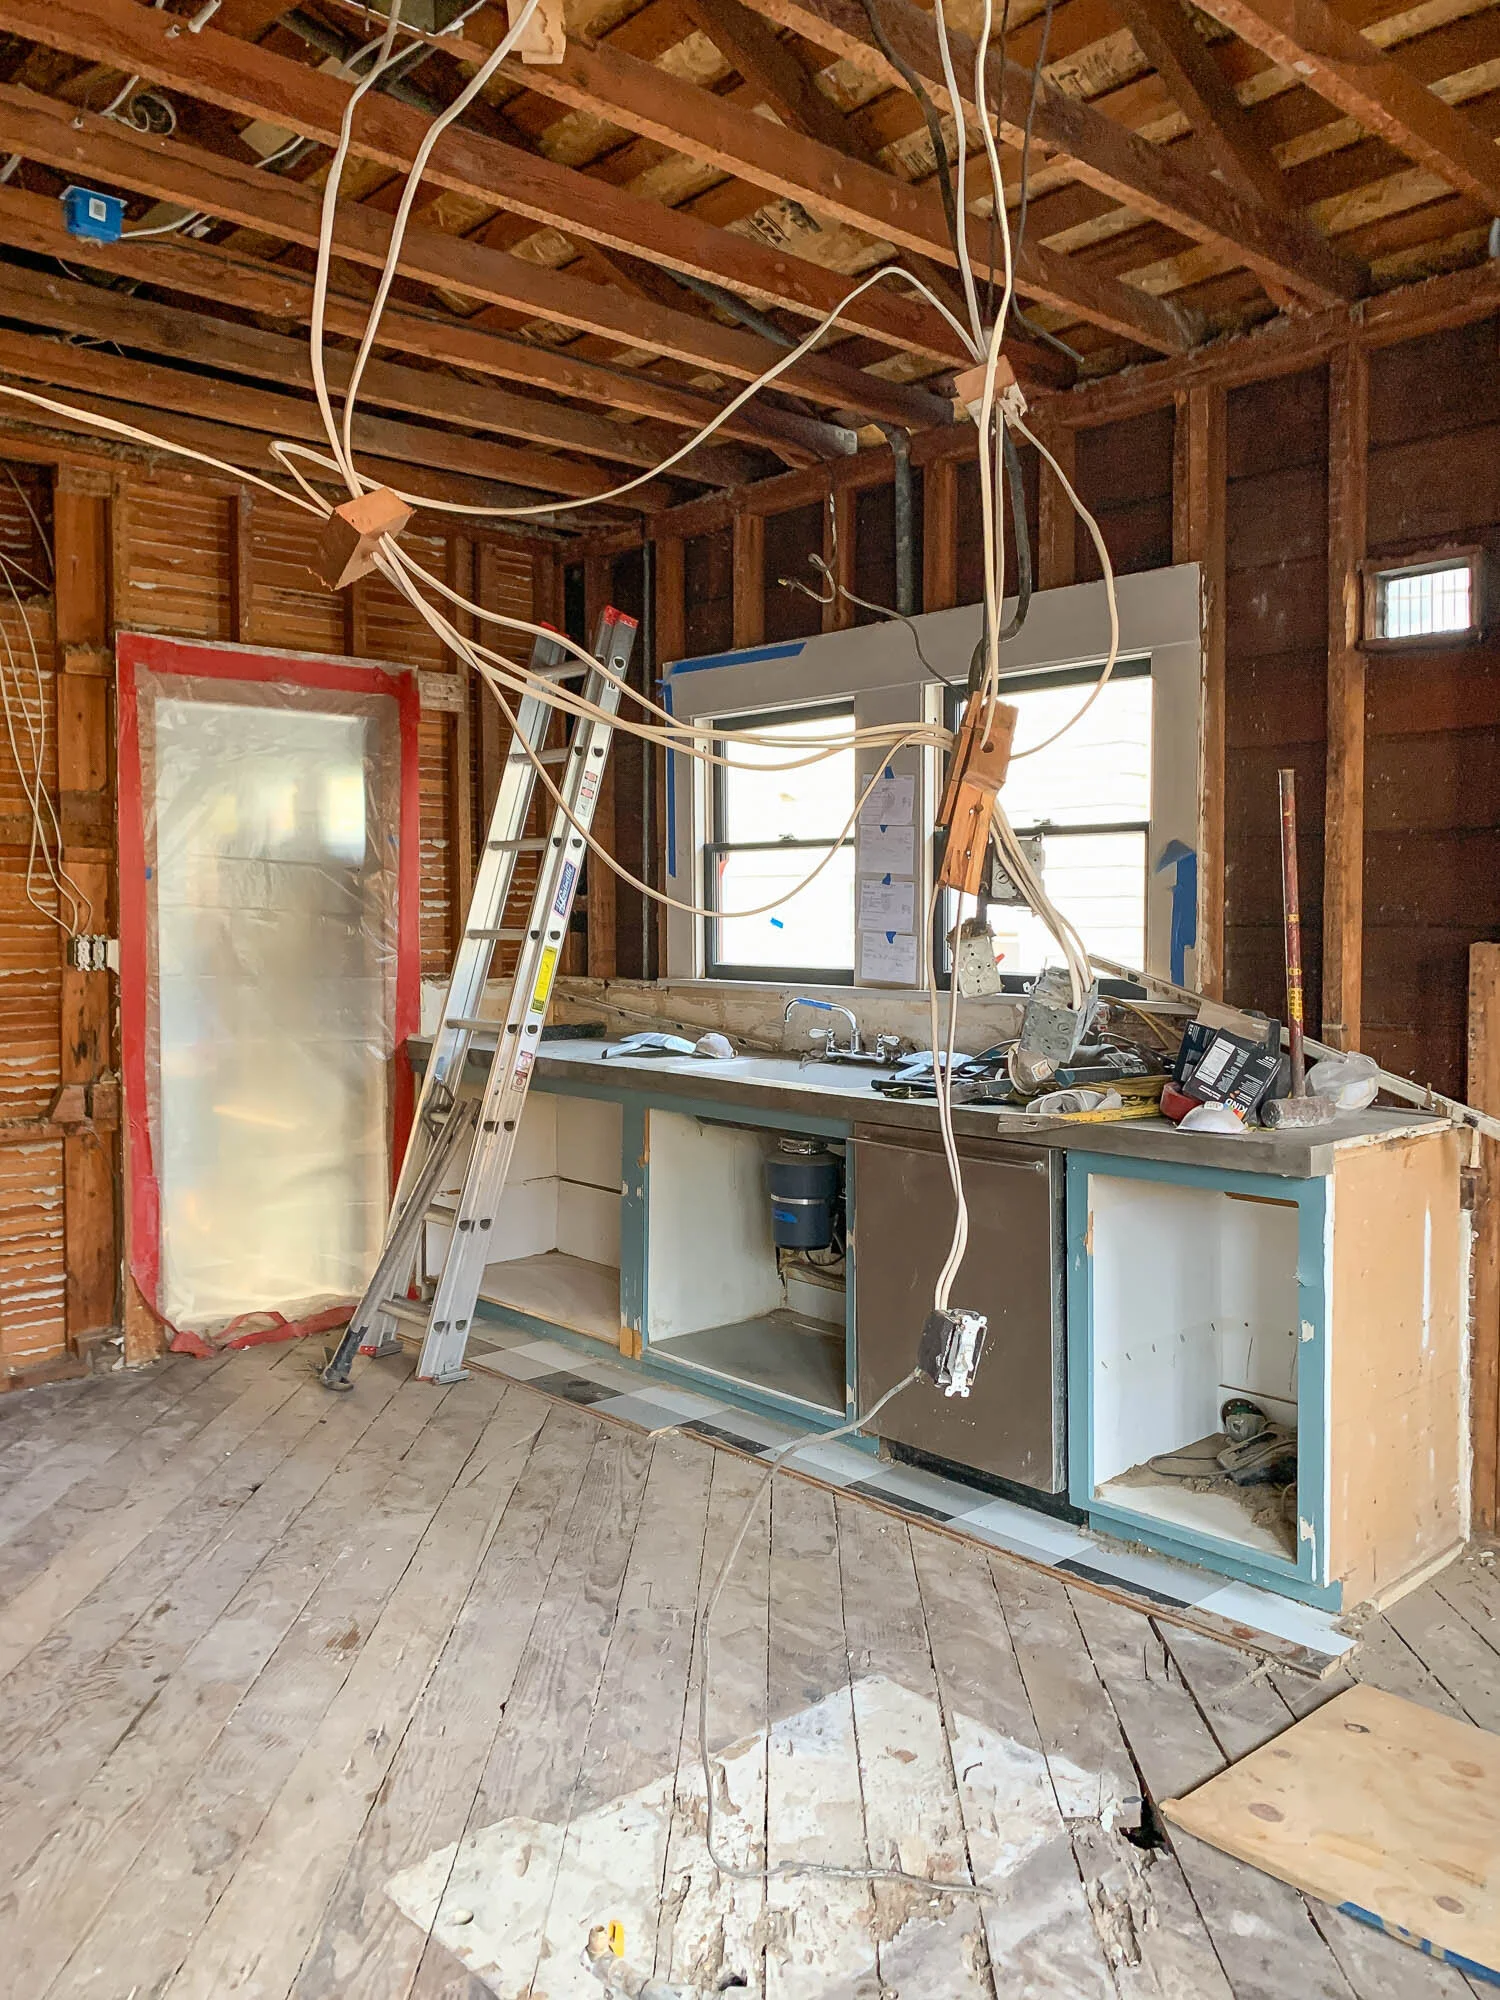
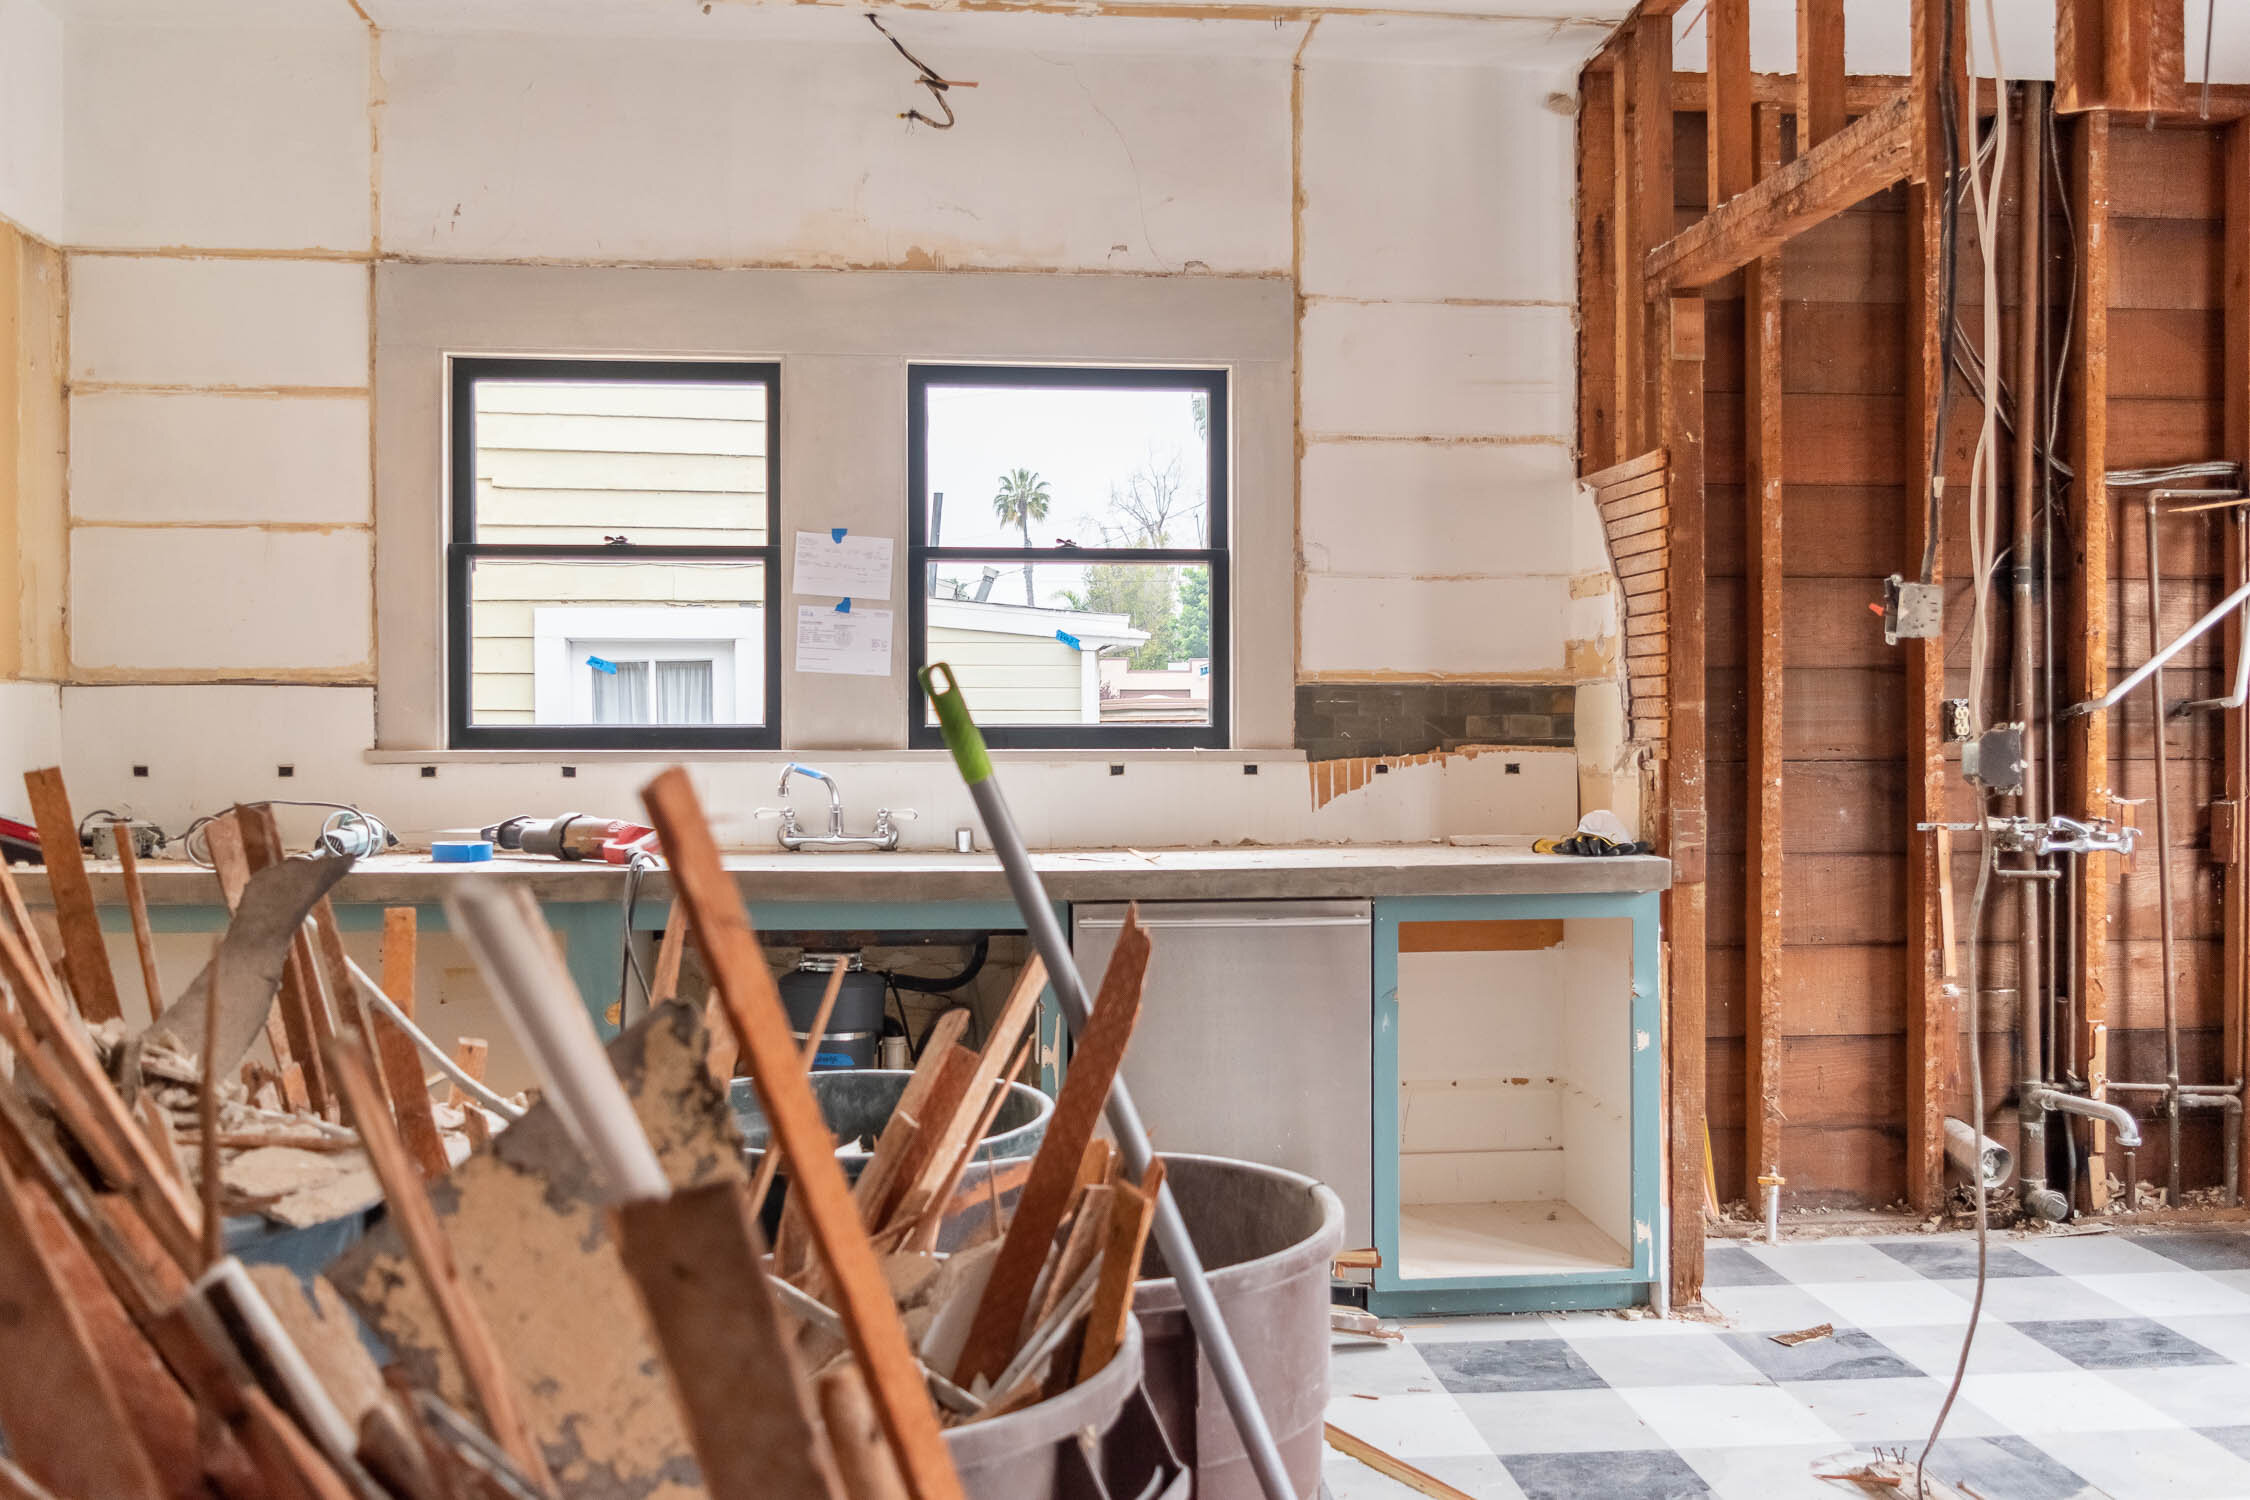
The guys also removed the sink, garbage disposal, and dishwasher. I had asked them to leave them as long as they could so I could still use them but I quickly realized in the middle of demo day 1 that there’s nothing useful about keeping the filthy sink in the messy construction zone. I listed all of those items for sale and someone came for the dishwasher within an hour - win-win!

They spent a good part of the day removing the termite damage and patching in new wood. They’re replacing a joist or two, patching in new subfloor in about 40 square feet, and replacing some of the wall framing too.
What to expect this coming week:
The crew is going to finish up some of the things they’re still working on. They’ll finish the demolition and clean out the space of the dead electrical, unused gas lines, corroded plumbing, and termite-damaged wood. They’ll work on replacing the bad wood with new fresh lumber, and shore up any un-level flooring issues.
Then, they’ll get started on putting things back together! We’ll hopefully start to see the new wall framing go in and we’ll probably have the plumbers and electricians visit to start adding all of that necessary stuff that will be hidden behind the walls.
If they finish these things by the end of the week, I’ll call out the inspector to take a look at everything, but let’s not get too far ahead of ourselves. I think this will most likely take place next next week.
What’s on my agenda for this week:
Finalize cabinetry needs and details
Order the pocket door hardware
Order the light switches
Salvage two wall heat vents
Schedule a meeting with my french door guy
Remove nails from the salvaged lath and find a more permanent home for it
I got a bunch of demolition questions in Instagram Stories but it’s a bit too early to answer them all. Some are curious about costs, but since demo isn’t done, I can’t give fair numbers. At the end of the project I’ll share a full budget break down! Other folks asked if we need to add support beams or if we anticipate X or Y or Z. I don’t know yet, so stay tuned!
Come back next week or follow along on Instagram Stories for daily updates! And don’t forget to watch my video about the demolition here.